Reddit mentions: The best adhesive tapes
We found 971 Reddit comments discussing the best adhesive tapes. We ran sentiment analysis on each of these comments to determine how redditors feel about different products. We found 411 products and ranked them based on the amount of positive reactions they received. Here are the top 20.
1. Gaffer Power Premium Grade Gaffer Tape, Made in the USA, Heavy Duty gaff Tape, Non-Reflective, Multipurpose. 2 Inches x 30 Yards, Black
- PROFESSIONAL GRADE GAFFERS TAPE – This tape is what the pros use. It's industry standard, premium grade gaffer tape, not the fake ‘gaffer tape’ being sold on Amazon. Our tape is MADE IN THE USA and has the specifications of ‘premium grade’ gaffer tape. THANK YOU FOR BUYING AMERICAN
- YOUR GEAR, CABLES AND SURFACE ARE SAFE AND INTACT – Whatever you use Gaffer Power on, it holds it down solid but is very easily taken off, leaving no residue. The adhesive will not peel back up. Your gear will remain protected and completely undamaged.
- NON-REFLECTIVE, EASY TO RIP AND WATER RESISTANT – Using it on set or stage? it blends discreetly into the background; Tear strips easily with hands no matter the size. This a strong cotton cloth pressure-sensitive tape with strong adhesive properties.
- ESSENTIAL TO ANY TOOLBOX – So many uses; secure your computer, TV or any other cables down to the floor and out of harms way; tape doors and windows to prevent drafts. Gaffer Power has hundreds of uses…it’s even used for boat and car repairs!
- PEACE OF MIND SHOPPING - We sell real professional gaffer tape and if you're not satisfied, we back it up with a replacement roll or full refund. You’ll receive a beautiful fresh roll, no mess, no hassle.
Features:

Specs:
| Color | Black |
| Height | 2 inches |
| Length | 4.8 inches |
| Number of items | 1 |
| Size | 2 Inches x 30 Yards |
| Weight | 0.04 Pounds |
| Width | 4.8 inches |
2. 3M Dual Lock Reclosable Fasteners Heavy Duty Industrial Use Black TB3550 1" x 10 ft Mated Strip Indoor/Outdoor Use Great for Metal, Glass, Acrylic, PC, ABS
- RELIABLE PERFORMANCE: Strong, interlocking mushroom-shaped heads connect with an audible "snap"
- QUICK AND EASY TO INSTALL: Adhesive sticks on contact to a variety of materials without special tools. Suitable for indoor and outdoor use
- DESIGN FLEXIBILITY: Lightweight and low profile; Fastener is hidden beneath the surface and does not interfere with the integrity of the design
- CUSTOMIZE FOR YOUR APPLICATION: Mix and match stem densities for the ideal closure strength
- BONDS TO A VAREITY OF SUBSTRATES: Metals, glass and plastics (such as acrylics, polycarbonate and ABS). Try mating different combinations of Type 170, Type 250 or Type 400 to achieve the desired strength profile
Features:

Specs:
| Color | Black |
| Height | 5 Inches |
| Length | 14 Inches |
| Number of items | 1 |
| Release date | November 2017 |
| Size | 1 in x 10 ft |
| Weight | 0.55 Pounds |
| Width | 14 Inches |
3. 3M 468MP Adhesive Transfer Tape, 12" squares (pack of 6)
- High speed processing of parts in the medical, telecommunications and electronics markets (medical components, durable labels, flexible circuits).
- Bonding graphic overlays for membrane switches and for bonding the complete switch to the equipment surface.
- Bonding metal nameplates and rating plates in the aerospace, medical and industrial equipment, automotive, appliance and electronic markets.
- Excellent resistance to harsh environments; this adhesive can withstand splashes of organic solvents, weak acids and bases and salt water, cleaning solutions, germicidals, disinfectants, oils, etc. In addition, it performs well after exposure to humidity and hot/cold cycles.
- Lamination to industrial foams for rotary die-cutting of small gaskets for industrial and electronics markets.
Features:

Specs:
| Color | Clear |
| Height | 0.7 Inches |
| Length | 12.7 Inches |
| Number of items | 1 |
| Weight | 0.2425084882 Pounds |
| Width | 13.5 Inches |
4. VELCRO Brand 5 Ft x 3/4 In | Black Tape Roll with Adhesive | Cut Strips to Length | Sticky Back Hook and Loop Fasteners | Perfect for Home, Office or Classroom
- SUITABLE FOR SMOOTH SURFACES: Hook and loop fastener adheres to most smooth surfaces; features a strong adhesive to organize at home, school, or office; no sewing, gluing or ironing required
- STRONG AND SECURE HOLD: Creates a long-lasting bond that applies easily to smooth surfaces indoors including walls, glass, tile, plastic, metal and wood—ideal for everyday use –the possibilities are endless
- SCHOOL SUPPLIES FOR TEACHERS AND EDUCATORS: Numerous applications to keep the classroom tidy - fasten items to desks and folders, stick name tags to back of chairs, adhere whiteboard erasers and markers to the board; sticky back tape provides plenty of uses
- BACK TO SCHOOL SUPPLIES FOR STUDENTS: Keep school projects organized and secure, use to add closures to homework folders, hang items and decorate lockers, add arts and crafts touches to school projects, organize desks at home and in the classroom
- CUT, PRESS AND SET: Simple to use cut-to-length tape; extend the roll to the desired size, cut, peel off the protective backing, and firmly press to activate adhesive; press hook and loop firmly together for a strong hold
Features:

Specs:
| Color | Black |
| Height | 7.25 Inches |
| Length | 6.6 Inches |
| Number of items | 1 |
| Release date | December 2012 |
| Size | 5 ft x 3/4 in |
| Weight | 0.05 Pounds |
| Width | 1.75 Inches |
5. Scotch Mounting, Fastening & Surface Protection RFD7091 Interlocking Fasteners Strips, 4, Black, 2 count
Delivers a powerful bond on contactHolds up to 10 lbs. (1 set holds 2 lbs)Lasts up to 1000 closuresWeather, dirt and UV resistantEasy-to-apply design with no mess or toolsIdeal for use on varnished/sealed surfaces, wood, bare metal, drywall, plastic and moreIntended for indoor and outdoor useEnsure ...

Specs:
| Color | Black |
| Height | 5.62 Inches |
| Length | 0.58 Inches |
| Number of items | 1 |
| Release date | October 2018 |
| Size | 4 |
| Weight | 0.04 Pounds |
| Width | 3.81 Inches |
6. X-Treme Tape TPE-XR1510ZLB Silicone Rubber Self Fusing Tape, 1.5" x 10', Rectangular, Black
- Will not melt up to 260°C (500°F)
- Remains flexible to -50°C (-60°F)
- Tensile strength of 700+PSI
- Insulates to 400 volts/mil
- Resists weathering
Features:

Specs:
| Color | Black |
| Height | 0.02 Inches |
| Length | 120 Inches |
| Number of items | 1 |
| Size | 1.5" x 10' |
| Width | 1.5 Inches |
7. 3M Aluminum Foil Tape 3381, 1.88" x 50 yd, 2.7 mil, Silver, HVAC, Sealing and Patching, Moisture Barrier, Cold Weather, Air Ducts, Foam Sheathing Boards, Insulation, Metal Repair, 051111078129
- COLD WEATHER: 1. 4 mil aluminum foil backing (2. 7 mil total thickness) coated with a pressure sensitive, cold-weather, acrylic adhesive system (-30F to 250F)
- EXCELS IN HUMIDITY: Designed for cold weather conditions and excels in demanding temperature and humidity applications
- MOISTURE BARRIER: Excellent barrier against moisture, dust, flame and certain chemicals
- UV RESISTANT: Providing good performance and durability in various environments
- CONFORMABLE: Malleable foil is conformable, capable of adhering to irregular surfaces
- APPLICATIONS: sealing foil faced foam sheathing boards, reflective insulation materials, duct wraps and residential insulation batts
Features:

Specs:
| Color | Silver |
| Height | 6 Inches |
| Length | 2 Inches |
| Number of items | 1 |
| Size | 1.88 in x 50 yd |
| Width | 6 Inches |
8. 1 Mil Kapton Tape (Polyimide) - 1/2" X 36 Yds
- Alternative to 3M Kapton Tape 5413: Tapes Master 1 Mil polyimide tape is alternative to 3M Kapton tape 5413. The tape is a HN general purpose amber color film with silicon adhesive and 3” polyethylene core. Rosh approved and Halogen Free
- High Temperature Resistant - Flame Retardant: Polyimide tape not only flame retardant (at temperatures as low as -273°C (-459°F) and as high as 400°C (752°F)), but also chemical and radiation resistant which protects surfaces to help reduce replacement costs
- No Residue after Peeling Off: Polyimide film does not soften at elevated temperatures, thus provides an excellent release surface at elevated temperatures. In addition, silicone adhesive's high temperature performance reduces adhesive transfer which helps to eliminate cleaning, enabling high productivity
- Protection, Insolation and Bonding: Protection of gold fingers: of printed circuit boards during wave solder or solder dip process. Insulation and Bonding for electrical switches, motor, lithium battery under Grade H
- Surface for 3D printers: Kapton and ABS adhere to each other very well, therefore is the recommended use of Kapton as a bed surface for 3D printers
Features:

Specs:
| Color | Amber |
| Height | 1 Inches |
| Length | 5 Inches |
| Size | 1/2 x 36 yds |
| Width | 5 Inches |
9. 3M Dual Lock Reclosable Fastener SJ3560 250 Clear, 1/2 in x 6 Ft by 3M
- 3M Dual Lock Reclosable Fastener SJ3560 250 Clear, 1/2 in x 6 Ft -by# gilsand2016>>>got issues ,communicate me with this item, i happy do it for you
Features:

Specs:
| Height | 0.5 Inches |
| Length | 5 Inches |
| Weight | 0.02 Pounds |
| Width | 4.9 Inches |
10. 12mm X 33m 108ft Heat Tape Heat Resistant Tape Heat Transfer Tape Thermal Tape High Temp Tape High Temperature Tape Heat Tape for Sublimation for Heat Press No Residue 1Roll
Color: mainly tawny. Material: durable polyimide and silicone.Size: Width: about 12mm; Length: about 30m /100ft. Heat resistance: about 280°C.<br>High insulation, high temperature resistance, acid and alkali-resistance, low electrolysis, mechanically sound, crocking resistance, tear-resistance, wit...

Specs:
| Color | Golden |
| Height | 0.47 Inches |
| Length | 3.54 Inches |
| Weight | 0.0220462262 Pounds |
| Width | 3.54 Inches |
11. Aluminum Tape / Aluminum Foil Tape – Professional / Contractor-Grade - 1.9 inch x 150 feet (3.4 mil) - Perfect for sealing & patching hot and cold HVAC, Duct, Pipe, Insulation home and commercial
- Professional / Industrial Grade: High-quality, high tensile strength aluminum foil coated in epoxy resin with strong, cold-weather solvent acrylic adhesive set on a easy-release silicone paper liner to preserve the adhesive and provide ease of use
- Wide Variety Of Uses: Ideal for an array of uses, including general repair, sealing hot and cold air ducts (excellent HVAC tape), duct insulation systems, sealing aluminum, stainless and plastic seams / joints, temporary repair of metal surfaces, copper pipe fixing, etc.
- Holds Up: Designed to resist flame, moisture / vapor, UV degradation, odor, weather and smoke transmission. Excellent for both indoor and outdoor use. Chemically resistant, thermally conductive (helping cooling/heating efficiency), heat and light reflective
- Sticks To Virtually Anything At High And Low Temperatures: Our aluminum foil tape provides a durable bond at low and high temperatures. Conformable backing and pressure sensitive adhesive means it is designed to adhere properly to a variety of smooth and irregular surfaces
- Lots Of Tape Means A Great Value: 1.9 inches wide x 150 feet (50 yards). 1.7 mil foil and 1.7 mil backing. Performs from -20 F to 220+ F. Ensure that surface is clean, dry, free of grease, oil or other contaminants before applying aluminum tape
Features:

Specs:
| Color | Silver |
| Height | 2 Inches |
| Length | 5 Inches |
| Weight | 1 Pounds |
| Width | 5 Inches |
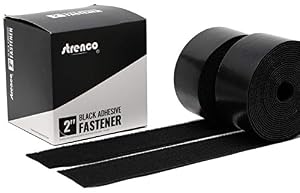
12. Strenco 2 Inch Adhesive Black Hook and Loop Tape - 5 Yards - Heavy Duty Strips - Sticky Back Fastener
2 inch wide Black Hook and loop Tape Self Adhesive (sticky back) straps/ strips by Strenco its great for Fastening.Hook and loop (complete double sided set) 5 yards (15 feet) long of each side.Sticks on glass, wood, plastics and other clean, flat surfaces.Mounting tape which is great as a office sup...
Specs:
| Color | Black |
| Height | 4.2 Inches |
| Length | 4.9 Inches |
| Size | 5 yards |
| Width | 4.9 Inches |
13. Scotch Super 33+ Vinyl Electrical Tape, 3/4 in x 66 ft, Black
- The tape's pressure-sensitive, rubber-resin adhesive and a durable PVC backing provide great protection
- Stands up to the elements: from UV rays and moisture to alkalis, acids and corrosion
- Tape dimensions: 3/4 in x 66 ft x 7 mil
- Black tape works great with rubber and synthetic splicing compounds
- Operates in temperatures ranging from 0 to 221 degrees F (-18 to 105 degrees C)
Features:

Specs:
| Color | Black |
| Height | 3 Inches |
| Length | 3 Inches |
| Number of items | 1 |
| Size | 3/4" X 66' |
| Weight | 0.05 Pounds |
| Width | 0.75 Inches |
14. Duck Brand 281973 Despicable Me Printed Duct Tape, 1.88 Inches x 10 Yards, Single Roll
- Features Despicable Me Minions print
- Excellent for crafting, fun and imaginative projects
- High performance strength and adhesion characteristics
- Tears easily by hand without curling and conforms to uneven surfaces
- Single printed roll is 1.88 inches wide by 10 yards long
Features:

Specs:
| Color | Despicable Me |
| Height | 3.75 Inches |
| Length | 3.75 Inches |
| Number of items | 1 |
| Weight | 0.25 Pounds |
| Width | 1.88 Inches |
15. Parafilm Grafting Tape (Genuine by Parafilm 90' Roll Clear (1" - One Inch)
Products Features:Item for 1 roll; size per roll: 1"wide x 1080"long; made in USAProduct contains polyolefin and a little bit waxWaterproof, flexible, stretchable, and self-adhesive with gentle stretchTape allows gasses to pass through. Excellent moister barrier for grafting and budding

Specs:
| Color | Clear |
| Weight | 0.21875 Pounds |
16. Duck Brand 281731 Printed Duct Tape, Bacon, 1.88 Inches x 10 Yards, Single Roll
Make your next quick fix stand outExcellent for crafting, fun and imaginative projectsHigh performance strength and adhesion characteristics, yet tears easily by hand without curling and conforms to uneven surfacesWorks on a variety of surfaces, including wood, vinyl, plastic, leather, metal and lam...

Specs:
| Color | Bacon |
| Height | 3.75 Inches |
| Is adult product | 1 |
| Length | 3.75 Inches |
| Number of items | 1 |
| Release date | November 2012 |
| Size | Single Roll |
| Weight | 0.25 Pounds |
| Width | 1.88 Inches |
17. 3M 2155 Rubber Splice Tape
Package length: 9.652 cmPackage width: 9.652 cmPackage height: 2.032 cmProduct Type: WALL ART

Specs:
| Color | Black |
| Height | 0.8 Inches |
| Length | 3.8 Inches |
| Number of items | 1 |
| Size | $$$ |
| Weight | 0.25 Pounds |
| Width | 3.8 Inches |
18. 3M Double Sided Tape, HitLights Heavy Duty Mounting Tape VHB Waterproof Foam Tape, 32ft Length, 0.39Inch Width for LED Strip Lights, Home Decor, Office Decor
- 【Heavy Duty Tape】Strong double sided mounting tape, 33ft length, 0.3in width, 0.025in thickness. Strength: holds up to 3 Ibs per 2 inches. It is ideal for mounting large and heavy tools, strip lights, car trim, teaching materials, posters and picture frames.
- 【Flexible Adhesive Tape】The double sided adhesive tape is designed to resist curling, making your installation process fast and easy, simple to peel, very flexible.
- 【Waterproof Double Sided Tape】Consists of a durable acrylic adhesive with viscoelastic properties, make the adhesive tape suitable for most surfaces, including mounting outdoors or in damp locations. Please keep the mounting surface dry, clean and free of oil when mounting, so that the tape will get great against water and moisture ability.
- 【Easy to Use】This foam tape is easy to install, just peel off the tape and stick it to the surface of the object. And it is easy to reposition when it’s not fully compressed and repositioning will not influence adhesion durability, it bonds quickly and securely when it’s fully compressed. No drilling, no screwing, no heating.
- 【Multipurpose Tape】Multipurpose tape with comfortable foam on both sides provides adhesion to a variety of surfaces including glass panel, LED plate, car spoiler, door edge, bodyside moldings, ABS and PVC rocker panels, wheel lip, nameplate, stainless steel.
- 【Warm Tips】Due to the strong adhesive of this tape, sometimes it may be hard for you to remove the red protective liner. Please use the plastic peeling tool in the package, or nails, tweezers, knife to help remove.
Features:

Specs:
| Color | Red |
| Number of items | 1 |
| Size | 33FT |
| Weight | 0.15 Pounds |
19. Scotch Film Strapping Tape 8896
Synthetic rubber adhesive has excellent bond strength to a wide variety of application surfacesAppliance, electronics, general industrial, metal working and glass manufacturingTensilized polypropylene tape, clean removal, strapping tape, shipping, holding, securing, keeping closed and stabilizing.
 ▼ Read Reddit mentions
20. Gorilla 6100116 6100101-2 Duct Tape to-Go, 1" x 10 yd, Black, (Pack of 2), 2-Pack, 2 Piece
Convenient for on-the-go repairs; it packs a powerful grip in a portable sizeGreat for smaller repairs or projects. It is made to stick to rough, uneven, unforgiving surfaces. Can also be used for clamping surfaces together.Double-Thick Adhesive; Grips smooth, rough and uneven surfacesTough, Reinfor...

Specs:
| Color | Black |
| Height | 5 Inches |
| Length | 3 Inches |
| Number of items | 2 |
| Size | 2 Pack |
| Weight | 0.52 Pounds |
| Width | 2 Inches |
🎓 Reddit experts on adhesive tapes
The comments and opinions expressed on this page are written exclusively by redditors. To provide you with the most relevant data, we sourced opinions from the most knowledgeable Reddit users based the total number of upvotes and downvotes received across comments on subreddits where adhesive tapes are discussed. For your reference and for the sake of transparency, here are the specialists whose opinions mattered the most in our ranking.
Subcategories:
Interested in what Redditors like? Check out our Shuffle feature
Shuffle: random products popular on RedditTop Reddit comments about Adhesive Tapes:
Summary
1. Gaffer Power Premium Grade Gaffer Tape, Made in the USA, Heavy Duty gaff Tape, Non-Reflective, Multipurpose. 2 Inches x 30 Yards, Black
- PROFESSIONAL GRADE GAFFERS TAPE – This tape is what the pros use. It's industry standard, premium grade gaffer tape, not the fake ‘gaffer tape’ being sold on Amazon. Our tape is MADE IN THE USA and has the specifications of ‘premium grade’ gaffer tape. THANK YOU FOR BUYING AMERICAN
- YOUR GEAR, CABLES AND SURFACE ARE SAFE AND INTACT – Whatever you use Gaffer Power on, it holds it down solid but is very easily taken off, leaving no residue. The adhesive will not peel back up. Your gear will remain protected and completely undamaged.
- NON-REFLECTIVE, EASY TO RIP AND WATER RESISTANT – Using it on set or stage? it blends discreetly into the background; Tear strips easily with hands no matter the size. This a strong cotton cloth pressure-sensitive tape with strong adhesive properties.
- ESSENTIAL TO ANY TOOLBOX – So many uses; secure your computer, TV or any other cables down to the floor and out of harms way; tape doors and windows to prevent drafts. Gaffer Power has hundreds of uses…it’s even used for boat and car repairs!
- PEACE OF MIND SHOPPING - We sell real professional gaffer tape and if you're not satisfied, we back it up with a replacement roll or full refund. You’ll receive a beautiful fresh roll, no mess, no hassle.
Features:
Specs:
| Color | Black |
| Height | 2 inches |
| Length | 4.8 inches |
| Number of items | 1 |
| Size | 2 Inches x 30 Yards |
| Weight | 0.04 Pounds |
| Width | 4.8 inches |
2. 3M Dual Lock Reclosable Fasteners Heavy Duty Industrial Use Black TB3550 1" x 10 ft Mated Strip Indoor/Outdoor Use Great for Metal, Glass, Acrylic, PC, ABS
- RELIABLE PERFORMANCE: Strong, interlocking mushroom-shaped heads connect with an audible "snap"
- QUICK AND EASY TO INSTALL: Adhesive sticks on contact to a variety of materials without special tools. Suitable for indoor and outdoor use
- DESIGN FLEXIBILITY: Lightweight and low profile; Fastener is hidden beneath the surface and does not interfere with the integrity of the design
- CUSTOMIZE FOR YOUR APPLICATION: Mix and match stem densities for the ideal closure strength
- BONDS TO A VAREITY OF SUBSTRATES: Metals, glass and plastics (such as acrylics, polycarbonate and ABS). Try mating different combinations of Type 170, Type 250 or Type 400 to achieve the desired strength profile
Features:
Specs:
| Color | Black |
| Height | 5 Inches |
| Length | 14 Inches |
| Number of items | 1 |
| Release date | November 2017 |
| Size | 1 in x 10 ft |
| Weight | 0.55 Pounds |
| Width | 14 Inches |
3. 3M 468MP Adhesive Transfer Tape, 12" squares (pack of 6)
- High speed processing of parts in the medical, telecommunications and electronics markets (medical components, durable labels, flexible circuits).
- Bonding graphic overlays for membrane switches and for bonding the complete switch to the equipment surface.
- Bonding metal nameplates and rating plates in the aerospace, medical and industrial equipment, automotive, appliance and electronic markets.
- Excellent resistance to harsh environments; this adhesive can withstand splashes of organic solvents, weak acids and bases and salt water, cleaning solutions, germicidals, disinfectants, oils, etc. In addition, it performs well after exposure to humidity and hot/cold cycles.
- Lamination to industrial foams for rotary die-cutting of small gaskets for industrial and electronics markets.
Features:
Specs:
| Color | Clear |
| Height | 0.7 Inches |
| Length | 12.7 Inches |
| Number of items | 1 |
| Weight | 0.2425084882 Pounds |
| Width | 13.5 Inches |
4. VELCRO Brand 5 Ft x 3/4 In | Black Tape Roll with Adhesive | Cut Strips to Length | Sticky Back Hook and Loop Fasteners | Perfect for Home, Office or Classroom
- SUITABLE FOR SMOOTH SURFACES: Hook and loop fastener adheres to most smooth surfaces; features a strong adhesive to organize at home, school, or office; no sewing, gluing or ironing required
- STRONG AND SECURE HOLD: Creates a long-lasting bond that applies easily to smooth surfaces indoors including walls, glass, tile, plastic, metal and wood—ideal for everyday use –the possibilities are endless
- SCHOOL SUPPLIES FOR TEACHERS AND EDUCATORS: Numerous applications to keep the classroom tidy - fasten items to desks and folders, stick name tags to back of chairs, adhere whiteboard erasers and markers to the board; sticky back tape provides plenty of uses
- BACK TO SCHOOL SUPPLIES FOR STUDENTS: Keep school projects organized and secure, use to add closures to homework folders, hang items and decorate lockers, add arts and crafts touches to school projects, organize desks at home and in the classroom
- CUT, PRESS AND SET: Simple to use cut-to-length tape; extend the roll to the desired size, cut, peel off the protective backing, and firmly press to activate adhesive; press hook and loop firmly together for a strong hold
Features:
Specs:
| Color | Black |
| Height | 7.25 Inches |
| Length | 6.6 Inches |
| Number of items | 1 |
| Release date | December 2012 |
| Size | 5 ft x 3/4 in |
| Weight | 0.05 Pounds |
| Width | 1.75 Inches |
5. Scotch Mounting, Fastening & Surface Protection RFD7091 Interlocking Fasteners Strips, 4, Black, 2 count
Delivers a powerful bond on contactHolds up to 10 lbs. (1 set holds 2 lbs)Lasts up to 1000 closuresWeather, dirt and UV resistantEasy-to-apply design with no mess or toolsIdeal for use on varnished/sealed surfaces, wood, bare metal, drywall, plastic and moreIntended for indoor and outdoor useEnsure ...
Specs:
| Color | Black |
| Height | 5.62 Inches |
| Length | 0.58 Inches |
| Number of items | 1 |
| Release date | October 2018 |
| Size | 4 |
| Weight | 0.04 Pounds |
| Width | 3.81 Inches |
6. X-Treme Tape TPE-XR1510ZLB Silicone Rubber Self Fusing Tape, 1.5" x 10', Rectangular, Black
- Will not melt up to 260°C (500°F)
- Remains flexible to -50°C (-60°F)
- Tensile strength of 700+PSI
- Insulates to 400 volts/mil
- Resists weathering
Features:
Specs:
| Color | Black |
| Height | 0.02 Inches |
| Length | 120 Inches |
| Number of items | 1 |
| Size | 1.5" x 10' |
| Width | 1.5 Inches |
7. 3M Aluminum Foil Tape 3381, 1.88" x 50 yd, 2.7 mil, Silver, HVAC, Sealing and Patching, Moisture Barrier, Cold Weather, Air Ducts, Foam Sheathing Boards, Insulation, Metal Repair, 051111078129
- COLD WEATHER: 1. 4 mil aluminum foil backing (2. 7 mil total thickness) coated with a pressure sensitive, cold-weather, acrylic adhesive system (-30F to 250F)
- EXCELS IN HUMIDITY: Designed for cold weather conditions and excels in demanding temperature and humidity applications
- MOISTURE BARRIER: Excellent barrier against moisture, dust, flame and certain chemicals
- UV RESISTANT: Providing good performance and durability in various environments
- CONFORMABLE: Malleable foil is conformable, capable of adhering to irregular surfaces
- APPLICATIONS: sealing foil faced foam sheathing boards, reflective insulation materials, duct wraps and residential insulation batts
Features:
Specs:
| Color | Silver |
| Height | 6 Inches |
| Length | 2 Inches |
| Number of items | 1 |
| Size | 1.88 in x 50 yd |
| Width | 6 Inches |
8. 1 Mil Kapton Tape (Polyimide) - 1/2" X 36 Yds
- Alternative to 3M Kapton Tape 5413: Tapes Master 1 Mil polyimide tape is alternative to 3M Kapton tape 5413. The tape is a HN general purpose amber color film with silicon adhesive and 3” polyethylene core. Rosh approved and Halogen Free
- High Temperature Resistant - Flame Retardant: Polyimide tape not only flame retardant (at temperatures as low as -273°C (-459°F) and as high as 400°C (752°F)), but also chemical and radiation resistant which protects surfaces to help reduce replacement costs
- No Residue after Peeling Off: Polyimide film does not soften at elevated temperatures, thus provides an excellent release surface at elevated temperatures. In addition, silicone adhesive's high temperature performance reduces adhesive transfer which helps to eliminate cleaning, enabling high productivity
- Protection, Insolation and Bonding: Protection of gold fingers: of printed circuit boards during wave solder or solder dip process. Insulation and Bonding for electrical switches, motor, lithium battery under Grade H
- Surface for 3D printers: Kapton and ABS adhere to each other very well, therefore is the recommended use of Kapton as a bed surface for 3D printers
Features:
Specs:
| Color | Amber |
| Height | 1 Inches |
| Length | 5 Inches |
| Size | 1/2 x 36 yds |
| Width | 5 Inches |
9. 3M Dual Lock Reclosable Fastener SJ3560 250 Clear, 1/2 in x 6 Ft by 3M
- 3M Dual Lock Reclosable Fastener SJ3560 250 Clear, 1/2 in x 6 Ft -by# gilsand2016>>>got issues ,communicate me with this item, i happy do it for you
Features:
Specs:
| Height | 0.5 Inches |
| Length | 5 Inches |
| Weight | 0.02 Pounds |
| Width | 4.9 Inches |
10. 12mm X 33m 108ft Heat Tape Heat Resistant Tape Heat Transfer Tape Thermal Tape High Temp Tape High Temperature Tape Heat Tape for Sublimation for Heat Press No Residue 1Roll
Color: mainly tawny. Material: durable polyimide and silicone.Size: Width: about 12mm; Length: about 30m /100ft. Heat resistance: about 280°C.<br>High insulation, high temperature resistance, acid and alkali-resistance, low electrolysis, mechanically sound, crocking resistance, tear-resistance, wit...
Specs:
| Color | Golden |
| Height | 0.47 Inches |
| Length | 3.54 Inches |
| Weight | 0.0220462262 Pounds |
| Width | 3.54 Inches |
11. Aluminum Tape / Aluminum Foil Tape – Professional / Contractor-Grade - 1.9 inch x 150 feet (3.4 mil) - Perfect for sealing & patching hot and cold HVAC, Duct, Pipe, Insulation home and commercial
- Professional / Industrial Grade: High-quality, high tensile strength aluminum foil coated in epoxy resin with strong, cold-weather solvent acrylic adhesive set on a easy-release silicone paper liner to preserve the adhesive and provide ease of use
- Wide Variety Of Uses: Ideal for an array of uses, including general repair, sealing hot and cold air ducts (excellent HVAC tape), duct insulation systems, sealing aluminum, stainless and plastic seams / joints, temporary repair of metal surfaces, copper pipe fixing, etc.
- Holds Up: Designed to resist flame, moisture / vapor, UV degradation, odor, weather and smoke transmission. Excellent for both indoor and outdoor use. Chemically resistant, thermally conductive (helping cooling/heating efficiency), heat and light reflective
- Sticks To Virtually Anything At High And Low Temperatures: Our aluminum foil tape provides a durable bond at low and high temperatures. Conformable backing and pressure sensitive adhesive means it is designed to adhere properly to a variety of smooth and irregular surfaces
- Lots Of Tape Means A Great Value: 1.9 inches wide x 150 feet (50 yards). 1.7 mil foil and 1.7 mil backing. Performs from -20 F to 220+ F. Ensure that surface is clean, dry, free of grease, oil or other contaminants before applying aluminum tape
Features:
Specs:
| Color | Silver |
| Height | 2 Inches |
| Length | 5 Inches |
| Weight | 1 Pounds |
| Width | 5 Inches |
12. Strenco 2 Inch Adhesive Black Hook and Loop Tape - 5 Yards - Heavy Duty Strips - Sticky Back Fastener
2 inch wide Black Hook and loop Tape Self Adhesive (sticky back) straps/ strips by Strenco its great for Fastening.Hook and loop (complete double sided set) 5 yards (15 feet) long of each side.Sticks on glass, wood, plastics and other clean, flat surfaces.Mounting tape which is great as a office sup...
Specs:
| Color | Black |
| Height | 4.2 Inches |
| Length | 4.9 Inches |
| Size | 5 yards |
| Width | 4.9 Inches |
13. Scotch Super 33+ Vinyl Electrical Tape, 3/4 in x 66 ft, Black
- The tape's pressure-sensitive, rubber-resin adhesive and a durable PVC backing provide great protection
- Stands up to the elements: from UV rays and moisture to alkalis, acids and corrosion
- Tape dimensions: 3/4 in x 66 ft x 7 mil
- Black tape works great with rubber and synthetic splicing compounds
- Operates in temperatures ranging from 0 to 221 degrees F (-18 to 105 degrees C)
Features:
Specs:
| Color | Black |
| Height | 3 Inches |
| Length | 3 Inches |
| Number of items | 1 |
| Size | 3/4" X 66' |
| Weight | 0.05 Pounds |
| Width | 0.75 Inches |
14. Duck Brand 281973 Despicable Me Printed Duct Tape, 1.88 Inches x 10 Yards, Single Roll
- Features Despicable Me Minions print
- Excellent for crafting, fun and imaginative projects
- High performance strength and adhesion characteristics
- Tears easily by hand without curling and conforms to uneven surfaces
- Single printed roll is 1.88 inches wide by 10 yards long
Features:
Specs:
| Color | Despicable Me |
| Height | 3.75 Inches |
| Length | 3.75 Inches |
| Number of items | 1 |
| Weight | 0.25 Pounds |
| Width | 1.88 Inches |
15. Parafilm Grafting Tape (Genuine by Parafilm 90' Roll Clear (1" - One Inch)
Products Features:Item for 1 roll; size per roll: 1"wide x 1080"long; made in USAProduct contains polyolefin and a little bit waxWaterproof, flexible, stretchable, and self-adhesive with gentle stretchTape allows gasses to pass through. Excellent moister barrier for grafting and budding
Specs:
| Color | Clear |
| Weight | 0.21875 Pounds |
16. Duck Brand 281731 Printed Duct Tape, Bacon, 1.88 Inches x 10 Yards, Single Roll
Make your next quick fix stand outExcellent for crafting, fun and imaginative projectsHigh performance strength and adhesion characteristics, yet tears easily by hand without curling and conforms to uneven surfacesWorks on a variety of surfaces, including wood, vinyl, plastic, leather, metal and lam...
Specs:
| Color | Bacon |
| Height | 3.75 Inches |
| Is adult product | 1 |
| Length | 3.75 Inches |
| Number of items | 1 |
| Release date | November 2012 |
| Size | Single Roll |
| Weight | 0.25 Pounds |
| Width | 1.88 Inches |
17. 3M 2155 Rubber Splice Tape
Package length: 9.652 cmPackage width: 9.652 cmPackage height: 2.032 cmProduct Type: WALL ART
Specs:
| Color | Black |
| Height | 0.8 Inches |
| Length | 3.8 Inches |
| Number of items | 1 |
| Size | $$$ |
| Weight | 0.25 Pounds |
| Width | 3.8 Inches |
18. 3M Double Sided Tape, HitLights Heavy Duty Mounting Tape VHB Waterproof Foam Tape, 32ft Length, 0.39Inch Width for LED Strip Lights, Home Decor, Office Decor
- 【Heavy Duty Tape】Strong double sided mounting tape, 33ft length, 0.3in width, 0.025in thickness. Strength: holds up to 3 Ibs per 2 inches. It is ideal for mounting large and heavy tools, strip lights, car trim, teaching materials, posters and picture frames.
- 【Flexible Adhesive Tape】The double sided adhesive tape is designed to resist curling, making your installation process fast and easy, simple to peel, very flexible.
- 【Waterproof Double Sided Tape】Consists of a durable acrylic adhesive with viscoelastic properties, make the adhesive tape suitable for most surfaces, including mounting outdoors or in damp locations. Please keep the mounting surface dry, clean and free of oil when mounting, so that the tape will get great against water and moisture ability.
- 【Easy to Use】This foam tape is easy to install, just peel off the tape and stick it to the surface of the object. And it is easy to reposition when it’s not fully compressed and repositioning will not influence adhesion durability, it bonds quickly and securely when it’s fully compressed. No drilling, no screwing, no heating.
- 【Multipurpose Tape】Multipurpose tape with comfortable foam on both sides provides adhesion to a variety of surfaces including glass panel, LED plate, car spoiler, door edge, bodyside moldings, ABS and PVC rocker panels, wheel lip, nameplate, stainless steel.
- 【Warm Tips】Due to the strong adhesive of this tape, sometimes it may be hard for you to remove the red protective liner. Please use the plastic peeling tool in the package, or nails, tweezers, knife to help remove.
Features:
Specs:
| Color | Red |
| Number of items | 1 |
| Size | 33FT |
| Weight | 0.15 Pounds |
19. Scotch Film Strapping Tape 8896
Synthetic rubber adhesive has excellent bond strength to a wide variety of application surfacesAppliance, electronics, general industrial, metal working and glass manufacturingTensilized polypropylene tape, clean removal, strapping tape, shipping, holding, securing, keeping closed and stabilizing.
▼ Read Reddit mentions20. Gorilla 6100116 6100101-2 Duct Tape to-Go, 1" x 10 yd, Black, (Pack of 2), 2-Pack, 2 Piece
Convenient for on-the-go repairs; it packs a powerful grip in a portable sizeGreat for smaller repairs or projects. It is made to stick to rough, uneven, unforgiving surfaces. Can also be used for clamping surfaces together.Double-Thick Adhesive; Grips smooth, rough and uneven surfacesTough, Reinfor...
Specs:
| Color | Black |
| Height | 5 Inches |
| Length | 3 Inches |
| Number of items | 2 |
| Size | 2 Pack |
| Weight | 0.52 Pounds |
| Width | 2 Inches |
Hey, I JUST came off building a setup and it cost me $750 total. We have 3 plants in there right now. I have the entire list with amazon links or store suggestions.
Item| Price | Where To Buy
---|---|----
Tent| $95| We bought this one, I don't know if it's worth spending a lot on anything more expensive. For a smaller option I just got a second with good reviews but can't vouch for it yet.
Lights/Hood/Ballast| $140| I got the 600W set, but 400W would make cooling MUCH easier and still get a big yield. For LEDs at similar price, Viparspectra 300W x2 or a single 600W eliminates need for extra cooling potentially (not included here, we used fans from around the house)
ph Test+Control Kit | $25| GET THIS. The water must be pH'd properly for your babies' health.
Cloth Pots| $20 | These are better for aeration, water flow, training, etc. Cheap and reusable too.
Nutrients | $50 | I got the Fox Farms Trio, but there are many good options out there.
Fan + Filter | $150 | This is huge and might be overkill for you. Make sure whatever you get fits your tent vents (This one fits the Apollo tent above with 6" vents).
Ducting | $20 | Connect fan to filter, to tent, to wherever. Might want multiple sizes, check tent vent sizes.
Foil Tape, Metallic | $10 | Here. Metal Duct tape is best duct tape.
Fan Speed Controller | $20 | Useful for if you do get a fan that is slightly overkill!
Fox Farms Ocean Forest | $15 - $40 | You can buy it online and I did for my first 3 bags....then I found it in a local store for $15. There is some controversy with FF lately, it's not organic FYI. There are tutorials on making your own soil if you care, but I like this because I didn't have to use nutes for 3-4 weeks.
Humidifier | $30 | This is the exact one I have. We're in winter so I need it to keep humidity up, you may not.
Dehumidifier | $40 | There are plenty for this much. You may not need this either.
Cal-Mag | $20 | I haven't needed it yet but it's best to have on hand if you do!
Seeds | $75 | I bought from Attitude, chose stealth, and bought like 15 seeds?, so it was expensive. You can get seeds for less.
Jiffy Pellets | $10 | Used to start seeds. There are other options.
Total | $745 | If you buy all this stuff, you have potentially even more than you need to get started, with room for 3-4x more plants than these boxes, and with nutrients to last you for a long long time!
Hope this helps! I'd hate to see you drop so much on it when you don't need to at all.
Hey, heads up on modern bulbs.
I started doing this about five years ago when not as many LEDs were used, my first with a Space Bucket is here from about four years ago, and some are now using a lot more LEDs in the bulbs. I did remount some of the LED modules for side lighting. I'm going to modify the article with a disclaimer.
The problem with more LEDs is that they are each ran in series, each LED needs 3-3.3 volts, so in some instances you are going to be exposing voltages that are going beyond safe levels by removing the cover. This should be isolated DC voltage, not AC line voltage, but keep in mind that with more than 15-20 LEDs that you can have a shock hazard.
Big Clive on YouTube has shown that they might not always be isolated from ground.
https://www.youtube.com/watch?v=rNf6VSj6M-E
Shock hazards are most serious when it's a hand to hand shock since the current path can go through the heart and 50mA is when things can start becoming lethal.
Also I found that if the LEDs become disconnected from the power supply that the power supply voltage floated up to about 170 volts which in 120 volt AC nations is the peak voltage that you would get with a rectified capacitor. You have to be aware of this particularly when doing major modifications to the bulb.
It can be done safely but insulation is the key.
Also, don't use hot glue with power electronics. You can use 5 minute epoxy instead and give it 5 hours to cure.
edit spelling
/u/MrSparkleBud is using modules with 10 LEDs and his setup looks pretty safe. The hot glue is being used in areas where there would not be an expected heat build up. Adhesive cable tie mounts with tiny cable ties would still be a much better option as they provide really good strain relief (as an electrician I used a lot of these). Those now exposed power supplies still have line voltage on them, though, but it's obvious he has experience doing stuff like this from the very neat layout.
Make sure the line voltage splicing is soldered/taped and not just twisted with line voltage. Be sure to use Scotch Super 33+ tape if you can get it and not cheap, generic tape. Home Depot etc will have it for about $3 as well as the cable mount stuff.
Wire nuts are preferred for line voltage splicing.
The size itself is great. You may have a bit of trouble furnishing it, though. For depth of bedding, you could probably add some simple "tubs" like cardboard boxes with the top cut off or those inexpensive sterilite shoe boxes. Hamsters need about 3-4 inches of deep bedding, but they really only need it for nest, a few fun tunnels, and food storage. A couple hundred square inches of deep bedding with more shallow bedding in other places would be fine.
The ramp is a bit steep, and would be unusable for a sick or old hamster, but you could just replace it with a longer board and glue down some coarse sandpaper for grip.
Secure the top with something better than gravity. Hamsters can lift quite a bit with their wedge-shaped heads. I'd screw a pair of "screw eyes" or hooks onto each front corner and use reusable zip ties to hold it secure. Easy, strong, and cheap.
With wood, there's a chance that a determined hamster could chew a hole through it if they can get a good purchase to start chewing from. The back looks especially susceptible because it seems like masonite or some similar fiberboard. Check it every few days. If you see a danger spot, you can just cover it with aluminum flashing. It's basically super thick aluminum foil for waterproofing the edges and corners of roofing. You can cut it with scissors and bend it to fit nicely on weird shapes. Attach it with cheapo silicone caulk for a bond that will last decades. Aluminum and caulk tube are just a few dollars each. Caulk gun may run you around $10 if you don't have one. But you probably know someone you can borrow from.
Put food and water on both levels because if your hamster gets hurt or sick, you want them to have it. They may be stuck on one floor while they wait for you to notice they have an issue.
Edit: I looked at the reviews by users on amazon, and it looks like this particular hutch may not be worth the money. 170 beaver dollars is too much to spend on something that may not fit together well. With that budget, you can get a 40-gallon breeder aquarium and a nice quality wire mesh lid for it. The floorspace on one of those is wonderful, the bedding depth is perfect, glass is completely unchewable and easy to clean, and you'll never get better visibility for watching your hamster. Just attach water bottles to the inner surface with adhesive velcro tape. I don't trust the other brands unless I can feel them in person.
If it's cool, I'm gonna just respond to this comment and the other one at the same time.
It's a Heatbed MK1? Awesome. Just like a lot of the other parts, that's totally a current component, and addressable by modern stuff. The MK2, 2B, and 3 are much more common these days, but there's still places you can buy a MK1 brand new, and while the new ones are a bit improved in terms of things like heat density and warp resistance, the original is totally usable. They do draw a lot of power, which is why the old machines often had two power supplies, as running with a heated bed isn't always necessary, so it's good to not have to worry about running 20 amps to a bed when you don't need to, haha. The orange material is what's known as Kapton tape. It's a high temperature resistant plastic (how high temperature you ask? One of its early uses was by NASA on the pods of rockets to allow them to survive re-entry. Tough stuff) that's still commonly used for a number of purposes, but back then was commonly used to ensure plastics like ABS stuck to the heatbed. There's other build surface coatings now, though some people still swear by it. The cardboard was probably just an insulator to help spread the heat more evenly, as the MK is around 200mm on both sides, and with an overhang of 100mm on the aluminum, it obviously needs some help to make sure that all stays around the same temperature. I'd keep that put together for now. Later on, there's some parts that can be changed out to make the bed operate in a manner that's a bit more modern, but for now it's serviceable, and not a big issue.
On to the other questions. When you dropped the board, you may have yanked some cables out of the screw terminals on the PSU. If you want to try and fix it, you can always shut off the power from the wall (wait a few minutes before you touch it, there's a lot of power in the caps), and carefully unscrew one terminal at a time, rearranging the wires wrapped around it so they make contact again, then put it back together. Alternatively you can ditch both PSUs and just get an ATX PSU from an old desktop capable of putting out 300-400W on the 12V rail (typically ones rated to 500 and above are good enough, as a decent amount of power is spent on the 5V rail), cutting the heads off a few leads, and plugging those into the power terminals. It's how I've run my primary printer for almost two years now, and it's an easy way to get a reliable, 12V PSU.
It sounds like your motors are all functional but they're either not getting enough current, or that other potentiometer is causing problems. It's pretty tough to kill this kind of motor, the only thing that really breaks them is dropping them, the wires ripping out, or them overheating. They're rated to operate normally at around 75C, though, so it takes a decent bit of work to really destroy ones of the size you have. If you want to test if they're all good, though, take a multimeter and test for resistance on the coil pars. Typically the coils are labeled as green/black and red/blue, but it can differ from manufacturer to manufacturer. As long as there's two distinct pairs of wires that complete a circuit with some resistance (usually it's around .8 ohms or something to that effect, but it differs from motor to motor), they work fine. Drivers are easy to kill, though, especially if you adjust them with a metal screwdriver, which can short spots on the potentiometer and kill certain things. I've easily burned through four or five out of carelessness, but luckily they're easy to source and replace. Honestly, motors are easy to source too, and only cost about $8-12 each, but the way the old Mendels mounted them means replacing them can be a bit of a task.
On the bed's readout, it definitely sounds like something's up with the thermistor, and if it's heating on its own (that is, without you telling it to), then one of the circuits on the RAMPS board may have failed, as some of the current control systems can fail in an "on" state, meaning they just directly pass power through to the bed continuously. That's fixed by replacing the thermistor/replacing the board, respectively. There's ways to replace the surface mounted components, but it's just simpler to replace the two components, in my experience.
I run a campus makerspace with three MakerBots, and I feel your pain. It's been a year since we got them, and we've only just NOW (read: within the last month) figured out how to cut down on about 95% of the warping. Lots of the solutions here seem like they come from folks who aren't too familiar with MakerBot printers and the true shittiness of the flex build plate grip surface. For reference, our machines are used by a campus of about 10,000 students, so the machines are running 9 hours a day, every day.
First, I'd agree with some of the folks on here about throwing the machine out the window. If you're within the 30-day return window, return yours. They are absolute garbage, and if it wasn't for the $250 restocking fee that MakerBot charges after that 30 days, I'd return my three MakerBots in a heartbeat. Both the extruders and the build plates for the Replicator+ are truly awful. The proprietary MakerBot Print software leaves very little in the way of customization, so you can't really expect to even modify some of the slicer settings to test out what some of the folks in here are suggesting. At any rate, you should still print with a raft, because of the lack of a heated build plate.
MakerBot Customer Support, in their infinite wisdom, will typically recommend the following things over and over. I've spent more hours on the phone with them than hours at my job, and I'll preface this by saying none of their solutions worked in the long-term for any of our machines:
Now, the solution that worked miracles: try buying gaffer's tape. Another redditor recommended it, and we purchased this gaffer's tape. Since then, not a single print has failed due to warping issues. We can spread objects across the build plate with little regard for orientation or arrangement without much issue. Granted, on extremely large prints that take up the entire print volume, we might see a slight (maybe 5% at the corner, warping up about 1 or 2mm from the plate) warping issue, but it's nearly perfect compared to before. The same gaffer's tape strips I placed down for the very first test at the beginning of April are still sitting without a scratch on the build plates, so you can bet it doesn't peel or get scratched up easily either.
I can't understate the amazing value of gaffer's tape.
I just wrote this for kids in our Scout troop; feel free to use whatever you see fit:
If the new Scouts are going to be buying a pack to take on practice hikes for the West Point Camporee or the Acadia trip, maybe they could use some advice before they hit the store.
Some folks may think “Buy once, cry once” and that’s fine. REI makes good stuff, plus the premium brands like Osprey are available in sizes to fit even little guys.
Other families may want to spend less: your Scout might be headed for a growth spurt, or might be hard on their stuff, or might not be guaranteed to stay in Scouts for ever. In that case, there are some less-expensive ways to buy a pack.
WHERE TO BUY
Discount sporting goods companies include Campmor, Sierra Trading Post, Moosejaw, and REI’s own outlet (the Garage). This offers lower prices on good gear that’s maybe from last year, or a close-out, or a weird color.
http://www.campmor.com
https://www.sierra.com
https://www.moosejaw.com
https://www.rei.com/rei-garage
When shopping online, always look for a coupon code at RetailMeNot! https://www.retailmenot.com
Amazon offers knock-offs of good-quality gear by no-name Chinese manufacturers. These items often have very few (and possibly astroturfed!) reviews; proceed with caution.
Amazon also sells its own knock-offs under the “Amazon Basics” label. Some of this stuff is pretty darn good: for example, I bought the 75-liter version of this internal frame pack last year (on sale for $40.15!) and was surprised at how well-made it was, with decent materials and good features. https://www.amazon.com/dp/B0141MQRGI/
That pack is almost identical to another — and $20 more expensive -- item, the Teton 4000: https://www.amazon.com/dp/B00167TGII/
No, the Amazon Basics pack won’t last for ever, and it’s not ultralight, but it’s functional and inexpensive.
Ask around! Someone in the troop or your family or neighborhood or workplace may have gear they don’t use any more, or may be able to lend you some stuff to try before you buy.
You can sometimes buy used or new gear on Craig’s List or a FaceBook group. The usual reminders of how to shop carefully online apply: never send money electronically, meet in a public place, don’t send anyone your credit card number, bring a friend to the meet-up.
REVIEWS
As for reading reviews to help select an item, there are very good reviews at Outdoor Gear Lab. Here’s their most recent (Nov. 2017) round-up of “budget backpacks”: https://www.outdoorgearlab.com/topics/camping-and-hiking/best-budget-backpacking-pack
(Note that the super-cheap option they suggest at the end is…the Teton pack linked to above!)
Amazon reviews are often bought, so I am suspicious of items with fewer than fifty or 100 reviews.
The (often truly awful) web site Reddit has a community about camping gear, and you can search it for reviews. (Just make sure not to read any other communities there.) https://www.reddit.com/r/campinggear/
And of course you can ask around the troop! Other Scouts and families have a lot of experience camping, and can share what they know about various manufacturers, specific items, or stores.
Congrats, just got mine 2 months ago.
SeeMeCNC forums are awesome. Start reading every new post.
Best upgrade I've done: PEI Bed
http://www.amazon.com/gp/product/B0013HKZTA
http://www.amazon.com/gp/product/B007Y7D5NQ
~$30 in upgrades; all my prints stick and pop off with ease. Also, the underside of every part is glassy and smooth. So good.
Buy "feeler gages" to assist with leveling the bed.
http://www.amazon.com/Stanley-Proto-J000AA-Master-Feeler/dp/B001HWDOK8/
My bed leveling process is kinda like this:
Let's see, what else. If you can spare the cash, I moved to Simplify3d for all my slicing needs ($100~$150 for the license). Love it. If you can't afford it, maybe you'll find a way.
Also, get ready to do a bajillion calibration runs. I mean it, don't be in a rush.
Find a nice 20mm box off thingiverse or whatever, and you're gonna want to print that repeatedly while you dial in your settings. Once that's set, move on to the hollow pyramid, or the 5mm stairs.
I seriously printed at least 20 of each of these while I dialed in my settings:
ASAP, move over to PLA. Prints so much nicer for me than ABS.
Oh, before you go to PLA, make sure you print 3x of the layer fans housings (not just 1x) and order up 2 more of the "squirrel cage" fans (centrifugal fans) from SeeMeCNC. edit: I spliced the single pair of layer-fan wires into three right at the connectors, I didn't bother running extra wire for them.
Oh, and one other big improvement I made was putting connectors in-line with the hot-end and for all the fans. This way, if I have to replace a fan or upgrade the hot-end I don't have to cut and splice wires, I can just pop it off and connectorize another new one. Here are the connectors I used:
That was probably too much info -- just take your time and try not to get frustrated while you get things all set up. It is not a plug-'n-play object, it requires care and feeding.
... oh, and have fun! Whatcha gonna print?
I would take the driver assembly off of the frame (aka remove the thand use an epoxy specially formulated to bond plastic to glue the pieces together. I recommend JB PlasticWeld. You probably want to practice on something else before you try it on your cans, since it dries super quick and you only have one shot at this.
One that has fully cured (it says 1hr but definitely give it a full 24hours), I would wrap the cracked part of the frame tightly in a self-sealing tape. This is a rubber tape which resembles electrical tape but it has no 'adhesives'. What you do is stretch it out as you wrap it and then tightly overlay half of the width over your last pass each time. It will fuse to itself and should support it pretty well. Make sure you have enough clearance to put the layer of tape on and still reattach the driver assembly back on, because once it's one there it's not going to come off without a huge fight (which is the whole point). Again, practice beforehand on something else. I personally use the 3M brand all the time with good results, and it's super cheap. Link.
Good luck.
It's a two person job, but my house is laid out pretty well so I had access to most vents easily.
My recommendations are:
-Feed cables down hill as much as possible, gravity is your friend
-Electrical tape around the end of the cable, to protect the contacts and stop the clip from bending and snapping off or getting hung up
-I had some old household electrical wire laying around so I peeled out about 5 feet of the solid stiff ground wire, then bent a hook on one end to help get into corners and tight spots. A coat hanger would work pretty well too
-There was one point that I had to exit through the side of one of the ducts. I drilled a half inch hole in the side of the duct and used some foil tape to patch the hole back up once the cable was through
-Anywhere the cable exited a duct I wrapped about 6 inches in either direction with a few layers of electrical tape for some added protection
If you had any other questions I'd be glad to help!
> Nice. I am currently designing a F1 wheel replica, and have made wheels in the past. If this is something that you want to do more, I advise spending money on a 3D printer, the Creality Ender 3 is excellent for £150, which is about 160 euro. (This will also allow you to very accurately prototype. I also like the custom quickrelease, a mod I am just finishing on my T300.
Yeah, I'm definitively going to get a 3D-printer once I move out of my studio apartment and get some money. Thanks for the recommendation!
> Have you thought of covering the handles? You can use suede material, or various things like plastidip or sugru for a more rubbery finish.
Yeah, I'm probably going to try self-fusing rubber tape to cover the handles. Something like this but maybe narrower: https://www.amazon.com/X-Treme-Tape-TPE-XR1510ZLB-Silicone-Rectangular/dp/B00HWROO7E/ref=pd_cp_328_1?pd_rd_w=TjtWn&amp;pf_rd_p=ef4dc990-a9ca-4945-ae0b-f8d549198ed6&amp;pf_rd_r=NHWY47ZSHGV250NA3EWS&amp;pd_rd_r=232d9373-4cbd-11e9-a258-1dc4cbbc6958&amp;pd_rd_wg=AQ5YE&amp;pd_rd_i=B00HWROO7E&amp;psc=1&amp;refRID=NHWY47ZSHGV250NA3EWS
> Judging by your previous posts, you seem to be quite into this. Are you thinking of doing any other wheels?
Yeah, I probably will in the future. I'm quite happy with this now, but maybe I'll do a more advanced F1-style design one day. I've also thought of doing a button box for a D-shaped wheel and maybe designing and building my own pedals with a load cell brake, as I don't have a load cell brake currently.
> I also have a questions. Where is that fancy looking usb cable from? I am looking for one that screws into the wheel.
It's just a normal cheapo coiled USB-A to micro-USB cable from ebay, and I bought the 5-pin airplane DIN connector separately, so something like these:
https://www.ebay.com/itm/Mobile-Phone-V8-Coiled-5-Pin-Adapter-Data-cable-Charger-Micro-Usb-For-Samsung/123576401188
https://www.ebay.com/itm/5-Pin-Female-Male-Microphone-Connector-for-CB-Radio-Ham-Plug-/200913559171
5-pin connector wasn't necessary as USB 2.0 has only four, but I couldn't find four-pin connectors at the time so I went with five, and just used the pins 1-4 on that.
> Also, how did you fit a button onto to the top right front and back, I can never find space for them.
The button on the backside just about fits internally, and the internal part of it actually extends between the internal parts of the buttons on the front side. It was a little bit of an afterthought and I had to drill in to the 3D-printed cover to get the hole for the backside button. These buttons have a nut and a spring washer on them on the inside, but I had to not use the spring washer for the button that is behind the grip, as I couldn't get it to fit properly with that.
From Top Left to Right.
Gearward Compact Survival Cord Mini, 25’
[http://gearward.com/collections/frontpage/products/compact-survival-cord-mini-technora]
Tucked inside the folds of the cord are: a micro neodymium magnet, a pen spring, a small safety pin.
[https://www.amazon.com/10-100pcs-Neodymium-Strong-Magnets-MarbellStore/dp/B01LZEJWVK/ref=sr_1_1?ie=UTF8&amp;qid=1484275063&amp;sr=8-1&amp;keywords=micro+neodymium+magnets].
Have actually used this for: fishing some ladies keys from a grate at the school before the janitor could show up. Also repaired a neighbour’s skate lace with the cord.
Night Ize Inova thumb light (three functions, bright, medium, flash)
[https://www.amazon.com/Nite-INOVA-Ultraviolet-Microlight-Clip/dp/B00CG17GDA/ref=sr_1_2?ie=UTF8&amp;qid=1484275003&amp;sr=8-2&amp;keywords=Nite+Ize+inova]
Have actually used this for finding a lost earring in a dark movie theatre. Thought I would use it to find the locks on my house and car, but everything is pretty well lit.
Stanley Key Chain Tape Measure
[https://www.amazon.com/Toysmith-Key-Chain-Tape-Measure/dp/B000F4G5NW/ref=sr_1_fkmr1_1?ie=UTF8&amp;qid=1484274328&amp;sr=8-1-fkmr1&amp;keywords=stanley+keychain+tape+measure+1m]
Have actually used this for buying a new sideboard from an antique shop. Knew the measurements of the room and used this to determined it wouldn’t fit in that room. LOL.
Nite Ize inka Mobile Pen
[https://www.amazon.com/Nite-Ize-Mobile-Stylus-IMP-M1-R7/dp/B00BAWSOD2/ref=sr_1_2?ie=UTF8&amp;qid=1484275029&amp;sr=8-2&amp;keywords=Nite+Ize+Inka]
Have actually used this tons of times whether someone doesn’t have a pen, or for myself at the passport office or recently at the lawyer’s office.
Prime-Lite 5-1 Multifunction Keychain with Light
[http://www.prime-lite.ca/camping_outdoors/5-in-1-multifunction-keychain-with-light-24-852.html]
A new addition. I like the full sized Phillips screwdriver bit. Has a flashlight. Used it to open the bottom of my son’s new RC car’s battery compartment. Has a knife, too. Good for package opening. Not much else.
[Nite Ize DoohicKey Keychain Multitool]
(https://www.amazon.com/Nite-Ize-DoohicKey-Multi-Tool-Stainless/dp/B00FIX126K/ref=sr_1_2?ie=UTF8&amp;qid=1484274688&amp;sr=8-2&amp;keywords=Nite+Ize+keychain).
Actually used this recently to pry open my frozen gas cap cover.
[Mini Bic Lighter]
(https://www.amazon.com/Lot-Bic-Mini-Multi-colour-Lighter/dp/B00863XN4I/ref=sr_1_1?ie=UTF8&amp;qid=1484274798&amp;sr=8-1&amp;keywords=mini+bic)
To light cigs, mostly. Haven’t needed to start any urban fires. But… I wrapped over it a thin layer of [To-Go Gorilla Tape] (https://www.amazon.com/Gorilla-6100101-2-Duct-Tape-Black/dp/B01M2AAGTZ/ref=sr_1_1?ie=UTF8&amp;qid=1484274817&amp;sr=8-1&amp;keywords=travel+gorilla+tape) and generic electrical tape at the base. [I interwove the electrical tape through a generic (plastic coated) paperclip so that it acts as a keychain. Haven’t lost one yet.]. I used the duct tape recently when a poster fell down at my kids’ Christmas recital and I was able to peel a few pieces off for the teacher to put it back up.
[Mini Sharpie Marker]
(https://www.amazon.com/Sharpie-Permanent-Markers-Assorted-4-Count/dp/B000GOZXA2/ref=sr_1_1?ie=UTF8&amp;qid=1484274852&amp;sr=8-1&amp;keywords=mini+sharpie+marker)
Used it recently to write a nasty note to a jerk who dinged my car. Also to get an autograph on a menu of an actor you’ve probably never heard of, but who was big growing up in Toronto.
[Generic Folding Travel Scissors]
(https://www.amazon.com/UCEC-Scissors-Xiaoquan-Slip-N-Snip-scissors/dp/B0199VSV42/ref=sr_1_1?s=arts-crafts&amp;ie=UTF8&amp;qid=1484274914&amp;sr=1-1-spons&amp;keywords=folding+scissors&amp;psc=1)
Sharper than I expected. I recently used this to save the day when my son refused to wear his new Christmas sweater for a family picture because the tags were itching his back. Snip. Problem solved.
[Gerber Dime Micro Tool]
(https://www.amazon.com/Gerber-31-001040-Dime-Micro-Tool/dp/B0079J51JU/ref=sr_1_4?ie=UTF8&amp;qid=1484274877&amp;sr=8-4&amp;keywords=gerber+dime)
Good to have this as it has pliers, but I haven’t used it other than to pull yellow lego heads out of lego helmets.
[Nite Ize Key Rack Locker]
(https://www.amazon.com/Nite-Ize-Stainless-Carabiner-MicroLocks/dp/B00FIX12AG/ref=sr_1_1?s=arts-crafts&amp;ie=UTF8&amp;qid=1484274970&amp;sr=8-1&amp;keywords=Nite+Ize+Keychain)
A good way to keep it all together. These clips don’t lose their… clippieness.
So, I love this little EDC. Will continue to use it, thought I don’t see many ways to improve it!
I prefer to cover the bottom of the pedals with gaffer tape — there are YouTube videos (which is how I found out about this) but I do it a little differently:
Edit: the gaffer tape should come off clean in most cases so this is also a great way to attach velcro to new/mint pedals and be able to easily get it off later when you want to sell but leave the pedal in mint condition.
Audio rattle is still there under Windows 10 and is because of Waves Maxx audio or whatever bundled bloatware comes with the realtek driver. Under any Linux distro, there is no rattle.
&#x200B;
The other things you mentioned are not really software issues - they are quality control issues. No BIOS update is going to fix horrible thermal paste jobs, or bad heat removal engineering.
The 9570 should be viewed as a "some assembly required" sort of device. It has great hardware at a great price, but is poorly put together. However, on the upside, it is a profoundly easy system to disassemble (just get any old computer/cellphone repair kit with a T5 star bit). My advice is, if you buy it, do so before you even boot it the first time. There are dozens and dozens of posts on both Reddit and elsewhere showing how to fix the heat removal problems in the 9560/9570. My approach was:
&#x200B;
&#x200B;
After doing this my temps hang out around 37 idle, around 50-something under heavy load. Previously I was ready to send it back but didn't have the heart to because it was such a good set of hardware for the money. I was a little intimidated ripping it apart at first, but it was well worth it and quite simple. PM me if you want any further guidance. I have a lot of experience using Linux on this machine as well and it is thoroughly documented all over the internet, so if you want to go that route there's lots of help available too.
Ba Co N
Bacon Strips and Bacon strips
Bacon Wallet
Exercise = Bacon
Exercise = Bacon 2
Bacon Strips hoodie
Everything tastes better wrapped in Bacon
Bacon Makes everything Better
Bacon is my Fav Veggie
Got Bacon?
Egg skull and cross Bacon
Come to the Darkside We Have Bacon
This Guy Loves Bacon
Life is Better With Bacon
Bacon Lounge Pants
Bacon duct tape
Bacon boxers
Bc = Bacon the Delicious element
I <3 Bacon sticker
Bacon Mints
Bacon toothpaste
Bacon floss
Bacon Jellybeans
Bacon Tie
Bacon Candy bar
Maple and Bacon Lollipops
Keep calm and Bacon Nom
If Bacon Grew on Trees
Mmmmm Bacon
50 shades of Bacon
I'd wrap that in Bacon
Bacon Soap
Bacon coffee mug
And to Wrap All of these amazing thing up???
BACON WRAPPING PAPER!!!!
Bacon is Meat Candy when it comes to finding things bacon.. I go above and beyond the call of duty.
Build some! Get some hard plastic irrigation tubing from Lowes or Home Depot, a few connectors, and some duct tape/grip tape or sand paper. If you know someone with a saw, great, if not you'll want to get a pipe cutter. Building your own is fun and while it seems spendy, I've gotten at least 5 hoops from a roll and have been able to downsize at will. You'll probably want to tape the hoop for added weight, and while gaff tape is nice and great for grip, duct tape is a bit cheaper and does a good enough job.
Congratulations on 3 months sober, it's inspiring to hear hooping has helped!
Hello, I somewhat specialize here.
What you can do is use gaff tape to secure the phone to the headset. use it around all the edges, at your discretion. you MUST use gaff tape because it leaves very little sticky residue... some may stay because of the heat, but its very easily cleanable. The strength of duct tape without the mess.
https://www.amazon.com/Professional-Premium-Grade-Gaffer-Power%C2%AE/dp/B00GZE3UJ8
*This comes in many colors, even white, which may suit better to be less noticeable.
After that, you can secure the black cover plate to it to cover up the phone... if you care more about security than aesthetics, go ahead and secure the black cover plate to the headset as well with the gaff tape...
alternatively, you can configure an anti theft pull box to the phone and/or headset. anti theft kits will most likely leave some sort of mark on either device so use with caution.
http://www.cissecuritysolutions.com/Anti-Theft_Pull-Boxes.html
It's a hot mess at the moment and I don't have a good photo, but here are the pieces:
I put the Amazon links for reference, but shop around. Some of this stuff is much cheaper at Home Depot or other online stores.
I use the foil tape to connect a "boot" directly to the back of the case my mining rig is in. Then connect the flex duct to the boot. Connect the other end to the inline fan. Connect a second piece of flex to the output of the fan and hang the end out of the window.
I've found pulling the heat out works much better than blowing cold air in.
If you have an open mining rig, I've seen people put up small tents like this one: https://www.amazon.com/Valuebox-2x2x4-Small-Indoor-Hydroponics/dp/B01GCHXUVU/ and then just connect the duct to it. That seems to work okay too.
On the cheap side I would use 3M Dual Lock, it's similar looking to velcro but WAY stronger. Instead of hooks and loops it uses opposing mushroom tops, the one I linked is the medium strength (250) and I think a 4-5 cm square on all four corners would be more then strong enough to hold up an A2 aluminum print (don't use too much, it is strong!). It's also nice that unlike velcro you use the same material on both sides, so you don't have to keep track of what you put on the wall or print.
A step up from that in price would be aluminum standoffs. Nicer looking, but much pricier and requires drilling a hole in the wall.
I have a sheet on both aluminum and glass. For for both I used 3M 468 adhesive. Works great, just be careful as it loves to stick to itself and once it's down you can't straighten it out.
I used this (Amazon link): [TapeCase 12" squares (pack of 6), Converted from 3M 468MP Adhesive Transfer Tape] (https://www.amazon.com/dp/B007Y7D5NQ/ref=cm_sw_r_other_apa_Ux1sxbDHBG4C0)
Make sure your build surface and PEI sheet are squeaky clean beforehand. Alcohol is your friend (rubbing, not drinking, though that's good too). Take your time laying down the adhesive to the PEI to minimize bubbles (there will be bubbles). Smooth it out as much as you can. You'll end up with a handful of larger bubbles still, but that's OK. Peel of the remaining sheet from the adhesive, and pop those suckers. I used an exacto knife and carefully scored the bubbles, then used a small piece of the discarded backing sheet to smooth them out. Now that that's done, carefully align and lay the stickified PEI sheet onto the aluminum bed. You only get one shot here, so make it work. What I did was lay one edge down and carefully push it down, keeping the farthest edge of the PEI up until the end. Take your time and keep bubbles to a minimum. Once your down, congrats. You now have a a super surface for printing.
Why all the stuff about bubble though? Well, hot air expands. This can cause minor warping of the PEI sheet as it warms up, and can mess up your first layers. You'll have some areas that might not go down smoothly, and others that the nozzle drags on. It's annoying. Trust me, I still need to redo my aluminum the right way.
Side note: if at all possible, I'd recommend getting a PEI sheet larger than your bed. Less work aligning it, then you can cut it to fit after putting it down. Drill holes through it afterwards, hell even counter sink it a bit. You'll have a nice looking print area afterwards!
...shit, time to order a 12in PEI sheet.
I bought the same thing for my v1:
12"x12" 0.03" PEI
https://www.amazon.com/gp/product/B0013HKZTA/
(6) 12x12" 3M Adhesive Transfer Tape:
https://www.amazon.com/gp/product/B007Y7D5NQ/
At the time there were no practical cheaper/smaller options (although the extra 3M adhesive does come in handy).
... I scored/snapped the sheet into 4 pieces, and I'm still on the first PEI sheet after like 300 hours. It still looks flawless. I only use sharp scraper blades or no tools to remove parts. If you're printing something crazy in a cold room, you can add hairspray, but for the most part, PEI has perfect adhesion on it's own.
I definitely recommend the thicker PEI (0.03"+), as it makes the MPSM bed much more rigid. I don't have to bend the aluminum bed "flat again" anymore. I dont worry about bending the bed when ripping parts off the bed, even with super high adhesion.
Clean it with alcohol, not sandpaper.
DiiCooler, Z braces, thumbscrews for bed leveling, and the melzi temp fix are all common mods that I can recommend. You could also get the all Metal Hot end from Micro Swiss but I have not done this myself.
As for supplies, I would recommend getting a sheet of PEI and some 3M adhesive to stick it to the print bed. PEI is a great, low maintenance print surface that prints stick to very well even without any form of fixative to improve bed adhesion. If you don't go that route I would say get some buildtak to put on the print bed with washable gluestick depending on the filament you use. Basically you don't want to be printing directly on to the bed as there is a hole where the thermistor comes through.
Other than that, just get extra filament and have fun with it.
I do a back yard show too and I find the board method too cumbersome. I now use the duct tape/bag/stake method.
Not a fan of roman candles. Dont waste your money.
Make sure you test your fuse and know what speed it burns. My white fuse burns super fast. My green fuse burns faster than my yellow. My yellow burns much faster than the Pink. The pink is slower than the Shiny green fuse. That wasn't always the case. My green fuse was always the slowest and yellow was the fastest.
I also don't like the idea of reloading shells during the show. If you must, you can prep them by zip tying the fuses together in groups of 8 or so. Throw 8 in the tubes and light the bunch. Dont put your head over any part. Stick the rest of prepped shells in a ready box. A ready box is designed so it cannot be left open. You lift up the lid, grab a bunch, the box has a string so that closes itself after opening
Invest in zip ties and metal tape. Use this to tie your fuse together.
https://www.amazon.com/3M-Foil-Tape-3381-Silver/dp/B00A7I5L86
https://www.amazon.com/Aviditi-CT422E-Nylon-Length-Purple/dp/B00DY98M1I/ref=sr_1_3?s=office-products&ie=UTF8&qid=1525752899&sr=1-3&keywords=4&#37;22+zip+ties
I cant begin to tell you how much I love these fuse cutters. This tool changed my fuse cutting life. I spit on scissors now.
https://www.amazon.com/Craftsman-Edge-Utility-Cutter-9-37309/dp/B0037IX2BG/ref=sr_1_12?s=power-hand-tools&ie=UTF8&qid=1525752808&sr=1-12&keywords=handi+cut
This fuse igniter will change your life. Lighters might as well be flint. Thats how next gen this is. Get some propane or MAPP
https://www.amazon.com/Bernzomatic-TS4000-Trigger-Start-Torch/dp/B00008ZA09/ref=sr_1_3?s=office-products&ie=UTF8&qid=1525753004&sr=8-3&keywords=berzomatic
This headlamp makes flashlights a thing of the past and changes your life. Make sure you get one that doesnt have a third strap along the top. If youre not using it you can wear your headlamp on your neck and not lose it.
https://www.amazon.com/Black-Diamond-Spot-Headlamp-Octane/dp/B06W9HPY25/ref=sr_1_6_twc-13d22461-ce_1?ie=UTF8&qid=1525753147&sr=8-6-acs&keywords=head+lamp&content_id=13d22461-ceea-426c-b620-9fe11db17513&ascsubtag=13d22461-ceea-426c-b620-9fe11db17513&tag=ospsearch-20&widget_name=expert_recommendation&content_provider=osp&ingress=search&content_type=story
Also invest some money in some eye and ear protection. I can't tell you how many times I went to bed with a "reeee sound" in my ears, and have gotten pyro shit in my eyes.
Build yourself some real racks if you're up for it. I just recently built myself some and it was a snap.
https://www.youtube.com/watch?v=-p7J4HV4Gak
Without pictures, I can't give super-specific advice, but I'll try to give some pointers:
First of all, a caution: now that you've pulled up part of a track, heating that track makes it more likely to de-laminate even further. So keep your heating as brief as possible.
Secondly, solder is not meant to be a mechanical connection. Anything you place should be securely taped down so it won't shake loose or put strain on the soldered connections. Similarly, do not attempt to force or strain parts that are soldered down - disconnect, adjust, reconnect.
Next - as for the potential short you have (exposed ground right next to your intended connection point) - we can fix that too.
Use insulating tape (preferably kapton tape - it can withstand high temperatures and you're unlikely to melt it with your iron). to cover up the exposed ground area. Now you can work in that area without fear of an accidental short.
Now you can use standard hookup wire to repair the connections that were once serviced by the now lifted track. In places where you solder down the hookup wire, use kapton tape to reinforce the connection and keep the trace from lifting further. Minimize heating of the broken traces. Once all connections are made and the wire has cooled, you can reinforce those points with something stronger, like electrical tape.
Finally, be sure to test your handiwork before inserting the batteries. Use a multimeter to measure the resistance between the battery positive and negative terminals. It should be non-zero (Above 1k sounds about right).
I hope this helps and good luck!
Thank you, I appreciate it! :)
It's actually [3M Foil Tape] that I just cut to length and stick inside. It takes some practice and patience but if you take your time it works pretty well.
It's probably not as reflective as mylar but I felt it was the best solution for my application.
I have no idea, but even if the one you got has a 3.3V issue, it's not that hard to solve. Here is a nice album detailing the workaround. I would strongly recommend using kapton tape instead of the kind used in the album. It's the ideal tape for the job, since it's basically made to work with electronics. If you're willing to wait a few weeks, you can get a roll perfect for this situation for as little as one dollar. If you're not able to wait, it'll cost you about ten bucks.
Here are some images of my setup.
https://imgur.com/PCOgUMr
I know folks are moding the HTC Vive deluxe audio strap onto the Quest but I just couldn't do it.I use to own a vive and already bought an audio strap. Gave it away when I sold my Vive.
https://imgur.com/YYUnJvL
If you want the L Extention for the usb-c you can find it here: https://www.amazon.com/gp/product/B07PHQR8P9/ref=ppx_yo_dt_b_asin_title_o00_s01?ie=UTF8&psc=1
And here's a shot of how I keep the battery on. It's not a perfect solution but it works for me. I use the quest to workout so Its important the headset be comfortable and stays in place. So far this has be a perfect solution for little money spent.
https://imgur.com/UWHRBxV
To keep the battery in place, I use Velco: https://www.amazon.com/gp/product/B00H3R9S1K/ref=ppx_yo_dt_b_asin_title_o02_s00?ie=UTF8&psc=1
It's strong and removable.
My kit, which is usually in some sort of shoulder or back pack, always has a thin roll of Gorilla Tape, a spool of micro-paracord (80 lb test, overkill for most repairs), a powerbank capable of charging my phone to completion more then once and the appropriate cable, condoms (can be used for the obvious but also as a bandage or to carry water), a method to make fire, and some sort of snack. I have a water container with me 100% of the time. Of course there's way more silly things in there, but those things are key.
The micro paracord is super useful, for easy rope and fun/socially. A lady's purse breaks, you can fix that no problem. Need an impromptu keyring? I got ya. Even marking which suitcases go to which hotels in a third world country (most recent time I was happy to have it). Ill grab a link from Amazon. I love it
Tons of colors too, a chain of military surplus stores in my city carries it.
Atwood Mobile Products Micro Sport Cord 1.18mm X 125 Ft Small Spool Lightweight Braided Cord https://www.amazon.com/dp/B073FMLVZQ/ref=cm_sw_r_cp_apa_i_KWC3DbHVWP9ZR
Travel size One inch Gorilla tape
Gorilla Tape, Mini Duct Tape To-Go, 1" x 10 yd Travel Size, Black, (Pack of 2) https://www.amazon.com/dp/B01M2AAGTZ/ref=cm_sw_r_cp_apa_i_vZC3DbPG9W03W
I built my own pedal board case out of plywood. In order to attach pedals, I've got one better than velcro: 3M Dual-Lock. It's incredibly strong, and survives way longer than normal velcro.
Edit: have some pictures!
Not shown is a MIDI floorboard that goes across the top-left for channel switching, etc. on my tube amp (Hughes & Kettner Swtichblade).
Over the next while, I hope to see the board get smaller and smaller as I sell it off since I just got an Axe FX and don't expect to ever need another pedal again (except I'm not going to sell the Silver Bulb Overdrive Deluxe because it's great and the T-Fuzz because it's pretty rare and have you heard that thing?!).
http://imgur.com/CvSGXzO
http://imgur.com/NQiV9iz
The inside is a rat's nest that I need to fix, and I'd like to add a volume control, but it's basically a finished product. I mounted the battery and amp using 3M adhesive Dual Lock, which is great stuff (Its way better than velcro because it locks into place, whereas with velcro your component will start leaning away from the mounting surface), and way better than screws because I can remove the components quickly if need be for a quick fix. One addition I'm contemplating making is adding Dynamat, which I think might help a lot considering it's just a cheap plastic cooler instead of a real speaker box. Oh, and one other thing I need to add is something on the exterior to hold a phone/mp3 player.
I actually use these on a $40 wal-mart chair, and it's perfect.
but the way arm rests tend to be mounted on gaming chairs you may want these as they'll put them more towards where you can reach without contorting.
Hope either of these help you out :)
EDIT: I attach them using this stuff and it is amazing and lasts so much longer than regular velcro, and it's great if you might want to take off your hotas and attach it to your desk or another chair.
Depends on your desk and how permanent you want the solution for ONE layout.
My first choice would be a good cable management channel that can hold it, it's permanent while maintaining flexibility in use, and ease of access if you need to move it. something like this or like this. Depending on your desk, there may be some specifically designed for it.
After that I'd go with Velcro is a great option since it is less permanent than
Custom Screw mount is basically the last option I'd go with - it's permanent and not at all versatile, if you need a new brick you might be SOL.
Posted to a diff user but here:
Here's a pro tip I can share.
My gf has a bunch of these and I kept knocking them over since they are on the same stand as our key holder.
HitLights Heavy Duty Double Sided Foam Mounting Tape, 32 Feet. https://www.amazon.com/dp/B00PKI7IBG/ref=cm_sw_r_cp_apip_WKWqhm3aTpXGs
Buy that. I initially bought them to mount LED strips. They are AMAZING and last forever.
They don't peel off paint and stick like crazy even tho if u touch the strip ud think it wouldn't do anything. Used it for LED strips, taping cardboard to fill gaps in a window for an internal AC unit, and lastly and most relevant took tiny strips and put them on the bottom of their feet. Now they are super sturdy and the cat can't even knock em over.
TL;DR: buy this (whatever size) and stick em to the bottom of their feet.
HitLights Heavy Duty Double Sided Foam Mounting Tape, 32 Feet. https://www.amazon.com/dp/B00PKI7IBG/ref=cm_sw_r_cp_apip_WKWqhm3aTpXGs
The short answer is: It depends.
Any rim can be sealed off at the spoke holes with rim tape if you clean it thoroughly and use the right width of tape.
The tricky part is how well the tire will seat at the bead. Stan's Rims and Spank are two rim manufacturers that I know take extra care with this area (and I think simply use a slightly larger diameter at this critical point) so that tires will seal well without much latex milk being needed to help.
You can do a simple test on the cheap. Buy the 3M equivalent of Stan's expensive rim tape like this one and buy or borrow a tubeless valve like this one. Put your existing tire on without a tube, using just a little bit of soapy water. If it pops in and inflates, you're good to go.
Maybe someone has experience with your rim type. I swear by tubeless, and so far have tried on Stan's Flow and FlowEX, Spank Spike 35 and Oozy Trail 345, and a couple of sets of made in China carbon rims, and it has always worked well.
The much bigger issue IMO is the type of tire. Schwalbe was the company that started with the "tubeless ready" slogan, which I guess involves having a little more rubber on the bead to help with sealing, Conti used to be stupidly difficult but have also improved especially with the Apex sidewall, Maxxis always worked well. These are the ones I have personally tried.
Happy Birthday!!!! Mine is on the 8th! :)
Tatted up Ariel I love these... I'm such a Disney nut. :)
also... Minion Duct Tape is Awesome!
here's a few things your friend might like
one - two - three - four - five - six - seven
all of these items are off of my various wishlists, and if i win you can surprise me :) but i do believe your friend might like some of these items!
My temps are fantastic.
Ambient temp of 22
CPU idle = 28
CPU load = 36
GPU idle = 29
GPU load = 38
I'm in the midwest in the states and right now there is a nice cool breeze with the windows open. The other day the ambient temp was around 28-29 so all idle/load temps were about 5 degrees more than what they are now. Nothing ever above or at 45 however (even when maxing out battlefield 4 while streaming youtube and chatting online).
The pumps and reservoirs were first held on with some screws and washers as there are plenty of holes on the side of the drive cages to attach these to. However, I noticed that this caused the drive cages to bend under he weight. So much that the drive doors would not stay shut and it was very noticeable. This was caused by a combination of my incredibly heavy glass reservoirs and the very thin drive cage material/metal.
To combat this, I used this 3m dual lock stuff which works remarkably well. It holds stronger than any simple velcro I have ever seen or used. Absolutely amazing stuff and I highly recommend it for modding. Once you join two pieces together you would swear that they are permanently glued together. I then used some zip ties and strung them from one side of the drive cage to the other (out of view and cannot be seen without opening up the drive cage doors) to prevent any more bending or bulging from the cages.
If you use washers and nuts, you will have to make sure that the head of the screw is facing the inside of the drive cage. the nut will be attached to the screw on the outside of the drive cage. This will allow the drives to still move in and out of the cage. Otherwise if your screw is protruding too far into the cage, your drives will nt be able to move in or out.
things i use, that you may already have/may not need depending on your application:
I hate to just say "upgraded grub screws" - but i cant recommend enough getting some hex-headed bolts from lowes/home depot. sadly ive forgotten the exact size, (i believe them to be m6x16mm but really want someone to confirm that. you'll need 2 of them, so i picked up 4 just in case). the included grub screws in the build plate locking mechanism are just so soft, and the allen keys just go through them like mush after 5-10 good torques.
painter's tool or similar - some kind of metal/hard plastic that will be able to get the prints off the build plate. the included spatula wont last long and I generally use it to mix resins that have separated in the vat. using it to also get prints off the build plate damages the plastic and increases risk of puncturing the FEP
lots of paper towels- wiping up drips, cleaning off the bottle drips, cleaning rim of the tank, cleaning off the spatula, placing print to dry after alcohol bath.
paint brushes- both medium and small. even with ultrasonic cleaner, ive seen some people say it doesnt get every nook and cranny and need to wipe down with a soft tip brush to get all excess resin off (i dont use an ultra sonic, but rather a "clean" and "dirty" ipa tubs to try and make sure as much of it comes off before curing)
x-acto knife - sometimes the micro-shears are just too wonky/large to clip a support without damaging the print.
sandpaper- 300 or so grit, not ultra needed, but depends on what you're doing. if printing minis i cant recommend some enough in order to get a smooth bottom on the base after all the supports come off
extra paint strainers - believe it comes with some, but go pick up a 50 pack at lowes, and wont need to worry about using the last of the 5 i think they give you for free
extra, opaque tupperware/jars/containers with wide top. i use old sour cream containers. just to pour off and strain resin into (far easier than trying to get it back into the bottle). can even use some as a final "last wash" ipa bath after ultrasonic cleaner.
random extra to consider: 1 mil kapton tape to seal the LCD and prevent spills from dripping down into the unit. ( https://www.amazon.com/Mil-Kapton-Tape-Polyimide-Yds/dp/B006ZFQNT6/ref=sr_1_3?keywords=kapton+tape+1+mil&qid=1574726246&sr=8-3 ) some might call it superfluous, but id rather not have my fep puncture then come to find resin all over the motherboard
- just a side note if doing the ultrasonic, put water in the actual tub, and put ipa in a ziplock bag, and put your print in the ziplock bag and seal it, then put the ziplock bag in the water. Wont have any clean out the ultrasonic tub, reduce IPA required to operate. reduce smell. reduce IPA vapors.
I mean, can't they change their company name? I guess its probably not cheap, but then this is a problem literally because they have been too successful in their marketing
edit: Maybe I'm wrong, not an expert, but it seems to me they are in this predicament because they advertised their products as Velcro, not Velcro hook and loop.
https://smile.amazon.com/VELCRO-Brand-Industrial-Strength-Strips/dp/B0010HADEA/ref=sr_1_1_sspa?ie=UTF8&amp;qid=1506366556&amp;sr=8-1-spons&amp;keywords=velcro&amp;psc=1
https://smile.amazon.com/VELCRO-Brand-Sticky-Strips-Black/dp/B000TGSPV6/ref=sr_1_2_sspa?ie=UTF8&amp;qid=1506366556&amp;sr=8-2-spons&amp;keywords=velcro&amp;psc=1
https://smile.amazon.com/VELCRO-Brand-Sticky-Back-Black/dp/B00006IC2L/ref=sr_1_6?ie=UTF8&amp;qid=1506366556&amp;sr=8-6&amp;keywords=velcro
https://smile.amazon.com/VELCRO-Brand-Industrial-Strength-Black/dp/B00006RSP1/ref=sr_1_7?ie=UTF8&amp;qid=1506366556&amp;sr=8-7&amp;keywords=velcro
https://smile.amazon.com/VELCRO-Brand-Thin-Fasteners-Tape/dp/B0013AIAQ2/ref=sr_1_10?ie=UTF8&amp;qid=1506366556&amp;sr=8-10&amp;keywords=velcro
None of them list hook and loop anywhere, though to their credit they do list Velcro BRAND very clearly. And one of them does mention the product type as fastener. They should start advertising and packaging them as Velco brand hook and loop fasteners. That way if someone challenges their trademark in court, they can point out that every single one of their product's promotional material clearly separates the product from the company - right now, that's not clear in their own marketing (outside this video of course).
Kapton tape
should work as well, if you happen to have some, but you might need to wrap it a few times, it's pretty thin. Might be a bit more permanent as well. I don't have shrink-wrap on hand, so I just use the tape.
Yeah, dry brushing can be good for imitating depth on a surface, like folds in clothing for small figurines or in this case the light shining from the bulb through the headlight fixture. But I don't know how it will look for sure, just an idea!
Kapton tape is a thin, orange-yellow translucent tape that is used in electronics and some mechanical parts because it is heat resistant. But it would be the perfect translucent covering to stick on the headlights https://www.amazon.com/dp/B00W3FAFP0/ref=cm_sw_r_cp_api_H6pEzbBGQQVNN
It sounds to me like you need some music and movement games. Also, is it possible for you to take a walk outside each day? My school does that, and it's a great learning opportunity for the students. If you have free choice activities, one punishment could be to not allow that student to choose his activity for the next 10 minutes or so. Instead, he will have a "teacher chosen activity," and you can give him counting bears or a toy that he doesn't usually use. Another solution is to use some [http://www.amazon.com/Duck-281973-Despicable-Printed-Inches/dp/B00CYQ36GS/ref=zg_bs_256160011_3](Duck Tape) and create different patterns on the carpet for the children to walk on (zig zags, etc). Yet another something to help them would be allowing them to create their own stories (write them as they tell you) and then have the other students act out these stories.
Finally, have you tried some indoor yoga? They love it!
Remember that rough and tumble play is okay, but be sure to monitor it and know the difference between an angry child and a playing child.
I would suggest an ultratherm. They are awesome UTH's. But as far as securing this to the tank, whether is the zoo med or the ultratherm, use aluminum duct tape.
Ultratherm - https://beanfarm.com/collections/heating/undertank-heaters (Same company also sells on Amazon)
Aluminum Tape - https://www.amazon.com/Aluminum-Tape-Foil-Ducts-Insulation/dp/B01FROBUXE/ref=sr_1_3?ie=UTF8&amp;qid=1525098985&amp;sr=8-3&amp;keywords=aluminum+duct+tape
After securing the heater to the tank, Insulate at least the back, if not 2-3 sides. The best stuff to use is reflectix.
Reflectix Insulation - https://www.homedepot.com/p/Reflectix-16-in-x-25-ft-Double-Reflective-Insulation-with-Staple-Tab-ST16025/100012574?MERCH=REC-_-PIPHorizontal2_rr-_-100052556-_-100012574-_-N
Doesn't get any better than those three links, IMO. Here is a picture of how my tank uses them. https://imgur.com/mfhU7Tk (this was mid-construction)
I recently stopped using blue tape and switched to PEI sheets on glass. I'll never go back. I think this would be a good thing for you to try, the PEI sheet releases pretty easily once cool.
PEI (Polyetherimide) Sheet, Opaque Natural, Standard Tolerance, ASTM D5205 PEI0113, 0.03" Thickness, 12" Width, 12" Length https://www.amazon.com/dp/B0013HKZTA/ref=cm_sw_r_cp_apa_j.9Dxb7FAEG3J
TapeCase 12" squares (pack of 6), Converted from 3M 468MP Adhesive Transfer Tape https://www.amazon.com/dp/B007Y7D5NQ/ref=cm_sw_r_cp_apa_S.9DxbBW56J7Z
Do yourself a favor and use some 3M 468MP transfer tape and a piece of PEI. You'll never have to worry about adhesion again. PLA and ABS stick to it perfectly and pop off when cool without issue. I've had hundreds of prints without adhesion issues, even when my offset is way off and I'm printing at 0.4mm height instead of 0.1mm. If you want to see what it looks like, check out the post I submitted yesterday
Those ducts look like they were masticed which is perfect. This was the product I was talking about: https://www.lowes.com/pd/Frost-King-0-125-in-Foam-Plumbing-Pipe-Wrap-Insulation/1081449
One side is sticky, but being out and exposed to the elements might take its toll.
My suggestion is this, I warn it will take some work but it will be very worth it, and not that expensive while yeilding the best r-value bang for buck:
Get some foam board adhesive: https://www.homedepot.com/p/Loctite-PL-300-10-fl-oz-Foamboard-Adhesive-1421941/202020476
And get some sheets of foam board: https://www.lowes.com/pd/Kingspan-Insulation-Common-2-in-x-4-ft-x-8-ft-Actual-2-in-x-4-ft-x-8-Feet-R-10-Unfaced-Polystyrene-Foam-Board-Insulation/999972968
Your outside layer of foam board should be this: https://www.menards.com/main/building-materials/insulation/foam-board-insulation/johns-manville-foil-faced-polyiso-foam-insulation-4-x-8/w-n5075/p-1444438921381.htm
To start you should verify 100% that those duct joints are masticed good, and I mean good, all the joints should be full of it and no holes, no pinholes even. if not get this: https://www.amazon.com/Design-Polymerics-Mastic-Sealant-0-50-Gallon/dp/B0085UZBE2
Once they are 100% sealed you can start. IF you want layers of foam board (more r-value the better) the best thing you can do is use an unfaced foam board for your layers. Your outer layer should be the foil faced foam board. To attach your foam board to your ducts use the duct adhesive, you MUST use this specifically, other adhesives can degrade and "eat away" the foam and eventually the adhesive will fail and it will fall off. Obviously you will need to cut the foam board to spec to fit on the ducting. USe the adhesive to attach it to the ductwork, foil face out. You will then want to cover the seams with silicon or foil faced duct work tape, not duck tape. IF you want additional security for them to hold and not fall off or fly off with wind you can use a metal band strap. or self tapping screws with large zinc washers
metal duct tape: https://www.amazon.com/3M-Foil-Tape-3381-Silver/dp/B00A7I5L86/ref=sr_1_6?keywords=speed+tape&amp;qid=1551224134&amp;s=gateway&amp;sr=8-6
metal strapping: https://www.amazon.com/DIVERSITECH-710-001-Galvanized-Metallic-Strap/dp/B00CD6WON0/ref=sr_1_8?keywords=metal+strapping&amp;qid=1551224293&amp;s=gateway&amp;sr=8-8
metal strapping tension locks: https://www.amazon.com/Tension-Triglides-Webbing-Strapping-Adjustor/dp/B01JG09244/ref=sr_1_17?keywords=metal+strapping&amp;qid=1551224293&amp;s=gateway&amp;sr=8-17
self tapping screws (need to be long enough to go through foam AND the metal duct work): https://www.amazon.com/Self-Drilling-Plated-Finish-Undercut-Phillips/dp/B00GYK2S7I/ref=sr_1_3?keywords=3+inch+self+tapping+screws&amp;qid=1551224214&amp;s=gateway&amp;sr=8-3
Now since its outside the air inside will eventually still change to the outside temperature, but not as fast and less bleed off of temperature in the ductwork due to outside ambient temperature making the ductwork sheathing the same temperature.
Anytime! 3M Dual Lock Reclosable Fastener TB3550 250/250 Black, 1 in x 10 ft (1 Mated Strip/Bag) https://www.amazon.com/dp/B007OXK1AK/ref=cm_sw_r_cp_api_FSb-Bb8T1AKGD
Sorry embedding links isn’t working for me at the moment. It’s similar to hook and loop but just holds a lot better. You don’t need much and it is very strong.
I use it for my pedals as well.
I have several upgrades in the queue for this weekend once my M3 hardware kit comes in:
(Note the above designs are all three by USWaterRockets, who seems to have exceptional engineering skills, but I haven't installed them yet. Hopefully, this weekend and I'll post results)
Another one I'm considering next:
Here is the E3D-v6 adapter I currently have on the printer:
Note the above design is just a quick-and-dirty solution; the author even states this. It works and will get you what you need to get things going with the new head.
Other upgrades I've done:
https://www.amazon.com/gp/product/B007Y7D5NQ/ref=oh_aui_detailpage_o05_s00?ie=UTF8&amp;psc=1
https://www.amazon.com/gp/product/B0013HKZTA/ref=oh_aui_detailpage_o05_s00?ie=UTF8&amp;psc=1
Here's the E3D-v6 printhead I bought and it's worked well: https://www.amazon.com/gp/product/B01H4V2QEK/ref=oh_aui_detailpage_o04_s00?ie=UTF8&amp;psc=1
Disclaimer: I'm new to 3D printing. This is my first printer and the learning curve is steep. I may look back on this posting in a year and think "what an idiot I was doing <this>". Take my advice with a grain of salt, as I'm muddling through this whole thing. YMMV
I have heard many good things about using that for HOTAS. I would recommend using this to secure it. I am pretty sure that the extreme pro will work with that
Try rubber splicing tape. It'll stick to itself but not anything else. Makes for good handle grips and it's easy to clean if it gets dirty. Just rinse it off and it's all good.
Some Bacon Band-Aids or Bacon Duct Tape for your husband!!! Bacon is Meat Candy and if I win, go ahead and surprise me!!! P.S. Bacon is delicious.
Same here... I've just ended up with a lot (I've even gotten rid of a ton of them sometimes). I've gotten a bit more selective about my shoe purchases... no more "these kinda fit and are one super secret clearance."
Oh man... that is tough... minions, TINK, these spideys, and the zebra is super versatile. I could go on though... Do you have a favorite one?
Thank you! That is much cheaper than Parafilm, and looks different from the gardening film but is probably the same material. https://www.amazon.com/dp/B0085OFNVE/ref=pe_2640190_350905710_TE_3p_dp_1 I was mistaken too it's 90' not 250' but for $9 I'm eager to test nonetheless but yours is definitely interesting and I'm going to order some to test as well!
Thanks! Yeah, I had to use tape to keep everything in place. I wish it wasn't necessary, but the adhesive that's on the strips just can't hold up the weight. I ended up using this tape and it's been so great! It's been months and everything is holding up perfectly.
The bung did not want to stay in initially. I think because I had pulled it from the sanitized water so to make sure it wasn't going anywhere and ruining the works I secured it with some gaffers tape.
Unrelated pro tip from photo and video experience. Decent gaffers tape is much better for securing non paper items than duck tape. It wont leave a sticky mess and its just as strong if not stronger than duck tape.
This is what I use and love
You can't, I've destroyed mine and installed PEI.
https://www.amazon.com/gp/product/B01KBGJU5S/ref=oh_aui_detailpage_o01_s00?ie=UTF8&amp;psc=1
Stick it down with this stuff here:
https://www.amazon.com/gp/product/B007Y7D5NQ/ref=oh_aui_detailpage_o00_s00?ie=UTF8&amp;psc=1
When you use this stuff you just wipe it with rubbing alcohol to clean the surface. Then it gives you near perfectly smooth prints where it touches the surface. The prints pop off easy after it cools but holds tight when it's warm. Personally I find it a waste of money to buy glue sticks/hair spray if you don't have to. Although I did buy glass I never installed it after this worked so well. It's amazing stuff and you'll never have to replace it.
Almost any rim/tire combo can be made tubeless. Save some money and buy the tape on it's own: http://www.amazon.com/Scotch-Film-Strapping-Tape-8896/dp/B00QVIBIMO
You just need valves and sealant now.
If that doesn't work, go the sliced 20" tube route. Either should work fine, the tape is a more elegant solution.
Hey! No problem
Honestly, using hot air for soldering is very difficult. It's great for desoldering however.
I did this method as a test, all my previous builds were just done with the fine tip iron, and I think I'll go back to the iron for next time. The time spent is about the same, so there's no real savings there, but it's trickier. Maybe if I were doing 3 or 4 at a time I would do this process again. Actually, If I were doing more, I might just order a film stencil and knock these out in 30 minutes.
Here's the tape I was referring to. It's pretty good stuff.
https://www.amazon.com/dp/B00HWROO7E/ref=cm_sw_r_cp_awdb_p2pKybHH6A56G
As I mentioned, heat shrink looks better but this stuff is excellent for when you can't get heat shrink over a component.
An Epic Meal Time bacon strips shirt!
And a wallet :D
Duct tape?
50 Shades of Bacon.
And wrap it all in some bacon gift wrap.
Bacon is Meat Candy! Surprise me :)
Sure can!
Get one of these sheets from Mcmaster carr:
12"x12" 3/32nd thick sheet of Ultim PEI plastic
http://www.mcmaster.com/#8685K41
Stick it to the existing glass with this adhesive:
3M 468MP transfer adhesive
http://www.amazon.com/gp/product/B007Y7D5NQ
Trim it to fit, then print on it as you normally would. remember to re-adjust your Z stop to compensate. For ABS at least I have not found anything that works better so far, and I've tried most things. You don't need ABS slurry with it, you can print without brim, things just stick, and then release when cooled off. Polyethalene Tape is garbage compared to this stuff. It's by far the best upgrade you can do for your printer after the heated bed itself, and it costs under $40 to do. If you are having trouble getting things to stick to your bed, this is the way to go. It supposedly works just as well for PLA, though I have not tested that personally.
I have always used 3 cables tied together with these [VELCRO wraps](VELCRO Brand - Sticky Back Hook and Loop Fasteners| Perfect for Home or Office | 5ft x 3/4in Roll | Black https://www.amazon.com/dp/B00006IC2L/ref=cm_sw_r_cp_api_i_mLODDb57DXZ66) cut to size. And I got 3 different colored electrical tapes to have each cable color coded. For the proper input/output. You can even cut a small piece of tape to put on you pedal/amp input/output/send/return to make it foolproof. There are more expensive solutions. But this has always worked for me and is pretty inexpensive. I definitely don’t recommend cable ties as they will damage cables over time.
This stuff is awesome:
https://www.amazon.com/3M-Dual-Lock-Reclosable-Fastener/dp/B007OXK1AK
Much stronger attachment than normal velcro, and can be removed cleanly (might just need a bit of goo-gone to get all the residue)
I haven't had a need to put any on my synths, but I use it to hold pretty much everything else together.
Just do what you did before but try again. Make it a little nicer looking if you want. Velcro tape is your friend if you'll need to redo it or take out/add cables. https://www.amazon.ca/dp/B00006IC2L/ref=cm_sw_r_cp_apa_i_PmnTDb926W3QT
I’ve used this for other projects and it’s seriously strong.
I wouldn’t use use if for tape though. It’s too permanent.
Double Sided Tape, HitLights Heavy Duty Mounting Tape 3M VHB Waterproof Foam Tape, 32ft Length, 10mm Width for LED Strip Lights, Home Decor, Office Decor https://www.amazon.com/dp/B00PKI7IBG/ref=cm_sw_r_cp_api_i_sA-CDbRCY1Q8Q
I use these and I’m really happy with them.
Command Outdoor Light Clips, Clear, 20 clips, 24 strips (AW017-20NA) https://www.amazon.com/dp/B076ZM1799/ref=cm_sw_r_cp_api_i_8C-CDbX9ZNDAY
I immediately took the stock tape off because I knew it wouldn't hold up well. I also wanted the ability to remove the entire mount whenever I wanted so I used this 3M heavy duty fasteners instead. It's like velcro except that it uses thick plastic prongs rather than fibers to bind itself together. It also has better adhesive on the backing. I've hit my AP countless times with my knee, accidentally yanked on the cord, as well as taken high G force corners and it has never ever fallen off. I've had it mounted like this for almost a year.
I have the Zoo Med Small UTH and thermostat on my 20 gal long tank 12"W x 30"L and the warm area is only about 6" around the center of the mat. I plan to add a second of the same mat next to it. I came from a 10 gal tank 10"W x 20"L and the small mat would heat about 80% of the tank to my warm temp target (too much). If I had the larger tank to start I would have gotten the med pad. If you don't have a thermostat I would definitely recommend it. I used aluminum duct tape to re-attach the pad which worked well.
EDIT: added some links
I used Aluminium tape, like that: https://www.amazon.com/Aluminum-Tape-Foil-Ducts-Insulation/dp/B01FROBUXE (not exact brand, I purchased the tape at a local shop). The glue on that is MORE than strong enough to hold onto the lid without moving. That type of lid normally has indentations in it, but I filled them with cardboard before putting the tape on top. It also makes for a more even surface, so I could apply the LED strips more easily :3
I was thinking to use these
Scotch(R) Heavy-Duty Fasteners, 2 Sets of 1 x 3 Inches, Strips ,Black (RFD7091) https://www.amazon.com/dp/B00347A8GM/ref=cm_sw_r_cp_api_iG22xbGPR59SP
I use them them to mount everything in my house. You can stick one on the back of the base station mount and one on the wall. These things are quite strong as well so they could definitely handle the weight of the base stations.
Not OP but go to Amazon and check out 3M Dual Lock. I love this stuff.
https://www.amazon.com/Dual-Reclosable-Fastener-SJ3560-Clear/dp/B0141MQRGI/ref=sr_1_5?ie=UTF8&amp;qid=1510875817&amp;sr=8-5&amp;keywords=dual+lock&amp;dpID=51wv-PLULnL&amp;preST=_SY300_QL70_&amp;dpSrc=srch
You might be interested in QLC+ (it's free and open source) and an Enttec DMX USB Pro mk I (same company as the DMXIS, but a hundred bucks less). I've programmed a show for a buddy's band to their click track and had a generally positive time with it. I'm a professional lighting nut, so I thought it was a bit restrictive, but that's more of a problem I have with preprogrammed shows than with the software.
Take the $200 you'd save with this control scheme instead and spent it on safety cables, velcro cable ties, a storage bin for your cables, computer, and DMX adapter, gaff tape, and pizza for when you get together to program and jam the first time!
Those links probably aren't the best options for each thing, I just wanted to link examples.
Well, I don't think there are really that many specialized tools the average user would need. I guess if you want to do some minor modifications or sleeve your psu, you would really benefit from some specialty tools. Generally speaking, I think nearly everyone would benefit from:
total: $15.60
It goes without saying that you should also have a Phillips screwdriver, but who doesn't have one of those around anyway? Of course, there are some extras you might want if you're messing with your psu cables (like if you're sleeving them or whatever), installed and reinstalling coolers, I don't know. It is all stuff I've used with my PC at one time or another.
total: $48.61
I don't know why you'd really want that ultra-mega-deluxe $49 kit I put together, unless you're certain you will be modding your pc. If you want to be all hardcore you could get a soldering iron just for your pc, but I wouldn't recommend doing that unless you already have experience. Seriously though, everyone should get some cable ties and compressed air.
Also known as Ultem, it can be purchased here from CSHyde. There are several options there for size and thickness. The bonus is that these sheets come with adhesive already laminated to the sheet. I believe you can also get custom sizes, although larger sheets are no problem to cut to size.
Alternatively (and probably more common), you can purchase PEI sheets here on Amazon. The recommended adhesive (transfer tape) is here, and there may be other sizes for both available on Amazon as well as wBay.
The whole idea on using PEI as a print surface is that you get good print adhesion with most common print materials. Using a heated bed with PEI works great for getting prints to stick while warm, and also pop off of the print bed fairly easily as the bed cools.
I went with the stuff from CSHyde for convenience, but I think most users here are going with the Amazon stuff (they have thicker sheets which many users prefer as it can last longer before needing replacement).
I got something like this, but there's so many listings on Amazon that look the same, I'd just go for the cheapest
https://www.amazon.com/dp/B019QT97WM/ref=cm_sw_r_cp_apa_vbNGAb2WY2HK4
Some people say parafilm is optional and you can use a plastic bag instead, but if you're going to do it, might as well try learning how to use this stuff:
https://www.amazon.com/dp/B0085OFNVE/ref=cm_sw_r_cp_apa_hdNGAb1MGMG47
Before the shears, I got one of these, but I reground the bevel to the other side because I was using it I guess opposite of how people normally hold it
https://www.amazon.com/dp/B008U7IYZI/ref=cm_sw_r_cp_apa_xhNGAbT2GB803
I never tried this, but if you're not a fan of sharpening knives so they're super sharp, but you want to try using a knife, I saw a video where a guy suggested using something like this (not sure what size to get, I guess depends on how big the wood is):
https://www.amazon.com/dp/B00096SCAK/ref=cm_sw_r_cp_apa_PlNGAbB0FY889
I went from Gen 5 to 6, get these with some velcro. Stick next to your right knee on the transmission tunnel for a good cell phone holder.
If you need a front plate, ZL1 Addons makes a great one I can vouch for.
http://www.amazon.com/dp/B0013HKZTA/ref=biss_dp_t_asn
http://www.amazon.com/TapeCase-squares-Converted-Adhesive-Transfer/dp/B007Y7D5NQ/
Do note I am using a rostock, but psi will work on all regardless, it's also acetone resistant, so you could clean really easily
Awesome, thank you for the recommendations (there goes the money I partitioned for dominators, ha)!
I ordered:
FrSky Taranis X9D plus
D4R-II
Spare motors + ESC
X-treme tape
The magnet wire wrapped around a typical toroid is enameled. This enamel is "just enough" insulation for the job it does. Now, assuming the tape didn't pull off any of the enamel, you still need that outer layer to protect the somewhat fragile enamel. Enamel insulation tends to get brittle when the transformer is used, due to heat. Kapton tape is good for this, and there are a lot of other good options.
Just don't use "electrical tape". That stuff will melt right off.
I had the same thing happen to me, no worries you can rewrap it yourself. Though taking the others advice and doing some cold pulls just in case couldn't hurt.
Anyway here the cotton and the tape I bought, worked great.
For the cotton just have a hold punch ready, perfect size to punch out a hole for the nozzle.
Looks good. May I suggest you go get some aluminum tape for the blade. LIke the link below. Fold it around the blade and smooth it out with your fingers. Gives a good blade effect. Also, the smoother the wood of the blade the smoother the tape.
https://www.amazon.com/Aluminum-Tape-Foil-Ducts-Insulation/dp/B01FROBUXE
"A gaffer in the motion picture industry and on a television crew is the head electrician, responsible for the execution (and sometimes the design) of the lighting plan for a production. The term gaffer originally related to the moving of overhead equipment to control lighting levels using a gaff. The gaffer's assistant is the best boy.[1]
Sometimes the gaffer is credited as Chief Lighting Technician (CLT)."
-Wikipedia
Side note: that's why the black tape used to secure/hide cords is called gaffer's tape
"In US and Canadian filmmaking, the key grip supervises all grip (lighting and rigging) crews and reports to the director of photography.[1]"
-Wikipedia
So the Key Grip is similar to the Gaffer, but has a focus on things like dollies, cranes, vehicles, etc.
Damn, too bad. It's too late now, but if there should ever be a next time, opt for air-tight fixtures, or seal them with metal tape before they are installed.
With the increasing popularity of the ultra thin panel LEDs, cans will drop out of favor in the next five years or so. They are easy to install, and do not affect the insulation envelope.
For right now, can you seal from the inside of the can? If so, use this:
https://www.amazon.com/3M-Foil-Tape-3381-Silver/dp/B00A7I5L86
welcome!
yeah most build videos i've seen usually omit them too, but it's usually cuz those people are accustomed to building so many. HELL, the other day i was calibrating my ESC's and for some reason blheli decided to make my motors go bat shit crazy (props off of course). Lucky, the smoke stopper didn't allow it to draw too much power. so yeah you just never know.
remembered a few more.
I've learned to prevent my battery straps from breaking (and they do) put a slab of hot glue near the plastic loop where it attaches to itself.. this part of the velcro is week on EVERY strap and this is where all of mine have broken from. After slapping a glob of hot glue in this location (both sides) i have yet to break one (well now i probably will, LOL).
I'm not even joking, a video is literally TOO MUCH. One screen shot is all you need. I misspoke when I said you technically only need to do 2 and 3, you technically only need to do pin 3 as shown in this image. But 1 and 2 are also unused and it's easier to stick a slightly larger piece over all 3. Then I just plugged in the sata cord and it was fine. 2 for 2, zero issues.
https://www.servethehome.com/wp-content/uploads/2019/01/Easystore-WD-10TB-USB-Desktop-Backup-Pin-Mod.jpg
I used this tape, if you could find it cheaper i say go for it.
https://smile.amazon.com/Mil-Kapton-Tape-Polyimide-Yds/dp/B006ZFQNT6
I guess the one extra piece of advice I could give is make sure you don't cover any of pin 4. It was really easy. And it's temporary. If you plug it in and something was messed up, you won't hurt it. You could take the tape off and try again. If the pin is uncovered it just won't show in your bios.
Edit: full shucking guide including that screen shot:
https://www.servethehome.com/wd-wd100emaz-easystore-10tb-external-backup-drive-review/
Dual lock velcro also does a fantastic job at helping to hold a battery still if you're looking for a slightly more refined solution.
I dunno, I look online at my local stores inventory and I see "black duct tape" and some that say "no residue" but I dont know if they are actual gaffers tape (which is more like a cloth and not shiny plastic) like I would use at a show.
Ill have to see in person next time I go, if so it would make things easier for me to get it in a pinch for work.
Like if you check lowes or homedepot I dont see anything called gaffers tape or gaffe tape available here. If you go to guitarcenter.com you do.
I dont know if its just a labeling thing or not though.
You may already know this (sorry if so) but this is what Im talking about
https://www.amazon.com/Premium-Gaffer-GafferPower-Available-Multiple/dp/B00GZE3UJ8/ref=sr_1_1?ie=UTF8&amp;qid=1527720749&amp;sr=8-1&amp;keywords=gaffer+tape
its a cloth tape that leaves no residue and is very easy to tear
Ha! hope you find what you were looking for on Amazon. If you plan on shipping any of your sample bottles, this parafilm tape is great for sealing bottle tops to prevent leakage. You can also get the shrink sleeves for the bottles, but they can be a nuisance to use.
I use this - 3M Dual Lock Plastic Velcro along with a typical normal Velcro strap. That battery will not move, I promise. The 3M is incredibly strong for front to back movement and they regular strap also helps prevent it from lifting up.
I've had the battery eject from my quad ONCE, but that's only because it ripped the shrink wrap off of the battery pack! The 3M held it in place lol the shrink wrap was still attached to the quad.
Battery Pic - http://imgur.com/jVvQyWX
Do you have a link to these on amazon or wal-mart set up where they can be shipped directly to you?
For Example: http://www.amazon.com/Velcro-Sticky-Back-Fastener-Dispenser-90086/dp/B00006IC2L/ref=sr_1_6?ie=UTF8&amp;qid=1377053995&amp;sr=8-6&amp;keywords=Sticky+Back+Velcro
But you will need to create a wish list with a ship to address (hidden) so that we can just add it to our cart and have it shipped right out to you ;)
http://www.amazon.com/3M-Dual-Lock-Reclosable-Fastener/dp/B007OXK1AK
Something like this may work best.
Oohh thanks for the suggestion! This looks like it should do the job fine.
Motherfreakin' minion duct tape!
Also, thanks for the contest! :)
If you like the look and the properties of this stuff, you can get an almost identical product from your local hardware store. I'm really happy with the durability of mine and that single cheap roll can do a couple bikes
It has less to do with the Gorilla tape and everything to do with Compass tires being the most loosely defined "tubeless ready" product on the market. I say this as a fan, early adopter, and regular rider of Compass Tires, with multiple friends who work or have worked for Jan and Compass.
Anyway, the tape will be fine. If it's not, just remove it and apply some strapping tape.
VELCRO - Industrial Strength - 2" Wide Tape, 15' - Black https://www.amazon.com/dp/B00006RSP1/ref=cm_sw_r_other_awd_Lu42wbXY3P2CH
That's what I use.
Here is the stuff Pedrotheterror recommended. I have never personally used it though. Seems a bit overkill as well.
3M Dual Lock Reclosable Fastener TB3550 250/250 Black, 1 in x 10 ft (1 Mated Strip/Bag) https://www.amazon.com/dp/B007OXK1AK/ref=cm_sw_r_other_awd_Fv42wb66S3VNH
I was typing up my list of shit for my second grow. Lets see if I got my Reddit Formatting Correct. :)
The Details
Seeds
Gear
Veg/Flowering
Seedlings
Medium and Nutes
Meters
Pots
Misc
Aluminum Tape may be what you're looking for. People use it for prop making all the time. It can be polished to a pretty good mirror finish.
Edit: Fixed link.
At first I was like lol, but then I was like, that's not actually a bad idea, if you use this: http://www.amazon.com/3M-Dual-Lock-Reclosable-Fastener/dp/B007OXK1AK
It's really tough.
One of the best things I bought along with the CH was a set of velcro fasteners: https://www.amazon.com/Scotch-Heavy-Duty-Fasteners-Inches-RFD7091/dp/B00347A8GM/ref=sr_1_2?ie=UTF8&amp;qid=1497634206&amp;sr=8-2&amp;keywords=3m+velcro+strips
They'll make the CH feel twice as solid.
Yes, there is a way:
Edit: This disables sending clips to Tesla, but it might still be recording. If it really comes to it, gaffers tape?. I'd just ask the gate guards if they know of anyone there has a tesla. If they say yes, there is obviously something that can be done....
Oh yeah. Sticks so well that, if the bed is heated, you can't even get the finished object off of it until you wait for it to cool to room temperature without the risk of damaging it.
Amazing stuff that no one should be without.
This is the stuff I have - http://www.amazon.com/dp/B0013HKZTA/ref=biss_dp_t_asn
Put it on with this - http://www.amazon.com/gp/product/B007Y7D5NQ/ref=oh_aui_search_detailpage?ie=UTF8&amp;psc=1
I used the Windex+credit card trick for both sides of the adhesive.
Cut it to size with an Xacto knife score and a metal rule. Snaps just like plexi.
You can see it in the original pic. He's sitting on a big yellow slab of the stuff. If you use a Z sensor you'll have to adjust for the height and so on.
It doesn’t have to be a pain. Get some of this and a strong pair of scissors.
https://www.amazon.com/dp/B00006IC2L
Cut the lengths you need and you can easily bundle wires together, but more importantly bundle them to those speaker stands, table legs, etc. That velcro roll might even be cheaper somewhere like monoprice, but it’s handy to have around.
http://www.amazon.com/gp/product/B00GZE3UJ8
It's great stuff!
Wow, I'm jealous of ethernet in each room. Nicely done.
If you already have a switch buy 3 to 5 Unifi AC-Lite APs. If you dont have a switch get a Unifi POE switch & their 5 pack of AC-Lites. As the 5 pack doesn't include the POE injectors.
Once you have the APs tape to walls / ceiling with gaffer tape (like duct tape but less residue) to sort out ideal placement & eliminate dead spots. Then once placement is sorted use Scotch fasteners or screw the base plate to drywall / bookcase.
SCOTCH Fasteners Extremely Strong Holds 10lb, 4.5Kg https://www.amazon.com/dp/B00347A8GM/ref=cm_sw_r_other_apa_bwIWBbZ63W8K5
I found the best thing is the 3M dual Lock tape used for toll devices.
https://www.amazon.com/3M-Reclosable-Fastener-SJ3560-Clear/dp/B0141MQRGI/ref=sr_1_1?ie=UTF8&amp;qid=1496260220&amp;sr=8-1&amp;keywords=3m+dual+lock+tape
As a simple hack, I've used double sided velcro like this one before to help with this, just put one side each on the fabric between buttons and it's magic! You have to replace it after ~5-10 washes but still - better than nothing :)
dude f that. just grab a whole roll of the stuff.
https://www.amazon.com/Dual-Reclosable-Fastener-SJ3560-Clear/dp/B0141MQRGI
its great and blows normal velcro outta the water.
Unless you plan on touching that dock once in awhile, you should get some 3M based velcro strips and mount it under the desk since it looks like you value minimalism.
https://www.amazon.com/SCOTCH-Fasteners-Extremely-Strong-Holds/dp/B00347A8GM
I imagine you'd plant a ring of cuttings, so you have clones to work with. Then you'd skin off a little bark on both trunks wherever you'd like them to join, maybe rub them with a little rooting hormone, then wrap them with grafting tape.
Double sided Velcro tape is my solution, and I can switch them out easily with racing pedals.
Do yourself a favor and pick up some Gaffer Tape and place on the printing surface(Tray). It helps the first layer of a print adhere to the surface much better. I used to struggle with starting a print almost every time but after I started using the tape I haven't had a problem since.
should i be getting something like this to mod the top and the sides?
https://www.amazon.com/Strenco-Adhesive-Black-Hook-Loop/dp/B00H3R9S1K/ref=sr_1_3?keywords=velcro&amp;qid=1574520914&amp;sr=8-3
Couple of thoughts:
You could paint the zippers black.
There exists Velcro tape with adhesive on both sides (like this) and if you look around a bit you can probably find one that has fairly ridiculously strong adhesive. You could cover the zipper with the Velcro, adhering one side (the hook side, say) to the boot and cutting it in half so one half is on each side of the zipper, then adhere a strip of black cloth or black leather to the other side (the loop side, say) so you can use the zipper functionality and then cover it with the Velcro cover. Note that the adhesive will probably start to fail if it gets very wet but you could stitch the hook side on and the stitches wouldn't be visible so wouldn't have to be very pretty.
Maybe something like this? I believe it will give the light an amber quality as well. Heat High Temperature Resistant Adhesive Gold Tape for Electric Task 30m 12mm https://www.amazon.com/dp/B00W3FAFP0/ref=cm_sw_r_cp_api_i_IvIJDbWJHHC0S
Posted below but here is the shelf and I used these velcro strips, surprisingly affordable. Another thing recommended is some stick on rubber pads to stop it from slippin n slidin around. Only other note, the shelf brackets make the board a little steep, kinda hard to use the wah. I'm deciding what my workaround is gonna be, but it isn't too bad for now.
I just copied the YouTube dude's parts list and bought them from Amazon. The USB light has several levels of brightness so that's a bonus.
I added an extra Magic Tape at the back before adding the Fastener in case the Fastener leaves a mess when I decide to remove it
Search for silicone tape on Amazon. Numbers of makers and sellers. Here's one example also come in clear and other colors.
I wanted to know what tape you use. Originally I bought this tape
because it's rubber, but it was too thick to fit around the motors and put the motor cover back on.
Could you link me what brand you use to add noise reduction to your wheels. That's my biggest issue.
3M dual lock velcro walmart carries it, way better then regular velcro
paired with some good rubberized straps itd be safe to say if the battery moved after a crash thatd be the least of your worries
I got you fam
https://www.amazon.com/Tilos-3mm-Rhinoskin-Velcro-Gloves/dp/B003JPCILC
And
https://www.amazon.com/VELCRO-Brand-Sticky-Back-Black/dp/B00006IC2L
Easy peasy
I use foil tape and rolled up towels. You can also tape up a piece of plexiglass/lexan/whatever over top of the window to create another buffer.
If you haven't done the wheel slip fix then your motor is slipping on the wheel. That's likely the root of your "traction" issues. I bought this tape https://www.amazon.com/gp/aw/d/B01FROBUXE/ref=ya_aw_oh_bia_dp?ie=UTF8&amp;psc=1
You have to take the wheel skin off, wrap about 2 layers of that tape around the motor, then slide the wheel skin back on. Your performance will improve greatly.
We include 3M Dual-lock so you can stick it anywhere you desire. Including in an SSD sled.
Where we placed it in H440 for photo op.
Where we placed it in I believe our Source 530.
I run a 50' ethernet cable from my living room into my bedroom. I just pulled it tight, and secured it with a roll of Gaffer's Tape. Once it's gaffed down you can stick it under a rug or what have you. For two cables put them side by side, pull tight, and gaff a foot at a time
Clean up the glue (rubbing alcohol works great) and get some of the 3M "Dual Hook Fastener"
IE This: https://www.amazon.com/3M-Reclosable-Fastener-SJ3560-Clear/dp/B0141MQRGI/
I guess? (Not really sure) It hasn't popped off on me at all, very secure.
Scotch(R) Heavy-Duty Fasteners, 2 Sets of 1 x 3 Inches, Strips ,Black (RFD7091) https://www.amazon.com/dp/B00347A8GM/ref=cm_sw_r_cp_apa_qD66xbBKF40R4
Sure. 90% of it was putting an Ikea Signum underneath the desk towards the back to carry all the cables. http://www.ikea.com/au/en/catalog/products/10200254/
I also used some 3M dual lock Velcro to stick the powerboard to the underside of the desk, up off the floor. https://www.amazon.com/3M-Dual-Lock-Reclosable-Fastener/dp/B007OXK1AK
Finally, I used a number of small Velcro cable ties, kind of like these, to keep cables together. https://www.amazon.com/VELCRO-Brand-ONE-WRAP-Management-Multi-color/dp/B00144CABS
3m Dual Lock and a rubber mallet
3M Dual Lock Reclosable Fastener SJ3560 250 Clear, 1/2 in x 6 Ft by 3M https://www.amazon.com/dp/B0141MQRGI/ref=cm_sw_r_cp_apa_2w0Rzb9CHAC1R
buy some Velcro tape like this, and only use one side of it to attach to the side already on your bag.
It looks a lot like Gaf Tape.
https://www.amazon.com/dp/B00GZE3UJ8/
Good call! I keep the extra lengths (typically 2-3ft) of my straps tidy with double-sided velcro. Never had a problem with them coming loose.
I agree, build you own kit. Below is my take. Know that some of those tools are not for every day use in networking, but who can resist getting more tools? Also, if you get all of these I realize it will be over $200. So, just use this list as a guide not a definitive list.
BAGS
ETHERNET TOOLS
SCREWDRIVERS
PLIERS and WRENCHES
POWER
MISC
SUPPLIES
Gaffer's Tape, not what you're talking about though. It's aluminum wire backed duct tape. The God tier of all tapes.
Yep, this roll in particular.
Caulk is not a good solution for this. Use self-amalgamating tape like 3M TemFlex. You stretch it and wrap it around the pipe and the joint, and it bonds to itself and turns into a waterproof shield similar to heat shrink tubing. You have to cut it away to remove it, but it has no adhesive so it won't leave a mess. I use this to protect antenna and RF cable connections, it lasts forever and completely protects from water and weather.
Not sure what exactly Amanda’s tape looked like but.....This is the kind of tape that Kim Kardashian uses for her boobs.
If you're concerned about shorting something out, you can spray some conformal coating on any contact areas. Another option would be to use kapton tape on the bottom of the hot wheels or where ever you position it. If it's not making direct contact with any components, you should be fine, however, those cars can roll very easily. For this reason, I'd look at maybe using a light adhesive or something to hold them in place. Common sense warning, don't use adhesive on any components.
Link to conformal coating
Link to kapton tape
How about a 90 foot roll for $8? I've picked up mine from Amazon two years ago and I have yet to need to buy a new roll. I might have to buy a new roll probably sometime next year. This stuff goes a long way.
Just extend the straps!
Strenco 2 Inch Adhesive Black Hook and Loop Tape - 5 Yards - Heavy Duty Strips - Sticky Back Fastener https://www.amazon.com/dp/B00H3R9S1K/ref=cm_sw_r_cp_apa_i_3lEODb8159GT9
Self-fusing tape is really good for this as well. Just a quick snip or two with the scissors and you've got access to the ESC.. No residue at all, not to mention it insulates electrical connections, is waterproof and works from -60F to like +500F or something ridiculous.
http://www.amazon.com/X-Treme-Tape-TPE-XR1510ZLB-Silicone-Rectangular/dp/B00HWROO7E
Tip: When that tape wears off, try using real Gaffer Tape. The tape you're using is closer to proper Duct tape, which may annoy you when it comes off (stick and stuff)
This is the tape that road crews use to tape cables to the ground (tile, carpet etc). It's slightly pliable and wont leave any residue when you remove it. It's actually amazing stuff, i use it for all sorts of things
https://www.amazon.com/Roland-JD-XI-JD-Xi/dp/B00VHFOV3E/
+
https://www.amazon.com/dp/B014M8ZO8S?ref=emc_b_5_t
+
https://www.amazon.com/Premium-Gaffer-GafferPower-Available-Multiple/dp/B00GZE3UJ8/
I'm only half joking.
X-Treme Tape TPE-XR1510ZLB Silicone Rubber Self Fusing Tape, 1.5" x 10', Rectangular, Black https://www.amazon.com/dp/B00HWROO7E/ref=cm_sw_r_cp_apa_i_hLTzDbDAW6STJ
This stuff shrink wraps itself, but is non adhesive do no mess like electrical tape. The secret to a nice looking build is to color coordinate AKA not have a bundle of multi colored wires hanging out on the front side of the Mobo.
Another potential easier option is silicone fuse tape - it permanently adheres to itself, but doesn't stick to anything else.
Gaffer's Tape
Table top facade
I'm just looking on Amazon, I see 3M Rubber Splicing Tape as Temflex 2155.
3M Rubber Splicing Tape https://www.amazon.com/dp/B001CGVEXS
Maybe Temflex 1300 is more traditional (sticky) electrical tape.
When you click buy from Amazon it shows the real price
DoubleSided tape will stay there. Just clean it with Alcohol. I used the 3M grey with red plastic on it. It's the same tape that holds on car emblems and if it can take that abuse, it will hold on the dot matrix. :)
https://www.amazon.com/HitLights-Heavy-Double-Sided-Mounting/dp/B00PKI7IBG/ref=sr_1_2_sspa?crid=94PW5YUCOHMT&amp;keywords=3m+double+sided+tape&amp;qid=1555861337&amp;s=gateway&amp;sprefix=3m+double%2Caps%2C156&amp;sr=8-2-spons&amp;psc=1
Silicon tape wrapped around the exposed wire fixed it for me. So it's no longer shorting out.
X-Treme Tape TPE-XR1510ZLB Silicone Rubber Self Fusing Tape, 1.5" x 10', Rectangular, Black https://www.amazon.com/dp/B00HWROO7E/ref=cm_sw_r_cp_apa_i_eADyDbNEZJTB2
It has to have a good thermo, so it turns out the board wasn't the problem. In my case I tightened it down and it cracked the protective coating and shorted it out. The tape fixed it
Yeah I’ll have to wait till I get home tonight, but it’s this kind of tape
https://www.amazon.com/X-Treme-Tape-TPE-XR1510ZLB-Silicone-Rectangular/dp/B00HWROO7E/ref=pd_aw_sim_328_1/137-3978350-5422325?_encoding=UTF8&amp;pd_rd_i=B00HWROO7E&amp;pd_rd_r=ce7504d5-3528-11e9-b839-4be84d534962&amp;pd_rd_w=kXX6q&amp;pd_rd_wg=XxJmE&amp;pf_rd_p=469620d9-3e90-496d-9dc8-b19f900ba5fe&amp;pf_rd_r=8YKZ9VJPE5NHYECWX4WY&amp;psc=1&amp;refRID=8YKZ9VJPE5NHYECWX4WY
To avoid kinks that bad in the future you may want to try this , and this is what I used to cover the ends of sleeving. I found a few reddit posts and it seemed to work well for people. However, others used heat shrink tubing not silicone tape like I did. The tape has held up well for a few weeks now, and when I see any sort of twisting it’s really easy to undo as with the sleeving the cable just sort of pushes itself around instead of gathering kinks.
FYI I just learned in another thread that Stan's Tubeless tape is just TESA 4289 strapping tape.
You can get the generic equivalent at ebay for $10 incl. shipping.
This 3M tape at Amazon is also supposed to do the same thing. Some of the widths are weirdly expensive for some reason, but may be available elsewhere.
I put velcro on the batterys and on the area where the battery goes on my RC aircraft, Never have a problem.
Top rated one on Amazon is $16.71. I guess it might depend on what you mean by "a decent sized roll", but I have one and it's the size of a regular roll of tape, so I would call it "decent sized".
Amazon has them for $22. Match with one of these to attach it.
The actual product doesn't have that weird edge, it's just a flat sheet.
This is what I use for wrapping ice tools, if you want a cheap fix.
http://www.amazon.com/3M-2155-Rubber-Splicing-Tape/dp/B001CGVEXS
Some people use PlastiDip which is more durable but not as grippy.
I haven't bothered with either on my mountaineering axe because I mostly hold it by the pick anyway.
> Can I get a sticker to put over the Ubuntu logo on my S76 laptop keyboard?
Yes.
https://www.amazon.com/3M-2155-Rubber-Splicing-Tape/dp/B001CGVEXS/ref=sr_1_4?ie=UTF8&amp;qid=1480268004&amp;sr=8-4&amp;keywords=self+amalgamating+tape
Here is the mobile version of your link
Scotch(R) Heavy-Duty Fasteners, 2 Sets of 1 x 3 Inches, Strips ,Black (RFD7091) https://www.amazon.com/dp/B00347A8GM/ref=cm_sw_r_cp_api_Gd90AbHHJ859H
Is this it?
Don't nail
Clean/sand the area and then use a heavy duty velcro to cover the entire area you are trying to hold (not just a single strip)
https://www.amazon.com/Scotch-Heavy-Duty-Fasteners-Inches-RFD7091/dp/B00347A8GM
I was going to say get some 3m velcro. Just don't put it on stickers.
http://www.amazon.com/Scotch-Heavy-Duty-Fasteners-Inches-RFD7091/dp/B00347A8GM/ref=sr_1_2?ie=UTF8&amp;qid=1450881554&amp;sr=8-2&amp;keywords=3m+heavy+duty+velcro There ya go OP.
Velcro and tether, baby
https://imgur.com/a/qKpPy
https://www.amazon.com/Scotch-Heavy-Duty-Fasteners-Inches-RFD7091/dp/B00347A8GM/ref=sr_1_4?ie=UTF8&amp;qid=1520960332&amp;sr=8-4&amp;keywords=3m+scotch+heavy+duty+fasteners
https://www.amazon.com/gp/product/B00JFS1TC6/ref=oh_aui_search_detailpage?ie=UTF8&amp;psc=1
Non-mobile: 3M Dual Lock Plastic Velcro
^That's ^why ^I'm ^here, ^I ^don't ^judge ^you. ^PM ^/u/xl0 ^if ^I'm ^causing ^any ^trouble. ^WUT?
The OG product.
https://www.amazon.com/3M-Dual-Lock-Reclosable-Fastener/dp/B007OXK1AK/ref=sr_1_5?keywords=3m+lock&amp;qid=1557450379&amp;s=gateway&amp;sr=8-5
I was just buying the little ~$5 pack at HomeDepot when I needed it, but that only gets you about 6 inches.
I think this is the same stuff. I need to go to HD tomorrow and verify I was buying 250/250. https://www.amazon.com/gp/product/B007OXK1AK
Use this to fasten the grill cloth frame to the speaker baffle. That way you can take it on and off for access. You only need 4 smallish pieces to hold it on.
pei sheet
adhesive
https://www.amazon.com/gp/product/B0013HKZTA/ref=oh_aui_detailpage_o02_s00?ie=UTF8&amp;psc=1
AND
https://www.amazon.com/gp/product/B007Y7D5NQ/ref=oh_aui_detailpage_o02_s00?ie=UTF8&amp;psc=1
And thou has received link
Everyone needs duct tape!
Bacon is meat candy, yum!
BACON DUCT TAPE