Reddit mentions: The best building supplies
We found 4,658 Reddit comments discussing the best building supplies. We ran sentiment analysis on each of these comments to determine how redditors feel about different products. We found 1,869 products and ranked them based on the amount of positive reactions they received. Here are the top 20.
1. 3M Indoor Window Insulator Kit Insulates 5 - 3'x8' Windows
- Saves energy and reduces heating costs
- Reduces condensation and prevents frost buildup
- Quick and easy installation
- Fits five 3'x 5' indoor windows
Features:

Specs:
| Height | 8.72 Inches |
| Length | 1.44 Inches |
| Number of items | 1 |
| Size | 5 Windows |
| Weight | 0.48125 Pounds |
| Width | 9.75 Inches |
2. GoControl/Linear GD00Z-4 Z-Wave Garage Door Opener Remote Controller, Small, Black
- Go Control z-wave products provide up to 100 feet range between the wireless controller and/or the closest z-wave device
- Nortek security & control/Go Control has been providing best-in-class home & business control solutions for over 50-years and is a leading worldwide mfg. . of z-wave products
- Garage door position sensor frequency: 345 MHz ; Certifications FCC ETL UL 325
- This product requires the use and pre-installation of a Z wave HUB.
- Add Z-Wave control to your current garage door opener. Compatible with virtually any automatic garage opener w-sectional garage door
- Easy to install and use
- Linear Z-Wave products provide up to 100 feet range between the wireless controller and/or the closest Z-Wave device
- Provides both audible and visual warnings prior to door movement
- Linear has been providing best-in-class home & business control solutions for over 50-years and is a leading worldwide mfg.. of Z-Wave products
- Specifications - Power: 120VAC, 50/60 Hz, Garage door position sensor frequency: 345 MHz, Z-Wave Frequency: 908.42 MHz
Features:

Specs:
| Color | Black |
| Height | 1.75 Inches |
| Length | 7.5 Inches |
| Number of items | 1 |
| Size | Small |
| Weight | 1.63 Pounds |
| Width | 5.25 Inches |
3. Lux WIN100 Automatic Heating & Cooling 5-2 Day Programmable Outlet Thermostat, Compatible with Portable A/C, Fans, and Space Heaters
- ON YOUR SCHEDULE: Program weekdays and weekends your way with 5-2-day temperature programming
- EASY TO USE: Intuitive touch keys make temperature tweaks simple while the easy-to-read display never leaves you guessing
- NO WIRING NECESSARY: All installation requires is simply plugging it in—and picking your perfect temp
- COMPATIBLE: Make the most of portable space heaters, window air conditioners, and circulating fans
- SETTINGS MADE SIMPLE: Set day, time, and temperature programs with a quick twist of our patented Speed Dial
Features:

Specs:
| Color | One Color |
| Height | 2.25 Inches |
| Length | 8 Inches |
| Number of items | 1 |
| Weight | 4.5 Pounds |
| Width | 5.5 Inches |
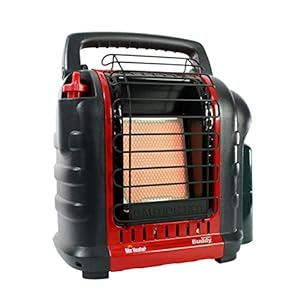
4. Mr. Heater F232000 MH9BX Buddy 4,000-9,000-BTU Indoor-Safe Portable Propane Radiant Heater, Red-Black
- 4,000- to 9,000-BTU radiant heater for spaces up to 225 square feet. Approved for indoor/outdoor use; clean-burning; nearly 100-percent efficient
- When operating the heater at altitudes over 7,000 FT above sea level the heater may shut off.
- Auto shut-off if tipped over, if pilot light goes out, or if detects low oxygen levels. Fuel Consumption/Burn Rate (Gal/Hr) at 4000 BTU = 0.044 Gal/Hr, at 9000 BTU = 0.099 Gal/Hr
- Fold-down handle; swivel-out regulator; connects to propane tank (not included); Run Time (Hrs at Max BTU): 3 Hours
- THE USE OF UN-AUTHORIZED ACCESSORIES/ATTACHMENTS WITH THIS HEATER ARE EXPRESSLY PROHIBITED, MAY CAUSE SERIOUS INJURY, AND WILL VOID THE WARRANTY.
Features:
Specs:
| Color | Red |
| Height | 15 Inches |
| Length | 7.7 Inches |
| Number of items | 1 |
| Size | L |
| Weight | 9 Pounds |
| Width | 13.4 Inches |
5. Woods Clamp Lamp Light with Aluminum Reflector, 150W, UL Listed, 6- Foot Cord
- VERSATILE LIGHT WITH CLAMP: Suitable for use in the home, office or work studio, studio lamp for artists, photographer and also for indoor gardens it can provide consistent light and warmth
- EASY-TO-USE CLAMPING LAMP: With an 8. 5” adjustable aluminum reflector for focused light, a convenient on/off button and a 6 ft. long cord for you mounting the metal clamp lamp, 6' 18/2 SPT-2 Brown Cord
- SAFETY AND INDUSTRY APPROVED LAMP WITH CLAMPS: This flexible clamp lamp is UL listed and meet applicable safety standards; this means it’s very safe to use. 8-1/2" Diameter
- SCRATCH-RESISTANT CLAMPS: The clamps of this small clamp lamp are covered with scratch-resistant sleeves that wouldn’t scratch your work surfaces while its adjustable ball joint gives you the flexibility to focus light where it’s needed. Aluminum Shade
- FEATURES OF CLAMP ON LAMP: 6 foot cord 18 AWG SPT-2; rugged molded-on plug; on/ off push button switch; double ball universal joint; non-marring spring clamp grips; 150-watt bulb medium base e26 bulb (E26). Heavy Duty Clamp
Features:

Specs:
| Color | Red |
| Height | 12 Inches |
| Length | 8.75 Inches |
| Number of items | 1 |
| Size | 8.5 Inch |
| Weight | 0.6 Pounds |
| Width | 8.75 Inches |
6. WILLHI WH1436A Temperature Controller 110V Digital Thermostat Switch Sous Vide Controller NTC 10K Sensor Improved Version
- WE'VE IMPROVED THE TEMP CONTROLLER: This is NOT a humidity controller! Simplified operation, larger power, wider control range, standard U.S. outlet, enhanced waterproof sensor probe. Get the new version right now. NO WIFI connection!
- HEATING OR REFRIGERATION WORKING MODE: Switch between heating mode and refrigeration mode according to the settings and device you plug into the controller. NO wifi connection!
- MAX LOAD: Rated for 10A,1100W at 110V. Outlet not compatible with 2 hot lines 220V plug (Celsius or Fahrenheit Read-out).
- PLUG AND PLAY: Insert the probe and then set ON & OFF temp. This temperature regulator will turn your device on/off as programmed to keep temperature between the desired range. Comes with a 3m(9.8ft) probe sensor. Measure range is -58 ~ 230°F(-50 ~ 110°C).
- WIDE APPLICATIONS: Our thermostat outlet is widly used for seedling germination, home brewing, fermertation, rooting, sous vide, incubation, pet breeding, aquarium, heaters or cooling devices such as heat mat/lamp, refrigerator/frezzer....
Features:

Specs:
| Color | White |
| Height | 1.8 Inches |
| Length | 4.9 Inches |
| Number of items | 1 |
| Weight | 1.04 Pounds |
| Width | 3.9 Inches |
7. Duck Brand Indoor 10-Window Shrink Film Insulator Kit, 62-Inch x 420-Inch, 286216
Reduce your energy costs by insulating your windowsCrystal clear film heat shrinks to seal out drafts and coldContains 62 x 420" of crystal clear film and 1/2-inch by 168-feet (2016") roll of double-sided tapeHelps increase energy efficiency - Home Smart and Earth FriendlyKit insulates ten 3' x 5' w...

Specs:
| Color | Clear |
| Height | 2.13 Inches |
| Length | 9.5 Inches |
| Number of items | 1 |
| Size | 10 Windows |
| Weight | 0.6 Pounds |
| Width | 6.5 Inches |
8. VIVOSUN 4 Inch Air Carbon Filter Odor Control with Australia Virgin Charcoal for Inline Fan, Grow Tent Odor Scrubber, Pre-filter Included, Reversible Flange 4" x 14"
- Premium Australian Carbon: Made of Australian Virgin activated charcoal with high microporosity, the VIVOSUN air carbon filter is designed to trap gas molecules as well as maintain sufficient airflow in ventilation devices for hydroponic systems; The 1050+ RC 48 carbon captures 3 times more air contaminants than average thanks to optimal surface area per carbon particle
- Excellent Odor Control: The porous activated carbon helps eliminate some of the most undesirable, pungent smells and particulates for indoor grow tents, and hydroponics grow rooms, preventing the gaseous pollutants from invading your bathrooms, basements and kitchens; It also absorbs stinky smells from pets, smokes, cooking fumes, etc
- Detachable Pre-Filter Cloth: Equipped with a pre-filter cloth that blocks 99% of the particles to prevent the air carbon filter from being clogged and keep it clean; Recommended replacing the carbon filter every 4 months to ensure well-conditioned use and high-efficiency to eliminate odor
- Reversible Flange and Base: Comes with heavy-duty iron flanges that fit exactly right over the ducting; The positions of the iron flange and bottom can be exchanged to reverse the charcoal canister, allowing the filter’s main body to be flipped upside-down for an exhaustive smell filtration and a long service life
- Versatile Applications: It can be used in conjunction with a 4-inch inline duct fan as an intake or exhaust filter; Perfect for grow tents, grow rooms, basements, garages, kitchens, smoking areas, air-cooled lighting, lower-level floors of double / triple story houses, window to window ventilation applications, or anywhere without a roof / ceiling cavity
Features:

Specs:
| Color | Silver |
| Height | 14 Inches |
| Length | 4 Inches |
| Size | 1 Count (Pack of 1) |
| Weight | 6.59 Pounds |
| Width | 4 Inches |
9. VenTech VT IF4+CF4 IF4CF412 Inline Duct Fan with Virgin Charcoal Carbon Filter Combo, 190 CFM, 4"
- Fan Features: Air Flow - 190 CFM ; Dimension: 9" Diameter x 7.50" Width / Duct Size: 4"
- Fans Speed: 2565 RPM / Decibels: 70 (+/- 1.5)
- Power - 65 W ; Input Voltage - AC 110v/60Hz
- Carbon Filter Features: Dimension - 4" x 7.5" x 12" Duct Size - 4"
- Package Includes: 1 - 4" Inline Fan / 1 - Fan Wall Mount / 1 - 4" Carbon Filter / 2 - Instructional Pamphlets
Features:

Specs:
| Number of items | 1 |
| Release date | November 2017 |
10. AC Infinity CLOUDLINE T4, Quiet 4” Inline Duct Fan with Temperature Humidity Controller - Ventilation Exhaust Fan for Heating Cooling Booster, Grow Tents, Hydroponics
- Designed to ventilate hydroponic grow rooms, transfer heating/cooling, cool AV closets, and exhaust odors.
- Intelligent controller with temperature and humidity programming, fan speed control, timer, and alarm system.
- Mixed flow design combined with a PWM-controlled EC-motor for a truly quiet and energy efficient performance.
- Kit also includes corded sensor probe, AC power plug, two duct clamps, and required mounting hardware.
- Duct Size: 4” | Dimensions: 6.9 x 11.9 x 7.4 in. | Airflow: 205 CFM | Noise: 28 dBA | Bearings: Dual Ball
Features:

Specs:
| Color | Black |
| Height | 11.899999987862 Inches |
| Length | 6.899999992962 Inches |
| Size | 4" |
| Width | 7.399999992452 Inches |
11. Rust-Oleum 7860519 Tub And Tile Refinishing 2-Part Kit, White, 32 oz
Prepare and paint surface the same day with a tough, 2-part epoxy acrylic formula that withstands moisture and resists corrosionFor best results, thoroughly mix parts A and B separately before mixing together for 2 minutes--once combined be sure to use within 6 hours of mixingEach kit covers up to 1...

Specs:
| Color | White |
| Height | 2.2 Inches |
| Length | 2.2 Inches |
| Number of items | 1 |
| Size | 32 Fl Oz (Pack of 1) |
| Weight | 2 Pounds |
| Width | 2 Inches |
12. VenTech DF6 6" Duct Fan 240 CFM
Air Flow: 240 CFMPower: 37 W * Input Voltage: 120v/60Hz *Dimension: 6" x 7" / Duct Size: 6"Max Temp 140 Fahrenheit / Decibels: 68 (+/- 1.5)Package Includes: 1 – 6” Duct Fan / 1 Instructional Pamphlet

Specs:
| Height | 6.4 Inches |
| Length | 7.9 Inches |
| Number of items | 1 |
| Release date | November 2017 |
| Weight | 3.0423792156 Pounds |
| Width | 7.4 Inches |
13. 2x4basics 90164 Custom Work Bench and Shelving Storage System, Black
- Lumber not included with each kit (Shelves not included)
- Includes 4 workbench legs, 6 shelf links
- Brackets made of heavy gauge structural resin. Workbench Legs to make a workbench in any length or width up to 8 feet by 4 feet (2.4m x 1.2m)
- Customizable workbench and shelving
- Only straight 90 degree cuts, no miter or angle cuts necessary
Features:

Specs:
| Color | Hopkins 90164 2x4basics Work Bench and Shelving Storage System |
| Height | 36 Inches |
| Length | 34.5 Inches |
| Number of items | 1 |
| Size | PACKS |
| Weight | 0.45 Pounds |
| Width | 96 Inches |
14. VIVOSUN 6 Inch 440 CFM Inline Duct Ventilation Fan with Variable Speed Controller
POWERFUL AIR FLOW: Heavy hitting blower with a fan speed of 2450 RPM for an air flow of 440 CFM. Moves air through your target location efficiently for optimal ventilation.RUNS SMOOTH AND QUIET: Powerful fan puts out only 50 dB noise level. Fine-tuned for minimum vibration with a sturdy vegan leathe...

Specs:
| Color | Black |
| Height | 5 Inches |
| Length | 9.3 Inches |
| Size | 6 Inch |
| Weight | 10.35 Pounds |
| Width | 11.4 Inches |
15. AC Infinity CLOUDLINE T6, Quiet 6” Inline Duct Fan with Temperature Humidity Controller - Ventilation Exhaust Fan for Heating Cooling Booster, Grow Tents, Hydroponics
- Designed to ventilate hydroponic grow rooms, transfer heating/cooling, cool AV closets, and exhaust odors.
- Dynamic temperature and humidity programming, with timers, grow cycles, scheduling, minimum speed.
- Connect with our app via Bluetooth to access advance programs, alarms, notifications, and view climate data.
- Mixed flow design combined with a PWM-controlled EC-motor for a truly quiet and energy efficient performance.
- Duct Size: 6” | Dimensions: 7.9 x 12.6 x 8.4 in. | Airflow: 402 CFM | Noise: 32 dBA | Bearings: Dual Ball
Features:

Specs:
| Color | Black |
| Height | 12.598425184 Inches |
| Length | 8.40157479458 Inches |
| Width | 7.90157479509 Inches |
16. Hydrofarm ACDF6 Active Air 6" Inline, 400 CFM Duct Fan, 6"
- Active Air inline duct fans offer innovation & performance at a great price.
- Active Air inline duct fans incorporate Brushless thermally protected AC motors with sealed for life Bearings (will not require any lubrication).
- With a full line of fans to meet your needs, All Active Air fans feature: durable ceramic-coated metal housing, UL-recognized components, high quality molded impeller, low noise output, Includes mounting brackets and 8 foot pre-wired 120V cord.
- Ul-recognized components
- Includes mounting brackets and 8 foot pre-wired 120V cord
Features:

Specs:
| Height | 12.5 Inches |
| Length | 12.5 Inches |
| Number of items | 1 |
| Size | 6" |
| Weight | 10.06 Pounds |
| Width | 9.3 Inches |
17. Mr. Heater F215100 MH4B Little Buddy 3800-BTU Indoor Safe Propane Heater, Medium
- Indoor-safe portable propane heater for rooms up to 95 square feet. THIS UNIT IS NOT INTENDED FOR GOLF CART USE OR FOR MOTORIZED VEHICLES.
- Continuous odor-free, 45-degree heating angle. Maximum Elevation (Ft) 7000 Feet. Automatic low oxygen shut-off system (ODS). Perfect solution for heating small enclosed spaces like tents up to 95 square feet
- Simple on/off buttons; uses 1-pound disposable propane cylinder (not included). Run time at minimum btu and maximum btu is 5.6 hours. Do not operate heater in any moving vehicle. This heater requires a vent area of 4 square inches minimum for adequate ventilation during operation
- Low-oxygen sensor and accidental tip-over switch with auto shut-off for safety.THE USE OF UN-AUTHORIZED ACCESSORIES/ATTACHMENTS WITH THIS HEATER ARE EXPRESSLY PROHIBITED, MAY CAUSE SERIOUS INJURY, AND WILL VOID THE WARRANTY.
- Recommended for emergency heat, tents, campers, workshops, job sites, porches, patios, decks, garages, storage buildings, picnics, tailgate parties, construction trailers, sporting events, barns, sheds, hunting blinds, shelters and ice fishing shanties
Features:

Specs:
| Color | Black/Red |
| Height | 11 Inches |
| Length | 11 Inches |
| Number of items | 1 |
| Size | Medium |
| Weight | 5 Pounds |
| Width | 11 Inches |
18. LEDwholesalers 6-Inch 240 CFM Air Duct Inline Hydroponic Booster Fan,GYO2402
All metal construction (including the blades)Light weight Air flow :Max. air flow 266CFM4 feet UL power cord120V, 60Hz Noise:51db(A)Discreet packaging

Specs:
| Height | 8 Inches |
| Length | 10 Inches |
| Weight | 3 Pounds |
| Width | 8 Inches |
19. Vortex 347 CFM S Line S-600 Fan, 6"
- The s-line is a revolutionary series of fans that combine energy efficiency, ultra-quiet operations and a collection of advanced technologies that deliver unparalleled performances.
- An extremely energy efficient ac brushless motor powers the patented mixed-flow dual impellers.
- Built with double insulated walls, noise is reduced to levels that were previously thought to be unattainable.
- All s-line models are assembled with high impact resistant polycarbonate casings, an integrated back draft damper and a mounting bracket designed for quick and easy installation.
Features:

Specs:
| Height | 10.6 Inches |
| Length | 17.3 Inches |
| Number of items | 1 |
| Size | 6" |
| Weight | 6.8 Pounds |
| Width | 11.2 Inches |
20. BLACK+DECKER Workmate Portable Workbench, 350-Pound Capacity (WM125)
Durable steel frameNon skid feet prevent slidingMeasures 33.3 by 5 by 5 inches; Weighs 17.8 poundsWork bench holds upto 350 poundsIncluded components: WM125 project center, (4) swivel pegs

Specs:
| Color | Black |
| Height | 5 Inches |
| Length | 33 Inches |
| Number of items | 1 |
| Size | One Size |
| Weight | 14.85 Pounds |
| Width | 5 Inches |
🎓 Reddit experts on building supplies
The comments and opinions expressed on this page are written exclusively by redditors. To provide you with the most relevant data, we sourced opinions from the most knowledgeable Reddit users based the total number of upvotes and downvotes received across comments on subreddits where building supplies are discussed. For your reference and for the sake of transparency, here are the specialists whose opinions mattered the most in our ranking.
Subcategories:
Interested in what Redditors like? Check out our Shuffle feature
Shuffle: random products popular on RedditTop Reddit comments about Building Supplies:
Summary
1. 3M Indoor Window Insulator Kit Insulates 5 - 3'x8' Windows
- Saves energy and reduces heating costs
- Reduces condensation and prevents frost buildup
- Quick and easy installation
- Fits five 3'x 5' indoor windows
Features:
Specs:
| Height | 8.72 Inches |
| Length | 1.44 Inches |
| Number of items | 1 |
| Size | 5 Windows |
| Weight | 0.48125 Pounds |
| Width | 9.75 Inches |
2. GoControl/Linear GD00Z-4 Z-Wave Garage Door Opener Remote Controller, Small, Black
- Go Control z-wave products provide up to 100 feet range between the wireless controller and/or the closest z-wave device
- Nortek security & control/Go Control has been providing best-in-class home & business control solutions for over 50-years and is a leading worldwide mfg. . of z-wave products
- Garage door position sensor frequency: 345 MHz ; Certifications FCC ETL UL 325
- This product requires the use and pre-installation of a Z wave HUB.
- Add Z-Wave control to your current garage door opener. Compatible with virtually any automatic garage opener w-sectional garage door
- Easy to install and use
- Linear Z-Wave products provide up to 100 feet range between the wireless controller and/or the closest Z-Wave device
- Provides both audible and visual warnings prior to door movement
- Linear has been providing best-in-class home & business control solutions for over 50-years and is a leading worldwide mfg.. of Z-Wave products
- Specifications - Power: 120VAC, 50/60 Hz, Garage door position sensor frequency: 345 MHz, Z-Wave Frequency: 908.42 MHz
Features:
Specs:
| Color | Black |
| Height | 1.75 Inches |
| Length | 7.5 Inches |
| Number of items | 1 |
| Size | Small |
| Weight | 1.63 Pounds |
| Width | 5.25 Inches |
3. Lux WIN100 Automatic Heating & Cooling 5-2 Day Programmable Outlet Thermostat, Compatible with Portable A/C, Fans, and Space Heaters
- ON YOUR SCHEDULE: Program weekdays and weekends your way with 5-2-day temperature programming
- EASY TO USE: Intuitive touch keys make temperature tweaks simple while the easy-to-read display never leaves you guessing
- NO WIRING NECESSARY: All installation requires is simply plugging it in—and picking your perfect temp
- COMPATIBLE: Make the most of portable space heaters, window air conditioners, and circulating fans
- SETTINGS MADE SIMPLE: Set day, time, and temperature programs with a quick twist of our patented Speed Dial
Features:
Specs:
| Color | One Color |
| Height | 2.25 Inches |
| Length | 8 Inches |
| Number of items | 1 |
| Weight | 4.5 Pounds |
| Width | 5.5 Inches |
4. Mr. Heater F232000 MH9BX Buddy 4,000-9,000-BTU Indoor-Safe Portable Propane Radiant Heater, Red-Black
- 4,000- to 9,000-BTU radiant heater for spaces up to 225 square feet. Approved for indoor/outdoor use; clean-burning; nearly 100-percent efficient
- When operating the heater at altitudes over 7,000 FT above sea level the heater may shut off.
- Auto shut-off if tipped over, if pilot light goes out, or if detects low oxygen levels. Fuel Consumption/Burn Rate (Gal/Hr) at 4000 BTU = 0.044 Gal/Hr, at 9000 BTU = 0.099 Gal/Hr
- Fold-down handle; swivel-out regulator; connects to propane tank (not included); Run Time (Hrs at Max BTU): 3 Hours
- THE USE OF UN-AUTHORIZED ACCESSORIES/ATTACHMENTS WITH THIS HEATER ARE EXPRESSLY PROHIBITED, MAY CAUSE SERIOUS INJURY, AND WILL VOID THE WARRANTY.
Features:
Specs:
| Color | Red |
| Height | 15 Inches |
| Length | 7.7 Inches |
| Number of items | 1 |
| Size | L |
| Weight | 9 Pounds |
| Width | 13.4 Inches |
5. Woods Clamp Lamp Light with Aluminum Reflector, 150W, UL Listed, 6- Foot Cord
- VERSATILE LIGHT WITH CLAMP: Suitable for use in the home, office or work studio, studio lamp for artists, photographer and also for indoor gardens it can provide consistent light and warmth
- EASY-TO-USE CLAMPING LAMP: With an 8. 5” adjustable aluminum reflector for focused light, a convenient on/off button and a 6 ft. long cord for you mounting the metal clamp lamp, 6' 18/2 SPT-2 Brown Cord
- SAFETY AND INDUSTRY APPROVED LAMP WITH CLAMPS: This flexible clamp lamp is UL listed and meet applicable safety standards; this means it’s very safe to use. 8-1/2" Diameter
- SCRATCH-RESISTANT CLAMPS: The clamps of this small clamp lamp are covered with scratch-resistant sleeves that wouldn’t scratch your work surfaces while its adjustable ball joint gives you the flexibility to focus light where it’s needed. Aluminum Shade
- FEATURES OF CLAMP ON LAMP: 6 foot cord 18 AWG SPT-2; rugged molded-on plug; on/ off push button switch; double ball universal joint; non-marring spring clamp grips; 150-watt bulb medium base e26 bulb (E26). Heavy Duty Clamp
Features:
Specs:
| Color | Red |
| Height | 12 Inches |
| Length | 8.75 Inches |
| Number of items | 1 |
| Size | 8.5 Inch |
| Weight | 0.6 Pounds |
| Width | 8.75 Inches |
6. WILLHI WH1436A Temperature Controller 110V Digital Thermostat Switch Sous Vide Controller NTC 10K Sensor Improved Version
- WE'VE IMPROVED THE TEMP CONTROLLER: This is NOT a humidity controller! Simplified operation, larger power, wider control range, standard U.S. outlet, enhanced waterproof sensor probe. Get the new version right now. NO WIFI connection!
- HEATING OR REFRIGERATION WORKING MODE: Switch between heating mode and refrigeration mode according to the settings and device you plug into the controller. NO wifi connection!
- MAX LOAD: Rated for 10A,1100W at 110V. Outlet not compatible with 2 hot lines 220V plug (Celsius or Fahrenheit Read-out).
- PLUG AND PLAY: Insert the probe and then set ON & OFF temp. This temperature regulator will turn your device on/off as programmed to keep temperature between the desired range. Comes with a 3m(9.8ft) probe sensor. Measure range is -58 ~ 230°F(-50 ~ 110°C).
- WIDE APPLICATIONS: Our thermostat outlet is widly used for seedling germination, home brewing, fermertation, rooting, sous vide, incubation, pet breeding, aquarium, heaters or cooling devices such as heat mat/lamp, refrigerator/frezzer....
Features:
Specs:
| Color | White |
| Height | 1.8 Inches |
| Length | 4.9 Inches |
| Number of items | 1 |
| Weight | 1.04 Pounds |
| Width | 3.9 Inches |
7. Duck Brand Indoor 10-Window Shrink Film Insulator Kit, 62-Inch x 420-Inch, 286216
Reduce your energy costs by insulating your windowsCrystal clear film heat shrinks to seal out drafts and coldContains 62 x 420" of crystal clear film and 1/2-inch by 168-feet (2016") roll of double-sided tapeHelps increase energy efficiency - Home Smart and Earth FriendlyKit insulates ten 3' x 5' w...
Specs:
| Color | Clear |
| Height | 2.13 Inches |
| Length | 9.5 Inches |
| Number of items | 1 |
| Size | 10 Windows |
| Weight | 0.6 Pounds |
| Width | 6.5 Inches |
8. VIVOSUN 4 Inch Air Carbon Filter Odor Control with Australia Virgin Charcoal for Inline Fan, Grow Tent Odor Scrubber, Pre-filter Included, Reversible Flange 4" x 14"
- Premium Australian Carbon: Made of Australian Virgin activated charcoal with high microporosity, the VIVOSUN air carbon filter is designed to trap gas molecules as well as maintain sufficient airflow in ventilation devices for hydroponic systems; The 1050+ RC 48 carbon captures 3 times more air contaminants than average thanks to optimal surface area per carbon particle
- Excellent Odor Control: The porous activated carbon helps eliminate some of the most undesirable, pungent smells and particulates for indoor grow tents, and hydroponics grow rooms, preventing the gaseous pollutants from invading your bathrooms, basements and kitchens; It also absorbs stinky smells from pets, smokes, cooking fumes, etc
- Detachable Pre-Filter Cloth: Equipped with a pre-filter cloth that blocks 99% of the particles to prevent the air carbon filter from being clogged and keep it clean; Recommended replacing the carbon filter every 4 months to ensure well-conditioned use and high-efficiency to eliminate odor
- Reversible Flange and Base: Comes with heavy-duty iron flanges that fit exactly right over the ducting; The positions of the iron flange and bottom can be exchanged to reverse the charcoal canister, allowing the filter’s main body to be flipped upside-down for an exhaustive smell filtration and a long service life
- Versatile Applications: It can be used in conjunction with a 4-inch inline duct fan as an intake or exhaust filter; Perfect for grow tents, grow rooms, basements, garages, kitchens, smoking areas, air-cooled lighting, lower-level floors of double / triple story houses, window to window ventilation applications, or anywhere without a roof / ceiling cavity
Features:
Specs:
| Color | Silver |
| Height | 14 Inches |
| Length | 4 Inches |
| Size | 1 Count (Pack of 1) |
| Weight | 6.59 Pounds |
| Width | 4 Inches |
9. VenTech VT IF4+CF4 IF4CF412 Inline Duct Fan with Virgin Charcoal Carbon Filter Combo, 190 CFM, 4"
- Fan Features: Air Flow - 190 CFM ; Dimension: 9" Diameter x 7.50" Width / Duct Size: 4"
- Fans Speed: 2565 RPM / Decibels: 70 (+/- 1.5)
- Power - 65 W ; Input Voltage - AC 110v/60Hz
- Carbon Filter Features: Dimension - 4" x 7.5" x 12" Duct Size - 4"
- Package Includes: 1 - 4" Inline Fan / 1 - Fan Wall Mount / 1 - 4" Carbon Filter / 2 - Instructional Pamphlets
Features:
Specs:
| Number of items | 1 |
| Release date | November 2017 |
10. AC Infinity CLOUDLINE T4, Quiet 4” Inline Duct Fan with Temperature Humidity Controller - Ventilation Exhaust Fan for Heating Cooling Booster, Grow Tents, Hydroponics
- Designed to ventilate hydroponic grow rooms, transfer heating/cooling, cool AV closets, and exhaust odors.
- Intelligent controller with temperature and humidity programming, fan speed control, timer, and alarm system.
- Mixed flow design combined with a PWM-controlled EC-motor for a truly quiet and energy efficient performance.
- Kit also includes corded sensor probe, AC power plug, two duct clamps, and required mounting hardware.
- Duct Size: 4” | Dimensions: 6.9 x 11.9 x 7.4 in. | Airflow: 205 CFM | Noise: 28 dBA | Bearings: Dual Ball
Features:
Specs:
| Color | Black |
| Height | 11.899999987862 Inches |
| Length | 6.899999992962 Inches |
| Size | 4" |
| Width | 7.399999992452 Inches |
11. Rust-Oleum 7860519 Tub And Tile Refinishing 2-Part Kit, White, 32 oz
Prepare and paint surface the same day with a tough, 2-part epoxy acrylic formula that withstands moisture and resists corrosionFor best results, thoroughly mix parts A and B separately before mixing together for 2 minutes--once combined be sure to use within 6 hours of mixingEach kit covers up to 1...
Specs:
| Color | White |
| Height | 2.2 Inches |
| Length | 2.2 Inches |
| Number of items | 1 |
| Size | 32 Fl Oz (Pack of 1) |
| Weight | 2 Pounds |
| Width | 2 Inches |
12. VenTech DF6 6" Duct Fan 240 CFM
Air Flow: 240 CFMPower: 37 W * Input Voltage: 120v/60Hz *Dimension: 6" x 7" / Duct Size: 6"Max Temp 140 Fahrenheit / Decibels: 68 (+/- 1.5)Package Includes: 1 – 6” Duct Fan / 1 Instructional Pamphlet
Specs:
| Height | 6.4 Inches |
| Length | 7.9 Inches |
| Number of items | 1 |
| Release date | November 2017 |
| Weight | 3.0423792156 Pounds |
| Width | 7.4 Inches |
13. 2x4basics 90164 Custom Work Bench and Shelving Storage System, Black
- Lumber not included with each kit (Shelves not included)
- Includes 4 workbench legs, 6 shelf links
- Brackets made of heavy gauge structural resin. Workbench Legs to make a workbench in any length or width up to 8 feet by 4 feet (2.4m x 1.2m)
- Customizable workbench and shelving
- Only straight 90 degree cuts, no miter or angle cuts necessary
Features:
Specs:
| Color | Hopkins 90164 2x4basics Work Bench and Shelving Storage System |
| Height | 36 Inches |
| Length | 34.5 Inches |
| Number of items | 1 |
| Size | PACKS |
| Weight | 0.45 Pounds |
| Width | 96 Inches |
14. VIVOSUN 6 Inch 440 CFM Inline Duct Ventilation Fan with Variable Speed Controller
POWERFUL AIR FLOW: Heavy hitting blower with a fan speed of 2450 RPM for an air flow of 440 CFM. Moves air through your target location efficiently for optimal ventilation.RUNS SMOOTH AND QUIET: Powerful fan puts out only 50 dB noise level. Fine-tuned for minimum vibration with a sturdy vegan leathe...
Specs:
| Color | Black |
| Height | 5 Inches |
| Length | 9.3 Inches |
| Size | 6 Inch |
| Weight | 10.35 Pounds |
| Width | 11.4 Inches |
15. AC Infinity CLOUDLINE T6, Quiet 6” Inline Duct Fan with Temperature Humidity Controller - Ventilation Exhaust Fan for Heating Cooling Booster, Grow Tents, Hydroponics
- Designed to ventilate hydroponic grow rooms, transfer heating/cooling, cool AV closets, and exhaust odors.
- Dynamic temperature and humidity programming, with timers, grow cycles, scheduling, minimum speed.
- Connect with our app via Bluetooth to access advance programs, alarms, notifications, and view climate data.
- Mixed flow design combined with a PWM-controlled EC-motor for a truly quiet and energy efficient performance.
- Duct Size: 6” | Dimensions: 7.9 x 12.6 x 8.4 in. | Airflow: 402 CFM | Noise: 32 dBA | Bearings: Dual Ball
Features:
Specs:
| Color | Black |
| Height | 12.598425184 Inches |
| Length | 8.40157479458 Inches |
| Width | 7.90157479509 Inches |
16. Hydrofarm ACDF6 Active Air 6" Inline, 400 CFM Duct Fan, 6"
- Active Air inline duct fans offer innovation & performance at a great price.
- Active Air inline duct fans incorporate Brushless thermally protected AC motors with sealed for life Bearings (will not require any lubrication).
- With a full line of fans to meet your needs, All Active Air fans feature: durable ceramic-coated metal housing, UL-recognized components, high quality molded impeller, low noise output, Includes mounting brackets and 8 foot pre-wired 120V cord.
- Ul-recognized components
- Includes mounting brackets and 8 foot pre-wired 120V cord
Features:
Specs:
| Height | 12.5 Inches |
| Length | 12.5 Inches |
| Number of items | 1 |
| Size | 6" |
| Weight | 10.06 Pounds |
| Width | 9.3 Inches |
17. Mr. Heater F215100 MH4B Little Buddy 3800-BTU Indoor Safe Propane Heater, Medium
- Indoor-safe portable propane heater for rooms up to 95 square feet. THIS UNIT IS NOT INTENDED FOR GOLF CART USE OR FOR MOTORIZED VEHICLES.
- Continuous odor-free, 45-degree heating angle. Maximum Elevation (Ft) 7000 Feet. Automatic low oxygen shut-off system (ODS). Perfect solution for heating small enclosed spaces like tents up to 95 square feet
- Simple on/off buttons; uses 1-pound disposable propane cylinder (not included). Run time at minimum btu and maximum btu is 5.6 hours. Do not operate heater in any moving vehicle. This heater requires a vent area of 4 square inches minimum for adequate ventilation during operation
- Low-oxygen sensor and accidental tip-over switch with auto shut-off for safety.THE USE OF UN-AUTHORIZED ACCESSORIES/ATTACHMENTS WITH THIS HEATER ARE EXPRESSLY PROHIBITED, MAY CAUSE SERIOUS INJURY, AND WILL VOID THE WARRANTY.
- Recommended for emergency heat, tents, campers, workshops, job sites, porches, patios, decks, garages, storage buildings, picnics, tailgate parties, construction trailers, sporting events, barns, sheds, hunting blinds, shelters and ice fishing shanties
Features:
Specs:
| Color | Black/Red |
| Height | 11 Inches |
| Length | 11 Inches |
| Number of items | 1 |
| Size | Medium |
| Weight | 5 Pounds |
| Width | 11 Inches |
18. LEDwholesalers 6-Inch 240 CFM Air Duct Inline Hydroponic Booster Fan,GYO2402
All metal construction (including the blades)Light weight Air flow :Max. air flow 266CFM4 feet UL power cord120V, 60Hz Noise:51db(A)Discreet packaging
Specs:
| Height | 8 Inches |
| Length | 10 Inches |
| Weight | 3 Pounds |
| Width | 8 Inches |
19. Vortex 347 CFM S Line S-600 Fan, 6"
- The s-line is a revolutionary series of fans that combine energy efficiency, ultra-quiet operations and a collection of advanced technologies that deliver unparalleled performances.
- An extremely energy efficient ac brushless motor powers the patented mixed-flow dual impellers.
- Built with double insulated walls, noise is reduced to levels that were previously thought to be unattainable.
- All s-line models are assembled with high impact resistant polycarbonate casings, an integrated back draft damper and a mounting bracket designed for quick and easy installation.
Features:
Specs:
| Height | 10.6 Inches |
| Length | 17.3 Inches |
| Number of items | 1 |
| Size | 6" |
| Weight | 6.8 Pounds |
| Width | 11.2 Inches |
20. BLACK+DECKER Workmate Portable Workbench, 350-Pound Capacity (WM125)
Durable steel frameNon skid feet prevent slidingMeasures 33.3 by 5 by 5 inches; Weighs 17.8 poundsWork bench holds upto 350 poundsIncluded components: WM125 project center, (4) swivel pegs
Specs:
| Color | Black |
| Height | 5 Inches |
| Length | 33 Inches |
| Number of items | 1 |
| Size | One Size |
| Weight | 14.85 Pounds |
| Width | 5 Inches |
Okay, as a 9mm reloader living in an apartment, here's my take.
First off, for everyone saying it won't save you much money: this is flat fucking wrong if you can get brass for free. I do this at the local outdoor range where people just leave their brass, especially after IDPA matches. The membership there is $100/year, so I guess that's my brass cost, but I was a member there before I started reloading and it was worth it.
Buying components in bulk, my ammo costs for 9mm with the particular kind of bullet I like (124gr flat point), powder I like (Clays), and whatever primers were cheap (Winchester in this case), is 11.3c/round. Even buying remanufactured Ultramax or Freedom or whatever you can't touch that price.
For apartment reloading, I use a Lee Classic Turret bolted to a 2x10 that I c-clamp to a tactical TV tray. When it's not set up, the press just sits on a shelf in my closet and it takes a single minute to pull out the "workbench", set it up, clamp the press to it and get cracking. And after loading a thousand or two rounds on it, I can crank out 100 rounds in an hour or so once I get up and going, so it's plenty fast. It's all the one-round-at-a-time focus of a single stage, with the speed and mechanical efficiency of a progressive. I love it.
I bought most of my gear secondhand, so I only have about $300 invested, but it'd probably be more like $400 new for the press, dies, powder measure (as a part of the press), bullet puller, calipers, and tumbler.
As for good load, I'm currently running a 124 grain whatever (currently roundnose, but I'm switching back to flatpoints after this thousand because they punch cleaner holes for competition) over 3.1grains of Clays. It's a pretty sweet round (less snappy than the Titegroup loads I was using) and the Clays powder is loose enough that it'd obviously overflow the case if I tried to doublecharge. I haven't chrono'ed it yet, but it's definitely accurate and feels like it should make 125 powerfactor for IDPA.
I can't believe it took me so long to start reloading, and the earlier you do it the more money you'll save in the long run. You can do it, I promise. PM me if you have any other questions; I'll be glad to help.
You're main electrical draws are going to be your major appliances then lighting. Though there isn't really one thing you can do to see a huge decrease in power consumption doing a few things together would be noticeable.
Off the top of my head that's what I got! If I think of other things I will add them! Also I apologize if some of my numbers are off, I've been out of the industry for a few years now.
I'm a professional mechanical engineer and a Certified Energy Auditor per the AEE.
Here's a couple things I did for my house that helped. They might help you.
Weatherize the garage: Add a floor threshold to the garage. Best done in the summer. Replace the weather seal on the top and sides. Replace the garage door threshold. All Amazon links. Measure your door and get the correct dimensions. I just linked to general items.
Weatherize your outlets and light switches: All holes through the wall allow tempered air to leak out. (nice warm air in the winter, nice cool air in the summer). With a flathead screwdriver, you can add gasket seals to all of your switches and outlets to reduce air leakage.
Weatherize doors and windows: If there are doors and windows that you don't use often, or don't use for a season, seal them off. If you use a door more frequently, there's lots of draft dodgers to help seal the door. Growing up, if it got super cold, we'd take a spare down comforter and nail it to the wall, totally covering the door.
As far as thermostats go, changing out the thermostat to a wifi thermostat and/or a programmable thermostat will go a long ways towards energy savings. Nest is definitely the best thermostat out there, but I recognize that it's the most expensive. In my opinion, the Nest is the best one because it has the best developed home/away sensors, has a clean and slick easy-to-use app (even for 8 thermostats like you'd have), and easiest to use scheduler. Don't change just one thermostat. Change all of them. At the very least, change the thermostat to a programmable one.
In general, it would help to go through the weatherproofing page of Amazon and buy and install anything that applies to your home and apartment.
As far as capital equipment, replacing boilers with condensing boilers can help, but remember that condensing boilers provide the most savings at the
temperature extremes.during shoulder seasons. Consult a local professional mechanical engineer to determine if they will really benefit your location.edit: had a brain fart when i wrote this. condensing boilers provide the most savings at the shoulder seasons. take a place like Fairbanks, AK, which, aside from this winter, generally spends most of the winter at the design outdoor temperature of -40. a condensing boiler operating at the design limit doesn't provide any more savings than a "standard" 80% AFUE efficient boiler. just doing my part to avoid spreading misinformation on the internet.
Right I guess what I mean is that you have to keep in mind that your gpu Temps show in celsius but you're reading your ambient Temps in Fahrenheit. So 109 is super hot for a human but is nice and cool for a gpu at only 42 degrees celsius.
There have been lots of posts on r/gpumining where people have done similar set ups to yours. To be honest in this situation having a smaller shed would be more beneficial because it'd be easier to expel the hot air which is the number one most important thing. You don't need to cool the air from the outside you just need circulation of air . You need to install one or two giant exhaust fans in the top of your shed and one or two at the bottom as intakes. Here is exactly what I'm talking about
In this guy's setup, his boxes are small enough that his giant ass exhaust fans actually are strong enough to suck air in the sides so he doesn't even need a separate intake fan. I doubt you'd be able to do the same though because of the size of your shed. I guarantee if you just invest in some quality fans. And I don't mean box fans I mean ones like this that will really start getting fresh air in and hot air out you will be fine and won't need the ac units. Especially because those ac units themselves use a lot of juice I imagine they've got to be wrecking your profits.
Just search on YouTube for "gpu mining shed" or "gpu grow tent" and you'll get a lot of good ideas. One YouTuber in particular id check out is Angry Chicken
I know this is a a complete rebuild but you might consider multiple smaller sheds like in the first link. Smaller enclosures allow for better circulation.
Either way, good luck!
Absolutely! You can get as crazy as you want with it, but there are some basics you need to figure out before you really start.
Where are you growing this plant? Do you have a space you're going to use? A closet, an unused bathroom, the basement? Are you going to be purchasing a tent, or maybe emptying out a dresser like this?
The light choice is one you can spend many (too many) hours on. LEDS have their benefits and drawbacks, as do CMH. Heat is more of an issue with CMH, but LEDs can also pump out serious heat. CMH is easy to know what to buy, no real dialing in the height, no worry you're not getting the right spectrum, etc. I'll probablu go LED at some point, but for now CMH is easier (for me). This is the CMH kit I started with. Ballast, bulb, reflector all included. if you have an option for the light, you'll want to get one that is 3100K and NOT the 4000K. 3100K is not as good for veg, but is great for flower. You can detatch the ballast from the reflector - helps keep temps in the tent down, since you can place the ballast outside.
How are you going to deal with heat? Lights run hot, and you WILL need to manage it at some point. Check my previous posts to see my light tube setup.
How are you going to deal with smell? Smell will be an issue, no ifs ands or buts. You can DIY carbon filters, but only if you trust yourself to do it right and hope it won't fail. You will need a carbon filter and fan to manage the smell. I'm running a 6" inline fan with a CAN33 filter. There is 0 smell from the exhaust, the filter is clutch. If noise is an issue for you, fans are decently loud running at full tilt. To work around this, a speed controller on a larger diameter fan, turned down to a lower speed, will reduce noise significantly while giving you the same airflow as a smaller fan on high.
You'll need to get soil and nutrients. Myself and a lot of growers really like Fox Farm Ocean Forest soil. FF Happy Frog is another good one. Get fabric pots if you can - lets the roots breathe a bit.
The above is very, very basic starting info. An enclosed space to grow; an exhaust fan and odor control; full spectrum light; water and nutrients.
Let me know if you have any other questions!
I've been taking ice baths for a bit now using plastic water bottles as reuseable ice cubes while filling the tub daily. I have a nice jacuzzi tub available most of the time that is great, but lugging the ice bottles around (my tub is on the 2nd floor, and my freezer is on the 1st floor) and having to re-freeze them every day can be a PITA - as well as having to use new water each day instead of the ability to recycle. My next solution is a chest freezer, which I intend to set up as soon as I am able.
A few tips from my research:
Start small. It'll save you money, let you get your feet wet, and help you learn how to grow better, and then you can buy bigger.
My "starter package" is:
https://www.amazon.com/gp/product/B00SWGYYWO
https://www.amazon.com/gp/product/B01I4NY8KW
https://www.amazon.com/gp/product/B00F8ZQYHA
https://www.amazon.com/gp/product/B0098R0600
https://www.amazon.com/gp/product/B004Q2ER5C/
https://www.amazon.com/gp/product/B006NGI8VS
https://www.amazon.com/Smart-Pots-5-Gallon-Soft-Sided-Container/dp/B002JUOWB2
https://www.amazon.com/FoxFarm-FX14053-12-Quart-Organic-Potting/dp/B001I49Q98
https://www.lowes.com/pd/Garden-Treasures-15-31-in-Rust-Plastic-Plant-Saucer/50445000
https://www.amazon.com/gp/product/B004PS4B08
So for about $420 (heh), you can get your foot in the door and start growing. This is a nice setup too, you can probably save $100 by shopping around, buying used, or doing-it-yourself. I've left off a few odds and ends like dryer duct, Fiskers for trimming, weed fabric pins for low-stress training, pitcher for watering, Mason jars for storage, but you can likely find those or suitable replacements around the house without spending money.
I also have a Raspberry Pi 3 ($43) with Sense Hat ($37) and metal case ($15) in each of my grow tents to log temperature/humidity and other things. I'm interested in eventually using the GPIO functionality to water my plants too. Not critical, but definitely a nice thing to have, especially if you're the hacker type. If you go this route, you might look at raspiviv.com too.
https://www.amazon.com/gp/product/B01C6FFNY4
https://www.amazon.com/gp/product/B014HDG74S
https://www.amazon.com/gp/product/B0722L338Q
I'm glad I bought a good intro setup because I still use it now that I've upgraded. I now have a 3' x 3' GG Shorty tent with HLG 300 LED for flower, a 2' x 2.5' GG Shorty tent with two 400W Roleadro COB's for veg, and my "intro package" is now my germination/cloning tent (and drying tent too since several people suggested that too). Being able to have three tents (germination -> veg -> flower) working simultaneously is increasing my output quite sharply. I'm doing this to help a relative with cancer, so you may not need to go quite as crazy as I did.
You mentioned using 35+ gs (~1.25 oz) a month. You probably aren't going to be able to grow that much given the constraints of tent size and light wattage (plus being a first-time grower! You'll learn a lot!). So once you get used to it, you'll probably want to buy more stuff. Marijuana isn't addictive, but growing marijuana absolutely is.
Once you've got your hardware, the variable cost is seed (~$10), soil (~$5), nutrients (~$20), and electricity (~$30). From that, I'm going to estimate you can grow ~1.5 ozs (you can do more as you learn more though). So you're looking at ~$40/oz after you've made the initial hardware investment.
Hope this helps. Depression, cancer, and everything else can just go suck it.
First, welcome to the enclosure club! You'll love the cost savings and lack of heat.
Here are a few points I'd like to make:
You're looking for inline fans. I personally run Vivosun 440cfm units. I ran only one when I had three rigs in my tent, but after moving my ASICs in, I'm hooking up a second to improve temps a bit more.
You can use conventional 6" dryer duct to move the air, but make sure you get the proper worm clamps and a Wye splitter (or better yet, two venting outlets for improved flow). The straighter the ducting, the better flow you will get.
Here is an old video that I uploaded showing when I just had two rigs. This is how it looks now, and creates quite a bit more heat.
Good luck with your build!
For a laptop, 130 Watts; for a radio, another 140W, for the USB, 5 Watts, for the camera, 10-15 Watts. For the heater, 1000 Watts, but we'll get to that later. While it might sound like a 350 W continuous inverter would be enough, in truth, they aren't really meant to run at maximum power, and the life expectancy will be drastically reduced. A 750 Watt inverter would be good enough to run everything except the heater.
To power the inverter, you probably want a good deep-cycle battery or two. For calculating how much battery you need, just take the wattage you need and multiply it by the time you need it to run, divide it by the Voltage (12V) and that gives you amp hours (Ah), which is a rating on any battery. You probably want to add a couple, if you calculate that you need 6 Ah, you might want to get an 8 Ah battery because the inverter and the power supplies for your electronics are not 100% efficient..
If you wire the battery(s) and the inverter together, and put them in an egg crate, it's definitely portable. But if you just want a portable drop-in solution, then a UPS may work best.
You can avoid the inverter by buying an automotive DC adapter for your laptop, a USB car adapter, and another automotive DC adapter for the camera. The total cost for all those is going to be roughly equivalent to the inverter but it massively improves the efficiency.
Now, for the heater. You're not going to practically be able to power a heater electrically with batteries. It's not efficient, and the energy density of batteries just isn't where it needs to be. I suggest bundling up, and using something like this, go to Ace hardware, etc and get naptha for fuel, (Should be about $5/quart) or this Using a 20 lb propane cylinder and a hose adapter can make it much cheaper to run.
I’ve been slowly chipping away at this bench all summer and trying to figure out exactly how I want it set up, but I finally feel like I’m where I want it to be. In a couple weeks I’ll put together a layout/cut out table next to it covered in HDPE. If anyone is interested, I used [2x4basics 90164 Custom Work Bench and Shelving Storage System, Black https://www.amazon.com/dp/B0030T1BRE/ref=cm_sw_r_cp_api_i_8vsoDbPMPZ0B9](this setup on Amazon) to put the bench together. I highly recommend it and I know a few people do as well on this sub. Makes it easy breezy.
I probably got $100 in lumber into it as well, but I opted for a nicely finished piece of plywood for the top. I can’t imagine I have more than $175 -$200 into the whole thing.
Anyway I’m super happy about it.
These are my suggestions - feel free to ask more questions if you need anything!
Read these guides (not by me) - I wish I had had something like this when I started: http://homegrow-pro.com/quantum-board-build-grow-tent/ And this one: http://homegrow-pro.com/the-3x3-grow-tent-setup/
The links and suggestions below are oriented for Canadians, so feel free to ask for alternatives.
Essentials
Extra accessories
a lighter (for sanitizing)
It's a little more expensive at the start, but this setup will pay for itself within two harvests.
With this setup you can expect to yield between 8 to 10 oz every run (even with autos), once you grow accustomed to the cycle.
I would get the hub earlier on since you want to monitor your washer/dryer, and if you have the hub you can buy devices that work with your hub so you can control everything from one spot.
The easiest solution for monitoring your washer/dryer are going to be z-wave devices. For the dryer, if it's electric, a sensor to detect vibration, or if it's gas, you can maybe get away with an outlet that detects current. For the washing machine, usually an outlet that detects current can work for you. It can be a bit tricky to get going though.
Skip the wemo plug and go with a z-wave plug. Any reason for the Lutron dimmers in specific?
For the bathroom fan, I use a z-wave smart switch. I don't have it tied to a humidity sensor, but I have it set (controlled by my hub) to turn off after 25 minutes, that way I don't have to worry about turning it off when I'm in a rush to leave for work. If I wanted to have it triggered by humidity levels or motion, or whatever all I need to do is add another z-wave device and I can make it happen.
The RainMachine seems cool, but pricey for an irrigation controller, no? I use the Orbit B-Hyve and it works great. I rarely ever interface with it honestly. I pull out my phone and run the zones occasionally to check that I don't have any broken heads, otherwise it just runs. It can be completely controlled from your phone, and can be controlled directly from the device as well. The other day I adjusted my schedule a little bit and increased the runtime on a few zones. Is your irrigation controller inside? If not, with the RainMachine you will also need to buy an enclosure to keep it weatherproof, whereas the B-Hyve is built into a weatherproof enclosure.
For garage door automation, there is a great z-wave option on the market. GD00Z-4 that will integrate into whatever hub you get.
Now as far as hubs go, I wouldn't go Wink personally. SmartThings is a bit annoying but it is the most used system on the market and there are some perks to that. You'll see recommendations for running Home Assistant, and that's a solution that requires some tinkering. HomeSeer is great, and if I started over completely I probably would have gone this route, but I have a bunch of zigbee devices, and the recommended way for using Zigbee with HomeSeer is to use another hub (Lightify Hub), and I don't really care for that solution. I'm using Hubitat now, it's an early product and I've had my frustrations with it but I like to tinker so it works for me.
>decent results for $1000
>actually recommended 1500
LOL @ the current /r/microgrowery
I remember when this used to be pages of people growing with tube light T4s for seedlings and CFLs for cheap grows.
Either way you need a budget. Let's say $175 for fun.
Go to a hardware store and get the cheapest 10 pack of LED bulbs. Get a power strip and some adapters to build one of these with those LED bulbs. You can fit 8 bulbs on a good power strip, save 2 bulbs for replacements if you want. That's 80W of LED from the wall for like $15-$20.
Get a tent. Here's a 2x2x4 for $38.. A tent will be easier than building anything, especially for the price.
With that small of a tent, you won't need a 6" fan, but if you think you'll get a big tent some day you may want to consider one. Get a 4" inline fan. Here's one on Amazon for $45, that comes with a speed controller to turn down (make quieter).
If you can't have your whole house smelling, you need a quality carbon filter. Here's an ok filter for $36 that will match your fan. It should last you a grow or 2.
Lights - $20
Tent - $38
Fan - $45
Filter - $36
You're at $139..
For the last $36 you need to consider your plant's pot, soil, nutes, and other small misc like rope or clothespins for plant training. It's not much, but you're shooting for cheap as possible. You can see where adding funds really can help this way. Hope it's helpful!
I just want to point out that if a space heater overloads the electrical circuit, any electrical heat source would do the same. An electric blanket alone probably wouldn't, but I see people listing a bunch of warm things, which would trip the breaker if all used together to replace a space heater.
Your best option is to keep as much heat as possible from leaving the room, and work on heating the smallest area possible (your bed, most likely). The more you can confine the heat, the less you will actually need to generate.
Seal up all the drafts, and insulate. Drafy buildings in New England often use window film to create an air barrier, and it makes a big difference. Heavy curtains are popular as well.
I like my bedroom cold when I sleep, so I don't turn the heat on. I have two blankets and a thick down comforter, and it is amazing. I would try combining some window film, heavy curtains, electric blanket, and big heavy down comforter, and see how you like that.
I honestly would use panda film over the mylar stuff. Mylar is slightly more reflective but panda film is cheaper and diffuses light better. It's black on the backside for blacking out. It's also cheaper. Either one will work great tho.
>Now my questions are, do i need some kind of air inlet to let fresh air in, and if so, will a simple vent do, or does it require a fan as well, or is that overkill for what I'm doing?
A vent should be plenty. Make it bigger than your exhaust, like 2x bigger. Intake fans arent needed in such a smll space. Make sure it's a lifeproof vent. Like this
>Also, If I get a 150Watt LED, I think that would meet my needs, but if I added another 50w LED light and pointed it at the undergrowth, would that be a benifit or will the 1 lamp provide all I need? I'm on a budget, but thankfully the budget is large enough that if I can find a good bang for my buck addition that will provide a better harvest, I can do it.
Like /u/Cuicos said, get the quantum board 135w kit. It will be all you need in that space. It equals one of the "600w" blurple LED panels on amazon. Or about 4-5 of those 150w LEDs you're talking about (UFO im assuming).
You wont need any side lighting or anything using the kit.
>I know I'll need an air extractor and carbon air filter, as wel as a small fan inside the room to circulate the air.
Yep. If you want a cheap one, get this. It will be loud as hell though. If you want a quiet one, get this. DO NOT GET A FAN LIKE THIS ONE.
If you are serious about smell, do not get a shitty filter. Ipower, vivosun, etc. are all shitty. I had a brand new 4" ipower filter and it couldnt handle 1 plant. Get a phresh one, this one is perfect.
I have a c920 and I am not disappointed. I subscribe to the belief that your camera is only as good as your lighting. Shit lighting will make a great camera look like shit and great lighting will make a shit camera look great.
I bought that exact screen from Amazon [link], but in retrospect I should've just gone to a fabric store and gotten a green sheet, because that's all it is. It is not special in any way. It is super thin though, so I just double mine up on a custom frame made with PVC pipe (cost of tools and materials was around $20). The good thing about the PVC is that you can measure your space and build a custom frame that fits your needs.
I found some awesome clamp light fixtures at Wal-Mart [example]. In my case I clamped them to my desk and a nearby window sill, pointed at approximately 45 degrees toward me and the screen behind me. The positioning is important in that you need your screen evenly lit and you need to not cast much of a shadow onto it. Luckily I have the space to put the screen far enough behind me and eliminate most shadow problems.
The bulbs I got are bright as hell though, so I've got [these] soft boxes on the way. These are not so much for the lighting itself (although I don't think it'll hurt) but for my own comfort. After only a few minutes of having those lights in my peripheral vision it got uncomfortable.
I also have a light almost directly above me, which rounds out my setup so far. Key light, fill light, and hair light. A Google search on studio and green screen lighting would benefit you. Good luck!
Tell your pops I used this stuff on my tub and it came out nice.
Couple tips: The directions say to use like 400 grit sandpaper, screw that, I tried that for almost 20 minutes and it wasn't doing a thing. I went down to like 150 grit. Real rough stuff. And it gouged the surface right up. I would periodically wipe the dust off with a damp cloth, then dry the surface and start sanding again. I think I sanded for just over an hour, taking a lot of short breaks to catch my breath since it was a pretty good workout. Once most of the gloss was gone and it was pretty well gouged up I applied the epoxy. People in the reviews complained about the vapors from the epoxy. So I setup two fans, a box fan blowing out the window and another fan blowing right at my head (the toilet's at the perfect height for this ;-)) And I felt completely fine breathing normally. It's been about a year and it's holding up great. Though we have babied it, just cleaning it with soap and water and a soft sponge, but it stays clean fairly easily and still looks great. Highly recommended easy DIY job for an old tub.
It doesn't snow here in L.A. so I don't worry about heating, but I have herd from a lot of people here that this is the perfect thing to own if it snows where you are, or if it is too cold. http://www.amazon.com/Mr-Heater-F232000-Indoor-Safe-Portable/dp/B002G51BZU I'd suggest you give it a try for the winter. It has really good rating here and in amazon, so it likely is very good. It has a built in detector for oxygen levels, but you should also pick up a Co2 sensor. I got one. Go check out the ford transit connect with the EcoBoost engine. It is smaller than the express, but has better millage. If you want MPG go for the Transit Connect, but if you want space then Try out the Chevrolet Express, or if you have the money pick up the Long Wheel Base Ram Pro master. It is half a foot longer than the Long Wheel Base Chevrolet Express. Anything longer than that is a Mini-Bus and those won't give you great MPG. Longest vans are the Long Wheel Base Chevrolet Express and the Long Wheel Base Ram ProMaster. The ProMaster being Half a foot longer than the Express. It'll be expensive to own an RV+Car. If you use the shower/toilet you will also have to go to a dump station every so often and refill the water tank. These are just things you will have to do on top of everything else. I don't recommend dumping the water on the street since it gives a bad image. If you do get an RV though I suggest you get like a Geo metro, something that gives you a lot of MPG because you will be returning to the same location everyday. I guess it would depend on how mobile you want to be. For me I travel about 10-15 miles mon - sat then do about 20 - 25 on sunday. Not much, but it is better to stay at the place you are going to than having to return to your RV on a daily basis. It just doubles the drive. that also cuts down on the MPG of the car you use since you have to drive around more. Then there are the other expenses I mentioned. If the RV has the fridge, stove, toilet, heater, ac, pump, and electricity working then it could be worth it. but you have to make sure they work. It would be like returning to a regular house. Other wise it would be like going back to a large boxy van.
Container: Rubbermaid 20 gal Brute Bin
Lights: Kingbrite 60 W Quantum Board (if you want dimmable, ask for a dimmable driver like the HLG-60H-36B and a potentiometer)
Screws: You'll need lots of nuts, long screws, washers, and spacers to mount the board and PSU. First put the board on the lid and mark where to drill, then drill holes. Then put the power supply on the outside in the middle, mark and drill those hoses. Mount power supply and then flip lid over and mount the light, using long screws and nuts to hold it in place (the light should NOT touch the lid but be 1-2 inches from it, held in place by nuts). Drill small hole for power line, then connect. Finally, drill 3 inch hole for exhaust beside the light. You'll also need long screws with nuts to keep the fan and shrouds together. Be sure to use spaces anywhere the screw heads or nuts are touching the lid or the lights. For light spacers, I used rubber spaces between the nuts.
Cooling shrouds: 120mm Fan Duct Cooling Shroud to 4 Inch Vent Hose
90 degree 4 inch elbow for exhaust: 4 in. 90° Round Adjustable Elbow
4" to 3" reducer for exhaust: 4 in. to 3 in. Round Reducer
2x regular JB Weld to mount the reducer and 3 inch "trunk"
Fan: Delta AFB1212SHE-PWM 120mm x 38mm 4pin PWM+Tac Sensor Extreme Hi-speed 3700 RPM 151 CFM
Fan controller: Noctua NA-FC1 4-pin PWM Fan Controller
Fan power supply: LE Power Adapter, UL Listed, 3A, 120V AC to 12V DC Transformer, 36W Power Supply
Fan power supply adapter: CRJ Female DC Power Supply Plug to 12V Molex Power Adapter Cable
Fan molex adapter: Coolerguys Mini 3-4 pin Fan Adapter (Single)
2x ABS fan elbow (for "snout" intake): 3 in. ABS DWV 90-Degree Hub x Hub Long-Turn Elbow
Air filter for intake: 16.25 in. x 12.5 in. x 0.19 in. - 16.3 in. x .2 in. x 12.5 in. - CF300 Carbon Filter
Air filter (not pictured): VIVOSUN 4 Inch Air Carbon Filter Odor Control with Australia Virgin Charcoal for Inline Fan
Fan hose (not pictured): iPower GLDUCT4X8C 4 inch 8 feet Non-Insulated Flex Air Aluminum Foil
Watering device (not pictured): Janolia Automatic Irrigation Kit, Self Watering System, with Electronic Water Timer
Camera (not pictured): Wyze Cam 1080p HD Indoor Wireless Smart Home Camera with Night Vision (glue steel piece for magnetic base onto the upper side of the bin)
Notes: This design is very safe because it keeps all electronic components high in the bin. At the same time, using a battery powered watering system keeps you from requiring to ever open it. The lamp runs very cool. The PWM fan controller works well and keeping the air moving without using a lot of power (do NOT buy a cheap voltage modulator, I did first and it doesn't work nearly as well as the PWM controller). The Wyze cam is super cheap and lets you keep an eye on everything or make timelapses. Have fun growing your tomatoes!
Saved this comment from a fella in micro grocery to start my set up
These are suggestions - feel free to ask more questions if you need anything.
Read this guide - I wish I had had something like this when I started: http://homegrow-pro.com/quantum-board-build-grow-tent/ Read this guide too: http://homegrow-pro.com/the-3x3-grow-tent-setup/
Essentials
• Grow Tent: 3 ft x 3 ft x 6 ft is the size you'd probably want. This is the one I bought: https://www.amazon.ca/VIVOSUN-Hydroponic-Observation-Window-Growing/dp/B01DXYMKIO
• Light: https://www.alibaba.com/product-detail/Kingbrite-240W-samsung-lm301h-288v3-quantum_62120261175.html?spm=a2700.7803241.0.0.31d73e5fhFxf6a This light is a fantastic LED quantum board that is very easy to assemble - I got the 3000K one with the epistar
• Fabric Pots: Head to Amazon and grab yourself a 5-pack of 7 gallon fabric pots https://www.amazon.ca/VIVOSUN-Gallons-Thickened-Nonwoven-Handles/dp/B00TF9E9PY/
• Also get yourself a saucer (you can get this at any garden store) and a pot elevator for each pot (pot elevator example: http://amazon.ca/Gro-Pro-725675-Level-Elevator/dp/B01J37FHF8/)
• Soil: Get yourself a bail of Pro Mix HP with mycorrhizae (it's cheap, reliable, and hard to overwater) from Canadian Tire, Rona, any store really and get also a bag of earthworm castings. Cover the bottom of your fabric pot with the castings (2-3 inches deep) https://www.homehardware.ca/en/20l-organic-worm-castings/p/5025712
• Nutrients: Gaia Green Dry Amendments (All Purpose and Power Bloom) Mix the All Purpose in with your Pro-Mix HP and then top dress your "soil" every month, changing it to Power Bloom during flowering https://www.canadiangardensupply.com/gaia-green-all-purpose-4-4-4.html https://www.canadiangardensupply.com/gaia-green-power-bloom-2-8-4-power-bloom-2-8-4-2kg.html
• Ventilation: Get the AC Infinity Cloudline T4 - it's absolutely worth it. Then purchase a 4-inch carbon filter and 4 inch tubing from Amazon (branding doesn't matter for these two things) https://www.amazon.ca/AC-Infinity-CLOUDLINE-T4-Ventilation/dp/B06ZXWN3BG https://www.amazon.ca/AC-Infinity-Dual-Layer-Aluminium-Ventilation/dp/B071LHCFZ8 https://www.amazon.ca/VIVOSUN-Australia-Charcoal-Pre-filter-Included/dp/B01DXYMBU6
• Timer: You can go cheap on this, but also consider a smart timer (like a Wemo) https://www.amazon.ca/Insight-Switch-Enabled-Compatible-Amazon/dp/B00EOEDJ9W
• Seeds: Jahseeds.ca - Canadian breeder, amazing beans, amazing price! Go with feminized seeds for your first round. https://jahseeds.ca/shop?olsPage=t%2Ffeminized-seeds
Extra accessories
• Pruning shears (seperate ones for trimming live plants and ones for harvesting) https://www.amazon.ca/Pruning-Gardening-Straight-Stainless-Precision/dp/B076HL5JJM
• a lighter (for sanitizing)
• a set of tweezers, for planting your sprouted seed
• some garden gloves
• rope ratchets for your lights
• zips ties for protecting things
• binder clips (for low stress training)
• plant ties (soft rubber and wire kind)
• watering can
• two pairs of measuring spoons for dry amendments
• a clip on fan and rotating fan (for air circulation over and under the canopy)
• markers and a pack of tag plant markers for identifying plants
• soil moisture https://www.amazon.ca/Soil-Moisture-Sensor-Meter-Hydrometer/dp/B014MJ8J2U
• paper towels (for germination)
• Bucket Head Wet Dry Vacuum Powerhead Lid for 19 Litre (5 Gal.) Multi-Use Buckets great for gathering up the excess water and tipped soil) https://www.homedepot.ca/product/bucket-head-wet-dry-vacuum-powerhead-lid-for-19-litre-5-gal-multi-use-buckets/1000666690
• 3 five gallon buckets (1 for the buckethead vacuum and 2 for extra water reservoirs) and two lids
• 3 surge protector power bars
• Various AC power extension cables
• 1 trellis net (for ScrOG training)
• USB microscrope (used to check the trichomes at harvest - if you want you can also get an adapter so it plugs directly into your smartphone, as opposed to plugging it into a computer) https://www.amazon.ca/Jiusion-Magnification-Endoscope-Microscope-Compatible/dp/B06WD843ZM
• 62% Boveda packs for curing
• Mason jars for curing and storage
• hanging rack for drying (you can substitute this for a hanger and some plant ties)
• Duct tape
It's a little more expensive at the start, but this setup will pay for itself within two harvests. With this setup you can expect to yield between 8 to 12 oz every run, once you grow accustomed to the cycle.
It has been said by others, but let me repeat for emphasis: Layers. I know lots of people that bitch about the cold but only wear a coat over a T-shirt. Come winter, I'm wearing some kind of undershirt/thermal, a flannel/chamois/wool shirt, a vest and then a coat. Merino wool socks are awesome. Smartwool is the name brand, but you can find store brands that are much cheaper. I would suggest some kind of waterproof shoe or boot for the snow.
Get several pairs of gloves. You will lose them and going to the store with one glove sucks. I personally think glommits are the bee's knees. Warmth+dexterity when needed. Embrace the hat and have fun with it.
People have talked about a winter kit for your car, which is a good idea, but how about your house? If you have newer, quality windows (double pane Low E glass) you probably don't need to do anything, but if you live in an older house with old, drafty windows getting window film might be a good idea. If you have a drafty door, there are many adhesive-backed foam strip products to help seal those up.
Bundle up and try to enjoy winter. To me there are few things as beautiful as a crisp sunny day after a fresh snow, where everything sparkles and glimmers. So long as you're inside and drinking a cup of coffee that is.
EDIT: spaces after links.
Go buy a 4x4 tent, ideally gorilla but can get cheaper.
https://growershouse.com/gorilla-grow-tent-4-x-4?utm_source=google&utm_medium=cpc&adpos=1o1&scid=scplp6055&sc_intid=6055&gsacid=952890155&keyword=&gclid=Cj0KCQiAw4jvBRCJARIsAHYewPMdnaA3pI_kaqr7hDDtRfQzZ5-nIJ_myYwy_RzlSfPlTYAKJuHyn5MaAotOEALw_wcB#!
Order the light
https://growershouse.com/horticulture-lighting-group-hlg-600w-qb288-v2-r-spec-led-kit?utm_source=google&utm_medium=cpc&adpos=1o2&scid=scplp15744&sc_intid=15744&gsacid=952890155&keyword=&gclid=Cj0KCQiAw4jvBRCJARIsAHYewPMp8yJqTkQMEmC5Db2_3fMT73eIoyEVEXZMPbEIJIB_wpvPAEW537saAsyFEALw_wcB
Inline fan
AC Infinity CLOUDLINE T6, Quiet 6" Inline Duct Fan with Temperature Humidity Controller - Ventilation Exhaust Fan for Heating Cooling Booster, Grow Tents, Hydroponics https://www.amazon.com/dp/B074XBXFPD/ref=cm_sw_r_cp_api_i_LMT4Db95YN9QZ
Carbon filter
VIVOSUN 6 Inch Air Carbon Filter Odor Control with Australia Virgin Charcoal for Inline Fan, Grow Tent Odor Scrubber, Pre-Filter Included, Reversible Flange 6"x 18" https://www.amazon.com/dp/B01731MLFK/ref=cm_sw_r_cp_api_i_HNT4Db23PB3M8
Flex duct
VIVOSUN 6 Inch 25 Feet Non-Insulated Flex Air Aluminum Ducting for HVAC Ventilation w/Two 6 Inch Stainless Steel Clamps https://www.amazon.com/dp/B010UCCMW6/ref=cm_sw_r_cp_api_i_yPT4DbNQFABKE
Fan
SPT Wall Mount 16" Fan with Remote Control https://www.amazon.com/dp/B071Y8CN45/ref=cm_sw_r_cp_api_i_oQT4DbV2ANXJG
Temp/hygrometer
AcuRite 00613 Indoor Thermometer & Hygrometer with Humidity Gauge, 3" H x 2.5" W x 1.3" D https://www.amazon.com/dp/B0013BKDO8/ref=cm_sw_r_cp_api_i_xRT4Db8N3X0K6
Rope hanger
iPower GLROPEX2 2-Pair 1/8 Inch 8-Feet Long Heavy Duty Adjustable Rope Clip Hanger (150lbs Weight Capacity) Reinforced Metal, 2 Pack, Black https://www.amazon.com/dp/B018WIOEDA/ref=cm_sw_r_cp_api_i_iST4DbF0EQJAK
Light timer
BN-LINK 7 Day Outdoor Heavy Duty Digital Programmable Timer BND/U78, 125VAC, 60Hz, Dual Outlet, Weatherproof, Heavy Duty, Accurate For Lamps Ponds Christmas Lights 1875W 1/2HP ETL Listed https://www.amazon.com/dp/B07G9RK4VV/ref=cm_sw_r_cp_api_i_wWT4Db5Q74NPA
PH meter
Digital PH Meter, PH Meter 0.01 PH High Accuracy Water Quality Tester with 0-14 PH Measurement Range for Household Drinking, Pool and Aquarium Water PH Tester Design with ATC (2020-Yellow) https://www.amazon.com/dp/B08197LX6H/ref=cm_sw_r_cp_api_i_TXT4DbZ8TF1W
Tower of Power
Hydrofarm TMTOP6 Tower of Power https://www.amazon.com/dp/B001WAL58I/ref=cm_sw_r_cp_api_i_f1T4Db88GD2GE
Loupe
VIVOSUN 30X 60X Illuminated Jewelers Loupe Foldable Magnifier with LED Light for Jewelry Gems Watches Coins Stamps Antiques Black https://www.amazon.com/dp/B07VK1LVKX/ref=cm_sw_r_cp_api_i_62T4DbR2KDDY4
Measuring cups.
Garden Smart Measuring Glass (1, 1 ounce) https://www.amazon.com/dp/B073C6S1LS/ref=cm_sw_r_cp_api_i_o5T4DbQFTS4FY
Fox Run Brands 4892COM 4-Ounce Mini Measuring Glass, Regular, Clear https://www.amazon.com/dp/B000N4CQWI/ref=cm_sw_r_cp_api_i_95T4DbTWPWNMP
Get some short heavy gauge cords
Still haven’t said what medium, so I can’t recommend anything there for nutes or pots. Since your new, I’d consider soil and airpots.
You’ve got lots to learn, buy the grow encyclopedia.
The Cannabis Encyclopedia: The Definitive Guide to Cultivation & Consumption of Medical Marijuana https://www.amazon.com/dp/1878823345/ref=cm_sw_r_cp_apip_9RIDjvgDjnPoc
I’m sure I forgot something, it’s off the top of my head, you’ll always be running and picking up a trinket or two. That said, this will get you far down the path.
Need to decide medium and I can help point you towards genetics. Probably clones to start off.
Gorilla Racks (or equivalent) can be assembled into a workbench; if you purchase a couple of them, you can even get some extra flexibility with assembly and layout. Be sure to the kind with multiple holes, so you can vary the shelving height. Also buy some nuts and bolts to attach units side-by-side. One other thing you'll want to buy is something better for the top surface; use the shelving wood pieces that come with the shelves for the "base" (to align it with the shelving edges), but drill some holes in it and drill/glue a slightly larger piece of 3/4" plywood or something on top. Then polyurethane it to finish it up (alternatively, put a piece of thin steel or aluminum over the top and bend the edges down and screw or glue in place).
Another option if space is tight, and your needs are fairly "light duty" - get one of these:
https://www.amazon.com/WM125-Workmate-350-Pound-Capacity-Portable/dp/B000077CQ0/
Then get a piece of 4' x 4' 3/4" plywood. Open the jaws of the bench up to their widest point and measure it; subtract a 1/2" or so. Cut a piece of plywood out to this width, then center and attach it to the remainder of the plywood with screws and glue. Once that is dry, clamp it into the workbench, then on each "jaw" draw a couple of the "circles" on each plywood side. Then find the center of those circles, and drill thru with a 1/4" drill to the other side. Then on the top side, use a spade bit (say 1" or slightly more) to "widen" up the hole, but only go thru about 1/3 to 1/2 of the way into the wood. Do this for all four holes. Polyurethane the top to finish it.
Get some bolts - flat hex head, or pan-head with phillips or similar - long enough to go thru the top you made, and thru the hole in the bench, plus a bit extra (about an inch); they should be about 1 3/4 to 2" long - 1/4 x 20 - get four of those, four washer to fit into the countersunk holes, four larger fender washers, and four 1/4 x 20 wingnuts.
Chuck the top into the workbench; tighten it up. Drop thru the holes a bolt with a washer, then on the other side, back each up with a fender washer and snug it down with a wingnut. And there you go.
This kind of bench is light duty (or you can get one of the "heavier duty" Workmates if your budget allows for it), but very versatile. For instance, you could make a variety of "tops" to mount tools on that can be chucked into place (or make a "universal" top for several smaller tools) - things like a miter saw, router table, small table saw, scroll saw, grinder, small drill press, etc. You could even potentially make an aluminum top for welding on (welding steel won't stick to the aluminum - or make a steel top if you want). Again, this is only light-duty stuff, but it's portable, lightweight, folds up, etc.
Be sure to pick up additional clamp dogs for the Workmate, and a "repair parts" assortment; these will be handy to keep the main workbench in shape. Also one other tip (kinda OT): If you ever needed to split a piece of transmission hose lengthwise, the Workmate bench has the answer! The jaws have a v-groove, so you can chuck a length of the hose in the groove, then use a box-cutter razor, guided along the edge of the jaw, to cut the tubing down the side in a very straight line. You can probably do this up to about 1" diameter tubing; anything larger would flex too much. I had to do this to custom make some u-bolt "padding" for use on a vehicle roof-rack to protect the cross bars.
If you needed something a bit more heavy duty than the Workmate, Harbor Freight sells a low-cost welding table, that you could make your own custom wood tops to bolt down onto the table (when you weren't welding on it, of course). The table folds up, but it doesn't have any vice-like jaw system, so keep that in mind. It's also much heavier than a Workmate, being made of heavier gauge steel.
You'll need to contain the plants inside a grow room or tent, then set up a way for fresh air to get in and smelly air to get out. You'll need a fan or blower to move air from the in-vent to the out-vent. On the out-vent end, set up a filter that the air has to go through, which will clean the odor from it.
An expensive but easy/effective way to do this is to buy a carbon scrubber with fan like this: http://www.amazon.com/gp/product/B004Q2ER5C
A much cheaper but DIY way is to set up a good fan and make sure all air passes through one or two layers of carbon filter fabric like this: http://www.amazon.com/Cut---Fit-Carbon-Pad-Purifiers/dp/B000U204W2
Edit: if you haven't looked at tents yet, there's a good selection at amazon: http://www.amazon.com/b/ref=sr_aj?node=3480699011&ajr=0 - they make it much easier to control venting, lighting, temperature, humidity, etc. For 1-2 plants, don't go smaller than 4 square feet, and give yourself plenty of height.
I understand being overwhelmed at first here, but I couldn't imagine trying to figure it out from a different language, so props to you! You can definitely build your own setup, or you could purchase a grow tent. The sizes range anywhere from 4x4x7' (or 4 feet by 4 feet wide and 7 feet tall), smaller, bigger, there's something out there for everyone. Some common lighting sizes with MH/HID (metal-halide/high intensity discharge, just different styles for different stages) bulbs are 400W, 600W, 1000W or so I've seen on here. You could also go with LED lights, but I don't know much about those. It depends on how many plants you'd like to grow and the size of your space.
As far as fans, I would get more powerful inline fans like this or this to actually move the air around if you're planning a bigger grow. If you're not too worried about a carbon filter, which it never hurts to be, maybe you could try making a DIY one with some supplies from your store and a guide from this sub?
Hope this helped, best of luck and please update us! (ps your English is actually fine and easy to understand)
I'm in a similar situation. Here's some of the stuff I'm doing:
I just bought a bunch of these - shrink film window insulators. I'm in a new apartment this winter and I'm in a colder climate than I'm used to, so hopefully they'll work. My brother uses them and he says they work really well. It makes sense that they would, since air is a great insulator. And buy insulating (or at least very thick) curtains. During the day when the sun is out, keep them open to get warmth in (on windows that are facing the sun), but at night shut them to keep out the cold.
Other than that, try to find out where in your house the warm air is escaping. I found out that my back door had about an inch-wide crack along the top that I stuffed with brown packing paper, which helped a lot. If there are any rooms you don't use that often, close them off as best as you can - seal off the window, shut the door and put a door runner along the bottom to keep all the cold air out and the warm air in. You want to be trying to heat as small of an area as possible.
You can also try to replicate a Japanese kotatsu if you have a low table and a heater that is low to the ground. I have a low coffee table I sit at, and I'm planning on getting a large blanket to imitate the general idea of a kotatsu with. The heater I use for my living room blows hot air out low to the ground, and a lot of it ends up under the coffee table anyway. I can sit at the table and keep my legs warm.
Also, as weird and lame as they are, I recommend a slanket. I know people make fun, but they're not at all the same as just having a bathrobe on backwards - they're much longer, much thicker, and they have hoods and pockets for your feet. You could try to make one but I don't think that would end up being more frugal, because the fabric would be expensive. The one I have is a godsend, especially since I do a lot of work from home and it keeps me warm while I'm on my computer.
Finally, drink a lot of warm drinks. Always have a hot cup of coffee or tea in your hand. It will warm up your hands and your body. I think that the logic behind the "warm drinks actually make you colder" thing is that they make you sweat, but if you're cold enough that you aren't sweating at all from drinking them, you're retaining most of the heat. And get enough food! Your body burns calories to keep you warm, so this is not the time to restrict yourself.
(Links are not an endorsement, they provide a photo and may help you find the product locally. Some little bitch on this sub had a meltdown over that because she wanted to fix the issue today, and wanted to know what to buy locally. Apparently showing her a picture of what the product looked like so she could pick it up at the local bigbox hardware store is a crime against humanity.)
Q:How does one hook up a 20# just for use on a 2 burner Coleman stove?
If you only use the propane for your stove and have a home base, you can get buy with a much smaller, approved refillable tank. photo The problem with full-timing with this is you can't use the propane exchange cages located at nearly every gas station, walmart, and hardware store. You must get it refilled in person or refill it yourself. (You will also go through the tiny tank quickly if you're heating your van)
I have a home base, and my current setup is a tiny space. I use refilled disposable bottled propane for the stove and space heating. I keep the bulk tank at home. The heater is no longer sold but it's equivalent to the smallest buddy heater. photo I run it for 10 minutes before going to sleep or getting out of the sleeping bag, and for this use it's all I need. But then again I'm not trying to live like this full time.
Q: Can you hook up a hot water heater to the 20# and not have to use electric?
Maybe? I boil water in a pot and use an adapted weed sprayer to shower with. But I'm not full time.
It seems hugely inconvenient to carry around a big propane canister just to lug it outside for my stove every morning, but the cost may be worth it, then?
Yep. I cook on the tailgate when the weather is good. Like I said I refill the disposables before the trip and save a $1.50 each time. Might not be worth it to you.
*I would never fill something like that on my own. Not gonna fuk with propane and blow myself up.**
It requires some care, but it's easy. You just weigh the bottle when empty and write the weight of the tank itself on it with a black magic marker. When the tank is full, just make sure the total weight, minus the tare is less than 1 pound (or less than 12 ounces on some disposable cylinders.) They're actually hard to overfill but you need an adapter and a kitchen scale.
These will be your best friend. It's like saran wrap that you wrap the window frame (and window) in. You use a hairdryer to get it all tight and it creates a pocket of air for insulation. It doesn't help quite as much with sound, but it's shocking how well it helps with heat retention. That and curtains will help immensely (and will help with sound too) look for really thick ones, or the "blackout AND insulated" ones and it will help with heat and noise.
Or you can get a space heater, those things rock.
You also can talk to your roommate about it. "Hey, I've noticed it's been a bit chilly lately--" and see what happens.
I hope you get warm soon! Enjoy basking in your showers in the meantime!
They absolutely help. Some types of blinds are better than others-- and some are even given r-value ratings. For most types of blinds, it's not that they're particularly good insulators-- it's just that bare window glass is so terrible that nearly any additional material is an improvement.
Some types, like cellular shades, can have pretty respectable r-values on their own, though.
If your roommates demand the view, though, tell them to chip in on one of the shrink-wrap window insulation kits for the winter. They're like $20, and you can almost certainly get them locally at a hardware store. They're even more helpful if the windows are old and drafty, since in addition to roughly doubling the r-value of a single-pane window, they make a nice vacuum seal around it.
I setup some filtering for my smelly resin 3d printer and I tried a 120mm fan but it wasn't strong enough. Maybe my fan was weak. Then I used a 12v bilge blower that they use on boats with a variable speed control. This is great in terms of air movement but it's noisy. Apparently, this is a good inexpensive option if you want more air movement through your filter (I'm going to switch to one of these soon unless I figure out some way to insulate my bilge blower to make it quiet):
https://www.amazon.com/gp/product/B075SY5P1K/ref=ox_sc_act_title_1?smid=A3NP2ORRCG15VI&psc=1
They have multiple products -- I'm talking about the cheapest one at $26.79 at the moment (4" duct fan, 197 cfm). It would use the 4" dryer duct you mentioned (I'm using that too, works great).
I'm putting a splitter on my system to hook up to a booth/3d print handling/soldering station. I made mine out of foamcore/foam board from Dollar Tree. The portable option looks like and a plastic tub is a good idea too but I wanted something more permanent (have a small table to dedicate to it).
For the output part, if you totally want to get rid of anything, you could send it through one of these:
https://www.amazon.com/dp/B01DXYMBU6
I'm using a similar one (one I bought was a couple bucks less but went out of stock). It completely gets rid of the resin smell so I think it would work well for stinky paints. But for acrylic, I'm sure it's overkill but I'm going to be using it for exactly that too along with my other uses.
To be 100% clear, this is how my setup works:
To connect the dryer duct, I put some electrical tape around the surface I was connecting to and then used cheap zip ties (had to double them up) to hold the duct on. They have hose clamps too but they seem a bit overkill for our usage.
just want to chime in here, I was in the same boat as you. Starting out as just an experiment seeing if I could actually sprout a seed, turned into a dedicated project :p But I can tell you I didn't have any idea with like lights, tents, air filters etc. So first thing I bought was this LED , but a better option would be this Viparspectra (the one I bought though has been just fine) and just hung it in my closet with the plant, and that's it. veg'ed it for 4 weeks just like that with the light on a timer and my closet door closed. (get a little desk fan to to move some air over the leaves) Then I figured I'd switch to flower, and was kinda on the edge about investing in a tent and carbon filter. but every thread I read about smell, veterans would always say "It's gonna smell a lot!" So I bit the bullet and got a 2x2x4 tent and this carbon filter and fan . You can probably use your DIY carbon filter just fine. Anyway, long story short, I started to flower and literally two days later I walk into my house after work and the smell just hits me. And this is just one plant. So definitely invest in that stuff. But as for the PC fan, unfortunately it's not going to have enough static pressure to force air through a carbon filter. You don't have to go with the one I got, like brotha said the duct boosters will work too. If you have any question let me know cause I relate very well to your situation, except I've now been halfway through the process lol. pm me if you want
Stay away from pallets please, cough up some money and some time (if you go to a box store) getting some okay dimensional lumber for projects.
If you decide to go the hand tool route, I've got all sorts of info and what not, I'd share. (Im a historical furniture maker's apprentice, I like to think I've got some decent knowledge) I've included a list here if thats the route you go.
Used this list for a couple posts, its about $200ish in all to get you started. This list uses chisels in lieu of say a router plane for dados and doesn't have an option for grooves but that's later down the road. I've got a big enthusiast list as well if you'd be interested.
> Crosscut/Ripsaw: Irwin Double Sided Pullsaw https://www.amazon.com/IRWIN-Tools-Double-Edge-9-5-Inch-213103/dp/B0001GLEZ8
> Joinery Saw - I think this is the one Japanese saw I own? works okay https://www.amazon.com/Z-saw-Dozuki-Z-Saw/dp/B001DSY7G6/ref=pd_sbs_469_3?_encoding=UTF8&pd_rd_i=B001DSY7G6&pd_rd_r=RBVEGF6TKKCZHVCH7WSH&pd_rd_w=16INj&pd_rd_wg=gFI50&psc=1&refRID=RBVEGF6TKKCZHVCH7WSH
> Chisels https://www.amazon.com/Narex-Republic-Woodworking-Chisels-863010/dp/B00GPC74ZQ/ref=sr_1_1?s=hi&ie=UTF8&qid=1499302108&sr=1-1&keywords=narex+chisels
> Marking Gauge https://www.amazon.com/Crown-135-Marking-Gauge-Beech/dp/B00EC9AOZQ/ref=pd_lpo_vtph_469_lp_t_4?_encoding=UTF8&psc=1&refRID=ZBYMV8TF850C6M5JDGDG
> Bevel Gauge https://www.amazon.com/dp/B06XC2NYKS?psc=1
> Mallet - I'd personally make one or buy a used one (of heavier wood, good grain and quality construction.) Amazon has some though. https://www.amazon.com/Narex-gram-Beech-Carving-Mallet/dp/B00L7BQL54/ref=sr_1_11?s=hi&ie=UTF8&qid=1499302341&sr=1-11&keywords=mallet
> Combination square -does the work of several sizes of squares for the price of one - https://www.amazon.com/IRWIN-Combination-Square-Metal-Body-1794469/dp/B005XUHIBG/ref=sr_1_2?s=hi&ie=UTF8&qid=1499302407&sr=1-2&keywords=square
> A No 4 or 5 sized plane - I buy old Stanley's/Bailey's because they're great, and usually cheap for bench planes - Flea Market/Antique stores/ebay -$20 ish --- Amazon also sells new (I give no guarantee on quality however) - https://www.amazon.com/Stanley-12-404-Adjustable-2-Inch-Cutter/dp/B000FK3WI2/ref=sr_1_1?s=hi&ie=UTF8&qid=1499302507&sr=1-1&keywords=stanley+plane
> "Workbench" - temporary thing to hold pieces while you make dovetails - https://www.amazon.com/WM125-Workmate-350-Pound-Capacity-Portable/dp/B000077CQ0/ref=pd_cart_vw_2_1?_encoding=UTF8&psc=1&refRID=CA9X21QD5D7QAXKMGE6S
> Woodscrew clamp, used to clamp peice to workbench while chiseling waste - https://www.amazon.com/ATE-Pro-USA-30143-Handscrew/dp/B0006A4A5U/ref=sr_1_1?ie=UTF8&qid=1499303583&sr=8-1&keywords=wood+screw+clamp
>
> Other than clamps, glue, mortice gauge, etc, this is good enough to get you started making carcass (dovetailed) pieces of furniture, like a shoe cubby or bookshelf.
>
> Thats around $200 for getting you started. Add a mortise chisel and mortise gauge and you can start mortise and tenon work. Invest in pipe clamps when you reach a glue up point.
SmartThings Version 3 Hub (I have the Version 2 Hub...you will have to look around for this one):
https://www.amazon.com/Samsung-SmartThings-Generation-GP-U999SJVLGDA-Automation/dp/B07FJGGWJL/ref=sr_1_1_sspa?ie=UTF8&qid=1540989501&sr=8-1-spons&keywords=smartthings+hub+2nd+generation&psc=1
GE Z-Wave Plus On/Off Light Switch:
https://www.amazon.com/GE-Repeater-Required-Works-SmartThings-14291/dp/B01M1AHC3R/ref=sr_1_3?ie=UTF8&qid=1540989582&sr=8-3&keywords=z-wave+switch
GE Z-Wave Plus Dimmer Switch:
https://www.amazon.com/GE-Repeater-Required-Works-SmartThings-14291/dp/B07361Y54Z/ref=sr_1_3?ie=UTF8&qid=1540989582&sr=8-3&keywords=z-wave%2Bswitch&th=1
GE Add On Switch (if you have a 3-way or 4-way switch):
https://www.amazon.com/GE-Bluetooth-Wireless-STANDALONE-12723/dp/B00RKJS8MQ/ref=sr_1_3?ie=UTF8&qid=1540989718&sr=8-3&keywords=z-wave+add+on+switch
ZigBee Motion Sensors:
https://www.amazon.com/gp/product/B07F8ZHBLS/ref=oh_aui_detailpage_o01_s00?ie=UTF8&psc=1
ZigBee Door Sensors:
https://www.amazon.com/gp/product/B07F956F3B/ref=oh_aui_detailpage_o01_s00?ie=UTF8&th=1
ZigBee Leak Sensors:
https://www.amazon.com/gp/product/B07F951JDP/ref=oh_aui_detailpage_o01_s00?ie=UTF8&th=1
ZigBee Outlet Plug (you will need to replicate your ZigBee mesh, I use to motion activate lamps, turn lamps on/off at sunset/sunrise, etc.):
https://www.amazon.com/gp/product/B07F96JB63/ref=oh_aui_detailpage_o01_s00?ie=UTF8&th=1
Z-Wave Thermostat:
https://www.amazon.com/gp/product/B005EJ7YO2/ref=oh_aui_search_detailpage?ie=UTF8&psc=1
ZigBee RGB Landscape RGB LED Strips:
https://www.amazon.com/gp/product/B00R1PB2ZY/ref=oh_aui_search_detailpage?ie=UTF8&psc=1
ZigBee RGB Lightbulbs:
https://www.amazon.com/gp/product/B073ZBYXKQ/ref=oh_aui_search_detailpage?ie=UTF8&psc=1
Z-Wave Deadbolt:
https://www.amazon.com/Kwikset-SmartCode-Electronic-SmartThings-featuring/dp/B004F1B24I/ref=sr_1_12?s=hi&ie=UTF8&qid=1540990126&sr=1-12&keywords=z-wave+lock
Z-Wave Garage Door Opener:
https://www.amazon.com/GoControl-Linear-GD00Z-4-Z-Wave-Controller/dp/B00M75TEIU/ref=sr_1_4?s=hi&ie=UTF8&qid=1540990160&sr=1-4&keywords=z-wave+garage+door+opener
Sonos One Speakers (Great music, and talking through SmartThings):
https://www.amazon.com/gp/product/B074XN1LH3/ref=oh_aui_search_detailpage?ie=UTF8&psc=1
Amazon Echo Show (for Voice Control...an Echo Dot will work just fine too):
https://www.amazon.com/All-new-Echo-Show-2nd-Gen/dp/B077SXWSRP/ref=sr_1_1?s=electronics&ie=UTF8&qid=1540990254&sr=1-1&keywords=echo+show
That's about all I can think of at the moment.
If you are going to do this, do it in stages. Z-Wave and ZigBee are mesh networks...meaning that the reliability of the network gets much better the more devices you have. Also, with these mesh networks:
I see so many people complaining about how the Z-Wave or ZigBee devices don't work, when they are relying on too many battery operated devices.
For Z-Wave devices, choose Z-Wave Plus over Z-Wave...it's the newest standard, and has much better range.
In the US, Z-Wave operates in the 900 MHz spectrum and ZigBee in the 2.4 GHz spectrum. Personally, I "prefer" Z-Wave devices as there is a lot of "junk" in the 2.4 GHz spectrum right now. However, the ZigBee devices are operating reliably as I have a strong mesh setup (with non-battery operated devices).
Two great application for the Leak Sensors:
Great applications for door open/close sensors:
Great Application for Motion Sensors
The motion sensors I linked above are the new ones...the magnetically mount. What's cool is that the magnet is in the sensor, and it's strong enough to attach the sensor to a dry wall screw (no need to mount the adapter bracket).
here are tips i can add to the pile; get an accurate remote thermostat or humidistat for your window A/C units.
http://www.amazon.com/Lux-Heating-Cooling-Programmable-Thermostat/dp/B000E7NYY8
thermostats built into most A/C units are cheap, inaccurate and cycle your unit on/off unnecessarily.
what i do is plug an A/C rated appliance extension cord into this thermostat, then my A/C into the extension cord so the distance between the A/C and the thermostat is now across the room. this separate thermostat helps keep your A/C unit from cycling too much by moderating the temperature where you actually are in the room.
when you plug your A/C into this thermostate, set the A/C thermostate on lowest and fan on always. that way when the remote thermostate goes on the A/C will always be on Cool+Fan no matter what the temperature is.
some new A/C units have temperature sensing thermostat built into the remote control that you keep accross the room from the A/C unit window, so look for this feature when you are buying a new window unit as it should help you be more comfortable at higher ambient temperatures without your A/C cycling too much;
http://www.amazon.com/gp/product/B0036WTWCQ (i do not own this A/C, i just link it as an example)
.
if you really want to save money on A/C, you could set your unit to go on/off based on HUMIDITY, not temperature. to do that you will need to buy (and apply the same way as the above a remote thermostat);
http://www.amazon.com/DAYTON-1UHG2-Dehumidifier-Control-Plug/dp/B001OLVNU0
so when the room Humidity gets uncomfortably above 50%, only then will you let the A/C kick on more for it's dehumidification ability, then it's cooling power. once the air is lower in humidity you should be fine with nothing more than a box fan to circulate air against your skin for cooling.
.
if you live in a dry heat zone, combine a fan with a evaporative wick humidifier. as the water evaporates it takes heat energy out of the fan blown air and moderately cools the room. the added humidity will also make you feel more comfortable in the dry air. this approach is commonly known as a desert cooler. evaporative wicks can last all season if you use a capful of bacteriostatic solution in the water. to clean a wick, simply allow it to run dry for a few hours.
http://www.amazon.com/821-000-Digital-Control-Evaporative-Humidifier/dp/B0000D8EJZ
Get something like this: https://www.amazon.com/gp/product/B002GKC2GW/ref=oh_aui_search_asin_title?ie=UTF8&psc=1 and wrap all your windows with it. It will cut down on the draftiness. In my bedroom it made it about 3-4 degrees warmer on average.
Start thinking about another heating source, stat. We have oil for our house heat but oil is also really expensive; if left on full time we'd spend about $450 easy per month. Instead we have it set for sporadic times to turn on during the day to save money, and mostly we run our pellet stove. A decent one can be had for about $1000 and it'll run less than half the cost of using oil heat. We bought a pallet of pellets from Lowe's for $330 and we're only about halfway through the supply for this winter (but that's mainly cuz our pellet stove only heats half the house; we're getting another one installed on the other side).
In terms of costliness, it goes electric > oil > pellets/wood (but imo wood is messier, you have to stack it, keep it seasoned, and the fire needs constant feeding). Most pellet stoves have an auger/feeder which keeps the fire stoked constantly so you don't need to worry about it -- downside of that is it uses electric so if your power goes out, so does your pellet stove (wood stoves will run regardless).
Lastly, but imo most importantly -- INSULATE YOUR HOUSE. Insulate it well. It's worth paying good money to tightly seal and insulate it with the correct R value (here's a good link that tells you how much you need based on where you live: https://www.energystar.gov/index.cfm?c=home_sealing.hm_improvement_insulation_table)
We bought a house last year and didn't know till we were in it that it was very poorly insulated. R15 where there should be at least 23, all over the house. Some walls with zero insulation. You'd be shocked at how common this is. Most contractors and home builders cut corners everywhere they can, and since you can't see insulation behind the walls, they don't bother doing it properly. We are re-doing pretty much every wall in this house, room by room, to correctly insulate and we already feel a difference.
Ok time to get off my soapbox, hope some of this helped.
I was running this LG ACoutside of a 5x5x8 tent and it kept it plenty cool enough. It comes with some in window mounts and a exhaust duct. I had to do some clever rigging on the front in to some flexible ducting and ran that inside the tent to a diffuser. To control the temperature I ran a power cord to this thing and put that inside the tent. I never really found the best place to put it I just kind of had it hanging in the middle. I then had to run the AC's power cord inside the tent to connect to the temperature controller. It all worked very well when I needed it ! I do wish the temp controller had a 'range' you could put on it. It seemed like the AC was off and on a lot so theres prolly a better way to do that! Anyways good luck! oh and here is some PICTURES of how I ducted the cold air
First off, i'm simply recommending them, the stuff you got works but theyre a bit over priced so i'm going to recommend a few cheaper stuff.
You can get away with a 4'' fan/filter/duct with the grow space tent you provided. heres a recommended one.
https://www.amazon.com/gp/product/B004Q2ER5C/ref=oh_aui_detailpage_o08_s01?ie=UTF8&psc=1
Your tent and led is fine
Ph up and ph down is fine as well, i recommend getting a digital ph and ppm meter combo on amazon, doesnt matter if theyre cheap, they'll work.
As for your timer, i highly recommend this https://www.amazon.com/gp/product/B0042I5FF6/ref=oh_aui_detailpage_o07_s00?ie=UTF8&psc=1
That timer will give you the ability to upgrade to two led if you want too in the future.
Don't forget hangers for the lights.
https://www.amazon.com/dp/B0098R0600/ref=twister_B00FL6MTJI?_encoding=UTF8&th=1
Everythign else seems fine.
I was planning on going with fox farm nutrients and I just ordered a ph tester last night. I tried googling it and found no luck, but how do I cheaply aerate the water?
I also looked up an inline fan, would you recommend a six inch in fan? I'm also unsure of the purpose and set up issues of an inline fan. Sorry for being so needy - I tend to get a bit overwhelmed with the details when I take a project like this up and unfortunately need a. It of hand holding. Thank you btw for your help.
Edit: this air filter I was looking at comes with an inline fan, but I think I'll need the 6 inch one since that's the size of my light exhaust.
I know you said you want a regular light bulb size, but I really recommend you get the ones that are a long tube instead. They're much stronger than any you can find in a bulb style and they're not that expensive, I've seen them at Wal-mart for under $20 for a 24" with all parts necessary.
But, If you really need a bulb just make sure you don't get the incandescent style, those are garbage. You literally have to place them right next to whatever you want to glow and they've always burnt out on me after a few days with minimal use. CFL (the twisty ones) bulbs are ok, but you'll need several and maybe some reflectors to really give them range. A blue CFL bulb will also cause fluorescent things to glow, and they're much brighter and have a longer range than the black light CFLs, but then everything will be blue. Personally, I think it looks pretty cool, but it might not serve your purposes. There's also LED blacklight bulbs now, I don't have much experience with those, though.
I see you have 4" ducting but trust me you're definitely going to want to have this, thankfully 6" ducting isn't to expensive. Also buy these, so much easier than duct tape and these for managing the ducting. This and this too for supporting the inline fan and filter, the inline fan at full power will vibrate very slightly and I feel that the bungee cords help minimize vibration. I usually use zip ties for managing cords but also as a precautionary measure, I have a few loosely secured zip ties on my inline fans just in case a bungee cord were to become unsecured which that has never happened thankfully but you can never be to safe.
I have been batting around the idea of building an EV myself for a long time. I have a DIY electric motorcycle which is a fun project and gets commuting use occasionally but is mostly for fun. The way things are now, though, I really doubt I would build my own EV for any reason other than fun. There are so many cheap, cheap used EVs on that market that just work without all the headaches of a DIY project (believe me- they will ALWAYS have headaches- you will never, ever have 100% reliability with a DIY EV). Used, degraded-battery Leaves or i-MIEVs would meet your needs and are available for less than $8000 in many places. There would be no AWD/4x4, but I suspect that either of those cars with good snow tires would perform well in the snow if the roads aren't covered with all 18 inches.
Would modifying an EV scratch your DIY itch? Perhaps adding some heating capacity to a Leaf or i-MIEV. I have thought it'd be a good project to add a propane heater to an EV, like this one, which I own. It provides instant heat, does not produce carbon monoxide, and is safe to use indoors. The tip sensor would be the one tricky bit- it shuts off if tipped even slightly and going around a corner or accelerating/decelerating could do it. I wouldn't prefer a diesel heater because of the smell and fumes, personally, whereas the propane one is odorless. I have the hose to hook mine up to a 20lb barbecue tank for use in the house during power outages. The other problem would be moisture buildup- the propane gets turned into CO2 and water- and that water will want to turn into condensation in your windows. Still worth trying, I think. Maybe I'll try it in my Prius sometime.
If you REALLY want to build your own snow-monster EV, I would start with whatever gas vehicle would be your choice for the conditions. Since your range requirements are so low, choosing a light, aerodynamic vehicle isn't as important. Don't go for a land-barge though- maybe an older Jeep Cherokee (XJ) in good condition, or a compact truck with 4x4. Compact pickups have been popular for EV conversions because of the easy mounting for the batteries. I'd be partial to an older vehicle with fewer computers, and probably 4x4 with a manual transfer case rather than anything AWD since I suspect that'd be more complicated. Again, I would caution you that unless you are extremely technically savvy, building your own EV is going to be a challenge of finding and fixing all the little problems that will, in all likelihood, take years to sort out and be a constant time-drain. I won't say it's impossible, but do want to advise you about the kind of commitment you'd be making for building and debugging.
Edit: Which Jeep
$20 for a stack of cut acrylic? You've got to do a much better job at explaining the value proposition here. Especially when the average person is not going to have any idea what it is you're selling.
Also - pictures, pictures, pictures. The average person will spend 5 seconds on your website tops, read 1 sentence (the heading), look at the pics, and leave. Your pictures look like they were taken in your backyard in the dark. Go buy:
Also, work on your shopify website. Spend a few hours - its not hard to modify an existing theme to look good. You need some color and a more clean layout. The site does not look professional. Why would a customer trust you if your store front looks amateur? They'll leave before they even look at your products.
If you believe in this niche, great. Make the website slick, get good pictures, think about why YOU would purchase these and write up some good copy, and then go drum up some business by participating in a related forum / subreddit / listserv / whatever. Is this actually a problem people need solving? You'll find out.
P.S. I know those blacklight photos look cool and all, but do your customers actually care? Are you going to use this product under blacklight? If not, you're probably turning off anyone older than highschool age.
P.P.S. Stop referring to yourself as cardistry-cards in the copy. The hyphen isn't doing you any favors. Shorten to CC or Cardistry if you're even going to do the 3rd person thing.
Okay 4 plants with good genetics can yield just as much weed as 6 plants with lesser genetics.
So here is what I recommend.
Tent: 4x4 minimum with 5x5 preferred because it gives you room to walk in the tent which saves your back and also gives you room for extra equipment inside the tent, buy Vivosun they are good quality and have excellent zippers.
Seeds/breeders: Dinafem and Dutch Passion are excellent breeders you can buy both from Dinafem.
https://www.dinafem.org/en/
Grow Light: Depending on how large of a yield you want you have several options.
500 Watt Samsung LED.
https://meijiuled.en.alibaba.com/product/62001333924-807906070/Fomex_hlg_550v2_Samsung_lm301b_480w_288_full_spectrum_dimmer_function.html?spm=a2700.icbuShop.41413.8.24d4185dhzMSXW
320 watt Samsung LED.
If you want more than 500 watts in a 4x4 or 5x5 you can buy more than one of these lights and hang them side by side.
https://meijiuled.en.alibaba.com/product/60803100408-807313817/2018_new_products_quantum_board_800_V2_samsung_lm301b_top_bin_full_spectrum_led_grow_light_with_320W_HLG_driver.html?spm=a2700.icbuShop.41413.72.39352189gT0xyF
Ventilation:
Exhaust fan.
https://www.amazon.com/gp/product/B074XBXFPD?pf_rd_p=c2945051-950f-485c-b4df-15aac5223b10&pf_rd_r=MZ90W6M80NJB8KY91153
Carbon Filter.
https://www.amazon.com/gp/product/B01731MLFK/ref=ppx_yo_dt_b_asin_title_o00__o00_s01?ie=UTF8&psc=1
Ducting.
https://www.amazon.com/dp/B0791V19H7/?coliid=IOTPSB8SN2VX3&colid=2JRQ421G587OR&psc=0&ref_=lv_ov_lig_dp_it
Fertilizer/supplements:
https://www.advancednutrients.com/
Misc stuff:
Hygrometer.
https://www.amazon.com/dp/B01HDW58GS/?coliid=I3I7T3XZ9CIWY3&colid=2JRQ421G587OR&psc=0&ref_=lv_ov_lig_dp_it
Rope Hangers.
https://www.amazon.com/dp/B07BWQB49J/?coliid=I3UY93HADIWB52&colid=2JRQ421G587OR&psc=0&ref_=lv_ov_lig_dp_it
Jewelers Loupe.
https://www.amazon.com/dp/B077XWJGN4/?coliid=I2Z2SKYZ5WH6JZ&colid=2JRQ421G587OR&psc=0&ref_=lv_ov_lig_dp_it
Trimming Scissors.
https://www.amazon.com/dp/B00114TK46/?coliid=I1DY00ZE56UXO4&colid=2JRQ421G587OR&psc=0&ref_=lv_ov_lig_dp_it
Felt Pots.
https://www.amazon.com/dp/B00TF9E6XE/?coliid=I21TH7VWPFRA0E&colid=2JRQ421G587OR&psc=0&ref_=lv_ov_lig_dp_it
TDS Meter.
https://www.amazon.com/dp/B01N2O1Z5B/?coliid=I1SGIRSI7FWY4V&colid=2JRQ421G587OR&psc=0&ref_=lv_ov_lig_dp_it
pH Meter.
https://www.amazon.com/dp/B07M87S9F4/?coliid=I2H2GCFLMBVHM4&colid=2JRQ421G587OR&psc=0&ref_=lv_ov_lig_dp_it
Is there anything else I can help you with?
It's a hot mess at the moment and I don't have a good photo, but here are the pieces:
I put the Amazon links for reference, but shop around. Some of this stuff is much cheaper at Home Depot or other online stores.
I use the foil tape to connect a "boot" directly to the back of the case my mining rig is in. Then connect the flex duct to the boot. Connect the other end to the inline fan. Connect a second piece of flex to the output of the fan and hang the end out of the window.
I've found pulling the heat out works much better than blowing cold air in.
If you have an open mining rig, I've seen people put up small tents like this one: https://www.amazon.com/Valuebox-2x2x4-Small-Indoor-Hydroponics/dp/B01GCHXUVU/ and then just connect the duct to it. That seems to work okay too.
Get this fan. Proper ventilation is super important for many things.
Seeing as you want LED, Mars Hydro is a good option for the price. For my 3x3x7 space I have a 900 watt LED, a bit strong but its working great.
Im always going to recommend more natural techniques, so if you are interested give this a thorough read
Depends on how much you want to spend but a simple and easy route is a electric heater with a fan hooked to a thermostats like this
https://www.amazon.com/Lux-Automatic-Programmable-Thermostat-Compatible/dp/B000E7NYY8
Check all the panels to see how well they are sealed and consider heat mates for under the pots to keep the roots from getting to cold. You can also put down normal mats to insulate the cold from the brick floor.
https://www.amazon.com/Seedling-Hydroponic-Waterproof-Germination-Propagation/dp/B073RC58JN/ref=asc_df_B073RC58JN/?tag=hyprod-20&linkCode=df0&hvadid=216531753338&hvpos=1o2&hvnetw=g&hvrand=5024264790334445552&hvpone=&hvptwo=&hvqmt=&hvdev=m&hvdvcmdl=&hvlocint=&hvlocphy=1014966&hvtargid=pla-350506522936&psc=1
You might want to add a small second fan just to make sure you have a good circulation of air moving and don’t get any cold or hot spots.
I didn't really read through the materials, just looked at the pics and the title (sub $40). $10 sounds like a much more reasonable price.
There's all kinds of sub-$30 duct booster fans out there on Amazon and elsewhere, but I honestly can't recommend anything like that.
(I found this one with a quick search, you'd need a reducer for the filter though. I'm sure there's a 4 inch model somewhere. http://www.amazon.com/LEDwholesalers-GYO2402-6-Inch-Hydroponic-Booster/dp/B003YFADW8/ref=pd_sim_indust_1 )
What people usually don't take into account is when you're pulling through a scrubber, you have to consider how static pressure affects the CFM rating. Increasing the static pressure a fan pulls against (ie, by blocking the intake, or in this case adding a scrubber) decreases the fan's CFM. This isn't linear across all types of fans.
A computer fan or cheap duct booster fan may be rated for 150+cfm, but as soon as you add a tiny bit of pressure to it, that drops close to 0cfm. With a centrifugal inline fan, it's built to overcome some of this pressure, and you can add much more drag to it without compromising your cfm.
If a cheap fan is good enough to cool your setup, then that's good, but don't expect to pull anywhere near the rated cfm. If you're going to use HID lighting, you should strongly consider just spending the money on a good fan/filter setup as well.
/fanrant
I'd recommend going on Amazon and sorting by best reviews. You really can't go wrong that way. Once you find two or three models you like, check out if those models are sold at walmart, costco, sams club, etc. first. If they're cheaper there, get them (although I seriously think Amazon's customer service makes even a slightly more expensive purchase worth it).
Although, like the others suggested, maybe go with something that's not electric? It's slightly less convenient, but a better deal (and, hey! That's sorta what we're here for, right?) but here's the highest rated space heater on Amazon currently. It's about the price of a nice electric heater, but possibly more cost effective.
link
Omniheat technology from Columbia Sportswear. Highly recommend. Get the jacket, and the snow shoes. Lightweight but super warm because it reflects your own body heat back at you.
https://www.columbia.com/
​
Plastic on the windows is a great energy saver
https://www.amazon.com/3M-Indoor-Window-Insulator-5-Window/dp/B00002NCJI/ref=sr_1_2?ie=UTF8&qid=1538434915&sr=8-2&keywords=plastic+window+covering+for+winter
​
At least 2 ice scraper/snow brush combo tools. One in the car and one in your home
An electric throw blanket for the couch
Mug warmer for tea/coffee at your desk or also home
​
​
​
Tent: TopoGrow 2-in-1 Indoor Grow Tent 108"X48"X80"
Lights: Three of these: MARS HYDRO 960w, apparently they just came out with a 2nd version of these at 900w, so here's that link
Soil:Fox Farm FX14054 Happy Frog Potting Soil
Pots:Fabric Pots
Humidifier:3.5G humidifier
Fan: basic large oscilating fan
Exhaust:AC Infinity CLOUDLINE T6
CO2 Bag: Exhale 365
Fertilizers: Technaflora Recipe for Success Starter Kit
Timers: Basic ones
Basil Seeds: because basil is fucking delicious
let me know if you all see anything extra i need or anything you think i could improve on!
Thanks again for the help!
I just switched to 12/12 from 24/0, started the flowering formula for the nutrients, and switched on the "bloom" light on the lights.
> We would be improving the value of the house and improve the insulation with good windows
How much are you expecting to save per year in power cost and how much would it increase the home value? I don't think it's wise to sink $10-15k unless you know exactly when it will pay itself off.
You can address the efficiency issue in the short term with these while you save up for replacement windows.
The thought process for reloading is that you are able to shoot more for the same price. While that may be true, I save money by limiting the number of rounds I take to the range so I can always have a supply at the ready for what ever emergencies may arise. If you have the mindset of "if I have it, I am going to shoot it now", cost savings is not a reason to reload.
With that said, the list above is very thorough. There are a couple of things you can look at and first, is the bench. This is my bench. I used the 2X4 Basics for my bench and love it. If you live in a wet environment it helps by having the plastic on the floor and not wood. This also makes it easier to clean around your bench. Secondly, if you are planning to shoot a lot at one time and don't want to space your cleaning out, you might want to look at a larger tumbler (My opinion! I don't have anything against my purchase of the HF tumbler except its capacity). If you and your friends are mechanically inclined, you can build one.
Lastly, you wanted to know why you should be reloading. This is tough to answer because it is different for everyone. I reload for these reasons (not in any particular order):
Everyone has their own reason to reload. They may not 100% agree with mine, but that's what makes it a community.
Also, don't forget to use the 20% off coupons at harbor freight. I bought my digital calipers there for $12. They also have an ultrasonic cleaner that works well.
Sous Vide EQUIPMENT is WAY overrated. It has finally started to come down in price, but honestly, you can sous vide with a $30 temperature controller and a thrift store slow cooker (which, honestly, most people already have). I get excellent results with that exact setup.
I've seen people get great results with a Styrofoam ice chest, a thermometer, and tea kettle on the stove. They were able to maintain the temp within a few degrees by just checking once an hour.
Depending on the outdoor temperature where you live, you may want to reverse that airflow direction, so you're venting outside. You will need the intake airflow to be temp controlled, around 70-ish F. If you get extreme cold or heat where you live, drawing your intake from outside will give you trouble. However, with your budget, you can definitely afford a name brand carbon filter (Phresh is a good one), so you won't have to worry about smell.
There are a few ways to limit the fan noise. Some combination of: (1) a larger 6" fan, turned down with a fan speed controller, (2) a "silenced" fan, (3) insulated ducting, and/or (4) building a box around the fan to muffle the noise.
Also, you don't have to limit yourself to a dwarf autoflower with a 30x23" space. You can grow a pretty good size photoperiod plant in there, or maybe two smaller ones.
This is a pretty good light setup for that space, if you aren't scared of doing a little minor assembly (it's really easy). It can be done a little cheaper, but that's a pretty good, complete package (discount code: growmau5). Get the driver ending in 2100B and the poke-in 3500K SE chips, and add THIS dimmer. Assembly instructions are linked at the bottom of that page.
OK so my favorite accessory is, by far, the garage door opener and sensor system. It closes my door automatically at night if I forget and leave it open, and sends me notifications when it's left open during the day. Plus as I have the lights controlled, it turns on my main garage lights when I come home at night. https://www.amazon.com/GoControl-Linear-GD00Z-4-Z-Wave-Controller/dp/B00M75TEIU
Secondly, I know it's not a switch but I also love the Schlage connect lock. This was the first "smart" device I ever got, well before I had Wink. It's amazing as with remote start cars, and this, I now never have to touch my keys, and it works great for letting people in with temporary codes when you're on vacation. Plus when I go for a run I don't have to carry my keys. It integrates fantastically with Wink letting you set codes, lock door, change settings, etc. I actually only bought the Wink hub because of it since I wanted an easier way to program/control it (well, that and the fact that when Quirky went under Meijer was selling the hub for $5 and the controlled power strips for $10. No lie.) https://www.amazon.com/Schlage-Connect-BE469NX-Touchscreen-Deadbolt/dp/B00AGK9KOG/ref=sr_1_2?s=hardware&ie=UTF8&qid=1479481619&sr=1-2&keywords=schlage+keyless+lock
As for switches, I tend to prefer the Leviton ones as they are the cleanest looking, don't have obnoxious lights (like the GE ones) and are reasonably priced. I only have one Caseta switch, and while it works fine, I just don't know that I care for the style. (On a side note, the Caseta remotes can work for any Wink device if you set up shortcuts for the various buttons). The annoying thing with the GE switches is that you have to push up to turn it on and down to turn it off. While I know that sounds like a silly complaint since physical switches work that way, it's something you have to think about since it doesn't stay up or down, and instead is always in the middle. I have the same complaint with the separate buttons on the Caseta switches. This is another reason why I like the Leviton ones. Only one button which simply toggles the state.
Finally, all the Z-Wave switches work independently of the hub and will ALWAYS respond to your physical commands immediately, regardless of hub or no hub. They are always a physical switch first and remote second.
My comment was really targeted toward OpenHAB. If you're running Wink, I think you'd be better off getting one of these GoControl/Linear GD00Z-4 Z-Wave Garage Door Opener. Amazon reviews are pretty solid and Home Depot was selling them for use with Wink for a while. I believe it comes with a tilt sensor, which is probably easier to use than boogering a regular door sensor on like I did. Probably a solid bet. I would have bought one of these if OpenHAB supported the z-wave barrier class.
As far as the MIMOLite... I can't tell you for sure as I run OpenHAB, but it looks like it should work according to these links: post in reddit /r/homeautomation and Amazon review
I'm using a Go Control / Nortek Controls / Linear WADWAZ-1 to sense my garage door. I snagged one of the WNK01-21KIT kits from Home Depot on sale.
I've also got a Honeywell Ademco 958 overhead door contact on my other door that should work as the door contact listed in fortrezz's diagram linked in my previous comment, if you wanted to sort of wire it.
For Wink, by the time you buy both the mimolite and the door contact (wired or z-wave) you might as well just buy the go controls device and get the benefit of secured z-wave barrier class.
These carbon filters are used mostly in commercial spaces. In the United States they are commonly found in marijuana grow houses to move air outside. A carbon filter removes a high percentage of odors to reduce the risk of detection.
I like them in my home because I'm not a fan of buying other scented products that "mask" smells. When I walk into my home and my carbon filter is on it smells clean. I'm not sure if that clean smell is due to something from the carbon? Either way it's a clean, crisp smell that many people comment on and cannot be replicated by chemicals.
Cons: inline fans are loud and the system is a little bulky. Noise can be reduced by adding ducting to the end or buying insulated fans as referenced below.
Pros: I breath amazing air. You can cook/smoke inside your home and it's still going to smell amazing!
Filter: https://www.amazon.com/gp/aw/d/B008NYF8S4/ref=ya_aw_od_pi?ie=UTF8&psc=1
Quiet fan: https://www.amazon.com/gp/aw/d/B00EIRU2YU/ref=ya_aw_od_pi?ie=UTF8&psc=1
Indeed. However, if you've ever lived in a leaky apartment with electric heat, that can result in 3 very high electric bills.
Anyways, in my experience, Austin Energy doesn't help with apartments. Talk to your landlord, they may be able to help.
If you must DIY, which is pretty likely, the film can be obtained via Amazon for notably less than local purchase.
You can also install polyisocyanurate insulation on single-pane windows to further prevent heat transfer. Cut to press-fit into the window frame, then use duck tape to form an air-tight seal around the frame. It's pretty easy to work with, a boxcutter will make clean cuts through it. This helps a lot with through-the-glass heat transfer, but not with leaky window frames. You'll want to use paper to line the insulation (on the outside) to avoid complaints from the landlord, since you want to face the foil outwards for best results.
If you're like me and can't stand the cold, and like your apartment toasty in the winter, look for a unit with gas heat on your next move. Electric heat is way too expensive... Gas is more effective and significantly less expensive.
I can't imagine an oil lamp being safer than propane, not to mention the minimal heat. Oh yeah, and they don't burn as well, so you'll be breathing in a lot nastier air.
Honestly your best solution is a Mr. Heater. It's what I use in my van. It's super efficient, and super warm. No power necessary, just propane. You can use those little green 1 pound propane tanks, or hook it up to a 20 pound tank (that's what I do).
https://www.amazon.com/Mr-Heater-F232000-Indoor-Safe-Portable/dp/B002G51BZU
I hooked one of these up to an in wall AC unit in a townhome I rented and when I moved out 3 years later the AC unit was still fine despite the thousands of abrupt power cuts. I say do it. Even if it makes the compressor go out after 5 years instead of 10, you’ll have enjoyed those 5 years of your life in more comfort, and you can then buy an AC unit with smarts built in to replace it. https://www.amazon.com/Lux-Automatic-Programmable-Thermostat-Compatible/dp/B000E7NYY8/ref=mp_s_a_1_3?keywords=thermostat+plug&qid=1564867841&s=gateway&sr=8-3
edit: I also have used smart switches and those work fine as well, but I found that AC units can be too much for some smart switches. My Wemo Insight handled every AC unit I tried fine, but my Eve smart plug would just shut off when my more powerful unit would turn on full blast.
This is kind of ghetto, but i use something like this. I run an extension cable into my fridge, then plug that into the extension cord (which is inside the fridge), then plug the fridge into that thing. Once the temp goes over what i set, it turns on the fridge until the temp is acceptible - so if you're looking to add a heating aspect to it i'd recommend another avenue. There are love controllers, PIDs, and some greenhouse stores have other types of temp controllers like the style i use but have an outlet for heat and an outlet for cooling.
It looks like a monster but it's functional... The black cable is the fridge's plug, which is plugged into the controller, which is plugged into the blue extension cord.
I used two kits of this on my dark pink tub about a year ago and it doesn't show any wear yet. http://www.amazon.com/Rust-Oleum-7860519-Refinishing-2-Part-White/dp/B000PTSBKW/ref=sr_1_fkmr0_1?ie=UTF8&qid=1426613305&sr=8-1-fkmr0&keywords=rustoleum+bath+refinder
I realize it may begin to wear eventually - but we will probably sell the house later this year. If I knew I was going to be in a house for more than ten years, I'd go for professional resurfacing - but for my purposes the DIY worked great. Just be sure to ventilate and follow the directions to a T. Read the amazon reviews and understand the process before you jump in.
Good luck!
This is probably out of your price range - http://www.amazon.com/Mr-Heater-F215100-3800-BTU-Indoor-Safe/dp/B001CFRF7I/ref=sr_1_4?ie=UTF8&qid=1416249690&sr=8-4&keywords=indoor+heater+propane - ($70.57) but I have one of these and have used it for several power outages during the winter. Its safe to use inside for some scientific reason. The material that heats up looks like a super porous lava rock, how that makes it safe indoors is beyond me, but I'm not dead yet, so it must be working. It puts out quite a bit of heat, and in your car you wouldn't need to run it too long I imagine.
If your house has conditioned air, you might be able to draw off of that to cool your cabinet in the attic. A small cabinet can be cooled by a 4" line and a real exhaust fan. Install a bathroom fan style ceiling grate in an out of the way place (spare bedroom closet?) and no one will know what's up there. Just, uhh, don't pull from the bathroom... Not only would you suck bathroom smells into the tent, but if your bathroom fan is powerful enough and the door is shut, it could conceivably pull air from the tent into the bathroom 😬
Look for a fan that can do in the neighbourhood of 200cfm, preferably with a speed controller. I have this Vivosun one: https://www.amazon.ca/dp/B01DXYMGOM but if you're not on a budget, this one would be excellent: https://www.amazon.ca/gp/aw/d/B06ZXWN3BG
Avoid the super cheap "booster" fans, they're only useful as an add-on in the middle of a long run.
I'm completely new to woodworking, too. I did a workbench for my first project.
I bought this cheap B&D Workmate, and built this simple workbench. Got the cheap lumber from Home Depot. The solid core door that serves as the workbench surface is heavy, probably >50lbs.
All I used was a circular saw, drill and a couple clamps. I did it in a day and a half. I know some could do it in like an hour or two, but I literally don't/didn't know how to do anything more than hang a picture on the wall before I built this bench. I was actually very surprised at how easy it was and how well it came together. It actually looks like a real table/workbench! LOL
You're saving some dollars, but your method isn't as efficient as 3M window plastic. I've used that stuff before and it's great. I'd rather spend a few extra bucks to get better heat retention, plus ya know, I enjoy being able to see out my windows and have that warm natural light come in. Since you aren't getting as much sunlight, how much extra are you using electric lights? In my opinion the 3M kit is the more frugal option.
You again! Thanks for your help :)
I've also read that booster fans aren't great if carbon filters are involved and I'd rather have too much power than too little. I'm legally only allowed to grow 4 plants so I don't think my setup will ever expand beyond a 2'x4' tent, 3 plants at a time. Your 10x12 room is much larger than my small tent, so perhaps a booster is sufficient even with a filter?
​
It sounds like a 6" inch inline fan is almost overkill since I'll likely be running it on low full-time. I also use my grow-room as a small office so quiet is preferred.
​
I"m wondering if a 4" inline duct fan with a carbon filter is the way to go, or do you still recommend a 6" inline with the carbon filter, at low setting? I'm looking at this fan on Amazon. The total cost is $193CAD including filter/ducting. There's only $10 difference between 4" and 6" so 6" is likely better.
​
​
That house will definitely give you some character! You will be a tough skinned, fast walking, don't talk to anyone you don't know New Englander in no time!
But seriously though, New England is one of the oldest European occupied locations in North America, we have some old friggin' houses and apartments here. I'm in Rhode Island, although I'm in Boston constantly, but same deal applies. Here are some pro-tips for surviving winter in really old houses.
First, get yourself some shrink wrap plastic for the windows, it's in your local hardware store and even Amazon has some. Don't put this up until at least mid-October though, we can get random 70-80F degree days through Oct. 31, doesn't happen constantly, but it happens. You also want to get some under the door draft stoppers. You can get them for all outside doors or just the door to your bedroom, either way they help.
Next, get yourself multiple layers of blankets for the bed. I do this so I can pull them off/layer them up when late fall/early winter nights spike 55 degrees one night and 25 degrees the next. So it's sheets first, then a thin blanket, then a full quilt and lastly, a thick blanket that sits at the foot of your bed that can be pulled up when freezing at night (or left to just warm your feet). I have a fake fur one that is really thick for the last layer of defense.
Last, dress yourself in warmer clothes! As you are Canadian, I'm sure you can manage this, even if you are from a milder city. But dressing warmly in your own house is the most critical. I have ultra winter lounge pants, these in fact, which are very expensive, but you don't need those in particularly, you can just find furry pants like those. Wear those and thick wool socks when in your house or even sleeping (if it's that cold, I can't sleep in pants personally). I will wear these with a fake fur lined hoodie when home, so if it's really freezing cold you can pull the hood up.
That should help some! Welcome to New England and go Blue Jays...next year we'll get 'em (ugh). I'm a native New Englander but lifelong Jays fan (long story).
> i basically just need a light and thats it? if i want to grow autoflower only
oh boi... alright here we go.
youll need duct fans for both ventilation and heat dissipation, especially if you go with HPS/MH lights 600/1000watts will require reflectors with ducting so you can connect to it. This will need to exhaust out of your tent. Then you will need a intake fan coming preferably from outside. Youll most likely also need a Carbon filter attached in series to your exhaust fan. Your light will have a ballast as well, which creates a good amount of heat so plan for that to be located outside your tent. Youll also need smaller fans in the corners so you can keep a good air circulation going (hurricane fans are great). Also consider using T5 lights when starting your seeds off as your higher wattage lights are not good for seedlings. Also get a few supplies like gorilla tape and duct clamps and anything else you might need to secure everything together.
When it comes to growing, even if you are only doing autos youll need smart pots, fertilizer, promix HP, perlite plus both vegging and flowering nutrients. Have access to PH up and down solution, and also get a Ph Pen + PPM meter (TDS).
Ive only linked amazon, there are probably other local options for you.
This is the link for the fan im using so you can see specifics easier : https://www.amazon.com/dp/B074XBXFPD/ref=cm_sw_r_other_apa_i_clzWDbV60BEY3
Im in a vivosun grow box.
https://www.amazon.com/dp/B07HQMX3S1/ref=cm_sw_r_other_apa_i_fpzWDbMGRGRDA
using a 1000 watt led light
https://www.amazon.com/dp/B07MZMHP8P/ref=cm_sw_r_other_apa_i_AqzWDbBENDE67
As well i have a small humidifier in there for obvious reasoning..lol
Hope i helped as much as you need.
Fair warning though the light i have is i believe overpowered for the size of my tent. Great luck growing frient..
Let me know if i can help more..
This is very nicely done. I just wanted to mention though for anyone who might think this is beyond their ability, I've had good results with an analog crockpot and the following controller that the crockpot plugs into. It's a smaller chamber and there is no active circulation, but it gets the job done for some pretty awesome steaks. Still if able though, I would make one like this guys.
Sorry, I don't know how to link other than the full URL on mobile. https://www.amazon.com/dp/B00V4TJR00/ref=cm_sw_r_other_awd_udiJwb9S6EN5W
Yes! This was a total budget saver! Those photobooth rentals are crazy expensive. We used a simple PVC pipe frame like this one. Now, thankfully we were very lucky to have an amateur photographer friend with a tripod (that we put our iPad mini on) and 4 clip lights like these. We used thick cheap curtains around 3.5/4 sides. We then used a fun (but also cheap!) red ruffle curtain for the backdrop. I DIYed the floating hearts using construction paper, a heart-shaped hole punch (thank you 40% coupon at Michael's), and fishing line. Here's a good tutorial. We also put up one line of string lights to give it a fun twinkle. Lots of plugs, so be sure you have an extension cord! A friend had some photobooth props that we could borrow, but really, you can find those for super cheap if you need to. In terms of actually taking the pictures, we used the timer effect on the iPad camera to delay the shot a few seconds, and then I just posted all the pics to facebook later. Our guests had a lot of fun with it!
All I can tell you is - follow the universal truth - You get what you pay for. Of course there are a few exceptions, I've found great quality products for cheap, but those gems are far and few between right?
That being said, you are on the right track. After reading reviews I ended up going with this filter and then I got this fan and so far they've been great. The speed controller is a nice touch. When it comes to carbon filters, they are mostly all the same in terms of design, so if you go with a cheaper brand to save 10 bucks I really don't think you'll be hurting yourself or your set up, but things like fans, mechanical devices, i wouldn't cheap out on.
I've been browsing the grow light thread and thinking about getting more succulents before winter, and would like some input on which setup seems better or if you would recommend something else entirely. This adjustable growlight which has a gooseneck and clip (also comes with option for timer) or this bulb and this clamp light? I currently don't have many succulents at all (which obviously can change) so I don't need the light to cover a huge area. Should I set up a specific area to do this with shelving etc (please recommend if so) or is on top of a cedar chest on trays fine?
I'm pretty new to this and appreciate any advice I can get here.
As far as light bulbs, there are lots of places to start. If you want to replace bulbs themselves, look at LIFX or Hue. They both offer either color or white bulbs and an API that lets you dim/adjust color/etc via your phone.
Alternatively you can replace your light switches with ZWave switches (about $40ea) that you can hook to a ZWave controller (ZWave is a wireless protocol that a lot of HA devices use. Zigbee is another).
As far as a ZWave controller, I still personally like SmartThings ... although there are other options. OpenHAB+Aeon ZWave USB stick is more of a 'roll your own' setup. Wink, Abode, and Vera are other options.
As for your garage, once you have SmartThings or another option listed above, this will do the rest of the work for you:
http://www.amazon.com/GoControl-Linear-GD00Z-4-Z-Wave-Controller/dp/B00M75TEIU
For #3, Sonos is the most expensive but best option.
For #5, You can go Nest, Ecobee, or a number of the great ZWave thermostats if you have a Zwave controller.
Exactly my plan. Found a good and quite fan designed for AV racks and a special vent designed for windows:
The vent: https://www.amazon.com/dp/B01M17V4CO/ref=cm_sw_r_cp_api_i_-39QCb1FACNR0
The fan: https://www.amazon.com/dp/B06ZXWN3BG/ref=cm_sw_r_cp_api_i_c0aRCb9HB2TGH
And a standard dryer hose and a custom “box” to fit to the back of the rack and have a 4” hole in the top (to benefit hot air rising) that goes to the fan then the vent.
I already had a few pieces around, but here is my estimate:
I actually had the wine cooler from the early 2000's. I worked backroom at Target, and it went on clearance, but they didn't move it to the floor. It kept dropping in price as it was on clearance longer and longer until it was $20. Grabbed it, and have used it as a minifridge since.
A quick look at craigslist looks like you can pick on like mine up for 150-200. The glass front is nice. If you just want a minifride, looks like they're 50-100.
It comes in a kit and it's not expensive.
Along the same lines as this, get something to block the bottom of the doors leading outside, there can be a pretty decent draft underneath that can be eliminated. Ceiling fans too, if you've got them, make sure they are reversed.
Edit: Here's a guide to how they should rotate..
>During winter heating, to help move warm air that is trapped on the ceiling, blades should turn 'forward' in a clockwise motion. This movement will push up the air and pull the warm trapped air down the sides of the room improving heat distribution.
>During hot summer weather, to help produce a comfortable breeze or 'windchill' that cools the skin, blades should rotate in a 'reverse' counter-clockwise motion. The air movement has the same comfortable effect as when you fan yourself with a magazine to get relief from hot, stifling air.
I had the same problem in an older house -- heat rises to the second floor AND it's farther away from the central AC. What you really need is a duct boost fan, which will double the air being pumped to the second floor. You can buy them at any home store for under $30. They can be activated by a sail switch (which senses the flow of air and turns on the fan to boost the flow) or a solenoid that turns it on when the furnace fan fires up.
You can install a duct boost fan in a half hour. Trust me, it's worth it.
https://www.amazon.com/VenTech-VT-DF-6-DF6-Duct/dp/B005KMTYFK/ref=sr_1_1?ie=UTF8&qid=1466433488&sr=8-1&keywords=duct+booster
For 6 small pots, maybe a clamp light set up would work for you. Something like this, with this kind of bulb. The key is to get about 2,000 lumens per sqft if you want really tight growth and sunstress colors, though you can certainly go lower.
If you think you'll need more room, then I highly recommend a shelf set up. This is mine, it's just an ikea stand with a bunch of shop lights attached to each shelf.
The truth is you don't need to buy lights specifically advertised as "grow lights" or "full spectrum" lights. Just check that it's around 5,000k color temperature, and puts out about 2,000 lumens. This info should be on the packaging. Good luck!!
Thanks for this. In their FAQ, they say that the hardware already has everything for HomeKit compatibility, but they're just working on the software, which will get pushed out as an update in Q1 2017.
I was hoping for something more in the $40 price range. Just a simple thermometer with IFTTT or HomeKit support. But at least now I know there are options out there for $180. The next closest I found was Mother which is $300. For that price, I might as well get a better a/c unit with a built-in thermostat.
I also discovered this outlet thermostat for only $37. It doesn't connect to HomeKit or IFTTT but it does do exactly what I was wanting. The only problem is that the placement of my outlet is not the ideal place for a temperature probe, because it's buried under my bed where there's not much air flow. If only this had an extension for the temperature probe, so I could place it on the other side of the room, it could work great.
I got ahold of an old fridge on the cheap to set my fermenter in, and bought this temp controller. The idea is, you stuck the thermometer in your fridge, and plug the fridge into the device. and the device turns on when it’s too cool, off when it’s too hot. Keeps my fridge at pretty steady temps, and can be adjusted to fit some pretty wide ranges.
You don’t need to buy this one; there are plenty like it. But it’s cheap, easy, and effective.
https://www.amazon.com/WILLHI-WH1436A-Temperature-Controller-Thermostat/dp/B00V4TJR00/ref=mp_s_a_1_9?keywords=fridge+temperature+controller&qid=1563569773&s=gateway&sprefix=fridge+tem&sr=8-9
I moved up from the south 2 years ago and had the same questions for /r/boston
In typical fashion.......they did the same thing they are doing to you. Laughing, and being dicks instead of trying to help.
My place was old, the heaters were not working, and their were leaking windows everywhere. I bought this
Caulking Cord
and
window kit
and
Heater
I very legally could have gone to the housing authority and reported my landlord for the lack of adequate heating (and broken radiators) but decided that this stuff worked just fine. First winter I couldn't get the house above 62, and some rooms I am sure were much colder. The electric and gas bill was insane.
Second year we just don't even bother using the radiators at all, we use the space heater, a heating blanket, and sealed all the windows and doors (balcony) with that caulk. The house was still cold, but we were warm. This seems to be a common tactic up here, heat yourself not the house.
I also looked into buying one of these bed heater, but I don't want to sweat in the middle of the night and the bedroom is pretty easy to heat with that space heater.
Good luck. Also, most people up here can be dicks when it comes to heating/cold complaints. Just sit back and laugh at what these people call a severe thunderstorm, most of them would shit their pants if they ever experienced a regular summer storm in the south.
/r/PlantedTank is a great resource.
And as long as the bowl is big enough to allow for enough substrate, you can dose fertilizers, CO2, and have lights just like a tank, there's really not much difference.
My go-to heater is the Hydor Theo, this is the heater I'm currently using in all my tanks including my bowl; I love it because it's pretty compact plus it is adjustable, so you can turn it higher or lower to suit whatever fish you're keeping or turn the heat up to treat certain illnesses.
For filters, basically the only thing that's probably out of the question are HOB filters since they can't fit on the rounded edge of the bowl, otherwise any small filter will do. A lot of people use sponge filters, which are great for a small tank. I currently use this corner filter which I hook up to an air pump and filled with my own filter media (ceramic media, Seachem Purigen, and filter floss).
For lighting, on my bowl I just have a clamp light with these 6500K 1600 Lumens CFL bulbs screwed in, which are the same bulbs I use for growing my terrestrial plants. Clamp the lamp to a shelf or some other surface near the bowl, not the bowl itself.
Sorry for being so late, but if you have Z-Wave in your automation already, then Z-Wave garage door openers are under $100, like this one: https://www.amazon.com/GoControl-Linear-GD00Z-4-Z-Wave-Controller/dp/B00M75TEIU/ref=sr_1_1?ie=UTF8&qid=1491329589&sr=8-1&keywords=ZWave+garage+door+opener. Is the one I have, it has sensors that tell you if it is open or closed, and then you can use your phone (via z-wave controller) to close/open it. Works well for me. With my z-wave controller (Vera), I have it setup to notify me if I am not home and the door is opened, or left open.
There is also various WiFi options, which also allow you to control it, like this one: https://www.amazon.com/Chamberlain-MYQ-G0201-MyQ-Garage-Controls-Smartphone/dp/B00EAD65UW/ref=sr_1_1?ie=UTF8&qid=1491329677&sr=8-1&keywords=wifi+garage+door+opener. No personal experience with those, but if they support your opener, are probably a good option.
If DIY is more your thing, a Arduino and a simple switch on the track somewhere would work for notifying if it is open.
No problem! Do you have the space for 72 inches of height vs 60? Also consider a 3x3 would give you 9 square feet vs 8 square feet of a 4x2. Tents should be similarly priced these dimensions.
For your light this would be an awesome choice https://m.alibaba.com/product/62323084952/detail.html?spm=a2706.wapshop.0.0
240watt quantum led board
AC Infinity CLOUDLINE T4, Quiet 4" Inline Duct Fan with Temperature Humidity Controller - Ventilation Exhaust Fan for Heating Cooling Booster, Grow Tents, Hydroponics https://www.amazon.ca/dp/B06ZXWN3BG/ref=cm_sw_r_cp_apa_i_JL1MDbQ099E88
This would be a top of the line exhaust fan and then you would want a 4 inch inline fan for bringing in fresh air. If looking at other brands of exhaust I would suggest sticking with 4 inch for your space.
A carbon filter if smell is an issue.
A fan for the bottom of your tent for circulation.
Something to elevate your planter off the ground.
A powerbar that's rated 50% more amps than you are plugging into it.
Something to measure your temperature/humidity and depending on the temperature/humidity maybe a humidifier or dehumidifier
Maybe a clip on fan for circulation above the canopy.
Ratchet cord for hanging stuff.
Maybe clippers for defoliating and eventual trimming.
Stuff to tie with for training your plant and maybe a scrog net if thata for you.
Happy growing :)
Edit: sorry, accidentally replied to main post instead of your reply!
Edit: apology 2, forgot that you were looking to do this all under $200. Will be tough. Might be cheapest to just start with a little nutes and start piecing your tent setup together over some time.
Hi Mike! There used to be a 3rd-party device handler for Chamberlain MyQ openers, but it seems that it has been discontinued: https://community.smartthings.com/t/discontinuation-of-myq-connect-community-smartapp/47183
Another option is to use the GoControl unit that connects to your existing garage door opener: https://smile.amazon.com/GoControl-Linear-GD00Z-4-Z-Wave-Controller/dp/B00M75TEIU. It has native integration with ST as well as options for third party device handlers that extend the functionality. The price on Amazon is a bit high right now, but I've seen it around $65 in the past. If you're not in any hurry, use camelcamelcamel.com to track the Amazon price and notify you when it decreases or hits a target price you configure.
I can't help much with the camera portion of your question, but I'm interested to see what others have to say as well. This is something I'm still deciding on also.
I doubt you'll be able to fit 3 decent sized mature plants in that space, maybe 1 but you can always get a bigger tent! Anything else I can help you with?
Oh, for sure. It's all about the right tool for the right job. Slow cookers are better for braising type applications. Chicken breasts don't braise well.
> And also, just because I like being contrary, all you need to do sous vide is a styrofoam cooler, a thermometer and a zip top bag.
Speaking of right tool for the right job, this is like hammering a nail with a rock. It's possible, but so time and attention consuming, it's hardly worth it.
I have one of these which works great with my slow cooker. They don't work with the fancy programable slow cookers, but who needs one of those anyway. lol
On the fashion side include a set of boots for city streets with slush traps. The slush sits on top and looks like solid snow, but really you have a 2-3 foot ditch that's filled with disgusting ice cold filthy water.
I like some long underwear as well for the holy shit cold days that come eventually.
Depending on your house you may look at a roof rake so that a large snowstorm does not cause serious damage.
If you have cold spots in your house, use a fan to guide central heat there. Also I HIGHLY recommend these window insulation kits, they will save you hundreds of dollars on heating and usually allow rooms to get hotter as well.
I was going to suggest that first but didn't know if you wanted the cost of running a wall unit. A new, efficient little 5000btu unit shouldn't cost too much to run though.
Something like this though would allow you to set it to only run once it's reached a certain temperature and shut back off when your desired temperature is reached. https://www.amazon.com/Lux-Heating-Cooling-Programmable-Thermostat/dp/B000E7NYY8
Thanks! The reason I was wondering about phosphorus deficiency is due to the purple stems and leaf veins. It was mentioned to me that was not normal. In all honesty, I thought the plants were ok before then. There are a few with some wilting leaves and some of the lower leaves on a few plants started to curl on the edges. It may have gotten too warm inside the tent the other day. I’m ordering a ventilation system on Thursday from Amazon. Here it is. Ventilation System It’s supposed to monitor the temp and humidity and adjust fan speeds as needed. Thank you for your help and also for that link! I’m going there now.
That will definitely work but check out ac infinity fan on amazon. You still need to get a filter but holy fuck this fan is amazing. I just installed it today and it is so incredibly quiet and automatic adjusts the fan speed depending on what temp you want to maintain in the tent.
AC Infinity CLOUDLINE T4, Quiet 4” Inline Duct Fan with Thermostat Speed Control - Ventilation Fan Exhaust Fan for Heating Cooling Booster, Grow Tents, Hydroponics https://www.amazon.com/dp/B06ZXWN3BG/ref=cm_sw_r_cp_api_cLkRAb5CRK5QX
I wouldn't trust a PC fan for a carbon filter, all the ones I have seem very underpowered for that function. That being said, I've never tried the DIY filters, so other people might have other opinions.
You could use a more powerful fan, like this: http://www.amazon.com/VenTech-DF6-Duct-Fan-240/dp/B005KMTYFK/
Also ONA Gel might be useful in your situation
Cheers and welcome to the community! :D
Buy a DC powered mini fridge. Running an AC mini fridge takes more power and there is power loss by going through the inverter. A DC powered fridge can run as low as 30-40W. One like this.
If you drive enough (every day, an hour plus) an isolator to charge your battery will most likely be enough.
Since you are only planning on doing this for a short while, you don't need the nicest batteries. Costco has 160Ah deep-cycle lead acid batteries for less than $100. I'd reccomend one of those, maybe two. Remember, you can only discharge your batteries about 50%, so a 160Ah battery actually only gives you 80Ah of capacity. Also, the battery takes longer to charge the more charge it currently has, so the last 5-10% to top it off takes longer than the previous 5-10% etc.
I wouldn't use an electric heater, they are very inefficient. Without a more robust power/battery/charging solution you won't get much use out of it. Consider a propane heater and adequete ventilation. Something like this will provide more than enough heat for a space as small as an F150 bed.
For charging your laptop/phone/devices, you'll only need a small inverter. Remember that with a DC fridge you won't be running it off the inverter. I reccomend getting one 400W or smaller. The higher the Wattage on your inverter, the more power it wastes just by being on, so you want the smallest possible inverter for your needs.
F150's have pretty large engine bays. You may even be able to get away with putting your deep-cycle storage battery under the hood instead of using up space in your bed/living area for it.
I'd highly reccomend getting a small power bank to charge your phone and other small devices. You can plug the power bank into any wall outlet to charge it while you're at work, at a coffee shop, whatever. I have one that is 22,000mAh and I charge it while at work. With a full charge it will re-charge my phone enough times for me to use the phone 2-3 days without worry. With a 5 hour charge (a shift at work) it will charge my phone 1.5-2ish times. This reduces your reliance on your onboard electrical system in your truck, leaving more battery capacity reserved for running your fridge.
Also get LED some lights that run off DC power. It's a waste of energy to run lights off AC through your inverter.
Lastly, do a little math. Let's say you end up with a fridge that runs at 40W. 40W % 12V = 3.33A x 24hrs = 80Ah. Assuming you're running the fridge 24 hours a day you'd be using the full discharge capacity of your 160Ah battery every day, and that's without taking loss into account. I'm pretty sure those fridges will cycle on/off so it doesn't actually draw a full 40W at all times, but keep these things in mind. Make a plan based on how often you will drive, how fast your alternator charges your battery, and how often you plan on keeping the fridge on. I think you'd be crazy to use a standard mini fridge that draws 156W and runs of AC power.
Good luck have fun!
I have posted Amazon links to what I use below. You should be able to do under $20 for just 5 plants. I haven't used these long but my plants seem like they are pretty happy with it so far.
The lamp.
https://www.amazon.com/gp/product/B000HHQ94C/ref=oh_aui_detailpage_o00_s00?ie=UTF8&psc=1
The bulb.
https://www.amazon.com/gp/product/B005P29K1S/ref=oh_aui_detailpage_o00_s00?ie=UTF8&psc=1
Optional Timer.
https://www.amazon.com/gp/product/B006LYHED0/ref=oh_aui_detailpage_o00_s00?ie=UTF8&psc=1
Yeah dude, as a general FYI amazon is where I get EVERYTHING because you can get free delivery and no neighbors will know what you bought.
For your small grow, I would try and find the smallest carbon filter they sell. You might not actually have too much of a problem without one if you're only growing one or two plants (unless you don't have a medical card in which case better safe than sorry).
EDIT: You could probably use this filter and this inline fan. I've used about 3 of those inline fans in my grow and they're pretty solid.
Okay, thank you for that tip.
Workshop lights is probably the wrong term, sorry. I mean something like this.
Just one CFL would do for this?
Space isn't a huge problem, but I live in a flat so I just want something small like a 5-gallon bucket in my bedroom. What would be the best way to hang up that light bulb if it would do?
Thank you
Do you want to let light in?
Then this
Do you want MAXIMUM INSULATION(without actually rebuilding the house)?
Get a few blocks of this stuff and use it to cover your windows.
But really, what you want to do is make sure that your windows are all well caulked, that your doors fit well and things like that.
Cutting down on the air coming into your room around the windows will do a lot for helping keep you nice and toasty this winter.
Focusing on bang for buck:
In total, I get 85 oz. (or 5.3 pounds!) weight savings for a total cost of around $250, or you can do 3.8 pounds for $70 (no new quilt) or even 3.7 pounds for $45 (scratch the headlamp suggestion).
The Aerogarden grow systems are nice, but they aren't really set up for growing weed. For one thing, you would want to use supplemental lighting, even with the new, powerful lamp that comes with the Ultra. And you would probably want to get a grow tent in which to house it, with a fan and an air filter to cut down on smell during flowering. So in addition to the Ultra, you would still need to make some more purchases anyway.
I contacted Aerogrow when they came out with the Ultra, and asked if it would be a good unit for growing marijuana. They actually didn't want to answer my questions, saying they couldn't condone the use of their product for illegal purposes. I explained that I lived in a legal state, but they weren't having it. So I had to do the research online. Turns out that for weed, more photons = bigger, more potent buds. So you can grow a crop with the Aerogarden Ultra, but you would want to add more light.
I grow 2 plants at a time. I just use regular potting soil and regular fertilizer, Miracle-Gro. I have a small grow tent, and I use a Marshydro 300 lamp. In addition, I have an air filter and inline duct fan. I get seeds from Herbie's; they ship reliably and discretely.
Overall, it's a pretty cheap setup. There are coathangers and duct tape involved. I get a yield of 2 oz cured bud per plant, so that's 4 oz per crop, and I can grow 3 crops per year, so that's 12 oz per year. Plus, I convert the leaves and scrap into bubble hash, using a set of bubble hash bags. So 2 plants at a time yields more than I need for personal use. I could add a 2nd lamp and get a bigger yield, but it's not necessary for me.
Everyone makes a few mistakes on their first crop, so if you can yield 1 oz per plant, you're ahead of the game. I also recommend Jorge Cervantes' Marijuana Horticulture.
I'd recommend getting the light fixture with an air cooled hood instead of the cheap reflector. https://www.amazon.com/dp/B07D8VV2ZR/ref=psdc_14252961_t1_B00P8P51ZQ?th=1
The lamp comes with a bulb, they are cheap, but they do work. At some point you want to get better bulbs.
Looks like you'll need an inline fan for ventilation. https://www.amazon.com/Hydrofarm-ACDF6-Active-Air-Inline/dp/B00KWYJQYA
The fan can be turned down using a speed controller https://www.amazon.com/ACTIVE-AIR-ACSC-Speed-Adjuster/dp/B007TFTITS/
I'm looking into building some small wood based projects around the house. The is going to be a work bench that is based around a kit like this that comes with everything but the wood. The second item is just going to be a basic rectangle made from 2x4's for a small garden cut out.
My question is: Is there any home goods store (lowes, home depot, etc) that you can purchase wood from and have them cut it? Like say, I walk in with a list of different lengths of 2x4's, 2x6's, particle board, plywood, etc and have them cut it? Basic google searching yields sort of iffy results. Some people say no, some yes. What concerns me is that the people that say yes say the places do a extremely rough cut at best that usually yields very sloppy results.
I don't have the woodcutting tools or I'd do it myself and I definitely don't have the need to justify investing in said tools. On the other hand, I don't want to end up with a sloppy end result just because these places don't do the cuts to a decent standard.
I have the one you linked. I think it's okay but probably not bright enough for my succulents and cacti to thrive throughout the winter. I've mostly been using them for my succulent props though and they do great under it. I recently bought this lightbulb and this fixture to use on a few of my succulents for the winter. I read that you need a fluorescent light bulb with at least 6500K. I'm hoping this setup works because I can't afford anything much more than that for my plants lol.
Mr Heater Little Buddy!
It's designed pretty much exactly for this it has built in oxygen detectors and will auto shut off before it gets dangerous.
However if you decide to NOT use a heater you end up in a -20 sleeping bag shivering yourself to sleep while cuddling a friend for warmth, which is far less safe because you might get tauntauned for warmth.
Also if your a mom, you might not want to ask too many questions, especially things like, "where are your eyebrows" or "why do you have duct tape wrapped around your arm?"
/u/SpartanUp247 , I'm breaking this up so it's not a mega post.
Insofar as other as other supplies go... well, I could write on that for way longer than I'm going to tonight. I'll try to give a short essential list though.
--------------------------------
Bug out bags are cool and a good idea/place to get started, but realistically if you are forced to sincerely grab that bag and run out of the door with nothing else because things are just that screwed, you are likely pretty hosed. Chances are you'll have time to pack the car in most situations, so the best way to go is to plan on bugging in first and foremost. No point in turning yourself into a refugee if you don't need to. If you're still wanting to start with a bugout bag... see the next post for my recommendation for a cheap startup kit.
I have a similar tent and I just started my first grow about 3 weeks ago. I was having issues similar to you. I was above 80 degrees and low humidity. It burned my first plant right up. I fixed it with three things:
EDIT: Now I get ~70-74 degrees F inside the tent.
Set up was super easy, old port screws right off and you screw the new one right one and then slap on a filter and a fan (any carbon filter should do but here’s what I bought that works well)
VIVOSUN 4 Inch Air Carbon Filter... https://www.amazon.com/dp/B01DXYMBU6?ref=ppx_pop_mob_ap_share
VIVOHOME 4 Inch 195 CFM Plastic... https://www.amazon.com/dp/B078HFVTYX?ref=ppx_pop_mob_ap_share
And finally some ducting-
iPower GLDUCT4X8C 4 inch 8 feet Non-Insulated Aluminum Foil Vent with 2 Clamps, Ducting https://www.amazon.com/dp/B00EPE3XHY/ref=cm_sw_r_cp_api_i_CfrZCb6YXV1V7
This really works well for me. The smell otherwise is intolerable. Carbon filters are really amazing.
Easiest & cheapest way is to get something like this to seal it up for the winter. It's not a permanent fix and you'd have to repeat it each winter, but it does work and work pretty well (especially for what you in Fla would call 'cold' :) )
There are special 2 part epoxy paints that are used for this.
We used this paint to refinish a green bathtub, and it was easy to apply, and looked great until it started to scratch, peel, etc.
It is super smelly and requires proper ventilation and a respirator type mask.
Sure!
Also a put the wrong wattage on my lights above. Also had a buddy order it lmao. He hasn't been raided yet haha.
2x300w led- https://www.amazon.com/dp/B01HFZ3PC2/ref=cm_sw_r_cp_apa_CVjwyb4CPNXTK
2x2x4 tent was discontinued on amazon, but brand was Valuebox. Got it for dirt cheap like 40 bux
VenTech fan and filter
https://www.amazon.com/dp/B004Q2ER5C/ref=cm_sw_r_cp_apa_NYjwybWN2VC8K
3 gal smart pots - the 2x2 can fit four of these snugly
You want a Mr Heater Buddy, man. Easy to use, safe, cheap to run, and it will keep you warm in a space much bigger than a van. Highly recommended.
EDIT: for safety, make sure you install a carbon monoxide detector.
I ended up getting this. I found the same info you did, and almost did that, but the safety thing was HUGE for my wife. She was freaking out. And with a Lux outlet thermostat plus the UL rating of that heat mat, the safety factor is pretty high without adding dual thermostats and driving the cost way up. I'll post a pic eventually.
Here's an example: http://www.amazon.com/3M-Indoor-Window-Insulator-5-Window/dp/B00002NCJI
This can make a huge difference if you do a good job and blowdry it nice and tight.
i think your first step should be to try opening the curtains during the day so you can get some solar heat gain, and only closing them when the little one is sleeping. any heat gained during the day will help keep it warmer in there at night too. you can also look into using a window insulating film like this during the colder months to keep drafts out and keep the heat in.
as for a space heater, you could try to wall-mount one or put it on a high shelf so that it is well out of his reach. if there's a ceiling fan in the room, reverse it so it blows up and turn it on low to recirculate the heated air back down toward the floor.
as for having to close the door, is there a particular reason you want to keep kitty out?
I have a couple, the Inkbird on my cheese cave and this chintzy chinesium one on my wineador. Both work just fine, but the Inkbird is definitely superior in build quality. Seeing as the price point isn't too different, I'd recommend the Inkbird.
Does your space have any rules against using a hotplate? I bought this guy for $11 for use in my cooking experimentation and it's been very solid. It doesn't get extremely hot but it's enough to boil water, make soup, fry eggs, bacon, anything else you want.
I paired it with a PID temperature controller and turned it into what amounts to a sous vide/crock pot
I've also heard electric water kettles spoken of very highly for people in your situation. Drastically safer than a hotplate it'll make boiling water in a jiffy; that's all you need for a quick condensed soup. Pour boiling water into a thermos with rolled oats or beans n rice and it'll be perfectly cooked in about an hour
I have a Mr. Heater Buddy heater. I use it in my tiny camper and it heats the place up in 10 - 15 minutes. I have to turn it on and off again to keep from turning my place into a sauna. Typically, I'll run it for 10 minutes and off for 20. So I run it three or four times before I go to bed and then turn it on when I get up in the morning to take the chill off. Now that it's winter, I go through a bottle of propane about once a week.
I also have a carbon monoxide detector in my camper. In all the time I've used the heater, the only time it registered on my detector, was at the end of a bottle when it was not burning completely for a few minutes. My CM detector registered 31 but never went off. I opened the top vent and it went back to 0 in two or three minutes. The heater is frikin' fantastic. I consider it very safe and am not worried at all about oxygen depletion.
The purpose of those lines is to create airflow to prevent carbon monoxide poisoning. They function passively, so you should uncap them, for safety sake (or at least make sure a COO monitor is installed... fuck, I don't have one installed....). Notice how one inlet is (or was, or should be) at eye level, and the other is near the floor? That is to make use of when heat rises, the air near the inlet of one will rise out, and the cold air near the bottom of the other will sink, starting a circulating flow. Yes, this chills the basement, but, if it's unfinished that's OK.
a 100k but furnace may use rpoportionatly more air for combustion, but its in a controled space and a very efficient combustion, while the 54K burner will disperse the COO along the heat current it creates meaning you need to remove much much more air to gather all the gasses you should, than with just a sealed vented furnace. Also, there is a difference between inline duct booster fans, which aid in airflow, but lack dynamic pressure, and turbine fans which are both consistant rate and high dynaic pressure (meaning it would be able to pull air from a further distance with less drop in CFM)
These http://www.amazon.com/LEDwholesalers-GYO2402-6-Inch-Hydroponic-Booster/dp/B003YFADW8 won't work,
you'll need this http://www.amazon.com/Active-Air-720-Inline-8-Inch/dp/B002JQ4K1I
or for a quieter operation with better dynamic pressure, this http://www.amazon.com/gp/product/B001I4DHJI/ref=pd_lpo_sbs_dp_ss_2?pf_rd_p=1944687782&pf_rd_s=lpo-top-stripe-1&pf_rd_t=201&pf_rd_i=B004C2IWIE&pf_rd_m=ATVPDKIKX0DER&pf_rd_r=1V2RCEEAMG31CYMSKC7B
I am not trying to be alarmist, but I know the math off the top of my head, because I've worked with it SOOOoo many times, and as they are for safety, I urge you to heed my warning.
Ugh i wrote a lengthy reply but my phone crashed. So quick reply. My one hlg in 4x4x6 produces 10 degree increase. I use this fan for exhaust:
AC Infinity CLOUDLINE T6,... https://www.amazon.com/dp/B074XBXFPD?ref=yo_pop_ma_swf
Which i love because of controls and it isnt that loud. And easy to adjust temp and fan speed.
Thanks for reaching out. I saw some talk about COB LED. Any recommendations? I'm also not quite sure why they're said to be superior lights. Just spectrum? I saw this, but couldn't find any info on the actual wattage or people using it. https://www.amazon.com/Roleadro-HYG05-2X200W-W-Spectrum-Hydroponic-Indoor/dp/B00U2DP48I
Re: Fresh air. I'm also planning on having a few clip on fans inside the tent with a duct fan https://www.amazon.com/gp/product/B004Q2ER5C/ref=ox_sc_sfl_title_4?ie=UTF8&psc=1&smid=ATVPDKIKX0DER
The door to the closet doesn't close fully, and its incredibly thin plywood. The room itself has a pedestal fan and a window open for temp control.
> programmable power strip so I can set it to fan for as low as one minute a time several times throughout the day. Guess I should go pick up a fan
Automating as much as you can really makes your life easier, and you'll get more consistent results.
I used a setup where I had a duct booster fan blowing fresh air and the output of an ultrasonic humidifier and a small space heater into a 25 foot length of dryer duct that I piled into a plastic bin. The fan, humidifier, and blower (and lighting) were on X10 controllers to switch them on and off.
I had a scheduler program on the computer that would switch on the humidifier, and heater (if needed) then run the fan to blow the fresh air down the duct. The purpose of the duct was to give the water droplets time to evaporate; by the time the air reached the grow chamber it was nice warm and wet, but not dripping.
Once I got it all dialed in and added a thermometer in the grow chamber it was easy to maintain the right conditions with very little effort.
A great thing to purchase is a mr heater. it's a heater for inside the tent, you need to slightly open some windows because it's a propane heater. If my wife is happy with the temperature at night she loves camping.
http://www.amazon.com/Mr-Heater-F232000-Indoor-Safe-Portable/dp/B002G51BZU
145w or LED will generate about as much heat as 145w of HPS. Stick with the HPS.
To get cooling under control, you'll need to post details. Or, better, pics. 600w isn't a lot in a 4x4. Lots of people do it.
Without details, look at a CoolTube style hood on it's own ducting circuit--pulling air from outside, through the cooltube, then straight back outside using a 6" duct fan. That gets rid of most of your heat, versus a bare bulb/wing setup.
Then get a decent 6" inline fan as your main exhaust for the tent. Run this through a programmable thermostat, so it's only kicking on when you tell it to (on at 75 degrees, off at 72, for example). A fan speed controller for the inline is useful, to limit noise and the rate at which you are pulling all the humidity out of your tent. But not strictly necessary if you have the thermostat.
Both ducting circuits (one for the CoolTube, one for the Tent) should be vented outside. Or at least outside the room.
I know that adds a bunch of cost. You can go cheap on the CoolTube, ducting, and duct fan. Don't go cheap on the inline. Having proper ventilation (and, IMO, a programmable thermostat) is essential to be able to run, well, in all seasons. You have a good tent/light pairing. Get the ventilation right, and you can dial in your environment. That's 80% of the battle.
Yup. Truth, common here that in NYC renters buy their own ac units.
We've got maybe another month of cool weather ahead of us, but you should highly consider putting up some insulation. These are for windows but same principle would work here: http://www.amazon.com/3M-Indoor-Window-Insulator-5-Window/dp/B00002NCJI/ref=sr_1_2?ie=UTF8&qid=1458664828&sr=8-2&keywords=plastic+insulation
Pretty easy to put up and can have a pretty large effect on the amount of heat you're losing.
Something like this will work: Rust-Oleum kit That's a link to Amazon just because it's easy to find on there. You can probably find a similar product almost anywhere that sells home improvement stuff. As with most any paint type thing, preparation is key. Get the tub as clean as possible and carefully follow the directions.
I was in the same position few weeks ago till I read this post
Son bought me 3 of these lamps and my plants couldn't be happier.
Another post which is very helpful to get a grasp of lighting.
Good luck and Happy New Year!
That first picture is an electric baseboard heater, so yes using it would come out of your electric bill. Some baseboard heaters just have a manual on/off switch or knob somewhere, others are controlled by thermostat.
A lot of cold-climate houses have baseboard heaters in addition to forced air or radiant heat, but it's possible that the baseboard is your only source of heat.
Do you see any vents in the apartment like this, in the floors or walls? If so, that means there's a gas furnace somewhere, probably in the basement, pumping hot air through the house. A studio apartment might not have its own thermostat, the temperature would be controlled somewhere else in the building.
That tank in your second and third pictures is a hot water heater, for your shower and sink and washing machine. I can't tell for sure if it's gas or electric. If it's gas, it would have an exhaust vent on top. If it's electric, it would only have a water-in, water-out, and a wall plug.
You can improve your energy efficiency quite a bit by putting plastic on your windows, something like this will make a big difference in the winter.
Yeah, that's probably worth looking into for my tropicals at least. It's certainly cheap enough to experiment with.
This seems like a roughly equivalent product, as does this.
I'd just need to get a heater that comes on automatically when it's powered up, which is an easy enough thing to do. The more I think about it, the more I want to try it out.
I'd still like to build the monitoring solution, but something like this should be much more precise and reliable than what I'm currently doing.
I still think if I want to keep my temperate trees at 0C+/-3 I'd probably need something more customized.
This is what you want. This is probably what everyone should use. Maybe painters tape would work better, though I suspect it will fail soon enough too, but I tried using painters plastic drop cloth and duct tape, lots of it, and it started to peal off in about a week.
I'd personally prefer the dropcloth as it's slightly cheaper (~5$ for probably 15-20 windows, plus the cost of tape) and more importantly I like that it's translucent as opposed to transparent. The kit I linked essentially looks like nothing is there at all if done right, you definitely won't have a problem with light.
tent
light comes with hangers... looks complicated to order from alibaba but its not... and 1week delivery. you can also order from HLG in usa or canada but its more expensive. or you could go with a 400w hps from amazon with vented hood, or a 315 cmh.
fan amazing fan (have the 6'' model)
timer with battery built in
filter
temp and humidity
fan
We have an aquarium fan hooked up to a thermostat and it works wonderfully at keeping the Temps in whatever range I specify. We have it at 61-64°.
LONDAFISH Aquarium Chillers Aquarium Fan Fish Tank Cooling Fan Marine 2 Fan https://www.amazon.com/dp/B07FCJGZ4H/ref=cm_sw_r_cp_apa_i_TljSCb3ETB7D6
WILLHI WH1436A Temperature... https://www.amazon.com/dp/B00V4TJR00?ref=ppx_pop_mob_ap_share
This works best if you have great insulation and double-pane windows. We don't...so supercooling just made us cold while it ran, hot while it didn't, and jacked a "normal" $300/mo APS bill to $450+.
That was three years ago. I bought a window mount swamp cooler (http://www.homedepot.com/p/Bonaire-Durango-4-500-CFM-3-Speed-Window-Evaporative-Cooler-6280030/204679889) plus a plugin thermostat (https://www.amazon.com/dp/B000E7NYY8/), plumbed it with black 1/4" irrigation tubing, and haven't looked back since. We now only run the AC the last two weeks of July and all of August. 11/10 with rice, highly recommend.
I spent some time researching this, and ended up getting a z-wave garage door opener off Amazon (this one). It works well, communicates over Z-wave and reaches through several walls to my Z-Wave light switches to join the Z-Wave mesh my SmartThings hub communicates with - With that said, I found out rather quickly afterward that Amazon purposely prevents Alexa from working with any type of smart door/locking mechanism, which made me sadface. I could probably still get it to work through Smart Things custom scripting editor, but honestly I'm fine just doing it through the ST app.
Look at this stuff, it's cheaper on Amazon but they have it at Home Depot for a little more. Works nicely when done fully and should work just as nicely as a patch to keep the peeling down. Just make sure to take out the drain cover first since the flipper might not have done it correctly.
I use a crock pot plugged into one of these:
https://www.amazon.com/WILLHI-Temperature-Controller-Thermostat-Improved/dp/B00V4TJR00
Probably not as good as a professional sous vide, but much cheaper and it works great for me. There is no agitator, but I find it works pretty well without it if I fill it full of water and am not cramming the crockpot full of bags of meat. I think the natural thermal currents do a good enough job of keeping the temperature even throughout. Plus you can agitate every so often manually.
The lights are one for 18 hours and off for 6. Mine come on at 4 PM and go off at 10 AM.
I'm just using a power strip with a built in timer. Like this. Half the outlets are on a timer, the other half are always on.
I used to keep my fans on the timer as well, but I recently swapped them out for quieter models that are less powerful/noisy. Now I just run the fans 24/7. My main fan has a thermostat in it and will slow down and speed up depending on the temperature in the tent. I find it convenient as I work from home and my tent is in my office. If I didn't sit in the same room as the tent all day, I'd probably just stick with a cheap duct fan like this. It's easy to overdo it with fans in a small tent. I originally bought a big 6" fan but it was overkill. My carbon filters died fast because I was pushing so much air through them and it made more noise than I could stand.
My setup is pretty simple and cheap, but it grows more than I can smoke and I don't have to spend much time worrying about it. I pretty much just did a little research, went on amazon found a grow tent, and bought all the 'people that buy this also buy...' stuff.
I would get blackout curtains, at least for windows that get a lot of sun during the day. They'll keep your apartment cooler.
In the winter there are window insulation kits - something like this though I picked that at random as an example, shop around to find good prices and good reviews. They'll help keep your apartment warm in the winter.
The 600W LED I have has 2 built-in fans on top which keep it plenty cool. I keep the intakes open at the bottom of the tent and at the top of the tent I use a fan to pull air in through the carbon filter and out the back of the tent via flexible duct. I use this combo from Amazon filter/fan combo. Some people like to add a fan controller if the fan speed is too high and creating too much negative pressure or the fan runs too loud and doesn't need to be that high.
I got these light bulbs: Philips 433557 23W 100-watt T2 Twister 6500K CFL Light Bulb, 4-Pack https://www.amazon.com/dp/B00M6SR1JM/ref=cm_sw_r_cp_apip_w7S66nIcszAao
And these clamp lights: Woods 0151 150-Watt Clamp Light with 8.5-Inch Reflector and 18/2 SPT 6-Foot-Cord https://www.amazon.com/dp/B000HHQ94C/ref=cm_sw_r_cp_apip_HJwGKAbobQUct
I'm still a newbie, but they are loving the set up - my Aloe "pink blush" is significantly more pink than two weeks ago when I purchased it.
I'm no expert, I just recommend starting out with the lights at least 8 inches away and gradually moving them closer. They don't get hot which is nice!
Alright taking into consideration the 12 plant limit here, my previous setup was too big for so few plants. So with some downsizing hopefully saves even more!
Tent - GROWNEER 48"x36"x72" Lodge Propagation Tent
Lights - HLG65 lm301b and red 660nm hydroponic grow light 4000K x 2
Kingbrite 240W samsung lm301h 288v3 quantum board X1
Fan - AC Infinity CLOUDLINE S4, Quiet 4” Inline Duct Fan with Speed Controller
PH Meter - Wellcows Digital PH Meter
PPM Meter - HM Digital TDS-EZ Water Quality TDS Tester
Carbon Filter - VIVOSUN 4 Inch Air Carbon Filter
Ducting - VIVOSUN 2-PACK 4 Inch 8 Feet Non-Insulated Flex Air Aluminum Ducting
Nutrients - MEGA Crop (2500g)
Botanicare CAL-MAG Plus Plant Supplement 2-0-0 Formula, 1 Quart
PH Control - General Hydroponics pH Control Kit
Soil - PREMIER HORTICULTURE 20380RG PRO-Mix HP High Porosity Grower Mix
Pots - Gardzen 10-Pack 1 Gallon Grow Bags x 2
Cloning Machine - CLONE KING 25
Total - 880.62 (includes shipping)
So with this setup ill keep 1 or 2 mother plants and then run the rest in SoG in 1 gallon pots. Using the 2 4000k lights for the mother plant and the cloning station and the 240w for the SoG area of the tent. Its a small setup but I think it'll work. Any idea what kinds of yeilds this could achieve? Any further input would be greatly appreciated.
Sorry. I have actually have a digital temp controller that switches a circuit on and off based on low and high settings. I hooked it up tonight and set low at 90 and high at 90.7. When it hits 90.7 it shuts off and seems to float up to 91.4 then starts cooling. Circuit (uth) turns back on at 90 but floats to about 89 before it starts warming. So basically I have it set to always be between 89 and 91.4. Thank you for your help.
Edit: this is the control. Overkill for this application but I already had it laying around from a different project.
WILLHI WH1436A Temperature Controller 110V Digital Thermostat Switch Sous Vide Controller NTC 10K Sensor Improved Version https://www.amazon.com/dp/B00V4TJR00/ref=cm_sw_r_cp_apa_i_dfI2Cb2QX8AEA
They do go hand in hand, so I'm thinking that you are not going to have a lot of luck with the curtain idea.
If you can stand leaving the window closed, there is a window insulating method that will let the light in, but help keep your room warmer:
https://www.amazon.com/3M-Indoor-Window-Insulator-5-Window/dp/B00002NCJI
Won't work if you need the window open.
Oops, definitely more expensive than I remember.
Here’s the Heater (definitely recommend!): AmazonBasics 500-Watt Ceramic Small Space Personal Mini Heater - Black https://www.amazon.com/dp/B074MX8VN5/ref=cm_sw_r_cp_api_i_LEw2DbP4KC16G
I think this could be incredible for a grow-tent.
I already had the heater as a small-room heater, which was why I thought it was only $30 🤦🏽♂️
Canadian amazon link but I have this. https://www.amazon.ca/VIVOSUN-Inline-Ventilation-Variable-Controller/dp/B01CTM0JF2
I quite like it, but would go one size bigger if I had a static setup, mine I take in and out of the window so I kept the fan small, if it was all rigid then I would up size it.
It is very quiet, the fan on the laser is often louder than it and even when cutting MDF it pulls the smoke just fine
I use the thin film plastic window insulation kits every winter, I love them. They are great because the seal out all the tiny cracks in old windows and create a psuedo-double pane window. I would start there because they are much cheaper than curtains.
https://www.amazon.com/3M-Indoor-Window-Insulator-Windows/dp/B00002NCJI
If you sleep in your car with the windows rolled up, it will suck. You will feel clammy from the humidity and will definitely have frozen windows on the inside when you wake up.
If I were you, I would keep the windows slightly cracked and use a small propane heater in the vehicle. This sounds crazy but Mr. Heater makes some propane heater models that are indoor safe. These units auto shut off if they are tipped over or if the room oxygen level becomes too low. As long as you keep fabric away from the heat output, you should be fine.
Also, you might consider getting some plastic window deflectors for your car windows so that snow doesn't blow into the vehicle when the window is cracked.
Sleep with pajamas, socks, and a beanie on and bring a thermos filled with hot tea. You'll appreciate it as you're laying down for bed. :)
https://www.amazon.com/dp/B001CFRF7I
http://www.weathertech.com/side-window-deflectors/
thanks for the responce. i will be storing all my tools indoors so im not too concerned about rust. the drill press i saw was not that big so i could put inside, but you make a good point that i really dont need it currently. i was looking into a dowling jig, and a circular saw as well. whats your thoughts about the folding work benches they sell, like this: https://www.amazon.ca/WM125-Workmate-Portable-350-Pound-Capacity/dp/B000077CQ0/ref=sr_1_3?s=hi&ie=UTF8&qid=1542555148&sr=8-3&keywords=folding+workbench
i have a fold up pastic table but im conerned its not a pracital solution. its about 2ft by 1 1/2ft
This, yes.
Looked up bug-kill temps, and what you need is 133°F in the center of the wood for 30 minutes. Make it two hours per inch, I'm guessing.
Make a box out of polyiso board and foil tape, and make sure there is good air circulation. A hair dryer might work for circulation and for heat. Control thermostats are pretty cheap.
You could do scrambled eggs and reasonably thin frittata. Poaching eggs should be pretty easy if you've got a kettle as well.
If you buy this temperature controller unit (shop around though, you should be able to get a better price if you look) then you can turn your rice cooker into a sous vide cooker, all you need is ziplock bags.
Wow for the LED, I will definitively look into LEDs if I decide to upgrade my old 400W HPS.
As for the fan, if it's anything like this type of duct fan, it won't work with the filter.
This is the kind of fan you need
Something like this would be great for that! Might need to do something to diffuse the light a bit, a coffee filter would work nicely!
Well, 8 lbs is a much larger piece of plexi than I was imagining. Could you use a thinner/lighter piece?
On second thought, though, perhaps just using some window shrink film would work better. It seals air/water tight, can be easily removed and is cheap. Here's an installation video. It would probably look a lot better than plexiglass, too.
It's special film and it's very cheap at your home improvement store. It comes in a kit with tape and you stretch it with your hair dryer. It works great.
http://www.amazon.com/gp/aw/d/B00002NCJI/ref=redir_mdp_mobile?pc_redir=T1
This is a simple workbench that I built using MDF, 2x4s, and Amazon "workbench legs." Extremely strong and holds 1000 lbs per shelf. You could probably build this (or something similar) for around $100.
The best thing about this is I can extend and make this longer if I wanted to just by adding longer lateral 2x4 and another set of MDF boards.
This bench takes up minimal space and can be broken down and moved very easily.
https://i.imgur.com/X3UAe9J.jpg
Link: https://www.amazon.com/dp/B0030T1BRE/ref=cm_sw_r_sms_apa_i_xbl1DbYBKK3QQ
Do you recommend more than the suggested fan in the build? ( http://www.amazon.com/Hydroponics-Inline-Scrubber-Carbon-Filter/dp/B004Q2ER5C/ref=sr_1_1?s=hi&ie=UTF8&qid=1349241681&sr=1-1&keywords=4%22+inline+fan+combo )
How many plants are you growing/how many mature plants can fit?
4 different ones.
lights
https://www.amazon.com/gp/product/B07C59J8L2
https://www.amazon.com/gp/product/B01IVQ96WW
https://www.amazon.com/gp/product/B01IVQ96MW
https://www.amazon.com/gp/product/B015FLSOCE
fans
https://www.amazon.com/gp/product/B07D8ZC566
https://www.amazon.com/gp/product/B00I8Q30SC
clip fan
other stuffs
Frog soil
Smart pots - half 3 gallon half 5 gallon
Advanced nutrients nutrients
hygrometer: https://www.amazon.com/SensorPush-Wireless-Thermometer-Hygrometer-Android/dp/B01AEQ9X9I/
6 inch intake fan from home depot
filter: https://www.amazon.com/gp/product/B008NYF8S4
filter fan: https://www.amazon.com/gp/product/B01CTM0JF2
strains
1 white widow
1 amnesia haze
2 money bush
2 jack herrer
Oh I didn't realize it plugs in
You want this or something like it. Just plug that into your outlet, plug your wireless switch into that. It will make it so that the switch will not operate or get power until the temperature drops to whatever value you enter.
Hopefully that works for you as it will be entirely plug and play and take less than 5 minutes to set up.
You could look into a RaspberryPi and the Pi version of the HomeSeer controller software. If you have a little time the software plus a Pi only costs a little more than a SmartThings. Otherwise I use SmartThings and I have really liked it so far.
As far as switches if you do not mind mixing brands this is what I do. Anywhere I have a dimmer, a 3+ way switch, or have the need for scenes I use HomeSeer. If I just have a regular switch I don't need to do anything fancy with I use GoControl switches as they are a bit cheaper if you look at the other sellers.
For the garage I use GoGoGate because I wanted to ability to give others access. I have seen others on this sub use these GoControl Garage Openers with contact sensors to verify open/closed.
I would also look into doing fan control
Depending on the size of your house and how many switches you are replacing this could get you pretty close to your $1k budget. You may need to add cameras later on. Also in your future endeavors I would look into EcoBee/Nest for temperature control.
My fiance recently did our toilet and tile with no experience. We did take a free tiling class at a local store. It was a nice hands-on class and they gave us 20% off of all of the equipment. Borrow equipment (float, trowel, mixer) from friends and family if you don't plan on tiling again in the future.
We bought a really nice Toto toilet from homeclick.com for less than $200. There was free shipping and no sales tax. My dad has purchased two toilets from them (both Toto) with no issues.
If you can't afford a new tub now and the issue is mostly cosmetic, Rustoleum makes a tub and tile paint that works pretty well. I purchased from Amazon here. It's a good way to put off the really large purchases (tile and the needed supplies can be expensive). To give you an idea of cost, we tiled the floor of a 30 sf room with high-quality tile and it was over $400 for the cement, mat (we used the mat instead of backer board), grout, tile, and supplies.
We put the tile in before placing the toilet. We didn't replace our tub, but there isn't any tile under it, it just goes up the edge and there's a line of caulk.
we use a https://amzn.to/2pO7jOu when needed. we usually crank it up around dinner time when were done running around get it to a warm temperature and shut it off before bed. Durning the night we just use a good sleeping bag or many confuters. Never had any problems yet. It has gotten down to 17 inside the van, to the point where we've had an icicle coming out of our manual pump faucet. Crank up the heater in the morning, get back in bed for 10 minutes so the van get to a manageable temp then start breakfast. Also a tip we've learned.
10 minutes or so before arriving where we will park for the night we crank the heater of the van on full blast pushing all the hot air into the rear compartment of the van. Usually works great for us. sometimes it even eliminates the need for the mr buddy.
The best things to keep you warm are probably:
A down comforter (real feathers, not alternative).
Space heater (this one happens to be kid safe).
And a window insulator kit.
Brace yourself, winter is coming.