Reddit mentions: The best edge clamps
We found 40 Reddit comments discussing the best edge clamps. We ran sentiment analysis on each of these comments to determine how redditors feel about different products. We found 13 products and ranked them based on the amount of positive reactions they received. Here are the top 20.
1. Bayco SL-300 8.5 Inch Clamp Light with Aluminum Reflector
- electric-household-fan-replacement-parts
- Commercial brand: Bayco
- Import From: China
- Rated for Up to a 150-Watt Incandescent Bulb
- Adjustable Ball Joint for Easy Positioning
- Spring Steel Clamp with Scratch Resistant Vinyl Sleeve
- Energy Saving Durable On/Off Switch
Features:

Specs:
| Color | Silver |
| Height | 4.5 Inches |
| Length | 9.25 Inches |
| Weight | 0.65 Pounds |
| Width | 9.25 Inches |
| Size | 1pc |
| Number of items | 1 |
2. E. Emerson Tool Co. C50 50-Inch All-In-One Contractor Straight Edge Clamping Tool Guide
- Straight Edge - E. Emerson’s Contractor Series self-clamping straight edge patented design has integral tubes running the length of the wide body construction, making it ultra rigid and light to handle.
- No C-clamping - No more C-clamping! Achieve that truly straight cut using this self-clamping straight edge to guide your tools.
- Extra Wide - This self clamping straight edge is extra wide for exceptional rigidity and has a low profile for obstruction-free cuts.
- Flat Top - The extra low profile and flat top makes it easier for all circular saw or router straight cuts.
- Contractor Series - Please note: recessed tracks accept Contractor Series Saw Plate, Router Plate, and Stop Block. But it will not work with A, Twin, or Ultra Series accessories.
Features:

Specs:
| Height | 3.5 Inches |
| Length | 1.8 Inches |
| Weight | 1.76 Pounds |
| Width | 60 Inches |
| Size | 1-(50-Inch) |
| Number of items | 1 |
3. IRWIN VISE-GRIP Original Chain Clamp, Locking, 9-Inch (27ZR)
- Chain holds and locks around any shape or size
- Ideal for awkward pieces
- Turn screw adjusts pressure to fit work and stays adjusted for repetitive use
- Constructed of high-grade heat-treated alloy steel for durability
- Classic trigger release designed to provide maximum locking force
Features:

Specs:
| Height | 1 Inches |
| Length | 11 Inches |
| Weight | 1 Pounds |
| Width | 4.5 Inches |
| Size | Pack of 1 |
| Number of items | 1 |
4. All in One Clamp A-50 50-Inch Grip Clamp Guide w/T-track
No more C-clamping with a self-clamping straight edge to guide your power tools for truly straight cutsRaised T-track accepts A, Twin, and Ultra series Saw Plate, Router Plate and Stop Block but will not work with Contractor series accessoriesNylon jaws hold work piece securely and are predrilled fo...

Specs:
| Number of items | 1 |
5. E. Emerson Tool Co. C24 24-Inch All-In-One Contractor Straight Edge Clamping Tool Guide
- STRAIGHT EDGE - E. Emerson’s Contractor Series self-clamping straight edge patented design has integral tubes running the length of the wide body construction, making it ultra rigid and light to handle.
- NO C-CLAMPING - No more C-clamping! Achieve that truly straight cut using this self-clamping straight edge to guide your tools.
- EXTRA WIDE - This self clamping straight edge is extra wide for exceptional rigidity and has a low profile for obstruction-free cuts.
- FLAT TOP - The extra low profile and flat top makes it easier for all circular saw or router straight cuts.
- CONTRACTOR SERIES - Please note: recessed tracks accept Contractor Series Saw Plate, Router Plate, and Stop Block. But it will not work with A, Twin, or Ultra Series accessories."
Features:
Specs:
| Height | 33.8 Inches |
| Length | 1.8 Inches |
| Weight | 2.4 Pounds |
| Width | 3.3 Inches |
| Number of items | 1 |
6. Bora 540950 Clamp Edge Tool Guide,50-Inch
- Intended to fit a wide range of applications, these multi-purpose straight edge clamps boast many unique features
- The exclusive swivel head design will allow the Clamp Edge to firmly clamp angles up to 22.5 Degrees
- This feature gives the user much more flexibility for all types of clamping and cutting applications
- Swivel head design will firmly clamp angles up to 22.5 degrees
- Use with all circular saws, routers, jigsaws and other portable power tools
- Ridged Aluminum Straight Edge Guide for making straight and accurate cuts
- Soft-grip non-marring rubberized clamping pad, securely grips all surfaces
- Lifetime Warranty
Features:

Specs:
| Color | Silver metallic |
| Height | 2.25 Inches |
| Length | 64.5 Inches |
| Weight | 2.9 Pounds |
| Width | 2.25 Inches |
| Size | 50-Inch |
| Number of items | 1 |
7. E. Emerson Tool Co. C36 36-Inch All-In-One Contractor Straight Edge Clamping Tool Guide
STRAIGHT EDGE - E. Emerson’s Contractor Series self-clamping straight edge patented design has integral tubes running the length of the wide body construction, making it ultra rigid and light to handle.NO C-CLAMPING - No more C-clamping! Achieve that truly straight cut using this self-clamping str...
Specs:
| Height | 45.5 Inches |
| Length | 1.8 Inches |
| Weight | 1.28 Pounds |
| Width | 3.3 Inches |
| Number of items | 1 |
8. WTX 5 Pc Straight Edge Saw Guide Set, Includes 50" & 36" Clamp Edges, 50" Extension, Saw Plate, Rip Handle

Specs:
| Height | 3 Inches |
| Length | 63 Inches |
| Weight | 7 Pounds |
| Width | 9.25 Inches |
| Number of items | 1 |
9. All in One Clamp XWJ Wide Jaws Fixture for All in One Clamp (2-Pack), STRAIGHT EDGE NOT INCLUDED
- Fits all E. Emerson Tool Co. Straight Edge Clamping Tool Guides
- Aluminum jaws increase width of clamping surface to 3 3/4 inches
- Includes 4 screws for installation
- Additional holes in jaw allow for attachment of customer supplied story sticks
- Set of two aluminum jaws for one clamp
Features:

Specs:
| Height | 7.5 Inches |
| Length | 1 Inches |
| Weight | 0.3 Pounds |
| Width | 5.5 Inches |
| Number of items | 1 |
10. Bora WTX 50" Clamp Edge, 50" Extension & Saw Guide Kit, 100" of Straight, True Cuts When Assembled
- To get 100", you will connect the 50" Clamp edge and 50" Extension piece. Connectors are included
- Included in this kit are 50" Clamp edge, 50" Extension for clamp edge, saw guide
- Adjustable clamp end on straight edge slides easily up and down to fit material to be cut
- Saw plate connects to saw at 3 different points for secure fit
- Wtx Clamp edge is made of heavy-gauge, extruded aluminum for extreme durability
Features:

Specs:
| Height | 6 Inches |
| Length | 63 Inches |
| Weight | 3.25 Pounds |
| Width | 9 Inches |
| Size | 100" |
| Number of items | 3 |
11. All in One Clamp U-99 99-Inch Ultra Wide Grip Clamp with Double T-Track
- No more C-clamping with a self-clamping straight edge to guide your power tools for truly straight cuts
- Aluminum extrusion is extra wide for rigidity over the 99 inch length
- Raised T-tracks accept A, Twin, and Ultra series Saw Plate, Router Plate and Stop Block but will not work with Contractor series accessories
- Nylon jaws hold work piece securely and are pre-drilled for accessory Wide Jaws and Tall Jaws
- Distance of 99 inches between jaws allows lengthwise cuts on 4 foot by 8 foot stock
Features:

Specs:
| Number of items | 1 |
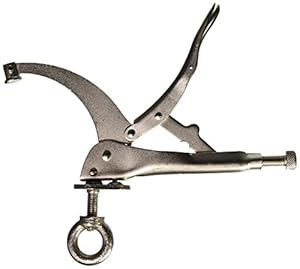
12. Steelex D2493 Drill Press Clamp, 12-Inch
Country Of Origin: ChinaModel Number: D2493Item Package Dimension: 14.6" L x 9.0" W x 1.8" HItem Package Weight: 1.95 lb
Specs:
| Height | 1.2 Inches |
| Length | 13.5 Inches |
| Weight | 1.85 Pounds |
| Width | 8.1 Inches |
| Size | 12" |
| Number of items | 1 |

🎓 Reddit experts on edge clamps
The comments and opinions expressed on this page are written exclusively by redditors. To provide you with the most relevant data, we sourced opinions from the most knowledgeable Reddit users based the total number of upvotes and downvotes received across comments on subreddits where edge clamps are discussed. For your reference and for the sake of transparency, here are the specialists whose opinions mattered the most in our ranking.
Interested in what Redditors like? Check out our Shuffle feature
Shuffle: random products popular on RedditTop Reddit comments about Edge Clamps:
Summary
1. Bayco SL-300 8.5 Inch Clamp Light with Aluminum Reflector
- electric-household-fan-replacement-parts
- Commercial brand: Bayco
- Import From: China
- Rated for Up to a 150-Watt Incandescent Bulb
- Adjustable Ball Joint for Easy Positioning
- Spring Steel Clamp with Scratch Resistant Vinyl Sleeve
- Energy Saving Durable On/Off Switch
Features:
Specs:
| Color | Silver |
| Height | 4.5 Inches |
| Length | 9.25 Inches |
| Weight | 0.65 Pounds |
| Width | 9.25 Inches |
| Size | 1pc |
| Number of items | 1 |
2. E. Emerson Tool Co. C50 50-Inch All-In-One Contractor Straight Edge Clamping Tool Guide
- Straight Edge - E. Emerson’s Contractor Series self-clamping straight edge patented design has integral tubes running the length of the wide body construction, making it ultra rigid and light to handle.
- No C-clamping - No more C-clamping! Achieve that truly straight cut using this self-clamping straight edge to guide your tools.
- Extra Wide - This self clamping straight edge is extra wide for exceptional rigidity and has a low profile for obstruction-free cuts.
- Flat Top - The extra low profile and flat top makes it easier for all circular saw or router straight cuts.
- Contractor Series - Please note: recessed tracks accept Contractor Series Saw Plate, Router Plate, and Stop Block. But it will not work with A, Twin, or Ultra Series accessories.
Features:
Specs:
| Height | 3.5 Inches |
| Length | 1.8 Inches |
| Weight | 1.76 Pounds |
| Width | 60 Inches |
| Size | 1-(50-Inch) |
| Number of items | 1 |
3. IRWIN VISE-GRIP Original Chain Clamp, Locking, 9-Inch (27ZR)
- Chain holds and locks around any shape or size
- Ideal for awkward pieces
- Turn screw adjusts pressure to fit work and stays adjusted for repetitive use
- Constructed of high-grade heat-treated alloy steel for durability
- Classic trigger release designed to provide maximum locking force
Features:
Specs:
| Height | 1 Inches |
| Length | 11 Inches |
| Weight | 1 Pounds |
| Width | 4.5 Inches |
| Size | Pack of 1 |
| Number of items | 1 |
4. All in One Clamp A-50 50-Inch Grip Clamp Guide w/T-track
No more C-clamping with a self-clamping straight edge to guide your power tools for truly straight cutsRaised T-track accepts A, Twin, and Ultra series Saw Plate, Router Plate and Stop Block but will not work with Contractor series accessoriesNylon jaws hold work piece securely and are predrilled fo...
Specs:
| Number of items | 1 |
5. E. Emerson Tool Co. C24 24-Inch All-In-One Contractor Straight Edge Clamping Tool Guide
- STRAIGHT EDGE - E. Emerson’s Contractor Series self-clamping straight edge patented design has integral tubes running the length of the wide body construction, making it ultra rigid and light to handle.
- NO C-CLAMPING - No more C-clamping! Achieve that truly straight cut using this self-clamping straight edge to guide your tools.
- EXTRA WIDE - This self clamping straight edge is extra wide for exceptional rigidity and has a low profile for obstruction-free cuts.
- FLAT TOP - The extra low profile and flat top makes it easier for all circular saw or router straight cuts.
- CONTRACTOR SERIES - Please note: recessed tracks accept Contractor Series Saw Plate, Router Plate, and Stop Block. But it will not work with A, Twin, or Ultra Series accessories."
Features:
Specs:
| Height | 33.8 Inches |
| Length | 1.8 Inches |
| Weight | 2.4 Pounds |
| Width | 3.3 Inches |
| Number of items | 1 |
6. Bora 540950 Clamp Edge Tool Guide,50-Inch
- Intended to fit a wide range of applications, these multi-purpose straight edge clamps boast many unique features
- The exclusive swivel head design will allow the Clamp Edge to firmly clamp angles up to 22.5 Degrees
- This feature gives the user much more flexibility for all types of clamping and cutting applications
- Swivel head design will firmly clamp angles up to 22.5 degrees
- Use with all circular saws, routers, jigsaws and other portable power tools
- Ridged Aluminum Straight Edge Guide for making straight and accurate cuts
- Soft-grip non-marring rubberized clamping pad, securely grips all surfaces
- Lifetime Warranty
Features:
Specs:
| Color | Silver metallic |
| Height | 2.25 Inches |
| Length | 64.5 Inches |
| Weight | 2.9 Pounds |
| Width | 2.25 Inches |
| Size | 50-Inch |
| Number of items | 1 |
7. E. Emerson Tool Co. C36 36-Inch All-In-One Contractor Straight Edge Clamping Tool Guide
STRAIGHT EDGE - E. Emerson’s Contractor Series self-clamping straight edge patented design has integral tubes running the length of the wide body construction, making it ultra rigid and light to handle.NO C-CLAMPING - No more C-clamping! Achieve that truly straight cut using this self-clamping str...
Specs:
| Height | 45.5 Inches |
| Length | 1.8 Inches |
| Weight | 1.28 Pounds |
| Width | 3.3 Inches |
| Number of items | 1 |
8. WTX 5 Pc Straight Edge Saw Guide Set, Includes 50" & 36" Clamp Edges, 50" Extension, Saw Plate, Rip Handle
Specs:
| Height | 3 Inches |
| Length | 63 Inches |
| Weight | 7 Pounds |
| Width | 9.25 Inches |
| Number of items | 1 |
9. All in One Clamp XWJ Wide Jaws Fixture for All in One Clamp (2-Pack), STRAIGHT EDGE NOT INCLUDED
- Fits all E. Emerson Tool Co. Straight Edge Clamping Tool Guides
- Aluminum jaws increase width of clamping surface to 3 3/4 inches
- Includes 4 screws for installation
- Additional holes in jaw allow for attachment of customer supplied story sticks
- Set of two aluminum jaws for one clamp
Features:
Specs:
| Height | 7.5 Inches |
| Length | 1 Inches |
| Weight | 0.3 Pounds |
| Width | 5.5 Inches |
| Number of items | 1 |
10. Bora WTX 50" Clamp Edge, 50" Extension & Saw Guide Kit, 100" of Straight, True Cuts When Assembled
- To get 100", you will connect the 50" Clamp edge and 50" Extension piece. Connectors are included
- Included in this kit are 50" Clamp edge, 50" Extension for clamp edge, saw guide
- Adjustable clamp end on straight edge slides easily up and down to fit material to be cut
- Saw plate connects to saw at 3 different points for secure fit
- Wtx Clamp edge is made of heavy-gauge, extruded aluminum for extreme durability
Features:
Specs:
| Height | 6 Inches |
| Length | 63 Inches |
| Weight | 3.25 Pounds |
| Width | 9 Inches |
| Size | 100" |
| Number of items | 3 |
11. All in One Clamp U-99 99-Inch Ultra Wide Grip Clamp with Double T-Track
- No more C-clamping with a self-clamping straight edge to guide your power tools for truly straight cuts
- Aluminum extrusion is extra wide for rigidity over the 99 inch length
- Raised T-tracks accept A, Twin, and Ultra series Saw Plate, Router Plate and Stop Block but will not work with Contractor series accessories
- Nylon jaws hold work piece securely and are pre-drilled for accessory Wide Jaws and Tall Jaws
- Distance of 99 inches between jaws allows lengthwise cuts on 4 foot by 8 foot stock
Features:
Specs:
| Number of items | 1 |
12. Steelex D2493 Drill Press Clamp, 12-Inch
Country Of Origin: ChinaModel Number: D2493Item Package Dimension: 14.6" L x 9.0" W x 1.8" HItem Package Weight: 1.95 lb
Specs:
| Height | 1.2 Inches |
| Length | 13.5 Inches |
| Weight | 1.85 Pounds |
| Width | 8.1 Inches |
| Size | 12" |
| Number of items | 1 |
Well, If filmmaking and video is your goal with these cameras I wouldn't recommend either.
If you're just starting and serious about video production here's a pretty effective starter kit that's just a tad over your $400 budget.
[Camera: Canon Vixia HF R400] (http://www.amazon.com/Canon-VIXIA-R400-Advanced-Camcorder/dp/B00AWZFJ22/ref=sr_1_1?ie=UTF8&qid=1395594961&sr=8-1&keywords=canon+vixia+hf+r400)
This is a decent starter camera. It's got a decent range of focal lengths, optical stabilization, microphone input, progressive frame-rates and most of all designed with video in mind. You'll need a SD Card
I noticed the cameras you picked resembles DSLRs but keep in mind that these in particular are not and with fixed lenses which defeats the purpose of having DSLR for video. Trust me, learn how to be effective with a camcorder first! Then, when your skill requires more artistic control you can upgrade.
Audio:
[Microphone:] (http://www.amazon.com/Audio-Technica-ATR-6550-Condenser-Shotgun-Microphone/dp/B002GYPS3M/ref=sr_1_1?ie=UTF8&qid=1395595673&sr=8-1&keywords=shotgun+microphone)
Having clean audio is probably the most important part filmmaking! The key is to get the mic as close to your subject as possible and away from your camera. You'll need a cable. If you need to mount it to your camera use this [bracket.] (http://www.amazon.com/Heavy-Photography-Bracket-Standard-Mounts/dp/B005Z4ROIW/ref=sr_1_1?ie=UTF8&qid=1395595189&sr=8-1&keywords=flash+bracket) This bracket will also help keep the camera stabilized when you go handheld.
Keep in mind this won't deliver perfect audio but it will be a MASSIVE improvement to the on board microphone and learning how to record with decent audio in mind is your first step into becoming a pro.
[Lighting:] (http://www.amazon.com/Bayco-SL-300-Clamp-Aluminum-Reflector/dp/B007RKKEHA/ref=sr_1_17?ie=UTF8&qid=1395595354&sr=8-17&keywords=can+lights)
Lighting is EXTREMELY important. A couple of these can lights will not only help with your image quality but put in you in the right direction for learning how to properly light your scene. You could start with daylight equivalent CFL bulbs.
[Tripod:] (http://www.amazon.com/AmazonBasics-60-Inch-Lightweight-Tripod-Bag/dp/B005KP473Q/ref=sr_1_3?ie=UTF8&qid=1395595413&sr=8-3&keywords=tripod)
You NEED a tripod. This one is cheap and cheerful. Looping the ends of a couple rubber brands around the pan handle and the other end around your finger will help deliver some smoother pans!
Total: $425/£258
Some things to keep in mind:
Best of luck to you!
edit: formatting
The cheaper route and the best temporary setup would be 55 watt CFL bulbs in a work lamp reflector (they label cfls on equivalent to incandescent bulbs and actual watts used just pay attention to the actual watts used). I use this setup for my succulents and they work great but they don't have enough power for fruiting or flowering plants they are great for the growing stages. The CFLs need to be very close to the plants but far enough where the light doesn't burn them and you need multiple bulbs or one of these kind of florescent lights if you need to cover a lot of area. The 55 watt bulbs can cover about a 1.5'X1.5' area if they are smaller plants.
You can get the big 55 watt bulbs and the reflectors at Walmart. The smaller 25 watt cfls work great too but they need to be very close like 2 inches away close and you need multiples you can fit 4 of them on a power strip with adapters.
The LEDs cost a lot more even the smaller ones but you can find them here for pretty cheap they are the most power efficient option out of the two but they don't come cheap. You get what you pay for when it comes to grow lights.
Edit: they also sell 6500k 55 watt CFLs that have a bit better color for growing.
Jig saws can give a crooked/rough cut pretty easily. They are typically used for making curves. I really would recommend a circular saw for your application but the track saw would be good as well (but probably more money). You can use a speed square for smaller cuts and clamp a known straight edge to make longer cuts. They make specialty tools to help break down bigger plywood easily, they clamp all the way across the piece.
quick square method: https://www.youtube.com/watch?v=cGucvgrVLGg
edge guide for long stuff: http://smile.amazon.com/Bora-540950-Clamp-Guide-50-Inch/dp/B002UQZDYA/ref=lp_553160_1_1?s=power-hand-tools&ie=UTF8&qid=1419896287&sr=1-1
you should be careful but not intimidated by them. use them as directed with the proper safety gear and they're pretty safe.
>Between 3000K and 4000K, if growing a small tomato bush, which would you go for?
I'm conflicted actually.
Probably the 4000k, and this is the rational: The increased blue light will reduce stretching in plant, at lower light levels.
Why I'm conflicted is I know 3000k works fine, I like the warm light/ find it relaxing, and red spectrum helps with flowering (important in a tomato plant).
Ultimately it might come down to what had more lux or was on sale that day XD !
>is the PAR38 shape all that important
PAR (parabolic aluminized reflector) kind of is important, the reflector bit in particular, as it means there is more light going in the right direction and reaching the plant. Light intensity is more important than exact spectrum.
>could I go for a regular globe shape?
Yeah you could, just put it in a reflector.
Ya I had the same problem and ended up putting them on top of a shoebox to get them closer. I would definitely recommend getting them closer. Any idea what color temperature those bulbs are? I've read you want them around 5000k or above, and if they are really low, soft white bulbs they can cause stretching.
I don't know how much of a budget you are on, but if they continue to stretch too badly you could always supplement them with cool white 26 watt cfl lights. I ended up buying these things from Walmart: http://www.amazon.com/gp/aw/d/B007RKKEHA?pc_redir=1395095763&robot_redir=1
And I'm having a lot of success with them.
By the way anytime you have questions feel free to PM me and I can try to help. I love this stuff haha.
My tablesaw was the best investment I ever made (well, my wife made as it was a present) with woodworking. It is the single most used tool in my shop. Build yourself a cross-cut sled and get a good blade, you won't regret it. I have a low-end Cabinet Table Saw and am glad I didn't get a Contractor Table Saw.
Miter saws are nice for framing & trim work assuming you get the right blade for trim work- most come with a rough carpentry 80 tooth blades so for trim work you probably want to replace the blade. Most only have a cut size of about 6-8 inches, so don't expect to cut your shelves on it without a LOT of flipping. Sliding compound Miter saws will give you a bit more cutting length (12-18").
Circular saws are great for breaking down larger pieces (such as full sheets of plywood) into more manageable pieces. They also can work well for other cuts if you buy a Straight-edge clamp. In fact, I'd recommend you buy one capable of 48" cuts for breaking down plywood, then you could also use it to set up your cuts for the shelving. Makes things much more repeatable than trying to eyeball it by hand.
I would suggest never taking photos in full sunlight. It can really change how the color is perceived.
I paint in oils and acrylic, and because I’m cheap I photograph my own work. There’s a technique in photographing indoors, but I prefer to take photos outside on a cloudy day out of direct light. This lessens the chance of having hot spots, and I’ll still probably have to color correct in photoshop as even in that light the sun can photograph the work as too warm or too cool depending on the time of year.
I’m not sure if you’re photographing 2d or 3d work, but the rules are different for each. You could jury-rigg a light diffuser. You can get a couple of these (you may be able to find something like this cheaper at a local hardware store or Walmart), put in a daylight bulb, look for one that’s not warm or cool. You want the light to be in the middle of the spectrum, some hardware stores have lightbulb samples. Then to diffuse the light put white paper or cloth between the bulb and your object. Make sure if your bulb gets hot that it’s not close enough to burn your diffuser. I suggest vellum, or plain white paper, or a very thin white sheet. You are just looking to make the shadow less harsh, and you want two lights because you want the light on either side of your object. For the background use something neutral. If your work is three dimensional you’ll want to curve the background. This video has instructions https://youtu.be/Vz-3hKfgs5I
It’s up to you to represent your work accurately to the buyer. If you keep getting this complaint I would suggest you change how you photograph your work, and not blame the customer for not reading your disclaimer. Besides you could be losing sales because potential customers won’t buy because they can’t be sure of what they’re getting.
Good luck.
I have one like that on some plants that aren't succulents and it's going really well. I just stuck some succulents under it too so we'll see how that goes. However, I have most of my succulents under this. It's super cheap, you just need a CFL lightbulb that has a "daylight" color (between 5000k-6500k) and is the equivalent of a 75 or higher watt bulb. Something like this (this is a four pack). You could get two of the one I use, plus light bulbs, for less than the one you linked too. And the clasp on the one I linked to is much stronger and bigger than on the LED light, so it's easier to attach in more places.
Edit to add that the clamp lamp with the reflector has a cord and an on-off switch. The picture makes it look like it's just a reflector and that you need to buy your own cord for the lightbulb.
I still asked for a picture of a set up. what size tank do you have? Ideally you will have 29 gallon tall tank. They are nocturnal so they don't need UVB light. They get their D3 from the repashy food instead. A UVB 2.0 flourescent light can be used for UVB and UVA and it will just make it a little more healthy. you want a basking corner of the tank at 85 F. you want to use a normal light bulb at 40-65 watt to get that temperature. just buy 2 of these they can be bought at home depot, or from amazon. in one of them put the 40-65 watt white light bulb. and another for your fluorescent light.
this website has some good suggestions too, just scroll down to the lighting section.
http://www.drsfostersmith.com/pic/article.cfm?aid=2365
If your basement is colder than 70 F you will probably want to get a red bulb to keep it warmer at night.
With this info you should be able to get your whole lighting set up for about $20
unfortunately i only have time to make video at night.
Clamp light like this one ?
For the light bulb, how many wattage do i need for a small room (10 feet x 9 feet)?
I think i can buy one cheap diffuser, but i don't know the differences between the one that looks like umbrella, or softbox
If i can only buy one, which 1 is better?
Thanks
The specs say the fuse is n it is rated to 100 Watts, I'm pretty sure two bulbs will be fine. I wouldn't buy it though. The following link has what I use and works great and is cheaper :). http://www.amazon.com/gp/aw/d/B007RKKEHA/ref=mp_s_a_1_2?qid=1463168473&sr=8-2&pi=SY200_QL40&keywords=clamp+light&dpPl=1&dpID=41GDTn2U52L&ref=plSrch
I wouldn't expect a lot for the price. 10000K is pretty high, you probably want more of a 5-6k range for freshwater plants. I got a similar cheap LED bar and it was barely enough to even illuminate a tank visually, let alone keep plants alive.
High end LED bars get expensive. If you want cheap lighting for a planted tank, just get fixtures like this and clamp or hang them above the tank, with daylight compact flourescent or LED bulbs (Home Depot or Lowes has a good selection.)
I just use one these for all my tanks. For a 10 gallon, put a 13w CFL bulb in it and call it good. Make sure you get one that is "daylight," around 6500k. I get them at Bed Bath and Beyond.
Works like a charm
Absolutely! Thanks so much for the help.
So for the lighting, I bought two clip clights like https://www.amazon.ca/Bayco-SL-300N4-8-5-Inch-Aluminum-Reflector/dp/B007RKKEHA/ref=asc_df_B007RKKEHA/?tag=googleshopc0c-20&linkCode=df0&hvadid=292962912878&hvpos=1o2&hvnetw=g&hvrand=7779507648941511035&hvpone=&hvptwo=&hvqmt=&hvdev=c&hvdvcmdl=&hvlocint=&hvlocphy=9001212&hvtargid=pla-357225917488&psc=1 and wrapped white cloth over them to soften the light from them. What would you say the main issue is with the lighting? DIY of course, but is there anything I could do with what I have to improve the lighting?
I'd prefer the Tamron 90 2.8 macro because it gives you a bit more working distance. But you can shoot with that on pretty much any consumer body. I'd want to have a 50 1.8 (The standard lens) and a 90 2.8, plus a light tent, on a Rebel body for products. Depending on the size of the products two fixed lights could be fine.
The big feature I like for that sort of photography would be a fold out screen. So the 70D could be an option as well.
For what it's worth, the company I work for, a major niche ecommerce retailer, uses a 7D (Original) with the 18-135, 50 1.8, and a macro lens with primarily fixed lighting like this ( http://smile.amazon.com/Bayco-SL-300-Clamp-Aluminum-Reflector/dp/B007RKKEHA/ref=sr_1_5?s=hi&ie=UTF8&qid=1418920997&sr=1-5&keywords=dish+work+light ) and a light tent.
Not bad, but I’d be interested in seeing how much torque you could apply on a small object before the chain distorts/slips to the side. With this design, it looks like there would be a lot of “wiggle room”, which is why most commercial models try to fix the chain as close to the object as possible. Eg: this, or this. This DIY design also limits you to open ended fixtures that you can slip it over; no working on attached pipe systems. Easy fix to both issues would be making one side detachable, with a hook or cross pin.
I've used circular saws with the fence attachment. It works okay. Well enough for carpentry work, but not for woodworking (IMO).
I use one of these and love it.
Kinda hard to see where the root positions are from the pictures.
Put marks on it so you know where top bottom and your 2g weld will be. Inside of pipe and outside of pipe.
You have a chain vice clamp? I'd recommend it. Also with a regular vice clamp. Clamp them together, gives you something steady to lean again.
Wheres the 6 oclock on your pipe? looks like you're going pretty far over. I'd never start right at the 6 oclock position, but looks like you're way over at the 7.30 - 8 position almost.
There's a bunch. I'm currently using a work lamp with a 60w bulb in it. You can use brew belts sold in homebrew stores, heating pads, heating wire from a pet store, etc. So many options but it depends how much you want to spend and what you feel will work best.
This is the saw that you will find in garages and construction sites across the country. It is an extremely well built, sturdy, accurate saw. And it's not crazy expensive.
http://www.amazon.com/gp/aw/d/B004YIALZI/ref=mp_s_a_1?qid=1367836425&sr=8-2&pi=SL75
After that, I'd consider getting one of the 4ft clamp guides, like this one from Emerson, or Kreg makes one as well: http://www.amazon.com/gp/aw/d/B0000DYV40/ref=mp_s_a_1?qid=1367836606&sr=8-4&pi=SL75
I think that a cutting guide like http://www.amazon.com/E-Emerson-Tool-C50-Contractor/dp/B003TXSAHU is better than that one; you can cut at whatever width you like, rather than being limited to a 24" width. And honestly, it's not hard to cut a length of plywood and simply use that as your cutting guide.
What about something like this: https://www.amazon.com/dp/B002NZZE7O?ref=ppx_pop_mob_ap_share
Could you use that as a fence? I like them a lot (I have 2).
I recently purchased the top link off of Amazon in the US. It has everything I need for my small studio and a 3rd light if I ever expand (it also came with all the bulbs). I also got one of the bottom link as I was having issues with my chair casting a shadow (no bulb included).
https://www.amazon.com/gp/product/B0054K9EU8/ref=oh_aui_detailpage_o02_s00?ie=UTF8&psc=1
https://www.amazon.com/gp/product/B007RKKEHA/ref=oh_aui_detailpage_o03_s01?ie=UTF8&psc=1
Jigs like this are quite common and easy to make and use. Or you can buy a straight edge clamp to do much the same thing; comes with a built in clamp, but you have to measure carefully to include the blade offset when using one.
I bought a clamp-on straight edge similar to this a while back. It works great for both my saw and router. It's only downfall is that it will slide if you put too much pressure on it. I think I got mine for around $30 at Menards.
https://www.amazon.com/E-Emerson-Tool-C50-Contractor/dp/B003TXSAHU
I would vote circular saw for cost and versatility. Team it up with something an clamping straight edge like this and you can cut down the OSB as well. In either case you won't be able to easily cut out the notches around the end posts as shown with either tool.
You can also use vice grips if you need to attach to something small. These would make an excellent ground on any pipe. Just attach your ground to the vice grips.
After some recent projects without a table saw, I would highly recommend a type of circular saw guide. Really aids with straight/square cuts. I picked this one up just the other day and it has made a huge difference.
The label called it a bench clamp, but amazon calls them an edge clamp.
I've made a soft-light box for really cheap before.
-Carboard box.
-Cut off one end so that it's open.
-Glue aluminum foil to the entire inside of the box.
-Insert a light through a hole on the back of box.
-Cover the open side with an old t-shirt or bed sheet.
Here's a link to my completed light box. Instagram Link
If you need better directions, I can look up the ones I followed. I just don't have them handy right now.
I used a clamp light similar to this, I just took off the aluminum reflector off of it.
Don't do this. Please do not do this.
You would get better results with some guides (like this or this) and a couple of sawhorses for the larger cuts. For smaller cuts I would use a miter box or a bench hook and a hand saw.
Designing and building a fence system that would stay parallel to the blade would take too long. If it is not perfectly parallel, or moves while cutting you are going to pinch the wood you are ripping. This is going to result in a board being rammed into your stomach, or a circular saw breaking free of its mount and flying around with a spinning blade. Either way, you are going to have a bad day.
One easy way to ensure straight cuts is to clamp some kind of guide to the work piece that you can run your saw up against. Something like these:
How to Build a Simple Circular Saw Guide for Straighter Cuts
Circular Saw Rip Guide--My Version
You can get more complex by adding some kind of clamping system to the bottom of the guides so that they're out of the way of the saw, or just carefully position regular clamps.
There are commercial versions of a similar thing, the only problem is you need to know how far to place them from the line you want to cut. Whereas with the DIY version above you place the edge of the guide right on the line, no extra measuring.
24" Clamp And Cut Edge Guide - Harbor Freight
All-In-One Clamp XWJ Wide Jaws Fixture for All-In-One Clamp (2-Pack) - Amazon
Regarding the jagged cut, sounds like you need to upgrade your saw blades to something with more teeth. The cheap blades that usually come with circular saws are 24T or lower, only good for ripping. Try a 40T or 60T for a cut you'll barely have to sand.
Track saws are ok for those who don't have a table saw; can give accurate and final cuts. When you have a table saw, and you just want to break down sheet goods, cut them a little proud and do the final trim to size cut on the TS and use one of these https://www.amazon.com/Emerson-Tool-C50-Contractor-Straight/dp/B003TXSAHU/ref=pd_lpo_vtph_469_bs_tr_t_1/142-9921801-8497807?_encoding=UTF8&psc=1&refRID=6Q3W4CMNDX100KB6SXPV or something like it, to guide your circular saw. For me, 95% of the time my breakdown cuts are quite accurate but I've been doing this for a long time. Keep it simple.
You could build the stand for holding the panel and then pick up a long saw guide/clamp and just use your circular saw.
Its a drill press clamp
Read more here
here's the saw plate and guide, and here's the router base plate for the guide.
I have several Tru-Grip guides. They are a clamp and a guide all in one.
I use a light clamp and then I screw an adapter into the socket to plug in multiple lights. I clamp my lights to some of the rope that hangs from the tent. I have two of these set up along with my 300w LEDs.
http://www.amazon.com/gp/aw/d/B007RKKEHA/ref=mp_s_a_1_7?qid=1458506517&sr=8-7&pi=AC_SX236_SY340_QL65&keywords=light+clamp&dpPl=1&dpID=41GDTn2U52L&ref=plSrch
http://www.amazon.com/gp/aw/d/B00T5JD2P2/ref=mp_s_a_1_17?qid=1458506653&sr=8-17&pi=AC_SX236_SY340_QL65&keywords=light+socket+adapter
I had the same problem in the middle of the project and took it back to Lowe's and got one of this type of thing. The one I got was cheaper, but the same idea.