Reddit mentions: The best household stains
We found 166 Reddit comments discussing the best household stains. We ran sentiment analysis on each of these comments to determine how redditors feel about different products. We found 87 products and ranked them based on the amount of positive reactions they received. Here are the top 20.
1. UNDERSTANDING WOOD FINISHING by BOB FLEXNER
- Bob Flexner has been writing & teaching wood finishing for 18 years.
- Completely updated second edition of UNDERSTANDING WOOD FINISHING.
- The most practical, comprehensive book on finishing ever published.
Features:
 ▼ Read Reddit mentions
2. Watco 241758 Butcher Block Oil & Finish, Clear
- Protects interior wood surfaces such as butcher blocks, cutting boards, salad bowls and more
- Non-toxic, food safe wood oil is easy to apply with no brush marks
- Dries to the touch in 2 hours and covers up to 50 sq. ft. , ready for use after 72 hours
- Easy wipe-on application with a clean cloth - meets government standards of 21 CFR 175. 300
- Enhances and maintains wood items with a rich, lustrous sheen
- Easy wipe-on application.
- The rich sheen enhances the wood while it protects.
- Food-safe formulation.
Features:

Specs:
| Color | Clear |
| Height | 6.5 Inches |
| Length | 3.875 Inches |
| Number of items | 1 |
| Weight | 1.1 Pounds |
| Width | 1.75 Inches |
3. Wood Dye - Aniline Dye 5 Color Kit - Wood Stain Kit
Wood dye from Keda Dyes can make 5 quarts of liquid dye stain, in 5 exotic wood dye colors per kit.Wood Dyes are eco-friendly, offer vibrant wood dye colors, and are very powerful.

Specs:
| Color | Black, Blue, Brown, Red, Yellow, all in one wood stain colors set |
| Height | 0.5 Inches |
| Length | 7 Inches |
| Weight | 0.0625 Pounds |
| Width | 4.5 Inches |
4. Rust-Oleum Parks Super Glaze, 241352 Ultra Glossy Epoxy Finish and Preservative Kit, Clear 32 Fl Oz
Durable and waterproofIdeal for table and bar tops, crafts and refinishing furnitureCan be used on almost any interior surfaceResists heat and chemicalsOne pour is as thick as 75 coats of varnish

Specs:
| Color | Clear |
| Height | 4.75 Inches |
| Length | 4.25 Inches |
| Number of items | 1 |
| Size | 32 oz |
| Weight | 2.45 Pounds |
| Width | 4.25 Inches |
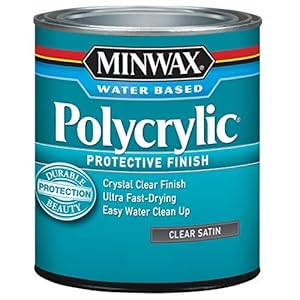
5. Minwax 255554444 Minwaxc Polycrylic Water Based Protective Finishes, 1/2 Pint, Gloss
Protects and adds beauty to interior wood surfaces including woodwork, furniture, doors and cabinetsCrystal clear finish is ideal for use over light woods like maple, ash and birch as well as over Minwax Water-Based Wood StainsUltra fast-drying formula allows for quick recoats in 2 hoursWater-based ...

Specs:
| Color | 1/2 Pint |
| Height | 2.9 Inches |
| Length | 2.8 Inches |
| Number of items | 1 |
| Size | 8 Fl Oz (Pack of 1) |
| Weight | 0.67749999943185 Pounds |
| Width | 2.8 Inches |
6. Minwax 41700000 High Performance Wood Hardener, pint
- The hardener penetrates deep into the wood and its special resin binds and reinforces the decayed wood fibers
- High performance wood hardener seals from further moisture penetration and hardens to a rock hard solid base for lifting
- Recommended uses: windowsills, doors, woodwork, floors, decks, furniture, woodwork
- Penetrates deep, strengthening decayed wood
- Prepares rotted wood for Minwax High Performance Wood Filler
- Seals out moisture
- 1 pint
Features:

Specs:
| Color | Clear |
| Height | 2.69 Inches |
| Length | 7.25 Inches |
| Number of items | 1 |
| Size | 1 Pint |
| Weight | 0.89999999924527 Pounds |
| Width | 2.69 Inches |
7. Minwax 70012444 Wood Finish Penetrating Stain, quart, Dark Walnut
Available in 28 beautiful colors.Can be used to add beauty to any bare or stripped wood surface.It is ideal for staining unfinished wood furniture, cabinets, wood door, trim, molding and hardwood floors.Penetrates deep into wood fibers to highlight the grainAmerica's favorite wood finish

Specs:
| Color | Quart |
| Height | 4.9212598375 Inches |
| Length | 4.330708657 Inches |
| Number of items | 1 |
| Size | Dark Walnut |
| Weight | 2 Pounds |
| Width | 4.9212598375 Inches |
8. J.E. Moser's 844995, Finishes, Wood Stains & Dyes, Water Soluble Ebony Black Aniline Dye
Brings out the beauty of the wood grain.Specifications: Coverage=75-100 sq ft, Diameter=1-3/4 in, Height=2-3/4 in
 ▼ Read Reddit mentions
9. Minwax 63487000 Wood Finish Stain Marker, Dark Walnut
This product adds a great valueIdeal for use on furniture, molding, cabinets and moreDark WalnutEasy touch-up for common nicks and scratchesIdeal for use on furniture, molding, cabinets and more.Dark WalnutFast dryingEasy and quickEasy touch-up for common nicks and scratchesIdeal for use on furnitur...

Specs:
| Color | Dark Walnut |
| Height | 2.25 inches |
| Length | 8.3 inches |
| Number of items | 1 |
| Size | Dark Walnut |
| Weight | 0.02 Pounds |
| Width | 1.3 inches |

11. Original Wood Finish, Pint
- Safe for Food & Skin Contact
- Free from Solvents, Dyes, Petrochemicals & VOCs
- Superior Moisture Resistance
- 100% Renewable Ingredients
- Matte sheen
Features:

Specs:
| Height | 4 Inches |
| Length | 3.3 Inches |
| Size | Pint |
| Width | 3.25 Inches |
12. Minwax 63484000 Wood Finish Stain Marker, Red Mahogany
This product adds a great valueIdeal for use on furniture, molding, cabinets and moreMahoganyEasy touch-up for common nicks and scratchesIdeal for use on furniture, molding, cabinets and more.MahoganyFast dryingEasy and quick
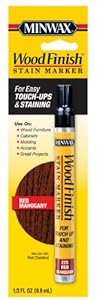
Specs:
| Color | Red Mahogany |
| Height | 1.3 Inches |
| Length | 8.3 Inches |
| Number of items | 1 |
| Size | Red Mahogany |
| Weight | 0.1 Pounds |
| Width | 2.25 Inches |
13. Watco Rust-Oleum A65741 Danish Oil Wood Finish, Quart, Natural
Ideal for use on a variety of indoor wood surfaces including bare, stripped or sanded; not recommended for floorsOil-based formula of blended oil & varnish penetrates deeply into wood pores for ultimate protectionDries to the touch in 6 hours and covers up to 170 sq ftEasy application and protects a...

Specs:
| Color | Natural |
| Height | 7.5 Inches |
| Length | 4.63 Inches |
| Number of items | 1 |
| Size | Quart |
| Weight | 1.8 Pounds |
| Width | 2.5 Inches |
14. Minwax 233334444 Minwaxc Polycrylic Water Based Protective Finishes, 1/2 Pint, Satin
Protects and adds beauty to interior wood surfaces including woodwork, furniture, doors and cabinetsCrystal clear finish is ideal for use over light woods like maple, ash and birch as well as over Minwax Water-Based Wood StainsUltra fast-drying formula allows for quick recoats in 2 hoursWater-based ...
Specs:
| Color | 1/2 Pint |
| Height | 2.87 Inches |
| Length | 2.87 Inches |
| Number of items | 1 |
| Size | 8 Fl Oz (Pack of 1) |
| Weight | 0.67749999943185 Pounds |
| Width | 3 Inches |
15. Krylon K03400000 Clear Non-Skid Coating - 11 oz. Aerosol
- Krylon Non-Skid Coatings Aerosol Clear
Features:

Specs:
| Color | Clear |
| Height | 1 Inches |
| Length | 1 Inches |
| Number of items | 1 |
| Release date | January 2013 |
| Size | 11 Ounce Aerosol |
| Weight | 0.85 Pounds |
| Width | 1 Inches |
16. TotalBoat Clear Penetrating Epoxy Wood Sealer Stabilizer for Rot Repair and Restoration (Quart, Traditional), Model Number: 403795
WOOD HARDENER FOR ROTTED WOOD: two-part epoxy system seals, hardens, preserves, and protects all types of wood by stopping rot. Makes finishes like paint and varnish stick better and last longer. Easy to use treatment has no VOCs or harsh fumesPENETRATING WOOD SEALER: An ideal dry rot treatment; thi...

Specs:
| Number of items | 1 |
| Size | Quart |
17. General Finishes Oil Base Gel Stain, 1/2 Pint, American Oak
- This is the stain that has the most "finishing feel" of all General Finishes' products
- Woodworkers love the lustrous finish that shows up
- Heavy-bodied, and so does not penetrate as deeply into the wood as liquid oil-base stains do
- Can help you get a more even appearance on difficult woods such as aspen or pine
- Easy-to-use stains simply wipe on with a cloth or applied with a foam brush (no spills or splashes)
Features:

Specs:
| Color | American Oak |
| Height | 3 Inches |
| Length | 2.88 Inches |
| Number of items | 1 |
| Size | 1 Half-Pint |
| Weight | 0.25 Pounds |
| Width | 2.88 Inches |
18. AMTECO DIVISION OF GEMINI INDUSTRIE TWP-1501-1 Gallon Cedartone VOC Stain
- Smooth, even coverage
- Model Number: TWP-1501-1
- Item Package Dimension: 14.0" L x 14.0" W x 9.0" H
- Item Package Weight: 7.5 lb
Features:

Specs:
| Color | cedartone |
| Height | 8 Inches |
| Length | 7 Inches |
| Number of items | 1 |
| Weight | 0.1 Pounds |
| Width | 7 Inches |
19. Wood Kote 213-9 Jel'd Stain, Walnut - 12 ounce can
Fast-drying, semi-transparent pigmented stainFor interior wood surfaces: casework-doors, trim, paneling and cabinetsMay be applied to bare or bleached woodCoverage:1,250-1,500 sq. ft. per gallon - recoating is not recommendedFormulated to be applied by hand in-shop or on-site with a soft clean lint-...

Specs:
| Color | Walnut |
| Size | 12 ounce container |
| Weight | 1.5 Pounds |
20. DEFY 1 Gallon Wood Brightener
- Consumer Alert: Most users do not need a license to operate this wireless microphone system. Nevertheless, operating this microphone system without a license is subject to certain restrictions: the system may not cause harmful interference; it must operate at a low power level (not in excess of 50 milliwatts); and it has no protection from interference received from any other device.
Features:

Specs:
| Height | 12 Inches |
| Length | 7.5 Inches |
| Width | 4.25 Inches |
🎓 Reddit experts on household stains
The comments and opinions expressed on this page are written exclusively by redditors. To provide you with the most relevant data, we sourced opinions from the most knowledgeable Reddit users based the total number of upvotes and downvotes received across comments on subreddits where household stains are discussed. For your reference and for the sake of transparency, here are the specialists whose opinions mattered the most in our ranking.
Interested in what Redditors like? Check out our Shuffle feature
Shuffle: random products popular on RedditTop Reddit comments about Household Stains:
Summary
1. UNDERSTANDING WOOD FINISHING by BOB FLEXNER
- Bob Flexner has been writing & teaching wood finishing for 18 years.
- Completely updated second edition of UNDERSTANDING WOOD FINISHING.
- The most practical, comprehensive book on finishing ever published.
Features:
▼ Read Reddit mentions2. Watco 241758 Butcher Block Oil & Finish, Clear
- Protects interior wood surfaces such as butcher blocks, cutting boards, salad bowls and more
- Non-toxic, food safe wood oil is easy to apply with no brush marks
- Dries to the touch in 2 hours and covers up to 50 sq. ft. , ready for use after 72 hours
- Easy wipe-on application with a clean cloth - meets government standards of 21 CFR 175. 300
- Enhances and maintains wood items with a rich, lustrous sheen
- Easy wipe-on application.
- The rich sheen enhances the wood while it protects.
- Food-safe formulation.
Features:
Specs:
| Color | Clear |
| Height | 6.5 Inches |
| Length | 3.875 Inches |
| Number of items | 1 |
| Weight | 1.1 Pounds |
| Width | 1.75 Inches |
3. Wood Dye - Aniline Dye 5 Color Kit - Wood Stain Kit
Wood dye from Keda Dyes can make 5 quarts of liquid dye stain, in 5 exotic wood dye colors per kit.Wood Dyes are eco-friendly, offer vibrant wood dye colors, and are very powerful.
Specs:
| Color | Black, Blue, Brown, Red, Yellow, all in one wood stain colors set |
| Height | 0.5 Inches |
| Length | 7 Inches |
| Weight | 0.0625 Pounds |
| Width | 4.5 Inches |
4. Rust-Oleum Parks Super Glaze, 241352 Ultra Glossy Epoxy Finish and Preservative Kit, Clear 32 Fl Oz
Durable and waterproofIdeal for table and bar tops, crafts and refinishing furnitureCan be used on almost any interior surfaceResists heat and chemicalsOne pour is as thick as 75 coats of varnish
Specs:
| Color | Clear |
| Height | 4.75 Inches |
| Length | 4.25 Inches |
| Number of items | 1 |
| Size | 32 oz |
| Weight | 2.45 Pounds |
| Width | 4.25 Inches |
5. Minwax 255554444 Minwaxc Polycrylic Water Based Protective Finishes, 1/2 Pint, Gloss
Protects and adds beauty to interior wood surfaces including woodwork, furniture, doors and cabinetsCrystal clear finish is ideal for use over light woods like maple, ash and birch as well as over Minwax Water-Based Wood StainsUltra fast-drying formula allows for quick recoats in 2 hoursWater-based ...
Specs:
| Color | 1/2 Pint |
| Height | 2.9 Inches |
| Length | 2.8 Inches |
| Number of items | 1 |
| Size | 8 Fl Oz (Pack of 1) |
| Weight | 0.67749999943185 Pounds |
| Width | 2.8 Inches |
6. Minwax 41700000 High Performance Wood Hardener, pint
- The hardener penetrates deep into the wood and its special resin binds and reinforces the decayed wood fibers
- High performance wood hardener seals from further moisture penetration and hardens to a rock hard solid base for lifting
- Recommended uses: windowsills, doors, woodwork, floors, decks, furniture, woodwork
- Penetrates deep, strengthening decayed wood
- Prepares rotted wood for Minwax High Performance Wood Filler
- Seals out moisture
- 1 pint
Features:
Specs:
| Color | Clear |
| Height | 2.69 Inches |
| Length | 7.25 Inches |
| Number of items | 1 |
| Size | 1 Pint |
| Weight | 0.89999999924527 Pounds |
| Width | 2.69 Inches |
7. Minwax 70012444 Wood Finish Penetrating Stain, quart, Dark Walnut
Available in 28 beautiful colors.Can be used to add beauty to any bare or stripped wood surface.It is ideal for staining unfinished wood furniture, cabinets, wood door, trim, molding and hardwood floors.Penetrates deep into wood fibers to highlight the grainAmerica's favorite wood finish
Specs:
| Color | Quart |
| Height | 4.9212598375 Inches |
| Length | 4.330708657 Inches |
| Number of items | 1 |
| Size | Dark Walnut |
| Weight | 2 Pounds |
| Width | 4.9212598375 Inches |
8. J.E. Moser's 844995, Finishes, Wood Stains & Dyes, Water Soluble Ebony Black Aniline Dye
Brings out the beauty of the wood grain.Specifications: Coverage=75-100 sq ft, Diameter=1-3/4 in, Height=2-3/4 in
▼ Read Reddit mentions9. Minwax 63487000 Wood Finish Stain Marker, Dark Walnut
This product adds a great valueIdeal for use on furniture, molding, cabinets and moreDark WalnutEasy touch-up for common nicks and scratchesIdeal for use on furniture, molding, cabinets and more.Dark WalnutFast dryingEasy and quickEasy touch-up for common nicks and scratchesIdeal for use on furnitur...
Specs:
| Color | Dark Walnut |
| Height | 2.25 inches |
| Length | 8.3 inches |
| Number of items | 1 |
| Size | Dark Walnut |
| Weight | 0.02 Pounds |
| Width | 1.3 inches |
11. Original Wood Finish, Pint
- Safe for Food & Skin Contact
- Free from Solvents, Dyes, Petrochemicals & VOCs
- Superior Moisture Resistance
- 100% Renewable Ingredients
- Matte sheen
Features:
Specs:
| Height | 4 Inches |
| Length | 3.3 Inches |
| Size | Pint |
| Width | 3.25 Inches |
12. Minwax 63484000 Wood Finish Stain Marker, Red Mahogany
This product adds a great valueIdeal for use on furniture, molding, cabinets and moreMahoganyEasy touch-up for common nicks and scratchesIdeal for use on furniture, molding, cabinets and more.MahoganyFast dryingEasy and quick
Specs:
| Color | Red Mahogany |
| Height | 1.3 Inches |
| Length | 8.3 Inches |
| Number of items | 1 |
| Size | Red Mahogany |
| Weight | 0.1 Pounds |
| Width | 2.25 Inches |
13. Watco Rust-Oleum A65741 Danish Oil Wood Finish, Quart, Natural
Ideal for use on a variety of indoor wood surfaces including bare, stripped or sanded; not recommended for floorsOil-based formula of blended oil & varnish penetrates deeply into wood pores for ultimate protectionDries to the touch in 6 hours and covers up to 170 sq ftEasy application and protects a...
Specs:
| Color | Natural |
| Height | 7.5 Inches |
| Length | 4.63 Inches |
| Number of items | 1 |
| Size | Quart |
| Weight | 1.8 Pounds |
| Width | 2.5 Inches |
14. Minwax 233334444 Minwaxc Polycrylic Water Based Protective Finishes, 1/2 Pint, Satin
Protects and adds beauty to interior wood surfaces including woodwork, furniture, doors and cabinetsCrystal clear finish is ideal for use over light woods like maple, ash and birch as well as over Minwax Water-Based Wood StainsUltra fast-drying formula allows for quick recoats in 2 hoursWater-based ...
Specs:
| Color | 1/2 Pint |
| Height | 2.87 Inches |
| Length | 2.87 Inches |
| Number of items | 1 |
| Size | 8 Fl Oz (Pack of 1) |
| Weight | 0.67749999943185 Pounds |
| Width | 3 Inches |
15. Krylon K03400000 Clear Non-Skid Coating - 11 oz. Aerosol
- Krylon Non-Skid Coatings Aerosol Clear
Features:
Specs:
| Color | Clear |
| Height | 1 Inches |
| Length | 1 Inches |
| Number of items | 1 |
| Release date | January 2013 |
| Size | 11 Ounce Aerosol |
| Weight | 0.85 Pounds |
| Width | 1 Inches |
16. TotalBoat Clear Penetrating Epoxy Wood Sealer Stabilizer for Rot Repair and Restoration (Quart, Traditional), Model Number: 403795
WOOD HARDENER FOR ROTTED WOOD: two-part epoxy system seals, hardens, preserves, and protects all types of wood by stopping rot. Makes finishes like paint and varnish stick better and last longer. Easy to use treatment has no VOCs or harsh fumesPENETRATING WOOD SEALER: An ideal dry rot treatment; thi...
Specs:
| Number of items | 1 |
| Size | Quart |
17. General Finishes Oil Base Gel Stain, 1/2 Pint, American Oak
- This is the stain that has the most "finishing feel" of all General Finishes' products
- Woodworkers love the lustrous finish that shows up
- Heavy-bodied, and so does not penetrate as deeply into the wood as liquid oil-base stains do
- Can help you get a more even appearance on difficult woods such as aspen or pine
- Easy-to-use stains simply wipe on with a cloth or applied with a foam brush (no spills or splashes)
Features:
Specs:
| Color | American Oak |
| Height | 3 Inches |
| Length | 2.88 Inches |
| Number of items | 1 |
| Size | 1 Half-Pint |
| Weight | 0.25 Pounds |
| Width | 2.88 Inches |
18. AMTECO DIVISION OF GEMINI INDUSTRIE TWP-1501-1 Gallon Cedartone VOC Stain
- Smooth, even coverage
- Model Number: TWP-1501-1
- Item Package Dimension: 14.0" L x 14.0" W x 9.0" H
- Item Package Weight: 7.5 lb
Features:
Specs:
| Color | cedartone |
| Height | 8 Inches |
| Length | 7 Inches |
| Number of items | 1 |
| Weight | 0.1 Pounds |
| Width | 7 Inches |
19. Wood Kote 213-9 Jel'd Stain, Walnut - 12 ounce can
Fast-drying, semi-transparent pigmented stainFor interior wood surfaces: casework-doors, trim, paneling and cabinetsMay be applied to bare or bleached woodCoverage:1,250-1,500 sq. ft. per gallon - recoating is not recommendedFormulated to be applied by hand in-shop or on-site with a soft clean lint-...
Specs:
| Color | Walnut |
| Size | 12 ounce container |
| Weight | 1.5 Pounds |
20. DEFY 1 Gallon Wood Brightener
- Consumer Alert: Most users do not need a license to operate this wireless microphone system. Nevertheless, operating this microphone system without a license is subject to certain restrictions: the system may not cause harmful interference; it must operate at a low power level (not in excess of 50 milliwatts); and it has no protection from interference received from any other device.
Features:
Specs:
| Height | 12 Inches |
| Length | 7.5 Inches |
| Width | 4.25 Inches |
After I posted my new split-top Roubo a few months ago, a lot of you said, “great, now go build something with it.” So, ya know, I did.
About halfway through the bench build, a co-worker approached me and told me about a bunch (about 105 b.f.) of 8/4 local Florida Cypress that he had purchased on Craigslist and wanted to be made into an outdoor table. We both started to get excited about the ideas we were tossing out and he eventually agreed to commission me to build it. So the fun challenge was figuring out how much table and one bench he could get out of the amount of wood on hand (he wanted to put two chairs on the other side) instead of the usual design, calculate, buy. We did some back and forth on the design while I finished my bench but he largely left it all up to me. I heavily based the design on Marc Spagnoulo’s rustic outdoor table because I really want to build one for myself. I added a few refining details that I’ve wanted to try in a project and eliminated one stretcher because of the amount of wood available. Some of the details worked, others I would change on subsequent versions.
Once the workbench was done, I got to dig in on the table. The first difficulty was the wood itself. Either my co-worker or the person from whom he bought it from had left the wood out for quite a while so that it was pretty discolored with mildew, was a bit punky in spots, and had been snacked on by bugs. My cutlist kept getting thrown out whenever I’d cut into a piece and find a worm or termite track. I kept a close eye on the wood and didn’t see any further signs of living critters but it did get annoying at times. I got around most of them but there are a few small tracks visible, not more than 1/32” wide or ½” long but I eliminated all big tracks. (1/4” wide) I’ve never worked with Cypress before and it was definitely a learning experience. New growth Cypress is so soft. If you imagine wood grain as a lot of straws bundled together, this stuff is like a bunch of pool noodles, yet it still proved quite prone to tear out. I’d sharpen my hand tools 2-3 times a day to keep getting clean, slicing cuts. No matter how sharp my plane blades/ tight my mouth/ close my chipbreaker was though, I’d still get areas of tear out in difficult areas. After some reading around and some great advice from r/woodworking, it seemed a lower angle iron might be the solution. Weeellll, I just happen to have some money set aside and now an excuse so, go ahead, twist my arm, I’ll get a new toy. Lie-Nielsen’s low angle jack proved to be absolutely perfect and gave me the best surface I’ve encountered right off the plane.
A few of the changes I decided to make to The Wood Whisperer’s table was to taper the legs, bevel the underside of the table top, and use drawbored dowels for the joinery. They worked well enough, especially since the customer loved the end product, but I’ll change things further on subsequent versions.
First would be the taper of the legs. It’s meant to be a bit rustic but I tapered the legs because I didn’t want an overly blocky look to it. When designing and then building it, something didn’t sit quite right but it didn’t condense into an idea why. After it was too late, I saw Marc building his gaming table and it clicked. Those legs were tapered from the inside, mine were tapered from the outside. I don’t have the design education to describe it using the right jargon but the lines of my table remind me of a shy person standing with their feet together, trying not to be noticed. The lines drag your eye down to the ground. Whereas Marc’s reminds me of the superman pose; someone standing with their legs slightly apart confidently. Your eyes are drawn up to the main part of the table. I’m still happy with my table but it’s something to improve on the next version, though I don’t know yet how that will jive with the side rails.
The next item I’d change is the drawbore pins. I’ve seen plenty of shaker pieces with squared off dowels set in a diamond pattern and cut from a contrasting wood color. They look very elegant and I wanted to try it here. First, I went with too many. I didn’t need two in each joint. It was having two dowels and the dowel’s shape that caused the first joint I put together to blow apart. I made most of the dowel round using Veritas’ dowel cutter, leaving the end tapered to a square. From an article on square shaker pegs in Fine Woodworking, I expected the softer Cypress to just deform to the harder Mahogany dowel. The problem was that the taper from round to square was too long, (about ¾”) meaning it was spreading apart the wood deeper down. It could only handle so much deformation before it split. The solution was to take a chisel to the rest of the dowels and limit the taper to about 1/8” and only drive it in to the point where it just transitioned to fully square. Chiseling the receiving hole just shy of square also meant the Cypress had to deform less so no splitting and a crisper diamond pattern. If I do it again, one dowel will be enough but I don’t even think I’ll do a contrasting color again. This wood is filled with knots and, instead of the dowels being a pleasant interruption of monotonous grain, it just joins the knots to make it look busy and chaotic. It just doesn’t stand out in a pleasant way.
The arched stretcher ended up being 4” tall instead of 3 ½” because, after making and putting in the side rails, loe and behold, I F’ed up. They were further apart than planned and I had to make the stretcher taller to accommodate.
The other two changes were the beveled undersides of the table and bench tops and all the other bevels added to the bench top. Those I would leave as I think they look really nice, giving each a visually lighter look than their 1 ½” thickness. The beveled top of the bench seat makes for a more comfortable spot to rest your posterior for a long while.
The other great thing to come from this project was that I got to use my hand tools more on this project than any previous build, especially hand planes. Obviously it was just too big for any of my hobby level power tools but I geeked out on every bit of it and it got me really comfortable with several tools.
Finally, I finished it fully expecting to be an outdoor table. I used Watco teak oil that could easily be reapplied in later years and won’t blister like a film finish. I applied clear penetrating epoxy sealer to the feet to stop absorption be the end grain at the bottom of the legs and keep them from rotting from the ground up. Lastly, I put a few coats of Minwax Finishing Paste Wax on the tops of the table and bench as a barrier against mustard, ketchup, beer, etc. It’s shinier than I intended but will knock down pretty quickly. However, as it turned out, he loved it so much it will now be the main dining table inside his house and some CL table will be found for outdoors. I’m perfectly ok with that.
Thanks for looking, reading, and any constructive criticism you can throw my way. Thanks for all the advice leading up to this and my workbench. You, my fellow wood nerds, are awesome.
I have what may be your easiest option.
It does not require too much sanding.
It's called gel stain LINK
It may require a few coats to even out the finish, but you can then use a gel top coat that will seal it afterwards.
I redid the woodwork on a sofa and changed the color to a beautiful walnut. It turned out amazing. LINK
The way it works is floating the color on top rather than soaking into the wood. This means less sanding. More importantly it means it is easier to even out the color without removing all of the old finish. You can get away with only a very light initial sanding of 300-400 grit, though a more durable finish may require more sanding in between coats than I did.
The best part is you just brush it on with a dollar store sponge brush and wipe it off with rags. Super easy.
DO NOT do this without asking your roomate first. Plus they can pick out the color. Would be much easier to hide the splotches on this table with a walnut or java stain for example.
Always good to test out new techniques on scrap wood or in a small area on a piece this is not easily seen. Then if you like the result you can continue.
OK, now I see your other photos. I would not change the color. Also you may even be able to get away with just the topcoat? Anyone here more experienced than I care to comment?
I would powerwash it and let dry for a week or so, then do one of two things:
You possibly could flip those deck boards and have a clean, unpainted surface. Worth checking out. May look like new under there.
I would suggest:
Basic process (You have the video to fallow, but these steps are general steps for almost all woodworking finish)
Other Options, instead of Laquer:
Good job (although I don't think you'll need that much maple ;) .) And hey, if you're crafty and feeling like making some guitar tools, you can use some of that maple, epoxy and a single-cut file (medium or fine) to make a fret-leveling file! I always keep some pieces of HD maple laying around, it comes in handy for all sorts of projects (plus it's strong and cheap!)
BTW, here's a link to Keda Dyes on Amazon, although they're available from their own site as well. The packets are small, but it's super concentrated (as are most powdered aniline dyes), so a little bit goes a long way. For $13 shipped, you might be interested in trying them out.
Here's a link to Fiebings Leather Dye, if you're considering giving that a go. Note that it's alcohol-based, so you can thin them out with alcohol if necessary (they're pretty heavy colors, so thinning would probably be a good thing; you can always add extra coats, but you'll have a lot of sanding to do if you put on too much!) Woodcraft and Rockler both carry some dyes as well, and Woodcraft is just a great place to shop anyway.
I'm working right now on getting a finish much like what you're describing that is based off a sister product to the one Gomlemer noted. I used this epoxy mainly cause it was available in small quantities at the local big box stores on short notice.
I want a finish for reclaimed wood that retains the history but still looks and feels great. Plus i didn't want the finish to be crazy thick. I wanted the holes filled, but the subtle contour of the wood to still be present.
Here's where i went with my finish. I used a clear coat poly to bring out the wood grain and make it pop. (not sure yet if you need this step). Then i used mixed the epoxy per the instructions on the box, but thinned it with about 10% to 20% acetone. Once I had the final mixture I brushed it on. I went over that sucker a bunch making sure no drips were forming cause i eventually got it on pretty thick, but certainly not as thick as just pouring it on and spreading it. Once it set but not cured about 8-12 hours if it wasn't thick enough or there were spots that weren't smooth enough based on the wood contour i mixed a little more and went over those again with the brush.
After I was happy with the thickness of the epoxy I let it cure to it's high gloss finish. Then went over the entire surface with #0000 steel wool. Then a couple of layers paste wax later i was pretty happy with the finish.
As I'm still working on the finish for a large project I hope to take on this winter (a table from my grandfathers barn) i don't have any huge pieces to show, but here are a few shots from the test laptop table I put together to figure out the finish.
Play it some Daft Punk ;)
You can get wood stabilized through certain companies. Basically, they use proprietary means to infiltrate the surfaces with resins that essentially infuse the wood with plastic. You can also coat the wood with strong substances. There are actual products called wood hardeners meant more for bolstering rotting wood, but they'd probably toughen it up some. If you're just looking to strengthen the surface against dings and scratches, you can just do a nice, strong finish.
As to that, I don't know anyone who knows more about finishing wood than Jeff Jewitt. He has books on the subject. Good books. In this article by Jeff, he writes "In fact, oil-based varnish is the most durable finish that can be easily applied by the average woodworker. Varnish surpasses most other finishes in its resistance to water, heat, solvents and other chemicals." That might be a good choice.
Well, regarding the sanding, my rule of thumb is to sand moving up through the grits until the sanding marks disappear. How high I go with the grits depends a lot on the tool I'm using (hand sanding versus orbital sander versus random orbital sander),species of wood, and what finish I plan to put on it. Hand sanding following the grain is pretty forgiving, because the scratch pattern blends in with the grain. Orbital sanders tend to leave a scratch pattern across the grain which stands out. Random orbitals are better, but still leave some swirls across the grain. If I'm going to stain it, sanding marks will show up much more strongly than if I was just going to clear coat it. Every project is different, but typically I'll sand to at least 180 if I'm staining, and at least to 120 if I'm just oiling and clear coating. In truth I usually go higher than those numbers, but if I'm in a rush I can get away with those as minimums. I've used it on a couple of projects and have been quite pleased with it.
Now, all that said, the amount of sanding you do doesn't really change the porosity of the wood. Rough sanding will leave a more toothy surface, but that doesn't make much difference to an oil or other penetrating finish, because it will soak in as deep as the cell structure of the wood allows regardless of how smooth it is. Paints don't penetrate, they just cling to the surface, so leaving a more toothy surface does benefit them. I looked at the primer you linked, and I'm still not quite sure what to make of it, but it seems to me to be something along the lines of what I've seen called grain conditioner, which is basically a thin oil that penetrates and soaks into the wood to sort of level out how the wood absorbs subsequent layers of stain or dye or whatever. It basically helps prevent blotchiness. Since it is a penetrating substance, it shouldn't really matter how much you sand it.
Since you seem to be having dificulty finding a final finish, I might suggest OSMO Top Oil. It's a hard wax oil that both penetrates and leaves a wax film on the surface. It's meant specifically for kitchen countertops, so it should be able to handle hard use and abuse, and it's easy to apply more as it wears over time.
Sure! I've been planning to do this since we bought this house.
This is the kit I'm using, obviously mine is in black. It comes with a sanding pad to do the sides of your cabinets, I guess they are made differently than the doors, but I went over all my cabinets with the pad and some 150 grit sandpaper, just so I could be sure it would adhere to the cabinets.
So far I've just been painting them, and being sure to use painters tape so I don't ruin anything. I am using a small artists brush to paint around the inner hardware so I don't have to take the doors off.
According to the reviews, and tutorials online they recommended to use This Satin Polycrylic Protective Finish just for added protection. I bought the one I linked, and plan to use it. It's a kitchen so I'm sure dings are going to happen. So for me the protection is a necessity.
Lining my cabinets with this chevron contact paper
And I'm thinking that hardware will really modernize my kitchen, which is what I'm going for.
Worth Knowing I used a different "no sand" type paint in my bathroom, and I love this so much more. This brand has a Facebook page, and seriously, their product really is awesome. I should have taken more before photos.
Also the kit only comes with 2 quarts(?) and it goes so far. My kitchen is huge! And we have done it all and 59% of it already has a second coating! and we have barley used 1/3 of the paint.
I bought a "damaged" box off Amazon, check there. This kit is at my Lowe's for $149, and $69 off the manufactures website. I paid $30. My contact paper was $10 and my Protective coating was $10. Might buy hardware but that's optional. So new fucking cabinets for $50, $40 if you skip the paper? Cannot be beat.
Look into gel stain for the cabinets. I used a brand that was super thick, almost like a wax called Jel’d Stain by Wood Kote Wood Kote 213-9 Jel'd Stain, Walnut - 12 ounce can https://www.amazon.com/dp/B00GW9O3EC/ref=cm_sw_r_cp_api_i_VU7CDb2SPX590
When we redid our floors, I wanted a way to stain our mantle to match and it worked perfectly! I even used it on some oak picture frames to darken them. Unlike paint or regular stain, you can easily adjust how thin or thick you put it on. I did several light coats until I was happy with the color match. After staining I sealed it with a clear sealant.
I bought mine at a paint store- I’m pretty sure it was Sherwin-Williams and there a bunch of different shades.
Per Bob Flexner's book,
Warping like this is caused by compression shrinkage. When the wood fibers get wet, especially only on one side, they are limited in their ability to swell laterally, so they well longitudinally. This deforms the fibers, making them longer than they were. They then dry in that long, thin shape, and when they try to return to their original configuration while drying, they are now thinner than they were because of the deformation. This causes them to shrink tighter than they were, pulling the sides of the board into a cup.
The solution to this is counterintuitive but effective. Since you can't fix the wood fibers that have already deformed, you have to deform the other side to match it. Clamp the sides so the wood can't expand in that direction, then soak the bowed (not cupped) side with water and let it dry. You may need to do this several times, but now the fibers on the opposite side will deform, shrink, and pull the board back flat.
It looks like you may need to remove the finish from the top to pull this off, unfortunately, but it's likely the only way to approach a fix without removing wood from the piece. Good Luck!
https://www.amazon.com/Watco-241758-Butcher-Block-Finish/dp/B000VITOT4
I used the Rustoleum version of this on my shot glasses that I made recently. Holds up to alcohol pretty well and is food safe so I'm guessing the wear and tear is pretty good as well. I think the salad bowl stuff is essentially the same thing as well.
Hope this helps :)
This advice assumes that the grey color comes from oxidation (usually sun/weather exposure like a grey-ed fence/deck). You can certainly sand this coloration away (and there is some merit to that as you will end up with a nice smooth finish) however, if the oxidation is deep, you will be sanding away a fair amount of material and it will require a lot of effort. Enter oxalic acid. Oxcalic acid is used to "bleach" wood, and is the main ingredient in wood brighteners. Depending on where you live, most any hardware store will sell a similar product over in the paint section. Often labeled as deck/fence restorer. For instance, Home Depot sells Behr All-In-One wood cleaner. The stuff is awesome, just clean/debride the wood with a stiff bristled scrub brush, wet the surface, brush on the cleaner (can dilute 1:1 with water), let sit 10-15 min (keeping wet), and rinse. It will take the grey color from the wood like magic. After that you can sand the surface smooth (if desired) with much less effort than trying to sand through the discoloration. If there is any finish left on the wood, you will want to remove that as well before refinishing.
Also, not to contradict /u/dragon34, but the advice he got about not sanding between coats of poly isn't particularly great. Yes, re-coating quickly will allow the second coat to adhere without sanding, but it will not result in the best finish. At the very least, you should denib the previous coat before moving to the next. Otherwise you will end up with bumps from dust, insect, uneven application, etc. being trapped between the layers. I usually just buff the previous coat with some 0000 steel wool until burnished smooth, and then go over it with a microfiber cloth that has been dampened with denature alcohol. If you are putting in all the effort to restore, prep, and refinish the piece, it is worth spending an extra 10 minutes prepping properly between coats.
Thanks for the info, really appreciate it. I just want to make something that looks nice without creating a bunch of trash or hazardous waste. Also, it saves me time and energy if there's an easy cleanup.
Ever tried the Original Wood Finish by Tried and True? https://www.amazon.com/gp/product/B003DKYZQ4/ref=crt_ewc_img_dp_1?ie=UTF8&psc=1&smid=ATZ61JQHZC6XB
Ive never used Rit but had good results with aniline dye. It doesnt require any bleaching and is easy to adjust the darkness.
Fading is only an issue in direct sunlight, and over a long time, but a clear UV inhibiting top coat can help with that.
Hey I really appreciate it! I used Minwax brand everything for the stain and sealer. The first go around was not a success due mostly to the brush we used. I ended up using a black foam brush which worked much better. The legs and riser supports are painted white for a contrast (basic white paint). I try to keep things simple and realistic but also make it look nice. It may not be perfect but hopefully I get to keep improving!
I recently started used Tried and True finish, it's food safe, and I have been very happy with the results. I've been putting 2 coats on, and it gets a nice semi gloss finish.
Pure tung oil is foodsafe. But you have to make sure what you buy is 100% tung oil, since lots of manufacturers put chemicals in with it to make it apply smoother, dry faster, etc.
For anything I want to be food safe, I generally use Watco Butcher Block Oil. It's probably about the same as tung oil to work with, as it makes a nice hard finish.
For non-food safe surfaces, I like poly better than anything else I've used.
I respectfully call Bullpucky on that.
"Almost any finishing product – stain, filler, glaze, finish – can be applied successfully over any other finishing product, except wax (including residue wax from paint strippers), as long as that product is dry." - Bob Flexner.
This article is good. His BOOK is even better.
Wow, nailed it - it is indeed plywood birch. I used this Dark Walnut stain marker, which was super easy.
K, if this is wrong, someone PLEASE, correct me! I'm here to be a good luthier, not cradle my ego.
I use an automotive paint for my color coats, see if you can find a local place that does custom jobs, my local shop has a binder as thick as a bible with color chips to choose from
For my clear coats, tint coats, sunbursts, etc I like Woodcraft's stringed instrument lacquer, it's basicall just a nitro finish, and I tint it with an ailide dye that I cut with alcohol
My biggest recommendation is get advise from a better luthier than myself. StewMac has a great book that has a lot of classic formulas, anf will give you all of the info you are looking for.
Edit: grammar/formatting is not my friend
You can find it at Home Depot, too
http://www.amazon.com/gp/product/B007177NZU?keywords=epoxy%20finish&qid=1449020221&ref_=sr_1_1&sr=8-1
Might not penetrate as well, never used CA glue, but it'll definitely gap fill and then some.
It's often used for bar/table tops.
One more for you; Looking at this on Amazon, any thoughts? Also, where I have a seam between edges from doing the outside and inside, will I want to buff or anything or is this going to be like concrete and slow and steady wins the race?
https://www.amazon.com/Minwax-255554444-Polycrylic-Protective-Finishes/dp/B000BZZ3S8/ref=sr_1_2?keywords=polyurethane&qid=1572928603&sr=8-2
Get a brush you don't care about, do 2-3 layers on the parts where its super obvious. Between that and judicious filing you can get areas like the legs looking a lot more natural.
I spent a few minutes on the interwebs looking at finished maple. honestly this looked the best to me http://www.amazon.com/Watco-Danish-Oil-Finish-Natural/dp/B00176TCU0
do a Google image search for danish oil on maple and you will see what I mean.
Thanks! ..and nope, no pre-sealer nor conditioner - I just dampened with water to raise grain, sand to 220, wipe clean and go. Here is the dye I used with denatured alcohol.
I used Minwax to stabilize about 12 sets of scales inside a pickle jar I turned into a vacuum with a brake bleeder and a brass fitting. So long as you don't manage to suck up the resin into the break bleeder it'll last long enough to get your moneys worth. Got about 27PSI with a full jar load which is enough so long as your scales are not too thick (over 1/2").
This video is basically the same thing I built but with a pump.
Haven't used it but I know cactus juice is very popular.
minwax woodhardener May help as well. Basically makes it plastic. Gonna need A LOT though to do the whole stool. The cracks will be through the whole piece.
Cool effect though is to let it crack. Then mix up clear epoxy with crushed turquoise, or some other stone/metal/etc and fill it back in.
Check out this video. youtube inlay with turquoise sand
Get one of [these pens] (http://www.amazon.com/Minwax-63484-Finish-Interior-Mahogany/dp/B000BQN8FM/ref=pd_sim_hi_2) but be sure to get the right color. It is hard to tell if it is badly chipped or just dinged a bit. For the bulk of it: Restore-a-finish in the appropriate color applied with some 0000 steel wool.
Wood will almost always look better than paint. To get a really good job with the paint you'll put about the same amount of work.
So you want to create your own butcher block?
If you just want to glue it, using a biscuit joiner would insure that it remains flat and level. The biscuits help lock it together.
For the finish, you want to look for the label "food safe". Something like this:
https://www.amazon.com/Watco-241758-Butcher-Block-Finish/dp/B000VITOT4
also, check out Understanding Wood Finishes by Bob Flexner amazon link
It's basically an encyclopedia on best practices for finishing and goes through specific techniques for a LOT of different kinds of wood.
Hey, I had the same problem (but with people). What I did was buy a can of clear non-skid coating, and it works like a charm. It wears off over time however, depending on how much foot traffic it gets. I usually reapply once a year.
That looks like the elvis costello jazzmaster? The new reissue fender did was alder with a "walnut" finish and nitrocellulose lacquer. That guitar in the picture looks like it has a much more satin finish though, so you'd have to do some sanding to get it looking more flat instead of shiny. Either way alder with a dark stain will get you most of the way.
I've tried to do walnut stain on light wood before and it's had mixed results, often brings out too much of the grain (especially on pine) so be sure to test the stain on the interior of the pickup cavity before you do the whole thing.
Yeah I'm thinking about drinking out of it not sure how it will taste. I put on a food safe finish it's called watco http://www.amazon.com/gp/aw/d/B000VITOT4?pc_redir=1395431410&robot_redir=1
Thank you! So if I use one of those stain pens marketed towards "red mahogany" it should work just fine, correct? The reason I ask is because the picture on the package looks darker than my stain.
Here's the exact production in question- Minwax 63484000 Wood Finish Stain Marker, Red Mahogany https://www.amazon.com/dp/B000BQN8FM/ref=cm_sw_r_cp_apa_i_a-YVDb0N2SEYH
It looks awesome, in the future if you want the layer lines to go away completely, put two to three (depending on layer height, larger needs more)very thin coats of Minwax Polycrylic on the model with a brush, it dries in about 15 - 20 mins, and just keep repeating until they are no longer visible. one pint will last a really long time.
https://www.amazon.com/Minwax-255554444-Polycrylic-Protective-Finishes/dp/B000BZZ3S8/ref=sr_1_2?crid=O04OC8LMAXD6&keywords=polycrylic+clear+gloss&qid=1567951875&s=gateway&sprefix=polycrylic+%2Caps%2C158&sr=8-2
Yeah, Osmo Top Oil is a blend of plant-based oils and a wax that have been heated to polymerize. It is supposed to be amazing.
Understanding Wood Finishing by Box Flexner has a whole section on French Polishing, well worth a read.
The epoxy I used is only in New Zealand I think (Norski Timber Sealer), but this seems to be the same thing :
TotalBoat Penetrating Epoxy
I've not used that one, but it seems to be the same thing, to give you an idea of what you're looking for. I'm sure there are lots of different brands.
I used the following: https://www.amazon.com/gp/product/B007RHA5KE/ref=oh_aui_detailpage_o00_s00?ie=UTF8&psc=1
Just a word of advice, spray this outside or in a well ventilated area or else be prepared to be smelling the noxious fumes for a couple hours later.
Everyone's got to finish their projects, and I've found this book to be such a good resource:
https://www.amazon.com/UNDERSTANDING-WOOD-FINISHING-BOB-FLEXNER/dp/B000H6EJ4U
What would be the end result difference between the Shellac and the water based poly? I assume something like this? Minwax 255554444 Minwaxc Polycrylic Water Based Protective Finishes, 1/2 Pint, Gloss https://www.amazon.com/dp/B000BZZ3S8/ref=cm_sw_r_cp_api_oDVKzbDNDMNAB
I just redid this thing A https://imgur.com/a/1feUU sanded to 150 grit with bare wood. I'm not sure there was any finish on it to begin with. I used this dye https://www.amazon.com/Wood-Dye-Aniline-Color-Powder/dp/B00BAKWTMQ 1/4 teaspoon in 8oz of denatured alcohol. 2-3 coats of the dye with a piece of t shirt. Black on the dresser and red on the drawers. It dries in like 30 seconds. The dye looks different when it dries, but polyurethane over top brings it back to how it looks when wet. Then I put on a few coats of old crusty oil based polyurethane with a $.50 harbor freight brush. Let the 2nd to last coat dry for 24 hours. Lightly sand and pick out the fibers shed by the brush. Then the final coat.
I would fill, then use these https://www.amazon.com/Minwax-63487000-Finish-Marker-Walnut/dp/B0000DI7ZK/ref=sr_1_3?ie=UTF8&qid=1519250430&sr=8-3&keywords=wood+stain+pens You can use several colors to mimic the grain in the wood making it pretty hard to notice if you don't know where it was.
Try:
https://generalfinishes.com/
If you want to really have an idea of what you're doing when finishing, I recommend Understanding Wood Finishing by Bob Flexner
obligatory post for
http://www.amazon.com/UNDERSTANDING-WOOD-FINISHING-BOB-FLEXNER/dp/B000H6EJ4U
if you want to really understand this subject. get it, read it. I have read it several times.
it's like the bible of finishing.
Thank you!
I used KEDA Dye
https://www.amazon.com/UNDERSTANDING-WOOD-FINISHING-BOB-FLEXNER/dp/B000H6EJ4U
Read this. It will help tremendously
Try Watco clear.
https://www.amazon.com/Watco-A65741-Danish-Oil-Finish/dp/B00176TCU0
Thank you. I bought these Leda dyes Wood Dye - Aniline Dye 5 Colour Kit - Wood Stain Powder by Keda Dye https://www.amazon.ca/dp/B00BAKWTMQ/ref=cm_sw_r_other_apa_i_u56KDbRYJDB31
Something like this or this?
wood dye if you want color, spray tru oil or shellac. You can buy the tru oil spray cans online, not sure if they have in stores.
I recommend this
wood dye.
thank you for the reply!
i am in ID, USA.
Woodworking has been my hobby for a few years. I've tried brush stain on some of my projects but I haven't tried dye.
Do you think I can get this color by using the stain below?
https://www.amazon.com/Minwax-70012-Finish-Interior-Walnut/dp/B001CESFSM/ref=sr_1_2?ie=UTF8&qid=1467402865&sr=8-2&keywords=wood+stain
Use a grease pen! Seriously though, I don't know how you would need to do it on walnut.
I did one in birch and burned in the scale and numbering, then overcoated with satin/flat version of this. Then I coated that in Minwax paste wax. The idea was/is for the marks for height or whatever are to be scratched in using a knife or scratch awl. Then that scratch would be gone over with a stain marker and wiped off. The wax would help the stain to only stick in the scratch.
Since you have a dark background, that won't work for you. I guess you could just use a regular light colored paint pen though. You would still have to scratch the wood to get it to stick. Wax, and to some extent polyurethane, won't let the paint stick permanently to it.
(I'm not sure what exact epoxy you are using, but...)
If you use a penetrating epoxy, you will get a significantly more durable finish. Be warned it does end up more "plastic" feeling than if you just use the spar alone.
Also, you have to keep up on it (recoat as necessary) because if you do let the finish fail, it is difficult to repair (vs. if you just used spar, you could just strip off the varnish).
I have had great luck using Total Boat epoxy, thinned 25%, 3 coats, covered with Epifanes marine UV varnish (first two coats thinned, last coat less thinned).
As an example, this bench has been out for three seasons, and the finish still looks just like it did the day I applied it.
I did some Googling and a few folks recommended this stuff. http://www.amazon.com/Minwax-23333-Polycrylic-Protective-Finishes/dp/B000C02AO2
Here's the wood filament (note that my printer takes 3mm filament, you might need the 1.75mm filament which they also have available): https://www.amazon.com/gp/aw/d/B00L0ZLS5U/ . Alternatively, I've heard good things about hatchbox wood filament, but it wasn't available in 3mm on Amazon.
Here's the finisher: https://www.amazon.com/gp/aw/d/B001CESFSM/ .
And here's a picture of this print from before I stained, to give you an idea of how it changes the print: https://m.imgur.com/a/NRulc
Edit: To get this level of darkness, I stained it twice, ten-fifteen minutes each.
Telecaster
Dye
Has anyone ever used wood hardener? Minwax 41700 1 Pint High Performance Wood Hardener https://www.amazon.com/dp/B000BPINKS/ref=cm_sw_r_cp_api_pn9MxbEJVXSAD
https://www.amazon.com/UNDERSTANDING-WOOD-FINISHING-BOB-FLEXNER/dp/B000H6EJ4U
This stuff, https://www.amazon.com/Wood-Dye-Aniline-Color-Powder/dp/B00BAKWTMQ/
Don't have much use for the red, yellow, and blue. I mostly used the brown with a touch of black.
I don't think so, but here is a link to what I frequently use.
I haven't used food coloring yet, so can't really comment on that aspect of it, but I ordered some Keda Dye about a year ago because I wanted to experiment with aniline dye without blowing a chunk of change on TransTint. I mix it with DNA (water can be used as well) so I can flash it off with a torch and set the colors quickly. Example on a bowl
It was This type of wood filler.It was Minwax Stain
https://www.amazon.com/Krylon-3400-Clear-Non-Skid-Coating/dp/B007RHA5KE
https://www.amazon.com/dp/B000H6EJ4U/ref=cm_sw_r_cp_apa_8hwjzb789RJCD
This book right here. Everything you need to know about finishing is in this.
Parks
I've used this for an insertable custom flogger handle. Its glossier than the 2-ton and adds a honey amber tone to the wood.
You could put some epoxy finish on it.
https://www.amazon.ca/Rust-Oleum-241352-Glossy-Finish-Preservative/dp/B007177NZU
Check out powdered Keda dyes as a comparable alternative for enormously cheaper:
https://www.amazon.com/Wood-Dye-Aniline-Color-Powder/dp/B00BAKWTMQ/
A stain marker would do the trick, just gotta eyeball a similar shade. Example: https://www.amazon.com/Minwax-63487-Finish-Marker-Interior/dp/B0000DI7ZK
It depends on the finish on the table now. If it is an oil, use Watco Butcher Block Oil and Finish. it will both protect it and rejuvenate the shine on it while keeping the antic look without adding any dark coloring to it.
https://www.amazon.ca/Watco-241758-Butcher-Block-Finish/dp/B000VITOT4
I would sand it down, dry it out thoroughly, like under a heat lamp, then using a poly varnish thinned down to water-like consistency, add coats to it until it no longer takes any more. In bad cases, use something like this: https://www.amazon.com/Minwax-41700000-High-Performance-Hardener/dp/B000BPINKS/ref=sr_1_fkmrnull_3?crid=314SVKR6R67V7&keywords=minwax+primer&qid=1555787793&s=gateway&sprefix=minwax+primer%2Caps%2C229&sr=8-3-fkmrnull
Pros tell me that seven coats of varnish is the absolute minimum.
If you want to "stain", look into keda dyes. They are cheap and you can mix the color to your liking. I've done a couple of burst finishes with them and it was no problem. Here is a telecaster album with the dye process:
https://imgur.com/a/BFkSe
Dye itself:
https://www.amazon.com/Wood-Dye-Aniline-Color-Powder/dp/B00BAKWTMQ/ref=sr_1_1?ie=UTF8&qid=1519139347&sr=8-1&keywords=keda+dye
Unfinished should be fine but if you wanted to use something they make finishes for things that will contact food. Here's an example of one made for butcher blocks and salad bowls. I've never used it myself. http://www.amazon.com/Watco-241758-Butcher-Block-Finish/dp/B000VITOT4
this is the dye i ordered. http://smile.amazon.com/gp/product/B00BAKWTMQ/ref=oh_aui_detailpage_o05_s00?ie=UTF8&psc=1
the directions were kinda crappy and confusing. so i ended up using the alcohol based part of the directions and it worked fine. Then i did a spray poly on it and buffed it to a shine.