Best products from r/ArtisanVideos
We found 30 comments on r/ArtisanVideos discussing the most recommended products. We ran sentiment analysis on each of these comments to determine how redditors feel about different products. We found 177 products and ranked them based on the amount of positive reactions they received. Here are the top 20.
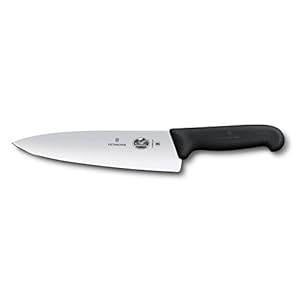
1. Victorinox Fibrox Pro Knife, 8-Inch Chef's FFP, 8 Inch, Black
- For home chefs & professionals. This Fibro Pro chef's knife has been the top choice of both home chefs and professionals alike. Expertly crafted with a tapered stainless steel edge that cuts with ease and efficiency.
- Fit for all tasks. Designed to handle kitchen tasks both big and small, This durable knife's razor sharp and laser-tested blade effortlessly chops, minces, slices and dices. An essential for every kitchen.
- Easy handling. Each knife features an ergonomic handle made from thermoplastic Elastomer (TPE) for a non-slip grip - even when wet. This exceptional knife is weighted and balanced for easy handling.
- Knife Dimensions. Blade made out of stainless steel material - 7. 9 inches in length. Made with dishwasher safe materials for an easy clean.
- Trusted Swiss quality. Expertly crafted in Switzerland in 1884, Victorinox provides a lifetime against defects in material and workmanship. Making a Lifetime commitment has never been so easy.
- Included Components: Fibrox Pro 8-Inch Chef'S Knife, Ffp
Features:
 ▼ Read Reddit mentions
2. CARL Angel-5 Pencil Sharpener, Blue
Smooth manual operation pencil sharpener. Quiet and Classroom Friendly.CARL'S Angel 5 mechanism automatically draws pencil into the cutting chamber, producing a pefect point. Once the pencil is sharp, the CARL Angel 5 unique design will not allow the pencil to over sharpen.Manufactured with double s...
 ▼ Read Reddit mentions
4. Paper Mache Dragons: Making Dragons & Trophies using Paper & Cloth Mache
- Formulated for Women: Designed to meet your everyday nutritional needs
- Added Benefits: Energy, Mood, Focus, Metabolic and Immune Support
- Complete Support: Chelated Minerals and Vitamins A through Zinc in their optimal forms
- Made without GMO's, gluten, milk, soy, salt, sugar, wheat or preservatives
- Made with Care: Emerald Labs is committed to manufacturing products without the use of additives
Features:
 ▼ Read Reddit mentions
5. Leica M9 18MP Digital Range Finder Camera (Black, Body Only)
- It has 2-years warranty
- Newly developed cover glass to elimate infrared light contamination , no IR filters needed.
- 18 megapixels which allow the full 35mm format.
- First Rangefinder camera with a 24 x 36 mm Format Sensor.
- Custom designed CCD sensor for optimal performance.
- First Rangefinder camera with a 24 x 36 mm Format Sensor.
- 18 megapixels which allow the full 35mm format.
- Custom designed CCD sensor for optimal performance.
- Newly developed cover glass to elimate infrared light contamination, i.e. no IR filters needed.
- 2-year warranty
Features:
 ▼ Read Reddit mentions
6. Tombow 56171 Dual Brush Pen Art Markers, Grayscale, 10-Pack. Blendable, Brush and Fine Tip Markers
- Updated color palette now includes N79 Warm Gray 2
- Ideal for hand lettering, watercolor, fine art, illustrations, doodling, journaling, coloring and more
- Water-based
- Blendable
- Acid-free, odorless
- Tips self-clean after blending
- For best results, use a smooth, non-textured paper
Features:
 ▼ Read Reddit mentions
7. Rust Eraser Sabitoru Medium and Fine 2-piece Set
Very friendly product to remove tough rust on knife without painful effortUsage: Soak the rust eraser for ten minutes with cold waterScrubs carefully the rusted part of knife and rinse knife when rust is gone.1.5"x2.5"x0.5"X2piecemedium grainX1 and fine grainX1
 ▼ Read Reddit mentions
8. Healthy Bread in Five Minutes a Day: 100 New Recipes Featuring Whole Grains, Fruits, Vegetables, and Gluten-Free Ingredients
- Great product!
Features:
 ▼ Read Reddit mentions
9. Artisan Bread in Five Minutes a Day: The Discovery That Revolutionizes Home Baking
- Fits perfectly on the Google Pixel XL 2016. Available in multiple color bumper finish styles to show off your unique style and passion for trend. Highest quality clear case comes outfitted with laser precise clean bumper in your choice of accent color.
- Crystal clear protection with advanced 2X clear quality coating enhances the Google Pixel original look with minimal bulk. The inside TPU corner cushions protect the Pixel from drops, while offering ultimate slimness. Ringke FUSION offers MIL-STD 810G - 516.6 Certified Military Grade Drop Protection in a slim and sleek profile.
- Slim transparent TPU bumper with Active Touch Technology allows easy and natural access to all key ports and buttons. Soft flexible premium edges cover all four corners with rear guards and tapered lips to offer vital lift design for daily usage scratches.
- Ringke's highest engineering technology for precise tailored cutouts is designed for impeccable perfect fit.
- Dual layer PC panel and premium TPU easy grip in the highest quality clear case is outfitted with rounded swipe-friendly side bezel that’s uniquely designed for smooth and easy glide across the screen for comfortable handling.
Features:
 ▼ Read Reddit mentions
10. MLCS 17733 Katana 60-Degree Edge Banding Tongue and Groove, 2-Piece Set
- Top quality, 2-flute, carbide-tipped matched 2-bit set
- Hide the ply!
- Add an attractive and durable edge to cabinet doors and shelf edges
- Perfect for plywood and MDF panels
- 1/2-Inch shank. For router table use
Features:
 ▼ Read Reddit mentions
11. Rolex Daytona Leopard Dial and Strap Diamond and Sapphire Bezel Mens Watch 116598SE
 ▼ Read Reddit mentions
12. Zebra DNA Luxfer L6X Aluminum CO2 Tanks with CGA320 on/off Valve (5 LB, Brushed)
Lightweight––up to 40 percent lighter than comparable steel cylinders.Thick, consistent walls resist damage.Brushed external surface provides a low-maintenance finish.Minimum burst pressure tested to 2.5 times service pressure without failure.Highly corrosion-resistant interior and exterior
 ▼ Read Reddit mentions
13. Kegco KC LHC-962 Premium Double Gauge Kegerator Beer Regulator, Black
- T-Style adjustment valve can be adjusted by hand, eliminating the need for a screwdriver
- Rubber gauge protectors helps prevent damage to gauges
- Non-adjustable "shut-down" built in to the body of the regulator
- Permanent nylon seal on inlet nipple helps eliminate a source of leaks
- Home brew Kits and accessories
Features:
 ▼ Read Reddit mentions
14. Joyce Chen J26-0013 Steamer, Bamboo, Tan
- Time-tested method for creating restaurant-style dishes at home, including dumplings, veggies, and fish
- Two tiers to cook several dishes or servings at a time
- So simple to use: place in a pan of water and heat
- Made with traditional bamboo, which is also a renewable resource
- Dimensions: 10.00 in L x 10.00 in W x 6.00 in H
Features:
 ▼ Read Reddit mentions
15. Whetstone Sharpening Stone Shapton Ceramic Kuromaku #12000
Color: CreamBody size: 210 ~ 70 ~ 15 mmItem No .: K0705Granularity: # 12000Country of Origin: Japan
 ▼ Read Reddit mentions
16. Victorinox Fibrox Pro Chef's Knife, 8-Inch
- An all-purpose chef’s knife provides ultimate control to mince your way through any culinary challenge.
- Contemporary, textured handle with a non-slip grip -- even when wet. The handle is ergonomically designed to help minimize tension at the wrist and provides a much more comfortable grip.
- Hygienic, dishwasher safe, slip-resistant and NSF approved. These exceptional knives are weighted and balanced for easy handling.
- Multipurpose chef's knife designed for chopping, mincing, slicing, and dicing with razor sharp, laser-tested, tapered knife edge is ground to form an exacting angle, to hold a sharp edge longer and ensure maximum cutting performance and durability
- Ergonomically designed, non-slip Fibrox Pro handle provides a sure grip and easy handling even when wet, making each knife safer and more efficient
- “Highly Recommended” for over 20 years by a leading gourmet consumer magazine that features unbiased ratings and reviews of cookware and kitchen equipment
- Expertly crafted in Switzerland since 1884; designed for professionals who use knives all day, every day; lifetime warranty against defects in material and workmanship
- Swiss item #: 5.2063.20 is imprinted on the blade. This is the same exact knife as 40520, 47520, 45520, and 47520.US2. The only difference is how the knife is packaged.
Features:
▼ Read Reddit mentions17. Kreg Jig R3 Pocket Hole System
- The Kreg Jig Jr(R3) is an amazing repair jig and an exceptionally handy addition to any tool collection
- Easy to use and install
- Whether you're crawling under a table to make a quick repair or taking Kreg Joinery on the road
Features:
 ▼ Read Reddit mentions


Top comments mentioning products on r/ArtisanVideos:
Summary
1. Victorinox Fibrox Pro Knife, 8-Inch Chef's FFP, 8 Inch, Black
- For home chefs & professionals. This Fibro Pro chef's knife has been the top choice of both home chefs and professionals alike. Expertly crafted with a tapered stainless steel edge that cuts with ease and efficiency.
- Fit for all tasks. Designed to handle kitchen tasks both big and small, This durable knife's razor sharp and laser-tested blade effortlessly chops, minces, slices and dices. An essential for every kitchen.
- Easy handling. Each knife features an ergonomic handle made from thermoplastic Elastomer (TPE) for a non-slip grip - even when wet. This exceptional knife is weighted and balanced for easy handling.
- Knife Dimensions. Blade made out of stainless steel material - 7. 9 inches in length. Made with dishwasher safe materials for an easy clean.
- Trusted Swiss quality. Expertly crafted in Switzerland in 1884, Victorinox provides a lifetime against defects in material and workmanship. Making a Lifetime commitment has never been so easy.
- Included Components: Fibrox Pro 8-Inch Chef'S Knife, Ffp
Features:
▼ Read Reddit mentions2. CARL Angel-5 Pencil Sharpener, Blue
Smooth manual operation pencil sharpener. Quiet and Classroom Friendly.CARL'S Angel 5 mechanism automatically draws pencil into the cutting chamber, producing a pefect point. Once the pencil is sharp, the CARL Angel 5 unique design will not allow the pencil to over sharpen.Manufactured with double s...
▼ Read Reddit mentions4. Paper Mache Dragons: Making Dragons & Trophies using Paper & Cloth Mache
- Formulated for Women: Designed to meet your everyday nutritional needs
- Added Benefits: Energy, Mood, Focus, Metabolic and Immune Support
- Complete Support: Chelated Minerals and Vitamins A through Zinc in their optimal forms
- Made without GMO's, gluten, milk, soy, salt, sugar, wheat or preservatives
- Made with Care: Emerald Labs is committed to manufacturing products without the use of additives
Features:
▼ Read Reddit mentions5. Leica M9 18MP Digital Range Finder Camera (Black, Body Only)
- It has 2-years warranty
- Newly developed cover glass to elimate infrared light contamination , no IR filters needed.
- 18 megapixels which allow the full 35mm format.
- First Rangefinder camera with a 24 x 36 mm Format Sensor.
- Custom designed CCD sensor for optimal performance.
- First Rangefinder camera with a 24 x 36 mm Format Sensor.
- 18 megapixels which allow the full 35mm format.
- Custom designed CCD sensor for optimal performance.
- Newly developed cover glass to elimate infrared light contamination, i.e. no IR filters needed.
- 2-year warranty
Features:
▼ Read Reddit mentions6. Tombow 56171 Dual Brush Pen Art Markers, Grayscale, 10-Pack. Blendable, Brush and Fine Tip Markers
- Updated color palette now includes N79 Warm Gray 2
- Ideal for hand lettering, watercolor, fine art, illustrations, doodling, journaling, coloring and more
- Water-based
- Blendable
- Acid-free, odorless
- Tips self-clean after blending
- For best results, use a smooth, non-textured paper
Features:
▼ Read Reddit mentions7. Rust Eraser Sabitoru Medium and Fine 2-piece Set
Very friendly product to remove tough rust on knife without painful effortUsage: Soak the rust eraser for ten minutes with cold waterScrubs carefully the rusted part of knife and rinse knife when rust is gone.1.5"x2.5"x0.5"X2piecemedium grainX1 and fine grainX1
▼ Read Reddit mentions8. Healthy Bread in Five Minutes a Day: 100 New Recipes Featuring Whole Grains, Fruits, Vegetables, and Gluten-Free Ingredients
- Great product!
Features:
▼ Read Reddit mentions9. Artisan Bread in Five Minutes a Day: The Discovery That Revolutionizes Home Baking
- Fits perfectly on the Google Pixel XL 2016. Available in multiple color bumper finish styles to show off your unique style and passion for trend. Highest quality clear case comes outfitted with laser precise clean bumper in your choice of accent color.
- Crystal clear protection with advanced 2X clear quality coating enhances the Google Pixel original look with minimal bulk. The inside TPU corner cushions protect the Pixel from drops, while offering ultimate slimness. Ringke FUSION offers MIL-STD 810G - 516.6 Certified Military Grade Drop Protection in a slim and sleek profile.
- Slim transparent TPU bumper with Active Touch Technology allows easy and natural access to all key ports and buttons. Soft flexible premium edges cover all four corners with rear guards and tapered lips to offer vital lift design for daily usage scratches.
- Ringke's highest engineering technology for precise tailored cutouts is designed for impeccable perfect fit.
- Dual layer PC panel and premium TPU easy grip in the highest quality clear case is outfitted with rounded swipe-friendly side bezel that’s uniquely designed for smooth and easy glide across the screen for comfortable handling.
Features:
▼ Read Reddit mentions10. MLCS 17733 Katana 60-Degree Edge Banding Tongue and Groove, 2-Piece Set
- Top quality, 2-flute, carbide-tipped matched 2-bit set
- Hide the ply!
- Add an attractive and durable edge to cabinet doors and shelf edges
- Perfect for plywood and MDF panels
- 1/2-Inch shank. For router table use
Features:
▼ Read Reddit mentions11. Rolex Daytona Leopard Dial and Strap Diamond and Sapphire Bezel Mens Watch 116598SE
▼ Read Reddit mentions12. Zebra DNA Luxfer L6X Aluminum CO2 Tanks with CGA320 on/off Valve (5 LB, Brushed)
Lightweight––up to 40 percent lighter than comparable steel cylinders.Thick, consistent walls resist damage.Brushed external surface provides a low-maintenance finish.Minimum burst pressure tested to 2.5 times service pressure without failure.Highly corrosion-resistant interior and exterior
▼ Read Reddit mentions13. Kegco KC LHC-962 Premium Double Gauge Kegerator Beer Regulator, Black
- T-Style adjustment valve can be adjusted by hand, eliminating the need for a screwdriver
- Rubber gauge protectors helps prevent damage to gauges
- Non-adjustable "shut-down" built in to the body of the regulator
- Permanent nylon seal on inlet nipple helps eliminate a source of leaks
- Home brew Kits and accessories
Features:
▼ Read Reddit mentions14. Joyce Chen J26-0013 Steamer, Bamboo, Tan
- Time-tested method for creating restaurant-style dishes at home, including dumplings, veggies, and fish
- Two tiers to cook several dishes or servings at a time
- So simple to use: place in a pan of water and heat
- Made with traditional bamboo, which is also a renewable resource
- Dimensions: 10.00 in L x 10.00 in W x 6.00 in H
Features:
▼ Read Reddit mentions15. Whetstone Sharpening Stone Shapton Ceramic Kuromaku #12000
Color: CreamBody size: 210 ~ 70 ~ 15 mmItem No .: K0705Granularity: # 12000Country of Origin: Japan
▼ Read Reddit mentions16. Victorinox Fibrox Pro Chef's Knife, 8-Inch
- An all-purpose chef’s knife provides ultimate control to mince your way through any culinary challenge.
- Contemporary, textured handle with a non-slip grip -- even when wet. The handle is ergonomically designed to help minimize tension at the wrist and provides a much more comfortable grip.
- Hygienic, dishwasher safe, slip-resistant and NSF approved. These exceptional knives are weighted and balanced for easy handling.
- Multipurpose chef's knife designed for chopping, mincing, slicing, and dicing with razor sharp, laser-tested, tapered knife edge is ground to form an exacting angle, to hold a sharp edge longer and ensure maximum cutting performance and durability
- Ergonomically designed, non-slip Fibrox Pro handle provides a sure grip and easy handling even when wet, making each knife safer and more efficient
- “Highly Recommended” for over 20 years by a leading gourmet consumer magazine that features unbiased ratings and reviews of cookware and kitchen equipment
- Expertly crafted in Switzerland since 1884; designed for professionals who use knives all day, every day; lifetime warranty against defects in material and workmanship
- Swiss item #: 5.2063.20 is imprinted on the blade. This is the same exact knife as 40520, 47520, 45520, and 47520.US2. The only difference is how the knife is packaged.
Features:
▼ Read Reddit mentions17. Kreg Jig R3 Pocket Hole System
- The Kreg Jig Jr(R3) is an amazing repair jig and an exceptionally handy addition to any tool collection
- Easy to use and install
- Whether you're crawling under a table to make a quick repair or taking Kreg Joinery on the road
Features:
▼ Read Reddit mentions
Sorry it took so long to reply. Been busy in the shop.
Plywood. Love or hate it, right? There is nothing inherently wrong with using plywood. Plywood makes fantastic drawer bottoms. I have a big chunk of it in the middle of the top of the coffee table I'm building. I am even using it for door panels in the built-in closet I'm also working on. In each of these instances the edges of the plywood is completely concealed. Before the thought crosses your mind, slapping a 1/4" thick strip of hardwood does not conceal the edge. It looks like a piece of veneered plywood with a hardwood strip glued on. No finishing tricks will ever make it look good. I've tried. Oh how I have tried.
There are tricks to using plywood so nobody knows. For lower-grade furniture I have built for friends, I have used the hot-melt glue edgebanding. I only use it for painted pieces, because whatever they say the veneer is, it isn't and it will never match the walnut or cherry plywood. Unless you spend hours using tints and dyes to get it to match. Your time is money, so it would have been cheaper to just use solid wood. If you have a perfectly dialed in tablesaw, and have some serious balls, you can use a dado blade to hog out the plywood in-between the outer veneer layers. Modern ply uses 1/128th or maybe 1/64th" thick veneer, so you have very tight tolerances to work with. And they can't support any weight, so you have to MacGuyver some way of supporting the plywood while you do this. But then you glue in a strip of hardwood and it is nearly invisible. Or, you can do what I do and cheat.
I use plywood for building drawer boxes all the time. For the shop. I always use a dado to hold the plywood drawer bottom. This guy's use of a plywood drawer box with a luan bottom on what is portrayed as a piece of fine furniture detracts from the piece aesthetically so much that McIKEA crap looks like a Maloof original. I would have use solid maple sides 3/4" thick with a 1/2" thick front and back of maple, and maple ply in the bottom. All untreated. I'd route a 3/8" deep dado 1 1/2" wide on the drawer box front to back, and centered. On the inside of the drawer cavity I'd mount a 3/8" thick maple strip, just a smidge under 1 1/2" thick on each side. Wax both the groove in the drawer and the rail with a good wax like Renaissance Wax, and call it a day. That would look a million times better than the cheap Chinese drawer slide.
If you are starting woodworking, go to antique shops and ask permission to look at how older pieces of furniture were built. They didn't have plywood back in the 1800's and they had dressers, chests, tables, etc. as wide as could be. The name of that game is wood movement. Here is a 3m video by some dude on wood movement. Here is a calculator from Fine WoodWorking that you can use to figure out how much wood will move. I've built a Dining Table, and to accommodate the seasonal wood movement, I used breadboard ends (glued the middle 2", each end free to expand/contract) and attached it to the frame the same. (Screwed in the middle, and figure-8's on the corners.
Onto Dominoes. Full disclosure, I think 90%+ of Festool is overpriced plastic crap. Floating tennons are damn cool, and if I cannot jury-rig a horizontal mortiser, I might buy one. In this case, he has to use a floating tennon because the miter joint isn't working. So before you drop $1500+ on the latest plastic do-dad stop. Pull your head out of your butt and think. Maybe a miter is not the best joint for what I want to do... A 1/8" hardwood spline would have been a better choice than dominoes. Those floating tennon thingys are not cheap. A domino would be one of the last tools i'd buy. There are much better places to spend your money.
>A miter vs a dovetail should be mainly in aesthetics in the end right?
Nope. A miter has zero mechanical strength - the only thing holding it together is wood glue. With plywood only a half of the wood is a long grain to long grain joint, which is the strongest glue joint. Also, unless you have your tools dialed in perfectly, it is really hard to get two perfect 45^o joints. A miter does have the advantage of hiding all endgrain. A dovetail is self-squaring and provides a lot of glue surface. Also, because of how the dovetail is assembled, the grain on both pieces run in the same direction, so seasonal wood movement will not blow the joint apart.
Although it does show end-grain, the dovetail is almost universally seen as a hallmark of fine furniture. You can control where you see the end grain if you use half-blind dovetails. For this piece, I would attach the top (pins) to the sides (tails) with half-blind dovetails. this way, the top is unmarred by the tails' end-grain. I'd probably just use full dovetails to attach the bottom. The grain of all 4 sides would run left <-> right and up <-> down. This way, seasonal movement would only make the piece stick out from the wall 1/8" more or less depending on the season.
>Plus why is it better to use chisels? That to me sounds kinda snobby.
Chisels are not snobby. I am firmly in the middle of the Normite versus Neanderthal argument. I use power tools and hand tools alike. Some operations are best suited to one or the other, but there are no absolutes when you work with a once-living medium. Sometimes my random-orbital sander is the best way to get a piece ready to finish, and other times it just makes a mess of the delicate and wild grain of a burl. So I use a #80 scraper.
Every woodworker should have a decent set of chisels. I have a set of Marples, but it looks like they were bought out by Irwin. This looks like a good set for the money All 8 for $100 sounds like a good deal to me. I have the Narex mortise chisels and the cranked-neck paring chisels and they are more than adequate for what I use them for. Those paring chisels are just fucking awesome for cleaning out glue from the inside of joints.
Every woodworker should also have a #5 bench plane, and a low-angle block plane. I got my Stanley #5 for $5 at a flea market. Cleaning it up and sharpening the blade took ~45 minutes. I can cut a shaving that is too thin to measure with fractional calipers. Veritas planes are really nice, but $300 for only a marginal improvement over my $5 Stanley?
A set of scrapers will run you $20. If you don't have strong hands when you start using them, you bet your ass you will when you are done. A #80 is just a fancy holder for a larger scraper. Those are rare as hell at flea markets. I've only seen one, and I bought it for $20.
I hope this has helped you out. The things that have helped me the most are:
I have seen both shows up on youtube and are popular re-runs on cable tv. Especially on the DIY channels in the wee hours of the morning. Set your DVR.
Damn this got long. Send me a PM if you need advice. I cannot guarantee I'll respond right away, but I will respond.
edit: fixed some formatting
I remember my first "nice" watch as well. Quite a sight when i could just press the pushers on watch and the chronograph came to life at my will. I did grow up with fashion watches from the likes of Swatch and Fossil and those are fun to look back on and see just how far I've come into the rabbit hole.
It is true, we do tend to gawk at these things for a little longer than normal, but as /u/MacStylee points out, there are two types of watch enthusiasts. The ones with, to put it lightly, more money than sense which give us remarkable pieces like this, and then the hobbyist who has spent an unhealthy amount of time finding the niche differences between various vintage models whose companies are lost to time. While both are drinking from the same font, they represent two different ilk imbibing in the same guilty pleasure for different reasons but both appreciate it from different outlooks as well. I would like to believe everyone who has bought a Patek is a watch enthusiast because I would love to chat them up about their watch choice and the various minutia, but I know more than a few people who own Pateks because they are a status symbol as well. In the end, I am happy they, the businessman or collector, found something they enjoy for what ever reason. Just be happy with what you choose is all I really want for everyone who picks up a watch.
>Have you made any liquor based drinks?
Screwdrivers are pretty good. Vodka and cranberry carbonated is pretty good as well. Margaritas you would think would be really good, but not so much. The sweeter the starting liquid the better it tastes carbonated, as carbonic acid is pretty bitter by itself. (carbonic acid is co2 dissolved in waters technical name, fun fact: The Ph value of our blood is what our bodies use to determine how much we need to breath. It is made slightly more acidic the more co2 is present.)
As far as supplies go, you need at a minimum,the stuff below. You can always get a bigger tank or longer/better hoses etc. But this is quite literally exactly what I have, and I only fill my tank up every 6-8 months (sooner if I make some dry ice with it.)
If you buy everything from amazon it will run you about $150, my local beverage distributor, in Atlanta suburbs, had most of this stuff a fair bit cheaper, so you may want to check with them first (I got burned by not checking).
Honestly, this was one of the best $100 or so I have ever spent. We buy those Mio squirt drinks when they go on sale, its like paying $0.08 for a 2 liter of Diet Faygo, plus all of the SodaStream flavors work as intended, you can get those from target for like 5 bucks and they make gallons of Soda. Plus all of the fruit stuff, and quixotic beverages just for fun.
Usage:
This are pretty easy to make at home if you ever want to try something different. The only special equipment you need is a steaming basket like this one, or even a rice cooker with a vegetable basket will work! I added a recipe for read bean paste buns below, but another great filling is Char Siu using the same dough recipe.
&nbsp;
&nbsp;
Dough
1 packet active dry yeast
1 tsp white sugar
1 cup warm water
1 T butter
1 tsp salt
3 cups all purpose flower
Whisk the yeast and sugar in warm water and let it sit for about 10 minutes while it froths. No froth? Sorry, your yeast is dead. Prepare flour in a large bowl and add the butter, salt, and yeasty water mixture. If you have a stand mixer with a dough hook, great! If not you can mix it by hand with a wooden spoon. Generally when making bread you want a flour to water ratio of about 3:1 but you may need to add more or less of either until the dough is tacky but not sticky. This usually means it will not stick to a silicon or rubber spatula but only just.
Once the dough is at this point form it into a ball and either take it out of the bowl and scrape it down or get a new bowl. Lightly oil the bowl and toss the dough ball a bit to get it covered in oil. Cover the bowl with plastic wrap and leave it in a warm place for about two hours or until doubled.
After it has risen, turn it onto a lightly floured surface and work the dough to get some of that air out. Divide into equal sized balls. I usually divide mine so that I can roll out about 5 inches at 1/2" thick. Flatten with your hands or a roller, fill with whatever you want using a small spoon, and wrap the dough around the filling while sealing it. Let sit for a bit before steaming. The longer the dough sits at this point (proofing) the fluffier the final buns will be. Generally I let my buns with sweet fillings sit for longer than with savory fillings. Cut out some small parchment paper squares and place the buns on them so they don't stick to the steamer. Make sure steam can still get through around the paper! Steam for about 7 minutes for small balls and up to 15 for large ones. When removing from the steam, be careful not to drip any water on the surface of the buns!
&nbsp;
&nbsp;
Red Bean Paste
My favorite filling is red bean paste which is basically beans boiled in sugar. You can buy these in jars at most large grocery stores, but if you manage to find dried adzuki beans I suggest making this yourself since it is so much cheaper and lasts for months frozen.
Equal parts by weight red beans and sugar
Water
Soak beans in water overnight in the refrigerator. The next day, drain the beans and add them to a pot large enough so that the beans are only a few inches thick on the bottom. Add about twice as much water as beans to the pot and bring to a boil. Lower and simmer for several hours until the beans can be easily mashed with a spoon. Check frequently in case you need to add more water. Burned beans are terrible!
It took me 30 minutes to find thisagain, so I hope you enjoy it. Best video of this type I've ever seen, and gives the best way to chop an onion. (Don't do that cut horizontally crap! Good way to cut yourself!)
Also, here is the link I saved for the best all around knife.
And here's the video that convinced me that's the best knife.
Wow! Thanks for an awesome reply. Unfortunately I'm not in a position where I can spend much money so I'll have to see if I can find some flea markets near me to buy some stuff at. All this stuff is great info that I need to look at better when I have time where I don't need to be asleep. But while I'm here I want to ask you one thing: What do you think of the Kreg jig? I'm using it to hold on the back of some floating nightstands and also used it heavily on my desk, although on my desk they aren't really load bearing whereas on the nightstands all the weight is going through that backplate first.
Thanks again for the awesome reply :)
> What would you say is the 'greatest' Rach 3?
Well, there are a lot of opinions on the best Rach 2 & 3 recordings out there. Personally, I think Ashkenazy does it best. This one with Andre Previn in particular. There's another one he recorded with Anatole Fistoulari with the LSO that also is beautiful.
For "white hot" virtuoso playing, the consensus is the previously mentioned Argerich or Horowitz.
Editing to add that Valentina has some YouTube videos of her playing the Rachmaninoff concertos without orchestra backing and they're really cool to watch if you've heard these a million times. Your brain fills in the orchestra part.
Enjoy!
your original statement comes across as a bit aggressive over the price, hence my response. HOwever, let's break down some costs. I am assuming 16 gauge wire because that seems to be fairly common for a structure like this. THinner would be more jewelry thickness and I don't think that would hold as well as this does once it started going out into the branches. I could be wrong but the difference will be about $2 every 25 ft. so not a huge deal.
So on Amazon I can get 25 yrds of 16 gauge for $5.50. converting to meters that is 7.62 meters for £4.20 (I am using US prices so the price may vary in the UK you would have to look that up). So to get 340 meters I would need 45 spools which would cost £189.
That's just the cost of the wire. So that is £271 left to pay for hours of work and specialised knowledge and experience and tools to be able to create the final product.
It is reasonable to assume the price for the wire will vary based on locations as well as the artist likely having a supplier they can get more of a bulk order instead of paying per small spool, but the price will still be limited by the value of copper itself and certainly won't ever be cheaper than copper is worth by weight.
When doing something specialised, especially if it is high quality and skillful a general rule of thumb for the person creating the item or product is materials x3 (or doing the math based on cost of materials + set hourly rate x hours needed to create the product). This will help cover costs of overhead and materials and still allow the person to make a little money to make it worth creating the product (especially if they are doing it as a primary source of income. Because if you can't make a profit to pay your own bills you aren't going to be able to continue making the items very long).. THis artist is charging less than that rule of thumb. So it's far less expensive than it may seem.
Good, sharp knives dont have to be expensive.
Ceramic: https://www.amazon.com/Kyocera-Advanced-Ceramic-Revolution-Professional/dp/B0017U3UA4/
Steel: https://www.amazon.com/Victorinox-Fibrox-45520-Frustration-Packaging/dp/B008M5U1C2/
Slightly more expensive steel: https://www.amazon.com/Global-G-2-inch-Chefs-Knife/dp/B00005OL44/
Ceramic is suuuuper insanely sharp and holds an edge for a very, very, long time if treated properly. It is however possible to break the blade with a sharp impact or drop. Not really feasible to sharpen at home. Kyocera does offer free lifetime sharpening if you pay shipping though.
Steel is nice because it's easy to sharpen at home with a little practice. I actually really enjoy sharpening my steel knives now that i am comfortable with the process. It's very zen. You'll just need a decent water or oilstone and some patience to learn.
This inspired me to look more into markers for shading and color. I do use watercolors relatively frequently, but get lazy and don't feel like getting my whole set-up out just for sketching. Does anyone have experience with Tombow and the quality?
Definitely not going to drop money on Copics/Prismacolor at first, but any budget-friendly artist markers would be great. My main goal is getting a better grasp on tones/shading rather than a large variety of colors.
The guy has a book, for anybody who's interested in making one of these things themselves. It's actually quite good. Very detailed. Of course, I have yet to try making one myself, so I won't comment on whether it's as easy (ha!) as he makes it look...
Interesting article, although the price tag does not seem that outrageous when you factor in the 3 lenses that are in the package.
From the article, the package includes:
That's $27,000 altogether, not to mention that these are limited editions (only 100 made). It's definitely a collector's item but the article seemed a bit unfair. Leica's have been known to be legendary cameras for pro photographers for generations and have amazing resale values!
Jacques Pepin is one of my all-time favorite people. If you haven't read his auto-biography, you should check it out. It's fantastic.
https://www.amazon.com/Apprentice-My-Life-Kitchen/dp/0544657497/ref=sr_1_6/135-5280378-8194424?ie=UTF8&amp;qid=1499832546&amp;sr=8-6&amp;keywords=jacques+pepin
It's not the exact same brand, but I have a pencil sharpener that pops out like that and sharpens incredibly well: http://www.amazon.com/CARL-Angel-5-Pencil-Sharpener-Blue/dp/B005D7S9FI/ref=pd_sim_sbs_op_1
Read his autobiography. It's great. People talk about how he comes into their restaurants and checks the trash first to see how much they are wasting and the book pretty much tells you it's from his upbringing through WWII.
Also goes into how he cooked for Charles De Gaulle (iirc) and how he was working for Howard Johnson's in the US.
https://www.amazon.com/Apprentice-My-Life-Kitchen/dp/0544657497/ref=sr_1_21?keywords=jacques+pepin&amp;qid=1555076529&amp;s=gateway&amp;sr=8-21
america's test kitchen (great cooking show where they try stuff out and come up with practical suggestions instead of just crazy complicated shit.) recommends a number of victorinox fibrox knives. i think i have the chefs and paring knives and i love them.
http://www.amazon.com/gp/product/B008M5U1C2/ref=wms_ohs_product?ie=UTF8&amp;psc=1
His name is Dan Reeder. He has several books available on making "Screamers" - 1, 2, 3, and a couple more. His website can be found here. He's even a redditor and has popped up in a few threads. I posted something about how much of an impact his books had on me growing up and he replied to my post. Nice guy.
yeah, but it cost like $6,899.99 0_o
I use the recipes from this book https://www.amazon.com/Artisan-Bread-Five-Minutes-Revolutionizes/dp/0312362919 and the technique from this book (sequel to the one above) https://www.amazon.com/Healthy-Bread-Five-Minutes-Day/dp/0312545525/ref=pd_bxgy_14_img_2?_encoding=UTF8&pd_rd_i=0312545525&pd_rd_r=1ZHJ521YQCR1VCC1EYAJ&pd_rd_w=EqWcS&pd_rd_wg=WcpLj&psc=1&refRID=1ZHJ521YQCR1VCC1EYAJ for no-knead bread. It's mind-boggling fast and easy compared to kneaded bread, and I'm famous in my community for my incredible bread.
The only proper response to this is "then sharpen your knife."
If your knife is fucked, or you never invested in a halfway decent knife before, shop around and pick up a Victorinox chef knife.
From my experience, this is the the commercial kitchen workhorse in the US. It holds an edge if you treat it well, has a plastic handle and no crevices that might be hard to clean, and is an excellent choice for mid level cooks.
Try out the Tombow Dual Brush Pen Art Markers. They are about 1/5 the cost and still give most of the benefits. As for the white pen used at the end, it's a Uniball Signo Broad in White. Any art store should have this in your area for around the same price. Try them out and then you can see about upgrading (slowly) in the future.