(Part 2) Best products from r/DIY
We found 91 comments on r/DIY discussing the most recommended products. We ran sentiment analysis on each of these comments to determine how redditors feel about different products. We found 7,518 products and ranked them based on the amount of positive reactions they received. Here are the products ranked 21-40. You can also go back to the previous section.
21. Makita MAC700 Big Bore 2.0 HP Air Compressor
- Cast iron pump with big bore cylinder and piston, combined with greater bore and stroke, delivers maximum performance
- Substantially lower noise levels with a large 1,720 RPM pump, enabling greater displacement at lower RPM
- Low amp draw reduces incidences of tripped breakers and voltage drop that can cause premature motor failure
- Oil lubricated provides cooler running pump, minimizes wear
- One-year manufacturer's warranty
Features:
 ▼ Read Reddit mentions
22. SE Helping Hand with Magnifying Glass - MZ101B
- Built-in magnifying glass (4x) aids in minute detail work
- 12 diopter
- 2 alligator clips on 4-way swivels—holds items securely (leaving hands free)
- Heavy-duty base for stability
- Great for electricians, hobbyists, jewelers, and users who work with solder or small details
Features:
 ▼ Read Reddit mentions
23. 3M Paint Project Respirator, Medium
- For workplace/occupational applications only
- Provides at least 95% filter efficiency against solid and liquid aerosols as well as certain organic vapors
- Each respirator kit contains (1) face piece, (1) pair of 6001 cartridges, (1) pair of 501 retainers and (2) pair of 5P71 filters
- NIOSH approved: OV/P95
- Size Medium
Features:
 ▼ Read Reddit mentions
24. Franklin Sensors ProSensor 710 Precision Stud Finder
- Advanced Multi-Sense technology senses the wall in multiple locations simultaneously
- Bright LEDs lights illuminate to indicate the position of hidden objects - making it very easy to visualize the position of studs
- Identifies the width of hidden objects so that you not only know the position of hidden objects, but so you also know the size of them
- Can identify the position of multiple studs simultaneously
Features:
 ▼ Read Reddit mentions
25. Easyget LED Arcade DIY Parts 2x Zero Delay USB Encoder + 2x 8 Way Joystick + 20x LED Illuminated Push Buttons for Mame Jamma Arcade Project Red + Blue Kits
- Beautiful LED Arace Game DIY Parts for MAME JAMMA Project!
- 100% Zero Delay USB Encoders and Perfect work for all windows systems!
- Perfect Parts for 2 Player Arcade MAME DIY Project!
- Made with highest quality materials!Heat resistant plastic!
- Perfect LED Kit for Arcade PC Game DIY Project! Easy Install!
Features:
 ▼ Read Reddit mentions
26. Drain Hero
- This wet/dry Vic attachment is great for unclogging sinks, tubs, and showers by pulling out the clog rather than PUSHING the clog further in
- Used for Power Tool Accessories, Misc. Power Tool Accessories
- GOT DIRT? Shop-Vac's full line of products includes cordless, rechargeable wet dry vacuums, automotive vacuum systems, air movers, attachments & more. Whatever the job, Shop-Vac has you covered!
- AN AMERICAN ORIGINAL: Shop-Vac offers the most complete line of vacuum cleaners, bags, filters, attachments, kits, & other cleaning tools available for home, industrial, & commercial applications.
- TOUGH & DEPENDABLE: Shop-Vac Corporation is the recognized world leader in wet/dry vacuum cleaners. Since 1965, we have made innovative, high quality vacuum cleaners, filters, bags, & other accessories.
- Use with 1-1/4, 1-1/2 and 2-1/2-Inch hose ends
- Use to unclog sinks, showers, and tubs
- Retrieves valuables lost in a drain
- Not recommended for use on toilets
- Made from pliable rubber
Features:
 ▼ Read Reddit mentions
27. WESTEK Indoor Wireless Wall Outlet Switch with Remote Operation - Ideal for Lamps and Household Appliances - the Easy Way to Add a Switched Outlet - Signal Works Through Walls, Up To 100 Feet Away
- Conveniently Control Lighting – This wireless outlet switch allows you to remotely operate and control indoor devices at the touch of a button. Ideal for hard to reach lamps and seasonal lighting
- At-Home Convenience – The wireless wall switch transmitter has a Radio Frequency signal that works up to 100 feet away, around corners and through walls to make your life easier. Saves energy consumption and money
- Easy to Install – Simply plug the desired appliance or lamp into the receiver and then plug into the outlet. Use the indoor remote light switch to turn the device on and off, no need to use an electrician
- Designed With You in Mind – Control your lamps and appliances from the comfort of your bed, chair or sofa. No need to get up if you don’t want to, perfect for hard-to-reach appliances
- Small and Portable – Small and unnoticeable, you probably won’t know it’s there. This simple wireless switch kit includes wall mounting screws for use if desired
Features:
 ▼ Read Reddit mentions
28. Stanley 20-556 6-Inch FatMax Jab Saw
- SharpTooth Saw Technology of the hand saw uses three cutting surfaces to cut 50% faster than conventional STANLEY Hand Saws
- Comfortable, slip-resistant, bi-material handle of the handsaw is designed for strength and durability
- Sharpened tip punches through drywall with ease
- 6-inch jab saw with a sharpened tip for puncturing drywall
- SharpTooth technology cuts 50% faster than conventional saws
- Induction-hardened teeth stay sharp up to 5 times longer than standard teeth
- Thick, ergonomically designed grip resists slipping and adds comfort
- 6-inch blade; limited lifetime warranty
Features:
 ▼ Read Reddit mentions
30. Con-Tact Brand Chalkboard Adhesive Shelf Liner, Removable, Black 18'' x 6' Roll, 1 Roll (06F-C9052-01)
- Chalkboard Adhesive roll, repositionable for easy application
- Great to use for keeping track of schedules, assignments, and reminders
- A great tool for teachers, parents, and students
- Con-Tact Brand 2018 is a registared trademark of Kittrich Corporation
- PROTECTION: Con-Tact Brand Chalkboard Liner provides protection to your covered surfaces while adding a creative touch to your home or work place
Features:
 ▼ Read Reddit mentions
31. Concrete Countertops: Design, Forms, and Finishes for the New Kitchen and Bath
Used Book in Good Condition
 ▼ Read Reddit mentions
32. Aketek IR Hidden Infrared Remote Extender Receiver Emitter Repeater System
 ▼ Read Reddit mentions
33. Crystal Clear Bar Table Top Epoxy Resin Coating for Wood Tabletop - 1 Gallon Kit
- 💎 PREMIUM CRYSTAL CLEAR EPOXY- Designed for Table Tops, Bars, Wood finishes, See-Through Encapsulations, Art work, only limited by your imagination. Our custom Epoxy formulation allows for minimal bubbles, goes on smooth, helps eliminate fish eyes, craters and various other imperfections. We only offer the best because that is what we use!
- ⭐ USA MANUFACTURED- It is Safe once fully and properly cured, Low odor because we proudly manufacture here so you can rest assured you are getting the very best product produced!
- 💦 EASY 1:1 MIXTURE: Imagine spending hours gathering your materials and spending your money just to have it all wasted because of Epoxy resin that doesn’t Level, is full of bubbles or starts turning yellow. REST ASSURED we’ve already done all the guess work for you. It’s High Gloss, U.V. Resistant, self leveling, the world is your canvas!
- 💪 ROCK HARD VERSATILITY - We ONLY Produce a Tough, High Gloss, Water Resistant Coating so you know when it counts, we have your back!
- 🎯 TEST OF TIME – So many options, hard to decide, we have very knowledgeable customer support staff standing by to support you on your journey! Let us earn your business. So that you know if you’re stuck, we are right here to help coach you along. If this is your first time or a pro we can help with bar tops, tabletops, river tables, jewelry, coffee tables, countertops, serving trays…The list goes on we have pretty much seen it all.
Features:
 ▼ Read Reddit mentions
34. TP-Link AV600 Powerline Ethernet Adapter - Plug&Play, Power Saving, Nano Powerline Adapter, Expand Home Network with Stable Connections (TL-PA4010 KIT)
- Fast speed: Wired connection with high speed data transfer rate, ideal for HD video or 3D video streaming and online gaming, up to 100Mbps
- Plug and Play: No new wires and no configuration required; Step 1: connect 1 adapter to your router. Step 2: plug in another Powerline adapter wherever you need wired internet service.
- Network expansion: The TL-PA4010 KIT transforms your home's existing electrical circuit into a high-speed network with no need for new wires or drilling and brings wired network to anywhere there is a power outlet(Up to 300 meters)
- Miniature design: Smaller than most Powerline adapters in the market, blends discreetly in front of any power outlet
- Power Saving Mode: TL-PA4010 KIT automatically switches from its "Working" mode to efficient "Power-Saving" mode when not in use, reducing energy consumption by up to 85%.
- Please note that powerline adapters must be deployed in sets of two or more
- Kindly Reminder: Powerline Adapters must be on the same electrical circuit for connectivity. Appliances and devices running on the same circuit may affect powerline performance.
- Compatible with all TP-Link Powerline Ethernet Adapters AV2000, AV1300, AV1200, AV1000, AV600, AV500, AV200. Please purchase TL-WPA4220 or TL-WPA4220KIT if you need Wi-Fi
Features:
 ▼ Read Reddit mentions
35. Weller WLC100 40-Watt Soldering Station
- High performance analog soldering station produces up to 900° F to handle many soldering projects
- Variable power control dial adjusts power from 5 watts to 40 watts for accuracy
- Quality, lightweight pencil iron with cushioned foam grip provides extended comfort during long term soldering projects
- Includes: a Weller certified ST3 iron plated tip for long life and consistent performance, a built in soldering holder to safely rest your pencil, and a cleaning sponge to remove unwanted residue from soldering for next time use
- UL Listed: Tested and meets independent safety standards
Features:
 ▼ Read Reddit mentions
36. SUPERNIGHT LED Strip Lights, RGB Color Changing 16.4Ft SMD5050 LEDs Flexible Light Strip Waterproof Rope Lighting Kit with 44 Key Remote Controller and 12V Power Supply
- 【RGB Color Changing】This RGB Led strip lights kit can change colors,set speed modes, adjust brightness with 44 Keys remote controller. DIY selection keys can help you create your great led mood lighting. All items including IR remote controller, led strip and power supply has over charging, short circuit protection, safe value for adults and kids.
- 【Our Advantages】Led strip lighting has premium 5050 SMD Leds in 16.4ft with dimmer and brightness controls.
- 【Easy Installation & Use】Led tape lights can be cut at the mark. You can cut off extra strips to adjust to a proper length.self-adhesive tape can be fit on any dry and flat surface. Flexible to install anywhere you want.
- 【Non-Waterproof Rope Lights】RGB led strip lights suitable for indoor lighting and decoration. Such as kitchen, under cabinet, dining room, bedroom,gaming room etc.
- 【Atisfaction Guaranteed】We offer these Led strip lights kits 30-day money-back guarantee for any reason + 12 month warranty for quality-related issues. Our friendly customer service staff will try our best to assist you fix the issue in 24 hours all year around.
Features:
 ▼ Read Reddit mentions
38. Drain King 186 Bathroom Sinks, Showers, and Swimming Pool Drains, 1.5 to 3 Inch
Made in U.S.A with high quality materialDrain King is the original water-powered drain cleaner to ever enter the marketOur Drain Kings feature a water pulsating valve to unclog blocked drains quickly, no hassleClears slow and clogged drains with water power in your bathroom sink, kitchen sink, and s...
 ▼ Read Reddit mentions
39. LE 12V LED Strip Light, Flexible, SMD 2835, 16.4ft Tape Light for Home, Kitchen, Party, Christmas and More, Non-Waterproof, Warm White(Not Include Power Adapter)
- Power adapter not includes. Please use it with your 12V power adapter.
- Safe to use. The working voltage is 12V, extremely low heat. Please do not use power adapter that is higher than 12V to supply. The wattage is 18W, Please be kindly informed that the total wattage of LED strip lights should not exceed the max wattage of power adaptor. It is touchable and safe to children.
- Easy Installation. Self-adhesive back with adhesive tape for safe and easy application.
- Cuttable: DIY various shapes; Good flexibility, it can bend and fold at will. The LED strip lights can be cut every 3 LEDs along the cutting marks, very suitable for easy DIY.
- Flexible operations. Slim, compact and flexible PCB strip. Mount end-to-end for bendable or angled patterns, or in continuous rows. Note: The strip light is very fragile. When installing and using, special attention should be paid not to involve and tear.
Features:
 ▼ Read Reddit mentions
40. VideoSecu ML12B TV LCD Monitor Wall Mount Full Motion 15 inch Extension Arm Articulating Tilt Swivel for Most 19"-32", Some Models up to 40", LED TV Flat Panel Screen with VESA 100x100, 75x75 1KX
- Fits 32 inch TVs except some Samsung 32 inch TVs, for example, Samsung 32in H4003 series and UN32J5205AF
- High grade steel material offers loading capacity to 44lbs
- Post-installation level adjustment allows the TV to perfectly level; Removable TV plate designed for single-person installation
- Adjustable 5 degrees forward or 5 degrees backward tilt, 180 degrees swivel, 360 degrees rotate; Retracts to 2.4"save space, extends up to 15" from the wall
- Compatible with VESA (mounting hole pattern) 75x75(3"x3") or 100x100(4"x4"). Common hardware pack included in the package
Features:
 ▼ Read Reddit mentions
Top comments mentioning products on r/DIY:
Summary
21. Makita MAC700 Big Bore 2.0 HP Air Compressor
- Cast iron pump with big bore cylinder and piston, combined with greater bore and stroke, delivers maximum performance
- Substantially lower noise levels with a large 1,720 RPM pump, enabling greater displacement at lower RPM
- Low amp draw reduces incidences of tripped breakers and voltage drop that can cause premature motor failure
- Oil lubricated provides cooler running pump, minimizes wear
- One-year manufacturer's warranty
Features:
▼ Read Reddit mentions22. SE Helping Hand with Magnifying Glass - MZ101B
- Built-in magnifying glass (4x) aids in minute detail work
- 12 diopter
- 2 alligator clips on 4-way swivels—holds items securely (leaving hands free)
- Heavy-duty base for stability
- Great for electricians, hobbyists, jewelers, and users who work with solder or small details
Features:
▼ Read Reddit mentions23. 3M Paint Project Respirator, Medium
- For workplace/occupational applications only
- Provides at least 95% filter efficiency against solid and liquid aerosols as well as certain organic vapors
- Each respirator kit contains (1) face piece, (1) pair of 6001 cartridges, (1) pair of 501 retainers and (2) pair of 5P71 filters
- NIOSH approved: OV/P95
- Size Medium
Features:
▼ Read Reddit mentions24. Franklin Sensors ProSensor 710 Precision Stud Finder
- Advanced Multi-Sense technology senses the wall in multiple locations simultaneously
- Bright LEDs lights illuminate to indicate the position of hidden objects - making it very easy to visualize the position of studs
- Identifies the width of hidden objects so that you not only know the position of hidden objects, but so you also know the size of them
- Can identify the position of multiple studs simultaneously
Features:
▼ Read Reddit mentions25. Easyget LED Arcade DIY Parts 2x Zero Delay USB Encoder + 2x 8 Way Joystick + 20x LED Illuminated Push Buttons for Mame Jamma Arcade Project Red + Blue Kits
- Beautiful LED Arace Game DIY Parts for MAME JAMMA Project!
- 100% Zero Delay USB Encoders and Perfect work for all windows systems!
- Perfect Parts for 2 Player Arcade MAME DIY Project!
- Made with highest quality materials!Heat resistant plastic!
- Perfect LED Kit for Arcade PC Game DIY Project! Easy Install!
Features:
▼ Read Reddit mentions26. Drain Hero
- This wet/dry Vic attachment is great for unclogging sinks, tubs, and showers by pulling out the clog rather than PUSHING the clog further in
- Used for Power Tool Accessories, Misc. Power Tool Accessories
- GOT DIRT? Shop-Vac's full line of products includes cordless, rechargeable wet dry vacuums, automotive vacuum systems, air movers, attachments & more. Whatever the job, Shop-Vac has you covered!
- AN AMERICAN ORIGINAL: Shop-Vac offers the most complete line of vacuum cleaners, bags, filters, attachments, kits, & other cleaning tools available for home, industrial, & commercial applications.
- TOUGH & DEPENDABLE: Shop-Vac Corporation is the recognized world leader in wet/dry vacuum cleaners. Since 1965, we have made innovative, high quality vacuum cleaners, filters, bags, & other accessories.
- Use with 1-1/4, 1-1/2 and 2-1/2-Inch hose ends
- Use to unclog sinks, showers, and tubs
- Retrieves valuables lost in a drain
- Not recommended for use on toilets
- Made from pliable rubber
Features:
▼ Read Reddit mentions27. WESTEK Indoor Wireless Wall Outlet Switch with Remote Operation - Ideal for Lamps and Household Appliances - the Easy Way to Add a Switched Outlet - Signal Works Through Walls, Up To 100 Feet Away
- Conveniently Control Lighting – This wireless outlet switch allows you to remotely operate and control indoor devices at the touch of a button. Ideal for hard to reach lamps and seasonal lighting
- At-Home Convenience – The wireless wall switch transmitter has a Radio Frequency signal that works up to 100 feet away, around corners and through walls to make your life easier. Saves energy consumption and money
- Easy to Install – Simply plug the desired appliance or lamp into the receiver and then plug into the outlet. Use the indoor remote light switch to turn the device on and off, no need to use an electrician
- Designed With You in Mind – Control your lamps and appliances from the comfort of your bed, chair or sofa. No need to get up if you don’t want to, perfect for hard-to-reach appliances
- Small and Portable – Small and unnoticeable, you probably won’t know it’s there. This simple wireless switch kit includes wall mounting screws for use if desired
Features:
▼ Read Reddit mentions28. Stanley 20-556 6-Inch FatMax Jab Saw
- SharpTooth Saw Technology of the hand saw uses three cutting surfaces to cut 50% faster than conventional STANLEY Hand Saws
- Comfortable, slip-resistant, bi-material handle of the handsaw is designed for strength and durability
- Sharpened tip punches through drywall with ease
- 6-inch jab saw with a sharpened tip for puncturing drywall
- SharpTooth technology cuts 50% faster than conventional saws
- Induction-hardened teeth stay sharp up to 5 times longer than standard teeth
- Thick, ergonomically designed grip resists slipping and adds comfort
- 6-inch blade; limited lifetime warranty
Features:
▼ Read Reddit mentions30. Con-Tact Brand Chalkboard Adhesive Shelf Liner, Removable, Black 18'' x 6' Roll, 1 Roll (06F-C9052-01)
- Chalkboard Adhesive roll, repositionable for easy application
- Great to use for keeping track of schedules, assignments, and reminders
- A great tool for teachers, parents, and students
- Con-Tact Brand 2018 is a registared trademark of Kittrich Corporation
- PROTECTION: Con-Tact Brand Chalkboard Liner provides protection to your covered surfaces while adding a creative touch to your home or work place
Features:
▼ Read Reddit mentions31. Concrete Countertops: Design, Forms, and Finishes for the New Kitchen and Bath
Used Book in Good Condition
▼ Read Reddit mentions32. Aketek IR Hidden Infrared Remote Extender Receiver Emitter Repeater System
▼ Read Reddit mentions33. Crystal Clear Bar Table Top Epoxy Resin Coating for Wood Tabletop - 1 Gallon Kit
- 💎 PREMIUM CRYSTAL CLEAR EPOXY- Designed for Table Tops, Bars, Wood finishes, See-Through Encapsulations, Art work, only limited by your imagination. Our custom Epoxy formulation allows for minimal bubbles, goes on smooth, helps eliminate fish eyes, craters and various other imperfections. We only offer the best because that is what we use!
- ⭐ USA MANUFACTURED- It is Safe once fully and properly cured, Low odor because we proudly manufacture here so you can rest assured you are getting the very best product produced!
- 💦 EASY 1:1 MIXTURE: Imagine spending hours gathering your materials and spending your money just to have it all wasted because of Epoxy resin that doesn’t Level, is full of bubbles or starts turning yellow. REST ASSURED we’ve already done all the guess work for you. It’s High Gloss, U.V. Resistant, self leveling, the world is your canvas!
- 💪 ROCK HARD VERSATILITY - We ONLY Produce a Tough, High Gloss, Water Resistant Coating so you know when it counts, we have your back!
- 🎯 TEST OF TIME – So many options, hard to decide, we have very knowledgeable customer support staff standing by to support you on your journey! Let us earn your business. So that you know if you’re stuck, we are right here to help coach you along. If this is your first time or a pro we can help with bar tops, tabletops, river tables, jewelry, coffee tables, countertops, serving trays…The list goes on we have pretty much seen it all.
Features:
▼ Read Reddit mentions34. TP-Link AV600 Powerline Ethernet Adapter - Plug&Play, Power Saving, Nano Powerline Adapter, Expand Home Network with Stable Connections (TL-PA4010 KIT)
- Fast speed: Wired connection with high speed data transfer rate, ideal for HD video or 3D video streaming and online gaming, up to 100Mbps
- Plug and Play: No new wires and no configuration required; Step 1: connect 1 adapter to your router. Step 2: plug in another Powerline adapter wherever you need wired internet service.
- Network expansion: The TL-PA4010 KIT transforms your home's existing electrical circuit into a high-speed network with no need for new wires or drilling and brings wired network to anywhere there is a power outlet(Up to 300 meters)
- Miniature design: Smaller than most Powerline adapters in the market, blends discreetly in front of any power outlet
- Power Saving Mode: TL-PA4010 KIT automatically switches from its "Working" mode to efficient "Power-Saving" mode when not in use, reducing energy consumption by up to 85%.
- Please note that powerline adapters must be deployed in sets of two or more
- Kindly Reminder: Powerline Adapters must be on the same electrical circuit for connectivity. Appliances and devices running on the same circuit may affect powerline performance.
- Compatible with all TP-Link Powerline Ethernet Adapters AV2000, AV1300, AV1200, AV1000, AV600, AV500, AV200. Please purchase TL-WPA4220 or TL-WPA4220KIT if you need Wi-Fi
Features:
▼ Read Reddit mentions35. Weller WLC100 40-Watt Soldering Station
- High performance analog soldering station produces up to 900° F to handle many soldering projects
- Variable power control dial adjusts power from 5 watts to 40 watts for accuracy
- Quality, lightweight pencil iron with cushioned foam grip provides extended comfort during long term soldering projects
- Includes: a Weller certified ST3 iron plated tip for long life and consistent performance, a built in soldering holder to safely rest your pencil, and a cleaning sponge to remove unwanted residue from soldering for next time use
- UL Listed: Tested and meets independent safety standards
Features:
▼ Read Reddit mentions36. SUPERNIGHT LED Strip Lights, RGB Color Changing 16.4Ft SMD5050 LEDs Flexible Light Strip Waterproof Rope Lighting Kit with 44 Key Remote Controller and 12V Power Supply
- 【RGB Color Changing】This RGB Led strip lights kit can change colors,set speed modes, adjust brightness with 44 Keys remote controller. DIY selection keys can help you create your great led mood lighting. All items including IR remote controller, led strip and power supply has over charging, short circuit protection, safe value for adults and kids.
- 【Our Advantages】Led strip lighting has premium 5050 SMD Leds in 16.4ft with dimmer and brightness controls.
- 【Easy Installation & Use】Led tape lights can be cut at the mark. You can cut off extra strips to adjust to a proper length.self-adhesive tape can be fit on any dry and flat surface. Flexible to install anywhere you want.
- 【Non-Waterproof Rope Lights】RGB led strip lights suitable for indoor lighting and decoration. Such as kitchen, under cabinet, dining room, bedroom,gaming room etc.
- 【Atisfaction Guaranteed】We offer these Led strip lights kits 30-day money-back guarantee for any reason + 12 month warranty for quality-related issues. Our friendly customer service staff will try our best to assist you fix the issue in 24 hours all year around.
Features:
▼ Read Reddit mentions38. Drain King 186 Bathroom Sinks, Showers, and Swimming Pool Drains, 1.5 to 3 Inch
Made in U.S.A with high quality materialDrain King is the original water-powered drain cleaner to ever enter the marketOur Drain Kings feature a water pulsating valve to unclog blocked drains quickly, no hassleClears slow and clogged drains with water power in your bathroom sink, kitchen sink, and s...
▼ Read Reddit mentions39. LE 12V LED Strip Light, Flexible, SMD 2835, 16.4ft Tape Light for Home, Kitchen, Party, Christmas and More, Non-Waterproof, Warm White(Not Include Power Adapter)
- Power adapter not includes. Please use it with your 12V power adapter.
- Safe to use. The working voltage is 12V, extremely low heat. Please do not use power adapter that is higher than 12V to supply. The wattage is 18W, Please be kindly informed that the total wattage of LED strip lights should not exceed the max wattage of power adaptor. It is touchable and safe to children.
- Easy Installation. Self-adhesive back with adhesive tape for safe and easy application.
- Cuttable: DIY various shapes; Good flexibility, it can bend and fold at will. The LED strip lights can be cut every 3 LEDs along the cutting marks, very suitable for easy DIY.
- Flexible operations. Slim, compact and flexible PCB strip. Mount end-to-end for bendable or angled patterns, or in continuous rows. Note: The strip light is very fragile. When installing and using, special attention should be paid not to involve and tear.
Features:
▼ Read Reddit mentions40. VideoSecu ML12B TV LCD Monitor Wall Mount Full Motion 15 inch Extension Arm Articulating Tilt Swivel for Most 19"-32", Some Models up to 40", LED TV Flat Panel Screen with VESA 100x100, 75x75 1KX
- Fits 32 inch TVs except some Samsung 32 inch TVs, for example, Samsung 32in H4003 series and UN32J5205AF
- High grade steel material offers loading capacity to 44lbs
- Post-installation level adjustment allows the TV to perfectly level; Removable TV plate designed for single-person installation
- Adjustable 5 degrees forward or 5 degrees backward tilt, 180 degrees swivel, 360 degrees rotate; Retracts to 2.4"save space, extends up to 15" from the wall
- Compatible with VESA (mounting hole pattern) 75x75(3"x3") or 100x100(4"x4"). Common hardware pack included in the package
Features:
▼ Read Reddit mentions
Hi. This sounds like such a fun project to do! I also agree with the mount idea.
I've used this for my monitors before I switched to these. Both are great quality, easy to install, and deliver what they advertise.
The benefit of these articulating types is that they can also tilt, swivel, and rotate. I don't know how your vanity is set up, but tilting might be something to consider if you ever both sit and stand. The swivel might be helpful if you're trying to catch the best natural light from a particular window.
The former is definitely more affordable and a simple enough solution. It's very sturdy when mounted onto a stud, or be sure to use anchors. Also, if you plan to use this type of mount, just be aware that when it's pushed back, the center of the mirror (if you affix it to the mount at the exact center) will be offset about a couple inches to the side from where the mount is attached to the wall. I hope I explained that well enough. There should be more info on this in the reviews with photos to help explain what I mean, or feel free to ask me for more details.
The latter (or something like it) would be a great option if you didn't want to attach anything to the wall at all as it can clamp onto an edge of your vanity, if possible. This might be a good route if your vanity is floating away from a wall. This one is much more costly, though, and I would personally rather spend that money on the makeup goodies lol. I'm only mentioning this option as it's the only other mount I've had experience with and it's a great mount, but there could be similar ones out there at a lower price point with the same features by now (I bought it a couple years ago).
Safety tips: I don't know if you have plans for how to affix the mirror to the mount, or what kind of mirror you want to use, but in regards to safety (if it is a simple bare mirror) I would recommend to create/attach/build some kind of backing/frame for the back and around the edges of the mirror so that it's more sturdy when you move it around. Also, I would recommend sticking bumpers onto the parts of the mount that come into contact with the back of the mirror when the mirror is pushed back towards the mount.
I hope this was helpful. Please feel free to ask me any questions.
There are two primary ways of doing it: cast in place, and molded. For a desktop you probably want to make a mold and drop the top onto the desk. If the existing surface has weird crap all over it, (like a messed up wood surface,) you might cast in place instead of seating on top of it. In any case, you have to be careful doing anything less than about 1.5" thick. I use rebar in the concrete, but in thin pieces you have to use hardware cloth (metal,) chicken wire, or expanded metal mesh. I use "remesh," a very widely spaced, square mesh.
To make a mold, you'd use melamine (plastic) coated MDF board. You need to work on a flat, level surface that you can bang on. You need black silicone caulk to seal the seams of the mold.
The process is a fair amount to explain in a reddit comment; I highly recommend the book by Fu-Tung Cheng as well as his video. (I can send you a DVD if you want.)
In a mold, the bottom is the top, so you could round the corners by putting a heavy bead of silicone caulk and smoodging it (technical term) into a nice, rounded profile. If pouring the top in-place, you could pull the side pieces off early (before the cement is fully hard) and pull something like a plastic bag down the edge, rounding it over.
There are many points to cover in the process of pouring concrete, but one that's often overlooked is your floor. Some large, 2" thick counter tops my gf & I made weighed about 450 lbs when finished. Make sure your floor can handle that. (and your desk!)
So... Mold: melamine board on the bottom, melamine strips for the sides, held with screws (pre-drill holes!) or corner brackets. The bottom (against the melamine) will be your top. Silicone seal all seams, or water seeps out. That's bad. Concrete needs moisture to cure, and your corners will be all dry and crumbly. Pour in place: Like a mold using your desk as the bottom. The top surface will be your top, so you can trowel or diamond-sand as you like.
Either way, you should also agitate the wet concrete. It settles it and causes air bubbles to rise to the surface. That can be as simple as banging on it with a hammer/mallet or lifting the whole work surface with a lever & dropping it back down. (Must have a solid floor for the lever approach.)
I recommend using Quickrete 5000 high early strength. Cures faster than regular concrete. Cures to full hardness in 28 days, usable in ~2 days.
So... I've probably raised more questions for you than I've answered. One good thing to do is to buy a bag or two (it's cheap--~$5/bag) and do some small practice molds. Even in buckets. Get the feel for troweling and sanding.
I also recommend Cheng's concrete sealer. It isn't cheap, but it's worth it. I use inexpensive Quickrete pigments for color.
I'm happy to answer questions, and seriously, if you want the Cheng DVD, just PM me an address. It's full of great info.
If you want to protect and soften which darkens the leather of the boots uniformly, and that I recommend, use this product. http://ecx.images-amazon.com/images/I/41oFIiQbhxL._AC_UL320_SR246,320_.jpg It has the consistency almost and look of corn oil, and has been used for a very long time by people looking to protect and make leather products last for as long as possible. Your boots will absorb the oil like a sponge, if you have done nothing after cleaning them, and it will waterproof the leather, and keep it from getting water blemishes in the future. Leather absorbing moisture or water and drying out hurts it. Aging leather will also dry out, with or without water. Dry makes it fragile. And from the look of it, your boots are very very dry, and unprotected. You can apply the oil with a small paintbrush 1” wide. Again, the oil will darken the leather, but the boots will become softer than new. I would guess that from my experience , your boots after the oil, because they are kind of orange in color, will become closer to this color.
http://www.sheplers.com/Red-Wing-Irish-Setter-Ashby-Work-Boots-Aluminum-Toe/57301.pro?parentCategoryId=448&categoryId=449&subCategoryId=2289
If you want to stiffen up the leather a little bit after applying the oil, and apply additional protection, apply some paste wax to the boots with a dry wash cloth or the same 1“ brush used with the oil. This product or one similar will further protect and water proof your boots, and keep the leather from rotting or cracking.
The paste wax will darken the leather if applied first or only to the boots, which you can opt for, but will not darken the boots any more if applied after the oil. The wax will fill the stitching seams of the boots and provide additional water protection. The oil should not be applied to the boots after the wax. http://www.amazon.com/Johnson-Fine-Wood-Paste-00203/dp/B0000DIWIM/ref=sr_1_1?ie=UTF8&qid=1458430009&sr=8-1&keywords=johnson+paste+wax
Those 2 products applied are probably the best things that you can do for those beautiful boots to make em happy and last. Enjoy.
Now if you don't have the clearance. Your only way to do it is is to build a frame around it so you hide the unfinished part. But personally, I'd just get another one that's in in-wall.
Doing drywall doesn't take a lot of specialized equipment. There are tons of videos on youtube. I don't have one that's better than another, maybe someone else will chime in as well. A couple of ladders, a couple of screwguns, a utility knife to cut it. You can get a drywall square, but a straight board will work as well. You'll want a couple of blades- a 6" and a 10-12" should be fine. You can get drywall mud online, but the shipping is crazy. You'll need drywall tape. A jab saw will help to cut out for electrical boxes, etc. Screws would probably be ebtter purchased there also. You'll also want corner bead. A cornering tool is also helpful. You can buy more specialized equipment, but this should cover the essentials, except for the drywall itself. Best wishes to you, stay safe.
Personally I would remove the left and right drawers and add doors instead. Possibly even remove the middle drawer as well and add a basket to the bottom, middle shelf. Then you would have two open shelves, a basket and two cabinets. The similar project you're referencing has the shelves in-between the old drawers removed which is why it doesn't look like a dresser anymore. I don't have any experience doing this so I would just add doors and turn them into cabinets. You would still be able to use whatever blu-ray players etc that are inside the cabinet by buying one of these. I use a similar one because my soundbar covers the sensor on my tv and it works great. Anyways, I love the charm of the dresser and glad to hear you're preserving it. Good luck!
From the pictures it looks like you are wearing a simple mask like this Home Dust Mask. If you have another project involving tile or dust like it, or a friend has such a project you should wear a better mask. One like this one would work, and this one would work even better and be more versatile.
On a side note, I bet the dust got to the refrigerator's compressor.
I personally use two of the single device models and they work great. Can be powered by the device itself if it has a usb port. Best part you don't have to buy a special remote. It uses the existing remote you have.
For a single device:
http://www.amazon.com/Infrared-Extender-Receiver-Emitter-Repeater/dp/B00AMTRR5K/ref=sr_1_1?ie=UTF8&qid=1416856752&sr=8-1&keywords=Infrared+Extender+Receiver+Emitter+Repeater
For multiple devices:
http://www.amazon.com/Generic-Infrared-Extender-Receiver-Emitters/dp/B00OT8TZLO/ref=sr_1_5?ie=UTF8&qid=1416856752&sr=8-5&keywords=Infrared+Extender+Receiver+Emitter+Repeater
Thanks to the wife we currently hide all of our electronics in an old dresser she re-did. I cut holes in the back for air flow and it works like a champ.
Easy and cheap hack to do this. Step one (while light/fan is off), open fan grate and pull fan cord from plug. Step two, figure out how much space you have in there. Step three, get a remote control "light switch" to plug in between the fan and the fan plug. Note: These are about $10 and plentiful for operating Xmas lights right now. Upside is this hack is cheap, slight downside is you can only use the fan while the light is on, but you can keep the fan off and still have the light on. Also, while you are messing with the light/fan with the grate off, maybe buy a nice LED bulb to replace whatever incandescent/CFL is in there, it will be a whole lot cooler/brighter and better for your new "light switch".
Example:
http://www.amazon.com/Westek-RFK100LC-RFK101LC-Mounted-Receiver/dp/B000HJBE68/ref=sr_1_1?s=hi&ie=UTF8&qid=1416814907&sr=1-1&keywords=wireless+light+switch
are you talking about placing the granite in a mold and then pouring concrete to fill up the rest of the mold?
if that's the case, i would place the granite in the mold so that the polished side is exposed when the counter top is taken out of the mold.
http://www.toolocity.com/5-jx-shine-wet-diamond-polishing-pads.aspx
click that link and you will find the pads you will need to polish the counter top. read the description "For granite and concrete."
for tops poured upside down in molds, i line the molds with a smooth formica type product and normally start polishing with a 400 grit pad. this will initially dull the polished granite but as you increase the grit, you will eventually get it close to back to the smoothness it is now.
I have done concrete counters and finished them at 3000 grit. it's glassy smooth but not as shiny as polished granite which i believe is finished all the way up to 8500 grit. i have 6000 and 8500 pads but have never used them. you could in theory just polish the whole top to 8500. the problem there is going to be that the concrete will not have enough 'tooth' to accept a topical protectant but their are solutions that soak in to protect. i have never used a protectant, i just keep them coated with mineral oil and let the chips fall. i like the patina. just be careful not to get lemon or lime juice on the concrete. fugly white stains that take forever to leach out. wine is somewhat of a problem but leaches out fairly quickly.
read up on the polishing process. it's messy as hell as you have to keep the pads wet. if what i have interpreted your project to be, it's totally doable and i think it would be an interesting outcome. whatever you do, pour a practice piece first and get the polishing process down before you start on a counter top sized piece. good luck.
http://www.amazon.com/Concrete-Countertops-Fu-Tung-Cheng/dp/1561584843
get ahold of that book somehow and it will answer a lot of your questions.
Drain Zips. I have a few of these and they work great -- along the same lines as your wire hangar, but probably better reach and grab. You can find them at any local hardware or big box store for just a few bucks.
http://www.amazon.com/Faucet-Queen-Zip--Drain-Clog/dp/B000YHRAXE/ref=sr_1_13?ie=UTF8&qid=1422409079&sr=8-13&keywords=drain+zip
If it's a deep, full clog, I've got one of these that also works like a champ, but you need a garden hose to supply force: http://www.amazon.com/G-T-Water-Products-186-Attachment/dp/B0000CBIWC/ref=sr_1_1?ie=UTF8&qid=1422409317&sr=8-1&keywords=drain+pressure+hose
Probably $10-$20 also at any hardware or big box store.
YMMV but I have one of these, and while it definitely will magnetize itself to a screw you have to have faith that the people who put up your drywall got all the screws nicely into the middle of the stud. The people who built my house definitely didnt. The studs arent all perfectly 16 inches on centre either. After using this while mounting a large tv and putting a bunch of unnecessary holes in our walls to find the studs we bought a sensor one it made sense for us to pay the extra for peace of mind because we were renovating and hanging a bunch of heavy things though
As others have said running standard 5e or 6 will work just fine.
I'd like to throw out a couple other options that I haven't seen covered yet.
I've used something like these PowerLine Ethernet adapters at my parent's house and even with older wiring it still worked out very well: https://www.amazon.com/TP-Link-Powerline-Adapter-Starter-TL-PA4010KIT/dp/B00AWRUICG/ref=sr_1_2?ie=UTF8&qid=1499982359&sr=8-2&keywords=powerline+ethernet
And another option would be to get a wireless system that is built to handle a bit more. Ubiquiti has a great range of wireless access points that are built to handle the load. You would install multiple access points and then turn down the transmission power of the radios. Doing this will help the devices split up and connect to the access point they are closest to. At the same time those devices are rated to handle something like 30 clients.
After refinishing old tools using electrolysis to remove all traces of rust, I've had good success using (Johnson's Furniture Wax)[https://www.amazon.com/Johnson-Fine-Wood-Paste-00203/dp/B0000DIWIM] to rub into to the metal to protect it.
Some items I get very hot with a torch then rub oil into the metal. This works similar to seasoning a cast-iron pan.
In general, I'm sticking with the furniture wax. It's easiest and provides a good sealing finish. (I didn't come up with this, I did the research after deciding to remove rust using electrolysis.)
I install a lot of SMD LED strips. I have had good luck with these. http://www.amazon.com/gp/aw/d/B00HSF64JG?cache=27cdb7082ac1067e2e4766bf86b4860d&pi=SY200_QL40&qid=1412750393&sr=8-3#productDescription_secondary_view_pageState_1412750433171
They use .5 Amps per Meter. You will need 4 rolls so you will also need a12Volt power supply rated at 10 Amps and 120 Watts. Something like this would work. http://www.amazon.com/gp/aw/d/B00LWQ2GS0?cache=27cdb7082ac1067e2e4766bf86b4860d&pi=SY200_QL40&qid=1412750809&sr=8-2#ref=mp_s_a_1_2
To control them you will need a dimmer or simple on-off switch. I would suggest a remote dimmer. Like this one. http://www.amazon.com/gp/aw/d/B009C34ZV6?cache=27cdb7082ac1067e2e4766bf86b4860d&pi=AC_SX110_SY165_QL70&qid=1412751212&sr=8-12#ref=mp_s_a_1_12
I personally prefer warm white for indirect lighting in a kitchen area. Cool white can be a bit harsh bouncing off the ceiling.
I hope this helps.
There are a couple interesting options when it comes to whiteboards.
There's adhesive backed rolls available. The biggest problem is getting a quality surface to put it on. The hardboard surface discussed below would be a great mounting surface.^1
If you're nostalgic for chalk boards they're available as peel and stick too. ^2 Scraping your fingernails across them doesn't sound like death cry on slate boards. Again, finding a good surface to put it on can be an issue.
4'x8' (32 square feet!!) hardboard sheets are cheap ($13) but not professional quality.^3 It's great for giving the kids a wall to write on!!
http://www.amazon.com/Complete-Do-It-Yourself-Manual-Completely-Revised/dp/0762105798/ref=pd_sim_b_1
A book like this is a great starting point. it will give you a good idea of what you would be getting into before you start a project. I would suggest a book like this then if you decided you wanted tile a bathroom get book specific for laying tile, then look at videos on you tube and try and learn as much as you can. this next part is important, just go for it. decide what you want to do and do it. best way to learn things is to actually do them.
I use mine in my woodshop. The small "pancake" porter cable type compressors are pretty awful (I went through two in 3 years, they are essentially unserviceable) and LOUD.
I then bought this Makita
It is AWESOME. Runs great, and AMAZINGLY QUIET, Amazon is selling it for about $200.
EDIT: Did I mention that it's quiet? In my garage I can talk on the phone while it pumps.
>I would like to know if a normal dust mask would be fine during the sanding, what respirator to get (any brand, but would prefer 3M), and if any filters would be suitable for use during the whole process.
I love my helping hands tool. Only $7 and had never failed. Maybe if I were soldering very small electronics I could see buying a nice vise grip like tool. https://www.amazon.com/dp/B000RB38X8/ref=cm_sw_r_cp_apa_-L0HAbVWXN6R8
I've used both depending on the application. Sucking seems to work quite well. Again, make sure you plug the overflow also. They actually make an attachment specifically for this purpose, but I have just used the hose beofre with good results.
Disclaimer: BE VERY CAREFUL IF YOU HAVE ALREADY USED CHEMICALS FOR THE CLOG. You don't want that crap splashing all over the place or getting on you.
sounds like it could be tinted paste wax. Easy fix for them, not a particulrly protective or durable solution unless the varnish beneath is in good shape. If they waxed freshly sanded flooring, I would recommend stripping the wax (mineral spirits wash, etc), then applying several coats of polyurethane.
Super easy to do it in this configuration. these are VESA mounts that I used they rotate and tilt. This will work perfectly for you.
Hey, I've made one of those :) Sans fancy veneers.
To make your soldering life easier, get one of these guys:
https://www.amazon.com/SE-MZ101B-Helping-Magnifying-Glass/dp/B000RB38X8/ref=sr_1_4?s=hi&ie=UTF8&qid=1518785664&sr=1-4&keywords=soldering+helping+hand
Next up is dealing with those frets, get a fret rocker/files off aliexpress (about 1/5th the price of buying from US sellers) and a set of feeler gauges.
The pickups included in those aren't so hot, https://www.guitarfetish.com/GFS-Guitar-Pickups_c_7.html for cheap and mildly betterer.
Now, garageband isn't the best way to play, so...lookup on building your own 5e3 kit or the like, you'll save hundreds and probably have another video to make just in that.
I agree with the clogged drain scenario. A simple option for this type of drain is a Drain King. Connect it to a hose pipe and stick it into the drain pipe. When you turn on the water it blows up like a balloon, sealing the pipe and using water pressure to clear the line. You can get them at pretty much any hardware or home improvement store.
Have you looked into power line communicators? Like the one linked (note that I've not used this model and only link this one because it was the first one to show up on my lazy search, you should look around if you decide to go this route)
https://www.amazon.com/dp/B00AWRUICG/ref=cm_sw_r_cp_apa_TuYHzb5NC86F6
What these do is encrypt the signal from Ethernet and send it over the neutral wire. If you're using it in the same room, there's a good chance it's on the same circuit and that's like best case scenario with these things so you don't need an expensive high end model.
TL;DR - I didn’t mean to write an essay, so I’ll start with this: Get a multimeter and a decent soldering iron. If you have time, want free components, and wish to practice desoldering, find some scrap electronics and start collecting (please recycle the remnants). Check SparkFun, eBay, or Google for bulk supplies of components as it might be cheaper that way, and you get only what you need. Otherwise, buy a kit. A decent kid’s one should do fine (recycle the book if it comes with one and it’s too basic for you).
It seems like your book is from the early 2000s and is biased towards analog circuits. I hate to break it to you that those days are over now that almost everything has moved towards surface-mounting on printed circuit boards (PCBs), and you'll find it's cheaper (time- and money-wise) to replace entire units than actually troubleshooting individual almost-microscopic components.
With that being said, I still found it useful to learn how to troubleshoot analog circuits to solidify my understanding of electronic circuitry in general and for my DIY projects, such as: fixing faulty wires/cables, making my own phone chargers, powering a bathroom scale with an old cell phone to make it rechargeable, replacing faulty components on / adding computer fans to power inverters, and most recently, re-soldering a problematic switch on the circuit board for a stove hood (would've been $50 for replacement board).
I only use a free multimeter (from Harbor Freights with any purchase) and would at the very minimal recommend that, but you should note that measuring a circuit does in fact change the circuit and if input impedance of the meter is not high enough (cheap meters like this one) compared to the impedance of the circuit being measured, you can get useless readings.
I would also recommend getting a decent soldering iron. I've had bad experiences with melting tips on the cheap ones, but have been going strong with my current station (an older version of this) with an off switch and varying levels of temperature (on my model, it heats to a certain point and waits until it drops to a certain point before re-heating it back to the level set like a conventional oven, but none of my projects require anything fancier than that).
I don't own an oscilloscope since my projects do not deal much with wavelengths, signals or latching. I would go to the nearby community college where I have taken classes before and ask to use one of their high-quality ones if I really needed it. I have never personally tested the handheld ones for under $100, but I have worked with someone who designs custom electronics for clients and swears by one. On the other hand, I've heard some negative reviews that the bandwidth/resolution of the the cheap scopes are impractical for many of today's circuits. You can make a "poor man's scope" by using a sound card and a modified 3.5mm audio cable if you really needed a basic one!
I haven't touched a function generator since I had to troubleshoot an old AM/FM transceiver in an electronics troubleshooting course.
Or even a drywall saw. I've got this Stanley Fat Max that I bought for actual drywall but I've recently been using it a fair amount as a general purpose saw when I want to shove something in a small space. World's best pumpkin carving knife/saw, too.
A PowerLine device, like the other guy suggested is perfect for avoiding running Ethernet. I use them around the house for running network to my TV, Xbox, and media player. You can even connect a network switch on the receiving end to connect multiple devices.
It basically uses the power lines in your home/apartment as an Ethernet connection. Generally much faster than Wi-Fi, and the greatest advantage is signal stability. You get a solid and consistently low ping, which you can't always get from wireless. Also, all data that is sent between adapters is encrypted, and it takes about 30 seconds to set up.
The previous recommendation is a much older device that is really slow and overpriced.
Get this and you'll be set!
TP-LINK TL-PA4010KIT AV500 Nano Powerline Adapter Starter Kit, up to 500Mbps by TP-LINK:
http://www.amazon.com/dp/B00AWRUICG/
Edit: added second paragraph for more details.
I purchased an Electric Lead Melting Pot and then went to a couple tire shops in my area and asked for their old lead tire weights. I brought them an empty 5 gallon bucket and they gave me a full one. Tire weights are dirty and made with other materials so when they melt you have to scrape the cruft off the top. I then poured the clean lead into Ingots. Then when I was ready I would melt the clean lead down and make my jigs. They worked great and the cost was way cheaper than buying my own. If you look at the site that I got the stuff from they have many different options for molds. It is time consuming but rewarding.
NOTE You are working with lead. Wear a Respirator
I am not aware of a way to wire a switch in a headboard that is up to code. You would probably need to attach the bed to the wall/floor so it is considered part of the structure, and any exposed wire would need to be in conduit. Can you put the switch in the wall?
Let me give you a simpler option if you want the switch on the headboard.
I have used these LEDs on a few projects. They are cheap and you can buy additional strips to extend them, or you can cut them shorter. Just make sure your power adapter has the current for the length you attach. They come with a remote which can turn them on and off and set the color and brightness. However, they remember the state they were in. So you could set them to a cool blue or pink or whatever she likes and forget about the remote. Then, with the wireless switch I linked, she can easily just turn them on and off. (you could always turn them on and off with the remote, but it's nice to have a switch because it is always in one place.)
Thanks! They were pretty easy. Just a 12V wall wart and these:
http://www.amazon.com/gp/product/B00HSF64JG?psc=1&redirect=true&ref_=oh_aui_detailpage_o01_s00
I don't know much about butane soldering irons or what he plans on soldering.
But i do a lot of electronics soldering, and the most important thing for me when buying a soldering iron/station, was that it was adjustable, meaning i could better control the temperature and not fry the components i was soldering. I ended up buying this solder station and it has worked great for me
I'd like to have the OP weigh in on this, but IR is pretty "bouncy". Pointing the remote at the door probably gives the remote line of sight to the cable box.
Alternatively, here's a simple $8 solution: http://www.amazon.com/Infrared-Extender-Receiver-Emitter-Repeater/dp/B00AMTRR5K/ref=sr_1_1/187-0235108-9396615?s=electronics&ie=UTF8&qid=1416934406&sr=1-1&keywords=wireless+ir+repeater
This is what I use on my projects and it works very well for table tops, bar tops, etc. This would not be appropriate for your garage floor, as it's a very different type of resin than the garage floor kits.
I hooked a DualShock 3 up for wireless P2 to mine. Anything that's USB and most bluetooth controllers work fine. For a bar you may want to consider something like this:
https://www.etsy.com/listing/222068642
Plus
https://www.amazon.com/dp/B00WAY9848/ref=cm_sw_r_cp_api_c0nezbKN0E68M
And a Pi3 would get you an awesome bartop console for under 150
Makita make a pretty awesome compressor that uses compressor oil and it is around 200 bucks.
Link
I was thinking the same thing, LED strip lights and a power supply can be had for cheap i.e.
http://www.amazon.com/gp/product/B00HSF64JG/ref=oh_aui_detailpage_o00_?ie=UTF8&psc=1
The linked LED strip even came with a barrel connector already connected and ready to plug in, as well as a secondary connector, just cut to get the desired amount of light, then peel and stick.
I just redid my mother's under cabinet kitchen(note: I used the waterproof version of those) lighting for like $30, previously she spent like $300 on expensive proprietary LED pucks(that she can't even buy any more) and electrician to hard wire it(I piggy backed my power supply off the touch power switch for the LED pucks and installed an inline rocker switch on the power cord that went to the power supply I used)
Thanks!
I bought this set of controls, an Open-Box 24" monitor from my local MicroCenter, and everything else was pretty standard, i.e. regular Raspberri Pi, a cheap case for it, the cheapest speakers I could find on Amazon, etc
I absolutely LOVE the Reader's Diegest Complete Do-It-Yourself Manual. It's old, but there are a lot of good things in there
I think if you're able to financially, you should try and get something more in the mid-range. I have a feeling that this 15 dollar iron is going to be wildly inconsistent in keeping it's temp up and make it extremely difficult for you to get good solder joints. I would recommend something like this.
As far as other accesories go, I would grab a "Helping Hands" a head band magnifier and some nice small tweezers.
If I where you, I would use this
Just cut to whatever size you want and solder the strips back together, has a nice remote to choose color and even has some cool effects. Pretty cheap too.
I need outlets because the lights I'm using come with plugged control boxes.
But I'm curious why you think I need 12/4 as that gets to the heart of my question.
http://www.amazon.com/Weller-WLC100-Soldering-Hobbyist-Yourselfer/dp/B000AS28UC
I have one of these it's a good iron. used it until my company was throwing out some old HAKKO's and got one for free! ^_^
I think a lot of people have trouble because they don't have a hot clean tip. My friend who "can't solder" has a 20+ year old soldering iron with a corroded tip. I use a wet sponge, cleaning wire, and tip tinner interchangeably to keep it clean as I go.
Also having one of those magnifying glass/alligator clip holders is extremely helpful.
Awesome! The buttons and joysticks connect to a USB encoder that connects directly to the powered USB hub. The powered USB hub is then connected to the Pi. This is the same buttons and joysticks that I used https://www.amazon.com/gp/aw/d/B00WAY9848/ref=mp_s_a_1_1?ie=UTF8&qid=1478364885&sr=8-1&pi=SY200_QL40&keywords=arcade+joystick+and+buttons&dpPl=1&dpID=61OqcBVFq7L&ref=plSrch.
If I was going to buy another compressor I'd probably get a Makita.
http://www.amazon.com/Makita-MAC700-Big-Bore-Compressor/dp/B0001Q2VK0/ref=sr_1_1?s=hi&ie=UTF8&qid=1374779714&sr=1-1&keywords=makita+compressor
http://www.amazon.com/Makita-MAC2400-Big-Bore-Compressor/dp/B0001Q2VPK/ref=sr_1_2?s=hi&ie=UTF8&qid=1374779762&sr=1-2&keywords=makita+compressor
http://www.amazon.com/Makita-MAC5200-Big-Bore-Compressor/dp/B0001Q2VPU/ref=sr_1_3?s=hi&ie=UTF8&qid=1374779762&sr=1-3&keywords=makita+compressor
As it stands they have great CFM flow and are relatively overbuilt.
I have a Makita compressor and absolutely love it.
http://www.amazon.com/gp/aw/d/B0001Q2VK0/ref=mp_s_a_1_1?qid=1416637483&sr=8-1&pi=AC_SY200_QL40
Many times in the past, I've had good success with one of these:
The black part swells to the diameter of your pipe when you turn on the water hose (keeping the water from coming up backwards), and creates enough pressure to break the clog loose.
We actually ended up using a couple brands because we really underestimated how much we would need. So we started with this stuff from home depot and then ended with this stuff from Amazon. They both worked great. I think the part that made it look really good was using a heat gun to get rid of all the air bubbles.
> but they plug in as oppose to being controlled by a switch. We still may install them.
If you want to use them, but don't want to wire (at least for now) you can get some fairly nice looking remote control switches for outlets. (Similar to this although there are many different styles: http://www.amazon.com/Westek-RFK100LC-RFK101LC-Mounted-Receiver/dp/B000HJBE68/ref=sr_1_17?ie=UTF8&qid=1395671730&sr=8-17&keywords=remote+control+outlet )
Tap on the wall with your knuckle and listen for the difference in sound, good stud finders can be had for fairly cheap as well.
ProSensor 710 Franklin Sensors ProSensor 710 Precision Stud Finder Yellow https://www.amazon.com/dp/B0064EICKG/ref=cm_sw_r_cp_api_aw4Dyb0DQVVAB
I have women in the house so I have slow drains too. I bought a Shop Vac suction cup and I don't know why I didn't buy it years ago. If you've got a spare $10 I'd look into it.
Shop-Vac 9193400 Drain Hero https://www.amazon.com/dp/B0042AY6XQ/ref=cm_sw_r_cp_api_.8y8yb4W496CC
Buy a https://www.amazon.com/ProSensor-710-Franklin-Sensors-Precision/dp/B0064EICKG/ref=sr_1_1?ie=UTF8&qid=1498578785&sr=8-1&keywords=franklin+prosensor+710
The stud finder you are using detects the change in density, which can be the edge of a stud or various other things. If you have textured walls, just moving it over the surface can give you a false positive. The prosensor checks across the entire width and gives you a visual indication of the where the stud is. There is apparently one at Cosco (Kirkland branded) that runs about $35.
The thing is life changing, particularly if you are moving to a new place.
The only pre-take apart option I don’t see on your list
Shop-Vac 9193400 Drain Hero
https://www.amazon.com/dp/B0042AY6XQ/
Get a wall mount. Measure how far he needs to sit comfortably there and find something that will reach. This one is cheap and extends 15" out. I used that one for a while with my previous desk setup
Also make sure your monitor can fit it before you buy. 99% of them do but obviously check before you buy it
I did a penny top desk a few years ago and used some from Home Depot. It was in the paint section. It was like $30 a box, and I needed 3 for my desk.
If I did it again I would get the stuff from Amazon sold by the gallon. Something like this: https://www.amazon.com/dp/B01LYK2NAG/
There was nothing wrong with the stuff from the big box stores, but from a pure cost perspective I could have bought that for less, and had a ton left over for something else.
Epoxy Resin would be your best bet. I don't trust water based polyurethane on anything that may get wet.
If breathing it in is causing issues, you might want to get a respirator. A cloth and a ball cap is not going to do a better job than a dust mask.
Hmm..
You could get lucky, and the room in question could have a light switch that controls an outlet. Plug lights into the outlet, and you're done.
Or, since they come with an infrared remote, so you could control them that way. Just use the remote to control the lights.
Then, there are all kinds of solutions to control infrared devices, usually home theatre equipment.
Now that i think about it, this might have the advantage of preserving the settings, because some of these devices don't save the last light color/mode setting when power is cut, but don't lose it when you cut power with the remote.
Last, you could do a wireless light switch solution. They make light switches that have two parts, a battery powered switch that you attach to the wall (looks almost normal too), and a controlled outlet you plug into the wall outlet, then plug in the lights. example
This is not on point, but I would suggest that any new homeowner buy The Reader's Digest Complete Do-It Yourself Manual and The Reader's Digest New Complete Fix It Yourself Manual. I've owned these books through multiple editions. They've saved me many thousands of dollars, hundreds of hours, and incalculable frustration. When you have a problem like this, they'll identify the possible causes, suggest some fixes, and help you figure out whether it's time to call a plumber.
sure! Supernight LED Light strip.
Amazon link
Go for a "pancake" or "hot dog" style. They are sufficient for airing up tires and occasional tool use.
Pancake style
HotDog style
Also, in my experience, electric paint rollers are much less hassle for housepaint. Less clogging and easier cleanup.
Maybe something like this. Can set many different colors, dimmable.
I used this for under cabinet lighting in my kitchen.
http://smile.amazon.com/gp/product/B00ASHQQKI?keywords=led%20light%20strips&qid=1450218869&ref_=sr_1_3&sr=8-3
Good job on the project, but they do make cheap mounts, although they are wall mounts I own both of these which would have been cheaper.
http://www.amazon.com/gp/product/B003O1UYHG/ref=oh_details_o04_s00_i00?ie=UTF8&psc=1
http://www.amazon.com/gp/product/B000WYVBR0/ref=oh_details_o04_s00_i00?ie=UTF8&psc=1
Yeah, I mounted them both on the wall. I found 2 studs and measured the spacing so I could have the monitors touching w/out a gap in between. Here are the mounts I used:
https://www.amazon.com/gp/product/B003O1UYHG/ref=oh_aui_detailpage_o09_s00?ie=UTF8&psc=1
This Weller is what you want. Don't mess around with a junky one. Get the real deal first time around.
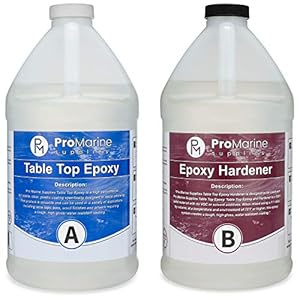
After much nail biting trying to choose the right epoxy, I went with this ProMarine from Amazon:
Try Drain King. It's amazing what water pressure can do.what ever is stuck should move before you burst a pipe.
http://www.amazon.com/G-T-Water-Products-186-Attachment/dp/B0000CBIWC/ref=sr_1_1?ie=UTF8&qid=1452997609&sr=8-1&keywords=Drain+King
you can also try an Ethernet bridge.
http://www.amazon.com/TP-LINK-TL-PA4010KIT-Powerline-Adapter-Starter/dp/B00AWRUICG/ref=sr_1_1?ie=UTF8&qid=1465196583&sr=8-1&keywords=ethernet+bridge
This one works well
You need an IR repeater- IR Hidden Infrared Remote Extender Receiver Emitter Repeater System https://www.amazon.com/dp/B00AMTRR5K/ref=cm_sw_r_cp_api_U43txbPCAN2B6
The link is under the first picture, but here you go: http://www.amazon.com/gp/product/B00ASHQQKI/ref=oh_details_o02_s00_i00?ie=UTF8&psc=1
2 rolls for the battery operated one ($14 CAD each, local Toronto electronics store) and 6 rolls of this from Amazon: http://www.amazon.ca/gp/product/B00HSF64JG?psc=1&redirect=true&ref_=oh_aui_detailpage_o02_s00
Two rolls for the small window, 4 rolls for the large one. You have to wire each roll to the power supply in parallel or it gets dim at the end.
This is what you need.
Light are here
I bought the power supply from a local Goodwill for $3 from their electronics section.
If wifi isn't your thing, why not just use these: https://www.amazon.com/gp/aw/d/B00AWRUICG/ref=psdcmw_1194444_t2_B001AGM2VI
As someone who has done a lot of similar projects at home and professionally I could make a couple of recommendations.
I recently bought this Makita compressor and I LOVE it! Recharges in 30 seconds and it's very quiet. Not a huge capacity for say roofing or framing but for moderate jobs you will never be waiting for a pressure.
Also this Harbor Freight 18g brad nailer has proven itself very versatile and reliable over the last five years or so. For $20 you can't beat it for trim work and cabinetry.
I used a 16.4 foot (5 meter) roll and ended up cutting off about 2.5 feet, so probably close to 14 feet.
Here's a link to the lights I use:
http://www.amazon.com/SUPERNIGHT-Waterproof-Flexible-300leds-Changing/dp/B00ASHQQKI/ref=sr_1_2?ie=UTF8&qid=1405091074&sr=8-2&keywords=led+strip+lights
Just be careful with those lights in the enclosed box. Read some reports of similar lights overheating. Especially bad in an enclosed box.
Here is the product & review, I know they are a different brand, doesn't mean they didn't come out of the same factory.
Waterproof Flexible 300leds
What about a simple articulating wall mount like this ?
I used a really similar one (maybe this exact one) to mount a ~24" tv in my bedroom. Folds right up to the wall when I need it out of the way and pulls out & swings around in any direction when needed.
**Edit- And in terms of being nervous about mounting to the walls, just buy or borrow a cheap studfinder. You'll have no problem supporting a small tv with a couple of screws into a stud!