Best products from r/itookapicture
We found 30 comments on r/itookapicture discussing the most recommended products. We ran sentiment analysis on each of these comments to determine how redditors feel about different products. We found 153 products and ranked them based on the amount of positive reactions they received. Here are the top 20.
1. Concrete Countertops DIY (Instructional DVD) featuring Fu-Tung Cheng
- Graphite pencils designed for sketching, portrait and figure drawing, illustration and fine art drawingSoft grade set is versatile for many sketch & rough layout stylesConsistent grading, strong opacity, and clean erasabilityLeads sharpen to a perfec
Features:
 ▼ Read Reddit mentions
3. Nikon AF FX NIKKOR 50mm f/1.8D Lens for Nikon DSLR Cameras
Note : Autofocus system is compatible with select Nikon DSLRs that support D-type lenses, and offers quick and precise focusing performance. Autofocus is not supported by DSLRs lacking an autofocus motor, such as the D3000-series, D5000-series, D40, D40X, and D60, where the lens may be used with man...
 ▼ Read Reddit mentions
4. Amlong Crystal Meditation Ball Clear Globe 80mm (3.1 inch) with Crystal Stand
- Our flawless crystal ball is handmade, polished, and inspected to ensure the highest K9 quality and consistency. Each crystal sphere is examined for clarity, and impurities before being packaged. The crystal ball has the energy of harmony and perfection owing to its spherical shape. It is great to be used as a lense ball. They can be used as healing and meditation crystals. In Feng Shui, you can place a crystal ball or two around to increase the positivity in your home or office.
- Works great for photography lens ball. It can easily be held in one hand and used whether you are a professional photographer with a DSLR camera or an amateur with a cellphone camera. Easily create stunning effects utilizing crystal ball photography. No special effects or advanced knowledge needed. With some experimenting and practice you will have amazing results using this photography crystal ball. The crystal sphere ball for photography will fit into your camera bag for easy travel.
- This classic clear crystal ball will add a touch of elegance to any room. The alluring conversation piece is also thought to bring harmony and balance into your life. According to feng shui belief, clear crystal balls not only attract positive energy to a room, but also stimulate existing energy.
- In Feng Shui, crystal balls are used to bring harmonious, calming energy to any space. Use as a meditation crystal, when you think of a crystal ball, you usually will think of an image of a fortune teller, waving their hands around a crystal ball to conjure images inside the ball but a gazing ball is merely a tool for focusing your mind and freeing your third eye. The clarity of this sphere also makes it a great crystal decoration. It makes a great gift for family, friends, and co-workers.
- The crystal ball is approx. 3.1 inches diameter. About the size of a baseball or the long side of a credit card. This crystal ball set also includes a sturdy clear stand to display your sphere on when not in use. The stand is approx. 1.4" x 1.4" and stands 0.71" high. The crystal ball stand is designed to make the ball the focal point of your room decor whether on a shelf or centerpiece. The entire crystal set is securely packed in an authentic brand “Amlong Crystal” satin gift box.
Features:
 ▼ Read Reddit mentions
5. Canon EF 50mm f/1.8 II Camera Lens - Fixed (Discontinued by Manufacturer)
- 50mm focal length, Minimum focus distance : 0.45m/17.72 inch
- 80mm equivalent focal length on Canon APS-C cameras
- F1.8 maximum aperture; F22 minimum
- Micromotor-type AF motor without full-time manual focusing
- 52mm filters
- Lens not zoomable
Features:
 ▼ Read Reddit mentions
6. B+W 65-073102 77mm Neutral Density 0.9-8x Filter #103
- Brass Ring for higher Quality Image
- Highest possible polishiing technique
- World's best optical glass
- New thinner Pro mount. No vignetting
- USA Warranty
Features:
 ▼ Read Reddit mentions
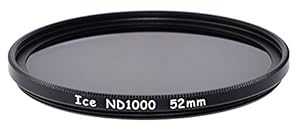
7. ICE 52mm ND1000 Filter Neutral Density ND 1000 52 10 Stop Optical Glass
- 10 Stop exposure correction.
- Slim: 3.6mm deep (not inc rear threads)
- Ideal for Wide Angle Lenses.
- Double threaded metal frame for additional filters or Hood.
- Superfine matte black frame.
Features:
 ▼ Read Reddit mentions
8. Acrylic Fine Art Wall Decor 36X49 Untitled by Darek Grabus
Crystal Clear Acrylic Print 1/8 inch thicknessComes with 4 pieces of Aluminium Stand offModern Piece of artVibrant acrylic wall artEasy to install and provide a great gallery style - other sizes available please contact us
 ▼ Read Reddit mentions
9. Tamron AF 28-75mm f/2.8 SP XR Di LD Aspherical (IF) for Canon Digital SLR Cameras (Model A09E)
- 28-75mm autofocus zoom lens with f/2.8 maximum aperture
- Focal Length : 28-75 mm, Minimum focusing distance of 13 inches, rotation-type zoom
- Designed to meet performance characteristics of digital SLR cameras
- Smaller and lighter than most fast zoom lenses; weighs 18 ounces
- Measures 2.9 inches in diameter and 3.6 inches long; 6-year warranty
Features:
 ▼ Read Reddit mentions
10. Canon EF-S 24mm f/2.8 STM Lens
- Wide angle lens for Canon APS C cameras (equivalent to 38 millimeter on a full frame camera)
- Focal length & maximum aperture: 24 millimeter 1:2.8, maximum magnification of x0.27
- Slimmest and lightest lens of the EF S series
- Circular aperture (7 blades) delivers beautiful, soft backgrounds
- Full time manual focus allows manual focus adjustment while in One Shot AF mode
- Minimum focusing distance of 0.16 meters /0.5 feet
- This product is compatible with all non full frame Canon EOS digital SLRs
Features:
 ▼ Read Reddit mentions
11. Hoya 52mm HMC NDX400 Screw-in Filter
- Reduces the amount of light to the camera sensor by 9 f-stops without effecting colour balance
- Can be used to achieve super slow shutter speeds in daylight to render moving subjects invisible
- Enables slow shutter speeds to be used to record movement in subjects such as waterfalls, providing a silky smooth effect to flowing water
- Decreases depth of field by allowing wider apertures to be used, helping to separate subjects from their background
- Hard Coated' HMC Multicoating process suppresses ghosting, flare and reflections, and increases light transmission
Features:
 ▼ Read Reddit mentions
13. Climbing Self Rescue: Improvising Solutions for Serious Situations (Mountaineers Outdoor Expert)
- CLIMBING SELF RESCUE
Features:
 ▼ Read Reddit mentions
14. Rock Climbing Anchors: A Comprehensive Guide (The Mountaineers Outdoor Experts Series)
Author: Craig LuebbenISBN: 9781594850066
 ▼ Read Reddit mentions
15. Climbing Anchors (How To Climb Series)
Author: John Long, Bob GainesISBN#: 9780762782079Publisher: Falcon GuidesPublication Date: 2013Jacket: paperback
 ▼ Read Reddit mentions
16. How to Rock Climb! (How To Climb Series)
- Author: John Long
- ISBN#: 9781575400785
- Publisher: Falcon Guide
- Publication Date: 1997
- Jacket: paperback
Features:
 ▼ Read Reddit mentions
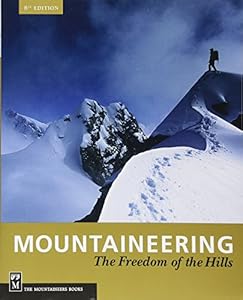
17. Mountaineering: The Freedom of the Hills
- Covers everything from the basics of equipment, knots, rappelling techniques, and leave-no-trace principles to the more advanced skills of setting up complex anchors, evaluating avalanche terrain, and developing your leadership skills. Completely revised and updated to include the latest in gear and techniques. Written by a team of more than 40 expert climbers and climbing instructors.
- Features hundreds of technical illustrations. Includes extensive revisions to self-rescue, aid climbing, waterfall and ice climbing. Significant new chapter on physical conditioning.
- All-time bestselling climbing instructional book. Printed on 100% recycled paper. 8th edition, 2010.
Features:
 ▼ Read Reddit mentions
19. Captured by the Light: The Essential Guide to Creating Extraordinary Wedding Photography
 ▼ Read Reddit mentions
20. Canon EOS 20D DSLR Camera with EF-S 18-55mm f/3.5-5.6 Lens (OLD MODEL)
Powered by rechargeable BP-511A 1390mAh battery packStore images on CompactFlash memory cardIncludes 18-55mm (3x zoom) f/3.5-5.6 autofocus lens, EF mount compatible with all Canon lenses in EF and EF-S lineup8.2-megapixel sensor captures 3504 by 2336 pixel JPEG or RAW imagesDirect printing with Pict...
 ▼ Read Reddit mentions
Top comments mentioning products on r/itookapicture:
Summary
1. Concrete Countertops DIY (Instructional DVD) featuring Fu-Tung Cheng
- Graphite pencils designed for sketching, portrait and figure drawing, illustration and fine art drawingSoft grade set is versatile for many sketch & rough layout stylesConsistent grading, strong opacity, and clean erasabilityLeads sharpen to a perfec
Features:
▼ Read Reddit mentions3. Nikon AF FX NIKKOR 50mm f/1.8D Lens for Nikon DSLR Cameras
Note : Autofocus system is compatible with select Nikon DSLRs that support D-type lenses, and offers quick and precise focusing performance. Autofocus is not supported by DSLRs lacking an autofocus motor, such as the D3000-series, D5000-series, D40, D40X, and D60, where the lens may be used with man...
▼ Read Reddit mentions4. Amlong Crystal Meditation Ball Clear Globe 80mm (3.1 inch) with Crystal Stand
- Our flawless crystal ball is handmade, polished, and inspected to ensure the highest K9 quality and consistency. Each crystal sphere is examined for clarity, and impurities before being packaged. The crystal ball has the energy of harmony and perfection owing to its spherical shape. It is great to be used as a lense ball. They can be used as healing and meditation crystals. In Feng Shui, you can place a crystal ball or two around to increase the positivity in your home or office.
- Works great for photography lens ball. It can easily be held in one hand and used whether you are a professional photographer with a DSLR camera or an amateur with a cellphone camera. Easily create stunning effects utilizing crystal ball photography. No special effects or advanced knowledge needed. With some experimenting and practice you will have amazing results using this photography crystal ball. The crystal sphere ball for photography will fit into your camera bag for easy travel.
- This classic clear crystal ball will add a touch of elegance to any room. The alluring conversation piece is also thought to bring harmony and balance into your life. According to feng shui belief, clear crystal balls not only attract positive energy to a room, but also stimulate existing energy.
- In Feng Shui, crystal balls are used to bring harmonious, calming energy to any space. Use as a meditation crystal, when you think of a crystal ball, you usually will think of an image of a fortune teller, waving their hands around a crystal ball to conjure images inside the ball but a gazing ball is merely a tool for focusing your mind and freeing your third eye. The clarity of this sphere also makes it a great crystal decoration. It makes a great gift for family, friends, and co-workers.
- The crystal ball is approx. 3.1 inches diameter. About the size of a baseball or the long side of a credit card. This crystal ball set also includes a sturdy clear stand to display your sphere on when not in use. The stand is approx. 1.4" x 1.4" and stands 0.71" high. The crystal ball stand is designed to make the ball the focal point of your room decor whether on a shelf or centerpiece. The entire crystal set is securely packed in an authentic brand “Amlong Crystal” satin gift box.
Features:
▼ Read Reddit mentions5. Canon EF 50mm f/1.8 II Camera Lens - Fixed (Discontinued by Manufacturer)
- 50mm focal length, Minimum focus distance : 0.45m/17.72 inch
- 80mm equivalent focal length on Canon APS-C cameras
- F1.8 maximum aperture; F22 minimum
- Micromotor-type AF motor without full-time manual focusing
- 52mm filters
- Lens not zoomable
Features:
▼ Read Reddit mentions6. B+W 65-073102 77mm Neutral Density 0.9-8x Filter #103
- Brass Ring for higher Quality Image
- Highest possible polishiing technique
- World's best optical glass
- New thinner Pro mount. No vignetting
- USA Warranty
Features:
▼ Read Reddit mentions7. ICE 52mm ND1000 Filter Neutral Density ND 1000 52 10 Stop Optical Glass
- 10 Stop exposure correction.
- Slim: 3.6mm deep (not inc rear threads)
- Ideal for Wide Angle Lenses.
- Double threaded metal frame for additional filters or Hood.
- Superfine matte black frame.
Features:
▼ Read Reddit mentions8. Acrylic Fine Art Wall Decor 36X49 Untitled by Darek Grabus
Crystal Clear Acrylic Print 1/8 inch thicknessComes with 4 pieces of Aluminium Stand offModern Piece of artVibrant acrylic wall artEasy to install and provide a great gallery style - other sizes available please contact us
▼ Read Reddit mentions9. Tamron AF 28-75mm f/2.8 SP XR Di LD Aspherical (IF) for Canon Digital SLR Cameras (Model A09E)
- 28-75mm autofocus zoom lens with f/2.8 maximum aperture
- Focal Length : 28-75 mm, Minimum focusing distance of 13 inches, rotation-type zoom
- Designed to meet performance characteristics of digital SLR cameras
- Smaller and lighter than most fast zoom lenses; weighs 18 ounces
- Measures 2.9 inches in diameter and 3.6 inches long; 6-year warranty
Features:
▼ Read Reddit mentions10. Canon EF-S 24mm f/2.8 STM Lens
- Wide angle lens for Canon APS C cameras (equivalent to 38 millimeter on a full frame camera)
- Focal length & maximum aperture: 24 millimeter 1:2.8, maximum magnification of x0.27
- Slimmest and lightest lens of the EF S series
- Circular aperture (7 blades) delivers beautiful, soft backgrounds
- Full time manual focus allows manual focus adjustment while in One Shot AF mode
- Minimum focusing distance of 0.16 meters /0.5 feet
- This product is compatible with all non full frame Canon EOS digital SLRs
Features:
▼ Read Reddit mentions11. Hoya 52mm HMC NDX400 Screw-in Filter
- Reduces the amount of light to the camera sensor by 9 f-stops without effecting colour balance
- Can be used to achieve super slow shutter speeds in daylight to render moving subjects invisible
- Enables slow shutter speeds to be used to record movement in subjects such as waterfalls, providing a silky smooth effect to flowing water
- Decreases depth of field by allowing wider apertures to be used, helping to separate subjects from their background
- Hard Coated' HMC Multicoating process suppresses ghosting, flare and reflections, and increases light transmission
Features:
▼ Read Reddit mentions13. Climbing Self Rescue: Improvising Solutions for Serious Situations (Mountaineers Outdoor Expert)
- CLIMBING SELF RESCUE
Features:
▼ Read Reddit mentions14. Rock Climbing Anchors: A Comprehensive Guide (The Mountaineers Outdoor Experts Series)
Author: Craig LuebbenISBN: 9781594850066
▼ Read Reddit mentions15. Climbing Anchors (How To Climb Series)
Author: John Long, Bob GainesISBN#: 9780762782079Publisher: Falcon GuidesPublication Date: 2013Jacket: paperback
▼ Read Reddit mentions16. How to Rock Climb! (How To Climb Series)
- Author: John Long
- ISBN#: 9781575400785
- Publisher: Falcon Guide
- Publication Date: 1997
- Jacket: paperback
Features:
▼ Read Reddit mentions17. Mountaineering: The Freedom of the Hills
- Covers everything from the basics of equipment, knots, rappelling techniques, and leave-no-trace principles to the more advanced skills of setting up complex anchors, evaluating avalanche terrain, and developing your leadership skills. Completely revised and updated to include the latest in gear and techniques. Written by a team of more than 40 expert climbers and climbing instructors.
- Features hundreds of technical illustrations. Includes extensive revisions to self-rescue, aid climbing, waterfall and ice climbing. Significant new chapter on physical conditioning.
- All-time bestselling climbing instructional book. Printed on 100% recycled paper. 8th edition, 2010.
Features:
▼ Read Reddit mentions19. Captured by the Light: The Essential Guide to Creating Extraordinary Wedding Photography
▼ Read Reddit mentions20. Canon EOS 20D DSLR Camera with EF-S 18-55mm f/3.5-5.6 Lens (OLD MODEL)
Powered by rechargeable BP-511A 1390mAh battery packStore images on CompactFlash memory cardIncludes 18-55mm (3x zoom) f/3.5-5.6 autofocus lens, EF mount compatible with all Canon lenses in EF and EF-S lineup8.2-megapixel sensor captures 3504 by 2336 pixel JPEG or RAW imagesDirect printing with Pict...
▼ Read Reddit mentions
Ah yes, the GAS beginnings! And in case you want to spend more money...
The nifty fifty is great, and almost too cheap not to have lying around. But on a crop sensor like the T5i it's a touch long as a general purpose lens, 80ish mm equivalent. You might find it a bit limiting, and it becomes extremely difficult to use indoors. Great for portraits though.
I highly recommend this prime for your rebel - it's also absurdly cheap. Bonus, it makes your camera absolutely teeny. Great for street photography. Around 35mm equivalent, a classic focal length for a good reason. I wish I had one, but my crop sensor Canon doesn't get a lot of use these days, and I have the 35mm f2 for the 5D.
https://www.amazon.com/Canon-EF-S-24mm-2-8-Lens/dp/B00NI3BZ5K
Also, if you want a cheap fast zoom (is such a thing possible?) I love my Tamron 28-75. It's fantastic on a full frame (honestly, it hardly ever comes off my camera, my primes have been gathering dust), and is perfectly usable on a crop sensor. Around $200 used.
https://www.amazon.com/Tamron-28-75mm-Aspherical-Canon-Digital/dp/B0000A1G05
Some random snaps from the last time I had the 40D out with it:
http://i.imgur.com/LHaTPAU.jpg
http://i.imgur.com/MQ6DSzF.jpg
http://i.imgur.com/JdQEgS4.jpg
http://i.imgur.com/Bp5ADly.jpg
http://i.imgur.com/8ysMYQy.jpg
http://i.imgur.com/jj7xNLI.jpg
I'm only about 1.5 years into DSLR photography, but I'm a meteorologist, so storm chasing and weather photography is most of what I do. It's all dependent on your camera and what time of day it is. If it's day time, you're going to need a good neutral density filter, narrow aperture, and low ISO. Then just adjust your shutter speed as needed so you don't get overexposed. This will be most dependent on the ND filter you get. Hoya makes a good one.
For night time, it really depends on the frequency of your strikes and how fast your camera can write to your card. In my experience, I find that I would rather take more shots at 8-10 seconds than 30 second exposures because my camera takes longer to write that 30 second exposure to the card before it's ready to take another picture. That time it's writing to the card is time wasted where a strike could be happening that I'm missing. You be the judge...if you have a ton of lightning, you may be okay with that. But then again, if you have a ton of lightning, you also may have too much light to do a 30 second exposure.
Settings wise, in my experience at night, F/8 - F/11...ISO of 100 and an exposure of about 10 seconds is usually what I start with and go from there. The more frequent the strikes, the more "exposed" your shot is going to be so you'll have to tweak things while you're out there. Your shot may not look right until a strike lights up the sky. Get yourself a remote trigger and just keep firing over and over again so you don't have any time where you're not shooting.
If I can recommend a good radar app, get RadarScope. It is the best radar app for iOS/Android out there. Yes, it is $10, but I use this while storm chasing as radar in my vehicle. Highly recommend it. It doesn't have lightning data in it, but it will at least tell you if you can stay outside long enough to keep dry. It's the cadillac of radar apps. Of course there are plenty of free alternatives that will do you just fine as well.
Of course, all of this is my camera (a Nikon) and my experience. Yours may vary entirely. I see this shot was F/4, 30 seconds and ISO 100. I think I have a lot more light pollution than you do. :)
Honestly, they're more likely to check out driving to/from the climb than from climbing itself.
When properly trained and performed, climbing is extremely safe (minimally dangerous?) and encourages good habits (problem solving, improvisation, calm demeanor) and provides inexpensive leisure that contributes to physical fitness and health.
Let me suggest, however, some required reading:
Once familiar with the theory and application of these texts, mentorship and apprenticeship in the field by competent parties is recommended. Reading and doing are different skills.
My finacee is very into alternative home designs. We've looked at monolithic domes and other concrete designs, but never tried it. That requires heavier equipment than we have, and more people. Our next project will be building some Vardo-style gypsy wagons. (I think)
We have done some jobs commercially; we recently finished doing 27 countertops and 9 hearths for a resort in Millinocket, Maine that added 9 cabins. Mostly for ourselves and friends, though. We are considering making it into a proper business, but I've got to say, it kills my frickin' back. (Two people moving 400-450lb slabs for weeks. Ug. My girlfriend never complains, though. I am a baby.)
The good news is that pouring your own countertops is very inexpensive. The bad news is that it is labor intensive. You can cast in-place or elsewhere. Casting elsewhere allows more freedom to make a mess and wet polish outside or someplace with a drain. (You can polish with sponge diamond pads, by hand.) Casting in-place means no heavy lifting, just more troweling to knock the aggregate down and smooth the surface.
As I said elsewhere, the best thing you could do would be to get Fu-Tung Cheng's book and/or DVD. He knows his stuff and he's extremely well organized and lucid. He sells bits like drain and sink knock-outs, but we make everything ourselves out of foam insulation and packing tape. (Occasionally aluminum flashing & tape.) Works like a charm.
You should pay attention to the load bearing capabilities of your kitchen floor. If it's OK that your kitchen winds up in your basement, don't worry about it. Often it's enough to simply double up the floor joists.
You might want to consider the rule of thirds when taking photos. In this case the most noticeable part of the image appears to be the cat's leg, which is pretty much centered. Ideally you would like to have something of interest in other areas of the photo so that the viewer's eye is drawn away from the center.
If you enjoy taking photos then pick-up a beginner's book on photography, preferably one with a lot of photos you can examine and learn from. I've recommended Digital Art Photography For Dummies to a few friends and it seems like a good place to start, though you could also just peruse the shelves of your favorite bookstore for something which appeals to you.
(I've been meaning to add this as a tutorial on my blog but I've never gotten around to it. Hopefully, this will give me a start and the energy to follow through with it.)
4a) Put the protective pane of glass in between the fire and the camera. It may cause some glow and reflection, but it beats burning the coating off of your glass. After about 15 successful burns I was convinced enough to remove the glass for a few shots.
I think the second photo is better than the first. The first photo's composition is a bit off to me. The subject takes up so little in the frame, she almost seems to be a distraction or an after thought in comparison to the rest of the photo.
I think Striker's crop is probably the best one I've seen here and what I would do if I were to make any adjustments. The color enhancement is good, too.
In the second photo, I think you could probably crop the left side and top away. One thing a lot of people do when they start taking portraits is leave a ton of room at the top of the photo. To me, all that area above her head is distracting, as well as the red junk under the pier to her left. You don't want your eye to wander that much, especially when it doesn't come back to the subject. You don't always have to crop the top out of the photo, but I think it would help in this case.
David Ziser has a lot of cool composition tips in his blog Digital Pro Talk as well as his book, Captured by the Light. He's mainly a wedding photographer, but a lot of what he discusses in his blog and book are applicable to any portrait type photography.
If you're looking for software, I would recommend Photoshop or Lightroom. Personally, I prefer Photoshop because it has more options just in case you need them. You get a lot wider range of actions options if you ever go that way, too.
I'd also recommend checking out books or videos on Adobe Camera RAW. I never realized how powerful that software is until I watched Scott Kelby's video series on it on his online training.
You could also check out Totally Rad Actions. I have the first batch and plan to buy the second at some point. I'm also a huge fan of Alien Skin's Exposure 3 program.
I'd say get a used DSLR for a few hundred and practice, practice, practice. Something like a Canon 20D. You can take good pictures with cheap cameras but the DSLR makes changing settings (aperture, shutter, etc) a lot easier. And they look cool too.
To get better: read photography blogs, find photos that you like, think about why you like them, read your camera's manual, learn all the settings and buttons, bring your camera everywhere, get a Flickr account and post to it, don't be scared to look silly while shooting, ask questions about your photos at r/photography, accept constructive criticism, and the most important thing... KEEP SHOOTING!!!
The trick here is to use the right shutter speed. I usually use anywhere from 1/4 to 1 full second of exposure depending on the waves. A shorter exposure will let you freeze the action better and the waves will be sharper, more recognizable; a longer exposure time will blur motion to the point that if you use something like 30sec +, it will be all smooth and "cotton candy" like. You will most likely need a neutral density filter to block some of the light, cause even if you use the lowest f stop and ISO, it's still probably gonna be way too bright to use 1/4s exposure.
Another thing to keep in mind is the timing of the waves when you are composing. An incoming wave adds more dynamic to the picture, makes the waves seem more "angry" almost like an explosion; while an outgoing wave like the one I posted here will appear much more peaceful and will give you the fine lines which is great to use as leading lines.
Finally, use burst mode on your camera. Chances are you don't get the position of the waves perfect every time and the composition is off(especially for the incoming waves), so use burst mode and "shoot first, ask later".
Ah I love IFTTT so useful! Thanks for the compliments! The lens I used was this Nikon lens. Its pretty amazing for bokeh, and has a great depth of field!
The "plastic fantastic" actually refers to this lens:
http://www.amazon.com/Canon-50mm-1-8-Camera-Lens/dp/B00007E7JU
The casing is literally plastic. But at about 100 bucks, it is an amazing value.
On a crop sensor like the T3i 50mm. a 50mm f/2 is more like a 80mm f/2 on a full frame sensor. The quick and dirty way of calculating this would be to take the focal length and multiply it by 1.6. In practice all it really means if you have to stand a little further back than if you had a pricey full frame camera. 1.6 meters, instead of 1 meter, for a similar effect.
Overall not a big deal.
As for the grain deal, that was just my person opinion. It is a striking image as it is.
It would be the excellent 50mm 1.8D or the ever slightly more excellent 50mm 1.8G.
The primary difference is that the "D" version is older and lacks a focus motor, so it only auto-focuses on Nikon bodies that already have a focus motor built in. The "G" version includes the focus motor in the lens. There are a few other differences as well.
Additionally, there's the 50mm 1.4D and 1.4G, if you want even further abilitiy to defocus backgrounds. (D=no focus motor, G=with focus motor.)
This is beautiful. Did you get that little ice ND10 filter. So cheap!
I have a d5200 and same lens and I looove that little filter. Some of these were from my first day out. (Also love LR and Nik collection)
Thanks! There's a good amount to choose from on Amazon, this is the one I got: https://www.amazon.com/gp/product/B004G45GLE/ref=oh_aui_detailpage_o04_s00?ie=UTF8&psc=1 . There are probably cheaper ones that do the exact same thing.
I've seen them sold for up to $100 some places... Happy shooting!
http://www.amazon.com/gp/product/B004G45GLE?psc=1&redirect=true&ref_=oh_aui_detailpage_o00_s00
You might have. Seems like Darek Grabus did it first. I believe it's called "Architectural Cutlery". You can even buy a copy of it on Amazon https://www.amazon.com/Acrylic-Decor-36X49-Untitled-Grabus/dp/B01IVRKBW0
I own this lens and am thinking about getting a portrait lens to photograph my brother's wedding (I'm just taking pictures for fun).
Would you recommend not getting this lens here and just sticking to the macro for portraits? If so, why?
Yep, a B+W 0.9 ND Filter
It's just an acrylic ball. Got if off Amazon for about $15
Edit: http://www.amazon.com/gp/product/B004G45GLE?psc=1&redirect=true&ref_=oh_aui_detailpage_o08_s00
Nope, this is a single 30 second exposure using a 10 stop ND Filter at f18 and 18mm on the Nikon Kit lens for my D90. The clouds must not have been moving fast enough to get any serious motion blur for the 30 seconds the shutter was open. Thanks!