Reddit mentions: The best tools & home improvement
We found 100,714 Reddit comments discussing the best tools & home improvement. We ran sentiment analysis on each of these comments to determine how redditors feel about different products. We found 37,228 products and ranked them based on the amount of positive reactions they received. Here are the top 20.
1. Luxe Bidet Neo 120 - Self Cleaning Nozzle - Fresh Water Non-Electric Mechanical Bidet Toilet Attachment (blue and white)
- A LUXURIOUS LOOK AT AN EXCELLENT PRICE – With a sleek design and high-quality parts, our bidet attachment will give your bathroom a next-level look. Constructed with high-pressure valves with metal/ceramic cores and steel hoses instead of plastic.
- HYGIENIC NOZZLE GUARD GATE – Shields the nozzle for your ultimate sanitary experience. The nozzle automatically retracts behind the guard gate after each wash to ensure it is protected until your next use.
- HAVE FUN DOING IT YOURSELF - Includes ALL PARTS AND TOOLS to get your bidet up and running in minutes. Easily attaches to and detaches from any standard two-piece toilet.
- ENVIRONMENTALLY-FRIENDLY, WORTHWHILE INVESTMENT – Save money (and trees!) on toilet paper. Cleaning with our bidet is gentle on your skin and sustainable for the planet.
- NO KIDDING 18-MONTH WARRANTY – We are always here to make sure you are 100% satisfied, so anytime you have problems or concerns about the products, we are just one call away. Register your bidet online and get an extended warranty.
Features:

Specs:
| Color | Blue/White |
| Height | 6 Inches |
| Length | 12 Inches |
| Number of items | 1 |
| Weight | 1.8 Pounds |
| Width | 6 Inches |
2. Weller WLC100 40-Watt Soldering Station
- High performance analog soldering station produces up to 900° F to handle many soldering projects
- Variable power control dial adjusts power from 5 watts to 40 watts for accuracy
- Quality, lightweight pencil iron with cushioned foam grip provides extended comfort during long term soldering projects
- Includes: a Weller certified ST3 iron plated tip for long life and consistent performance, a built in soldering holder to safely rest your pencil, and a cleaning sponge to remove unwanted residue from soldering for next time use
- UL Listed: Tested and meets independent safety standards
Features:

Specs:
| Height | 6.3 Inches |
| Length | 8.8 Inches |
| Number of items | 1 |
| Size | 1 Pack |
| Weight | 6.65 Pounds |
| Width | 3.76 Inches |
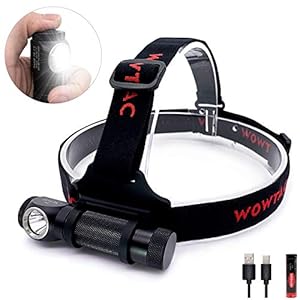
3. WOWTAC A2S LED Headlamp Headlight 6 Modes Max 1050 Lumen Waterproof Headlamps, Super Bright Outdoor Sports Running Walking Camping Reading Hiking Fishing (A2S NW)
- High-performance CREE XP-L2 LED with smooth reflector produces a defined small focused light pattern, making A2S V2 has a useful spill and flood to optimize your field of vision.
- Features 5 lighting modes with extra hidden SOS: Firefly; Low mode; Mid mode; High mode; Turbo mode and SOS for long range vision & long-lasting use.
- Push button on/off switch sits on right side of headlamp, one-handed adjustment from 0.5 to 1047 lumens. Push button switch also retains memory of light output at any of the low, mid, high modes.
- Weighing only 3.8oz(without battery) with adjustable elastic headband, A2S V2 made with aircraft grade aluminum with waterproof IPX-7, which can be used in all weather condition from all angles.
- Extra Bonus: A2S V2 headlamp can be taken off as a handheld flashlight, with a length of 4.17 inches. 1x USB-C Rechargeable battery included.
Features:
Specs:
| Color | Black - Usb-c |
| Height | 0.925195 Inches |
| Length | 4.17322 Inches |
| Weight | 0.23809924296 Pounds |
| Width | 1.1811 Inches |
4. Astor Bidet Fresh Water Spray Non-Electric Mechanical Bidet Toilet Seat Attachment CB-1000
- DITCH THE SCRATCHY TOILET PAPER AND UNSANITARY WET WIPES: The Astor Bidet is the sanitary, Earth-friendly solion that leaves you feeling cleaner than conventional paper and wet wipes.
- INSTALLS IN 10 MINUTES WITH ONLY A SCREWDRIVER: The premium quality bidet sprayer attaches to your existing toilet seat and doesn't use electricity or require special parts - everything you need is included in the box - making it a great value.
- AFFORDABLE UPGRADE TURNS YOUR TOILET INTO A LUXURIOUS BIDET: Using water pressure alone, the Astor Bidet provides a more comfortable, hygienic experience - you'll never want to go back to coarse toilet paper.
- ADJUST THE FRESH WATER SPRAY TO YOUR PREFERENCE: Your comfort is our priority - the custom dial lets you control the water sprayer pressure for the most enjoyable clean possible.
- ECO-WISE DESIGN: Besides saving toilet paper, the premium Astor bidet also works just as well when the lights go out. No batteries or electricity required: our engineering works purely on the pressure already existing in your water pipes.
Features:

Specs:
| Color | Basic pack |
| Height | 3.9 Inches |
| Length | 17.7 Inches |
| Size | Original |
| Weight | 1.9 Pounds |
| Width | 7.8 Inches |
5. Micro Cutter
- Flush-cut micro soft-wire cutter has 8mm long jaw with angled head for flush-cutting applications on up to 16 gauge (1.3mm) copper and soft wire
- 21-degree
- 2.5mm heat-treated carbon steel construction provides durability and long life
- Precision-ground holes and surfaces provide smooth movement, and spring returns tool to open position to reduce operator fatigue
- Dolphin-style nonslip hand grips with curved fore-edge provide comfort and control, and Parkerized surfaces prevent glare and increase corrosion resistance
Features:

Specs:
| Color | Red |
| Height | 0.8 Inches |
| Length | 5.9 Inches |
| Number of items | 1 |
| Size | Pack 1 |
| Weight | 0.04 Pounds |
| Width | 3.6 Inches |
6. Hakko FX888D-23BY Digital Soldering Station FX-888D FX-888 (blue & yellow)
- 1 Poncho-Gives extra privacy with hood and non-transparent plastic material. Large neck opening opens field of view into poncho. Large arm openings allows for free movement of hands into poncho while using the pee and poop bags.
- 1 Pee Bag-Unisex design with foam receiver cusp. Urine gels immediately upon contact with super-absorption polymer inside. Zip-lock seal.
- 1 Poop Bag Set-Fits snugly around your bottom with a no-miss triple harness catch system. Come with leak resistant disposal bag.
- 2 Moist Cloth Wipes-Made with gentle fabric and formula that soothes as it cleans. That means a cleaner job than traditional toilet paper can do and with much less wiping!
- Pocket-sized Disposable Restroom - Urinal, Fecal Toilet, Poncho (For Privacy) and Cloth Wipes is Ultra-portable, convenient, and hygienic.
Features:

Specs:
| Color | Blue/Yellow |
| Height | 7.3 Inches |
| Length | 9.6 Inches |
| Number of items | 1 |
| Release date | September 2017 |
| Weight | 2.6 Pounds |
| Width | 9.6 Inches |
7. Weller WES51 Analog Soldering Station
- Receptacle For Easy Iron Replacement
- Designed For Continuous Production Soldering
- Slim, Comfortable Pencil With Eta Tip Reduces Operator Fatigue
- Tip Temperature Offset Capability
- Allows User To Reset Station Temperature To Match In Tip Sizes & Styles
- Station Includes Power Unit, Soldering Pencil, Stand and Sponge
- New Receptacle For Easier Iron Replacement
- Designed For Continuous Production Soldering
- Slim, Comfortable Pencil With Eta Tip Reduces Operator Fatigue
- Tip Temperature Offset Capability
- This is for 120v only
Features:

Specs:
| Height | 4.25 Inches |
| Length | 11.42 Inches |
| Number of items | 1 |
| Weight | 4 Pounds |
| Width | 8.82 Inches |
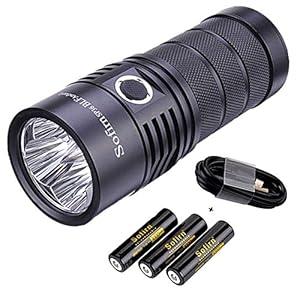
8. Sofirn SP36 BLF Anduril Powerful Flashlight, 4 LH351D LED 5000K 90 CRI, USB C Rechargeable, Battery Not Included
- Plow resistant design extends mailbox life by reducing stresses.
- Made in the USA
- Incredibly durable construction, built to take abuse.
- Stainless steel Pivot Bracket with plated steel nuts, bolts, and screws
- Does not include lumber or mailbox.
Features:
Specs:
| Color | White |
9. WOWTAC A2S LED Headlamp LED Headlight 6 Modes Max 1050 Lumen Waterproof Headlamps, Super Bright Outdoor Sports Running Walking Camping Reading Hiking Riding Fishing (A2S CW)
- High-performance CREE XP-L2 LED with smooth reflector produces a defined small focused light pattern, making A2S V2 has a useful spill and flood to optimize your field of vision.
- Features 5 lighting modes with extra hidden SOS: Firefly; Low mode; Mid mode; High mode; Turbo mode and SOS for long range vision & long-lasting use.
- Push button on/off switch sits on right side of headlamp, one-handed adjustment from 0.3 to 1050 lumens. Push button switch also retains memory of light output at any of the low, mid, high modes.
- Weighing only 3.8oz(without battery) with adjustable elastic headband, A2S V2 made with aircraft grade aluminum with waterproof IPX-7, which can be used in all weather condition from all angles.
- Extra Bonus: A2S V2 headlamp can be taken off as a handheld flashlight, with a length of 4.17 inches. 1x USB Rechargeable battery.
Features:
Specs:
| Color | Black - Usb |
| Height | 0.925195 Inches |
| Length | 4.17322 Inches |
| Weight | 0.23809924296 Pounds |
| Width | 1.1811 Inches |
10. KING KW65 1000/6000 Grit Combination Whetstone with Plastic Base
- King 01096 1000/6000 Grit Deluxe Combination Stone
- King brand known for quality and affordability
- Includes sturdy plastic base
- 8" x 2 1/2" x 1" thick
Features:

Specs:
| Color | Brown |
| Height | 1 Inches |
| Length | 7.25 Inches |
| Number of items | 2 |
| Size | One Size |
| Weight | 1 Pounds |
| Width | 2.5 Inches |
11. Kershaw Skyline Pocket Knife, 3.1 Inch Stainless Steel Stonewashed Blade, Manual Opening, 1760, Black
- 3.1” blade made of high-performance Sandvik 14C28N stainless steel, offers excellent strength, corrosion and wear resistance
- Lightweight G-10 handle scales offer a secure grip with texture and a deep index-finger contour
- The drop-point blade offers good balance and a strong, hard tip. The rugged Stonewash finish is capable of hiding scratches and fingerprints
- The perfect EDC for cutting tasks such as opening difficult packages, breaking down boxes, removing zip-ties, cleaning small game, aggressive animal defense, slicing fruit, and stripping small wire
- An excellent gift idea for any hunter, hiker, hobbyist, carpenter, angler, backpacker or any knife enthusiast in need of a highly reliable, American made pocket folder
Features:

Specs:
| Color | Black |
| Height | 1 Inches |
| Length | 6 Inches |
| Number of items | 1 |
| Release date | April 2009 |
| Size | 3.1 Inch Blade |
| Weight | 0.5 Pounds |
| Width | 1 Inches |
12. Kasa Smart Plug by TP-Link, Smart Home WiFi Outlet works with Alexa, Echo, Google Home & IFTTT, No Hub Required, Remote Control, 15 Amp, UL Certified, 1-Pack (HS100)
- Control From Anywhere: Turn electronics on or off from anywhere with your smartphone using the Kasa app (Compatible w/ Android & iOS)
- Voice Control works with amazon Alexa, Google Assistant and Microsoft Cortana supported devices for a hands free experience; Operating Temperature: 0 ºC to 40 ºC (32°F to 104°F). Operating Humidity: 5 percent to 90 percent RH, Non condensing
- Flexible Control: UL Certfied to switch upto 15A, for flexible control of a wide range of plug in devices
- Kasa scenes & schedules: Schedule the Smart plug to automatically switch on and off when away or set a scene for controlling many devices with a single button
- Note: Requires a secured 2.4 gigahertz wifi network connection
Features:

Specs:
| Color | white |
| Height | 3.9 Inches |
| Length | 3 Inches |
| Number of items | 1 |
| Size | Classic Plug 1-Pack |
| Weight | 0.4 pounds |
| Width | 2.6 Inches |
13. Streamlight 66118 Stylus Pro LED PenLight with Holster, Black - 100 Lumens
- Durable, anodized machined aircraft aluminum construction
- White LED produces 100 Lumens; 950 Candela; 62 meter beam; Runs 8 hours
- IPX4 – Water-resistant; 2 meter impact resistance tested
- About the size of a marker, it fits conveniently in your pocket 5.3” (134 millimeter); 1.64 ounce (46.9 gram)
- Removable pocket clip
Features:

Specs:
| Color | Black w/White LED |
| Height | 0.6 inches |
| Length | 5.3 inches |
| Number of items | 1 |
| Release date | October 2017 |
| Size | 2x AAA Alkaline Batteries |
| Weight | 0.1025 Pounds |
| Width | 0.6 inches |
14. Ontario Knife Company 8848 Rat I Folding Knife - EDC Knife (Black)
- Sport type: Hunting
- Open post construction for easy cleaning
- AUS-8 blade steel
- 3. 5 inch plain edge blade
- 3.5 inch plain edge blade
- Knife Closed Length: 4.5-Inch
- Knife Open Length: 8.5-Inch
- Weighs 5 ounces
Features:

Specs:
| Color | Black |
| Height | 1 Inches |
| Length | 3.5 Inches |
| Number of items | 1 |
| Release date | November 2019 |
| Weight | 0.30625 Pounds |
| Width | 1 Inches |
15. ThruNite Neutron 2C V3 Rechargeable LED Micro-USB Flashlight, 1100 Lumen with CREE XP-L LED, Turbo, Strobe Light and self-Defined Modes - NW
Newly Released Bright Flashlight - Neutron 2C V3 max output of 1100 lumen with CREE XP-L LED, 1100 lumen (max) provides bright light over beam distance of 262 yards.Infinite Brightness Adjusting - Neutron 2C V3 adjust the output by long press the switch to circle through infinity high and infinity l...
 ▼ Read Reddit mentions
16. 3M Indoor Window Insulator Kit Insulates 5 - 3'x8' Windows
- Saves energy and reduces heating costs
- Reduces condensation and prevents frost buildup
- Quick and easy installation
- Fits five 3'x 5' indoor windows
Features:

Specs:
| Height | 8.72 Inches |
| Length | 1.44 Inches |
| Number of items | 1 |
| Size | 5 Windows |
| Weight | 0.48125 Pounds |
| Width | 9.75 Inches |
17. Uvex Skyper Blue Light Blocking Computer Glasses with SCT-Orange Lens (S1933X)
- PROTECTS YOUR EYES: Orange Lens features Spectrum Control Technology (SCT) that absorbs 98% of blue light from laptops, computers & tablets, which helps prevent cataracts and macular degeneration
- REDUCES EYE FATIGUE: SCT-Orange lens reduces eye strain so you can work longer & more comfortably; also makes for more screen contrast with sharper details for improved focus and further reduced eye fatigue
- MULTI-ANGLE VIEWING: 3-Position lens inclination system allows for optimal screen viewing at different heights & positions; helps prevent neck strain while working, sitting, standing or stretched out
- WORK IN COMFORT: Adjustable-length Duoflex temples allow for custom, comfortable fit; temple tips are cushioned to prevent digging in to side of head; molded nose bridge rests easily on the face
- EASY LENS REPLACEMENT: Lens replacement is quick, easy and economical
Features:

Specs:
| Color | Sct-orange Lens |
| Height | 2.5 Inches |
| Length | 7 Inches |
| Number of items | 1 |
| Size | 1-Pack |
| Weight | 0.000625 Pounds |
| Width | 2.5 Inches |
18. Luxe Bidet MB110 Fresh Water Spray Non-Electric Mechanical Bidet Toilet Seat Attachment
- Easy and quick self installation in minutes
- Easily attachable and detachable to and from any standard two piece toilet bowl
- All accessories included
- A hygienic solution
- Premium quality and great value for money
Features:

Specs:
| Color | Original Version |
| Height | 2 Inches |
| Length | 2 Inches |
| Number of items | 1 |
| Weight | 1.8 Pounds |
| Width | 2 Inches |
19. Stanley 014725 25-Removable Compartment Professional Organizer
- Stanley - Black & Decker
- Unique lid design locks all compartments in place
- Built-in wide handle for easy and stable portability
- Heavy-duty latches ensure the lid will not flip open
- Comfy-grip handle
- Removable cup compartments in 3 different sizes
- Unique lid design locks all compartments in place
- Built-in wide handle for easy and stable portability
- Heavy-duty latches ensure the lid will not flip open
- Comfy-grip handle
Features:

Specs:
| Color | Black & Yellow |
| Height | 2.13 Inches |
| Length | 16.25 Inches |
| Number of items | 1 |
| Weight | 0.77 Pounds |
| Width | 13.5 Inches |
20. Streamlight MicroStream Ultra-compact Aluminum body with AAA alkaline battery, 3.5 Inch - 1.04 oz - 45 Lumens - 66318, Black
- Type II MIL-SPEC abrasion and corrosion-resistant anodized aircraft aluminum construction with unbreakable, scratch-resistant polycarbonate lens.
Features:

Specs:
| Color | Black |
| Height | 3.543307 Inches |
| Length | 0.590551 Inches |
| Number of items | 1 |
| Size | 3.6 inches |
| Weight | 0.065 Pounds |
| Width | 0.590551 Inches |
🎓 Reddit experts on tools & home improvement
The comments and opinions expressed on this page are written exclusively by redditors. To provide you with the most relevant data, we sourced opinions from the most knowledgeable Reddit users based the total number of upvotes and downvotes received across comments on subreddits where tools & home improvement are discussed. For your reference and for the sake of transparency, here are the specialists whose opinions mattered the most in our ranking.
Subcategories:
Interested in what Redditors like? Check out our Shuffle feature
Shuffle: random products popular on RedditTop Reddit comments about Tools & Home Improvement:
Summary
1. Luxe Bidet Neo 120 - Self Cleaning Nozzle - Fresh Water Non-Electric Mechanical Bidet Toilet Attachment (blue and white)
- A LUXURIOUS LOOK AT AN EXCELLENT PRICE – With a sleek design and high-quality parts, our bidet attachment will give your bathroom a next-level look. Constructed with high-pressure valves with metal/ceramic cores and steel hoses instead of plastic.
- HYGIENIC NOZZLE GUARD GATE – Shields the nozzle for your ultimate sanitary experience. The nozzle automatically retracts behind the guard gate after each wash to ensure it is protected until your next use.
- HAVE FUN DOING IT YOURSELF - Includes ALL PARTS AND TOOLS to get your bidet up and running in minutes. Easily attaches to and detaches from any standard two-piece toilet.
- ENVIRONMENTALLY-FRIENDLY, WORTHWHILE INVESTMENT – Save money (and trees!) on toilet paper. Cleaning with our bidet is gentle on your skin and sustainable for the planet.
- NO KIDDING 18-MONTH WARRANTY – We are always here to make sure you are 100% satisfied, so anytime you have problems or concerns about the products, we are just one call away. Register your bidet online and get an extended warranty.
Features:
Specs:
| Color | Blue/White |
| Height | 6 Inches |
| Length | 12 Inches |
| Number of items | 1 |
| Weight | 1.8 Pounds |
| Width | 6 Inches |
2. Weller WLC100 40-Watt Soldering Station
- High performance analog soldering station produces up to 900° F to handle many soldering projects
- Variable power control dial adjusts power from 5 watts to 40 watts for accuracy
- Quality, lightweight pencil iron with cushioned foam grip provides extended comfort during long term soldering projects
- Includes: a Weller certified ST3 iron plated tip for long life and consistent performance, a built in soldering holder to safely rest your pencil, and a cleaning sponge to remove unwanted residue from soldering for next time use
- UL Listed: Tested and meets independent safety standards
Features:
Specs:
| Height | 6.3 Inches |
| Length | 8.8 Inches |
| Number of items | 1 |
| Size | 1 Pack |
| Weight | 6.65 Pounds |
| Width | 3.76 Inches |
3. WOWTAC A2S LED Headlamp Headlight 6 Modes Max 1050 Lumen Waterproof Headlamps, Super Bright Outdoor Sports Running Walking Camping Reading Hiking Fishing (A2S NW)
- High-performance CREE XP-L2 LED with smooth reflector produces a defined small focused light pattern, making A2S V2 has a useful spill and flood to optimize your field of vision.
- Features 5 lighting modes with extra hidden SOS: Firefly; Low mode; Mid mode; High mode; Turbo mode and SOS for long range vision & long-lasting use.
- Push button on/off switch sits on right side of headlamp, one-handed adjustment from 0.5 to 1047 lumens. Push button switch also retains memory of light output at any of the low, mid, high modes.
- Weighing only 3.8oz(without battery) with adjustable elastic headband, A2S V2 made with aircraft grade aluminum with waterproof IPX-7, which can be used in all weather condition from all angles.
- Extra Bonus: A2S V2 headlamp can be taken off as a handheld flashlight, with a length of 4.17 inches. 1x USB-C Rechargeable battery included.
Features:
Specs:
| Color | Black - Usb-c |
| Height | 0.925195 Inches |
| Length | 4.17322 Inches |
| Weight | 0.23809924296 Pounds |
| Width | 1.1811 Inches |
4. Astor Bidet Fresh Water Spray Non-Electric Mechanical Bidet Toilet Seat Attachment CB-1000
- DITCH THE SCRATCHY TOILET PAPER AND UNSANITARY WET WIPES: The Astor Bidet is the sanitary, Earth-friendly solion that leaves you feeling cleaner than conventional paper and wet wipes.
- INSTALLS IN 10 MINUTES WITH ONLY A SCREWDRIVER: The premium quality bidet sprayer attaches to your existing toilet seat and doesn't use electricity or require special parts - everything you need is included in the box - making it a great value.
- AFFORDABLE UPGRADE TURNS YOUR TOILET INTO A LUXURIOUS BIDET: Using water pressure alone, the Astor Bidet provides a more comfortable, hygienic experience - you'll never want to go back to coarse toilet paper.
- ADJUST THE FRESH WATER SPRAY TO YOUR PREFERENCE: Your comfort is our priority - the custom dial lets you control the water sprayer pressure for the most enjoyable clean possible.
- ECO-WISE DESIGN: Besides saving toilet paper, the premium Astor bidet also works just as well when the lights go out. No batteries or electricity required: our engineering works purely on the pressure already existing in your water pipes.
Features:
Specs:
| Color | Basic pack |
| Height | 3.9 Inches |
| Length | 17.7 Inches |
| Size | Original |
| Weight | 1.9 Pounds |
| Width | 7.8 Inches |
5. Micro Cutter
- Flush-cut micro soft-wire cutter has 8mm long jaw with angled head for flush-cutting applications on up to 16 gauge (1.3mm) copper and soft wire
- 21-degree
- 2.5mm heat-treated carbon steel construction provides durability and long life
- Precision-ground holes and surfaces provide smooth movement, and spring returns tool to open position to reduce operator fatigue
- Dolphin-style nonslip hand grips with curved fore-edge provide comfort and control, and Parkerized surfaces prevent glare and increase corrosion resistance
Features:
Specs:
| Color | Red |
| Height | 0.8 Inches |
| Length | 5.9 Inches |
| Number of items | 1 |
| Size | Pack 1 |
| Weight | 0.04 Pounds |
| Width | 3.6 Inches |
6. Hakko FX888D-23BY Digital Soldering Station FX-888D FX-888 (blue & yellow)
- 1 Poncho-Gives extra privacy with hood and non-transparent plastic material. Large neck opening opens field of view into poncho. Large arm openings allows for free movement of hands into poncho while using the pee and poop bags.
- 1 Pee Bag-Unisex design with foam receiver cusp. Urine gels immediately upon contact with super-absorption polymer inside. Zip-lock seal.
- 1 Poop Bag Set-Fits snugly around your bottom with a no-miss triple harness catch system. Come with leak resistant disposal bag.
- 2 Moist Cloth Wipes-Made with gentle fabric and formula that soothes as it cleans. That means a cleaner job than traditional toilet paper can do and with much less wiping!
- Pocket-sized Disposable Restroom - Urinal, Fecal Toilet, Poncho (For Privacy) and Cloth Wipes is Ultra-portable, convenient, and hygienic.
Features:
Specs:
| Color | Blue/Yellow |
| Height | 7.3 Inches |
| Length | 9.6 Inches |
| Number of items | 1 |
| Release date | September 2017 |
| Weight | 2.6 Pounds |
| Width | 9.6 Inches |
7. Weller WES51 Analog Soldering Station
- Receptacle For Easy Iron Replacement
- Designed For Continuous Production Soldering
- Slim, Comfortable Pencil With Eta Tip Reduces Operator Fatigue
- Tip Temperature Offset Capability
- Allows User To Reset Station Temperature To Match In Tip Sizes & Styles
- Station Includes Power Unit, Soldering Pencil, Stand and Sponge
- New Receptacle For Easier Iron Replacement
- Designed For Continuous Production Soldering
- Slim, Comfortable Pencil With Eta Tip Reduces Operator Fatigue
- Tip Temperature Offset Capability
- This is for 120v only
Features:
Specs:
| Height | 4.25 Inches |
| Length | 11.42 Inches |
| Number of items | 1 |
| Weight | 4 Pounds |
| Width | 8.82 Inches |
8. Sofirn SP36 BLF Anduril Powerful Flashlight, 4 LH351D LED 5000K 90 CRI, USB C Rechargeable, Battery Not Included
- Plow resistant design extends mailbox life by reducing stresses.
- Made in the USA
- Incredibly durable construction, built to take abuse.
- Stainless steel Pivot Bracket with plated steel nuts, bolts, and screws
- Does not include lumber or mailbox.
Features:
Specs:
| Color | White |
9. WOWTAC A2S LED Headlamp LED Headlight 6 Modes Max 1050 Lumen Waterproof Headlamps, Super Bright Outdoor Sports Running Walking Camping Reading Hiking Riding Fishing (A2S CW)
- High-performance CREE XP-L2 LED with smooth reflector produces a defined small focused light pattern, making A2S V2 has a useful spill and flood to optimize your field of vision.
- Features 5 lighting modes with extra hidden SOS: Firefly; Low mode; Mid mode; High mode; Turbo mode and SOS for long range vision & long-lasting use.
- Push button on/off switch sits on right side of headlamp, one-handed adjustment from 0.3 to 1050 lumens. Push button switch also retains memory of light output at any of the low, mid, high modes.
- Weighing only 3.8oz(without battery) with adjustable elastic headband, A2S V2 made with aircraft grade aluminum with waterproof IPX-7, which can be used in all weather condition from all angles.
- Extra Bonus: A2S V2 headlamp can be taken off as a handheld flashlight, with a length of 4.17 inches. 1x USB Rechargeable battery.
Features:
Specs:
| Color | Black - Usb |
| Height | 0.925195 Inches |
| Length | 4.17322 Inches |
| Weight | 0.23809924296 Pounds |
| Width | 1.1811 Inches |
10. KING KW65 1000/6000 Grit Combination Whetstone with Plastic Base
- King 01096 1000/6000 Grit Deluxe Combination Stone
- King brand known for quality and affordability
- Includes sturdy plastic base
- 8" x 2 1/2" x 1" thick
Features:
Specs:
| Color | Brown |
| Height | 1 Inches |
| Length | 7.25 Inches |
| Number of items | 2 |
| Size | One Size |
| Weight | 1 Pounds |
| Width | 2.5 Inches |
11. Kershaw Skyline Pocket Knife, 3.1 Inch Stainless Steel Stonewashed Blade, Manual Opening, 1760, Black
- 3.1” blade made of high-performance Sandvik 14C28N stainless steel, offers excellent strength, corrosion and wear resistance
- Lightweight G-10 handle scales offer a secure grip with texture and a deep index-finger contour
- The drop-point blade offers good balance and a strong, hard tip. The rugged Stonewash finish is capable of hiding scratches and fingerprints
- The perfect EDC for cutting tasks such as opening difficult packages, breaking down boxes, removing zip-ties, cleaning small game, aggressive animal defense, slicing fruit, and stripping small wire
- An excellent gift idea for any hunter, hiker, hobbyist, carpenter, angler, backpacker or any knife enthusiast in need of a highly reliable, American made pocket folder
Features:
Specs:
| Color | Black |
| Height | 1 Inches |
| Length | 6 Inches |
| Number of items | 1 |
| Release date | April 2009 |
| Size | 3.1 Inch Blade |
| Weight | 0.5 Pounds |
| Width | 1 Inches |
12. Kasa Smart Plug by TP-Link, Smart Home WiFi Outlet works with Alexa, Echo, Google Home & IFTTT, No Hub Required, Remote Control, 15 Amp, UL Certified, 1-Pack (HS100)
- Control From Anywhere: Turn electronics on or off from anywhere with your smartphone using the Kasa app (Compatible w/ Android & iOS)
- Voice Control works with amazon Alexa, Google Assistant and Microsoft Cortana supported devices for a hands free experience; Operating Temperature: 0 ºC to 40 ºC (32°F to 104°F). Operating Humidity: 5 percent to 90 percent RH, Non condensing
- Flexible Control: UL Certfied to switch upto 15A, for flexible control of a wide range of plug in devices
- Kasa scenes & schedules: Schedule the Smart plug to automatically switch on and off when away or set a scene for controlling many devices with a single button
- Note: Requires a secured 2.4 gigahertz wifi network connection
Features:
Specs:
| Color | white |
| Height | 3.9 Inches |
| Length | 3 Inches |
| Number of items | 1 |
| Size | Classic Plug 1-Pack |
| Weight | 0.4 pounds |
| Width | 2.6 Inches |
13. Streamlight 66118 Stylus Pro LED PenLight with Holster, Black - 100 Lumens
- Durable, anodized machined aircraft aluminum construction
- White LED produces 100 Lumens; 950 Candela; 62 meter beam; Runs 8 hours
- IPX4 – Water-resistant; 2 meter impact resistance tested
- About the size of a marker, it fits conveniently in your pocket 5.3” (134 millimeter); 1.64 ounce (46.9 gram)
- Removable pocket clip
Features:
Specs:
| Color | Black w/White LED |
| Height | 0.6 inches |
| Length | 5.3 inches |
| Number of items | 1 |
| Release date | October 2017 |
| Size | 2x AAA Alkaline Batteries |
| Weight | 0.1025 Pounds |
| Width | 0.6 inches |
14. Ontario Knife Company 8848 Rat I Folding Knife - EDC Knife (Black)
- Sport type: Hunting
- Open post construction for easy cleaning
- AUS-8 blade steel
- 3. 5 inch plain edge blade
- 3.5 inch plain edge blade
- Knife Closed Length: 4.5-Inch
- Knife Open Length: 8.5-Inch
- Weighs 5 ounces
Features:
Specs:
| Color | Black |
| Height | 1 Inches |
| Length | 3.5 Inches |
| Number of items | 1 |
| Release date | November 2019 |
| Weight | 0.30625 Pounds |
| Width | 1 Inches |
15. ThruNite Neutron 2C V3 Rechargeable LED Micro-USB Flashlight, 1100 Lumen with CREE XP-L LED, Turbo, Strobe Light and self-Defined Modes - NW
Newly Released Bright Flashlight - Neutron 2C V3 max output of 1100 lumen with CREE XP-L LED, 1100 lumen (max) provides bright light over beam distance of 262 yards.Infinite Brightness Adjusting - Neutron 2C V3 adjust the output by long press the switch to circle through infinity high and infinity l...
▼ Read Reddit mentions16. 3M Indoor Window Insulator Kit Insulates 5 - 3'x8' Windows
- Saves energy and reduces heating costs
- Reduces condensation and prevents frost buildup
- Quick and easy installation
- Fits five 3'x 5' indoor windows
Features:
Specs:
| Height | 8.72 Inches |
| Length | 1.44 Inches |
| Number of items | 1 |
| Size | 5 Windows |
| Weight | 0.48125 Pounds |
| Width | 9.75 Inches |
17. Uvex Skyper Blue Light Blocking Computer Glasses with SCT-Orange Lens (S1933X)
- PROTECTS YOUR EYES: Orange Lens features Spectrum Control Technology (SCT) that absorbs 98% of blue light from laptops, computers & tablets, which helps prevent cataracts and macular degeneration
- REDUCES EYE FATIGUE: SCT-Orange lens reduces eye strain so you can work longer & more comfortably; also makes for more screen contrast with sharper details for improved focus and further reduced eye fatigue
- MULTI-ANGLE VIEWING: 3-Position lens inclination system allows for optimal screen viewing at different heights & positions; helps prevent neck strain while working, sitting, standing or stretched out
- WORK IN COMFORT: Adjustable-length Duoflex temples allow for custom, comfortable fit; temple tips are cushioned to prevent digging in to side of head; molded nose bridge rests easily on the face
- EASY LENS REPLACEMENT: Lens replacement is quick, easy and economical
Features:
Specs:
| Color | Sct-orange Lens |
| Height | 2.5 Inches |
| Length | 7 Inches |
| Number of items | 1 |
| Size | 1-Pack |
| Weight | 0.000625 Pounds |
| Width | 2.5 Inches |
18. Luxe Bidet MB110 Fresh Water Spray Non-Electric Mechanical Bidet Toilet Seat Attachment
- Easy and quick self installation in minutes
- Easily attachable and detachable to and from any standard two piece toilet bowl
- All accessories included
- A hygienic solution
- Premium quality and great value for money
Features:
Specs:
| Color | Original Version |
| Height | 2 Inches |
| Length | 2 Inches |
| Number of items | 1 |
| Weight | 1.8 Pounds |
| Width | 2 Inches |
19. Stanley 014725 25-Removable Compartment Professional Organizer
- Stanley - Black & Decker
- Unique lid design locks all compartments in place
- Built-in wide handle for easy and stable portability
- Heavy-duty latches ensure the lid will not flip open
- Comfy-grip handle
- Removable cup compartments in 3 different sizes
- Unique lid design locks all compartments in place
- Built-in wide handle for easy and stable portability
- Heavy-duty latches ensure the lid will not flip open
- Comfy-grip handle
Features:
Specs:
| Color | Black & Yellow |
| Height | 2.13 Inches |
| Length | 16.25 Inches |
| Number of items | 1 |
| Weight | 0.77 Pounds |
| Width | 13.5 Inches |
20. Streamlight MicroStream Ultra-compact Aluminum body with AAA alkaline battery, 3.5 Inch - 1.04 oz - 45 Lumens - 66318, Black
- Type II MIL-SPEC abrasion and corrosion-resistant anodized aircraft aluminum construction with unbreakable, scratch-resistant polycarbonate lens.
Features:
Specs:
| Color | Black |
| Height | 3.543307 Inches |
| Length | 0.590551 Inches |
| Number of items | 1 |
| Size | 3.6 inches |
| Weight | 0.065 Pounds |
| Width | 0.590551 Inches |
(Had to repost this because I used link shorteners to stay under char limit and it got auto-deleted, so this one is finally fixed)
I'm a native New Yorker, and I'll chime in as someone who was able to buy a place in NYC (brooklyn) before turning 30. Now, the prices have exploded in my area since I bought (2010), but there are other areas that are still in the "reasonable" range.
I was by no means rich. I'm not rich, but I technically own property that has appreciated so I "have" money on paper. I can't spend that money. I am the type of person subbed to r/frugal, /r/personalfinance, and /r/churning. I grew up somewhat poor, and I think that has shaped my complete fear of going broke. For some, it may also fuel the desire to buy nice things. You have to be careful with that second one. I pay off my credit cards every month, but I also take advantage of any "no interest for 12 months" type deals on a Best Buy store card when I need a big purchase. I'm going to talk about buying, and then I'm going to talk about what I generally do financially.
"Avocado toast" really seems to be an example of a bigger underlying problem, which is that people have too many things that they spend too much money on. $14 for avocado on toast is obscene given how cheap it would be to make it yourself. And yes, I understand that they restaurant pays the rent, the servers, etc, but the point is that avocado toast and expensive coffee shouldn't really be a regular luxury. The thing is, how many other places are you basically throwing away excess money, like GrubHub and bars?
I'm not saying don't have fun. I'm saying that you should meter that stuff a bit. If you have the funds and you want to buy a Nintendo Switch, go ahead. That's a one time cost for the system, and it provides ongoing fun. But that's gotta be your thing. Your thing can't be bars AND dining out AND traveling AND expensive jeans AND tattoos AND...
Here are my personal tips for finance that may make life a bit easier. This may not lead to you buying a place, but it can lead to you getting some financial freedom. It's the same theory when it came to packing a ruck: ounces make pounds. In this case that extra money you save (or spend) adds up over time.
First off you need to plan.
I like Quicken. I used to love MS Money more, but that's gone and mint wasn't doing it for me at the time and I haven't tried it since. Don't get the new version every year. Maybe every 4 years IF you feel the new features will help you.
Quicken works best if you have steady income, but if you have income that fluctuates due to hours or tips, you should just estimate a basic income that you typically get and you can always adjust upward for actual. Better to underestimate income. So now you have an estimate of money in.
Now, you need to take control of your bills and calculate money out. Personally, I pay most of my bills weekly so they can't sneak up on me. For example, I went to the electric company website and looked at my bills for the past year, added that up, and divided by 52. That's my weekly average energy spend. It goes up in summer and down in winter. Then, for one bill I paid it off, and then the following week, I had my bank start automatic payments of that weekly amount. This does three things. First, the bills don't surprise me all at once. Second, should anything happen, I'm a month ahead of my bills, so I have some time to think. Third, with the payments going automatically, I don't have to waste time paying bills or trying to figure out what needs to be paid. And your bank send it, so you can't forget, they track it, and you don't need a stamp (if you mail it to someone).
Remember that thing I mentioned about "12 months no interest" on a store card. Don't wait 12 months and get screwed. Again, take the amount, divide by 50, send that much to the card each week for 52 weeks. So if you need a new laptop, and it's going to cost $1,300, that might really hurt your budget. However, at $25 a week, it becomes easy to manage. That's like not eating out once.
I pay for everything possible with a credit card. I could try to figure out a budget, but I'm lazy, and my spending can go all over the place. However, with the card, I just estimate what I usually spend each week and have the bank auto-pay that. This also makes it easy to track the real money in my checking account in Quicken because the output is stabilized. Just like with the other bills. Also, I get cool points and stuff that I will later use for travel or whatever, and I pay no interest.
So, in Quicken, with your general income and spending put in, you can see what your money is doing over time. And you can see if your lifestyle is going to slowly drive you to being broke. When I first got my place and needed a roommate, the area sucked. However, I could see in quicken what the minimum that I needed to charge was in order for me to not go broke. My roommate paid less than a third of the total costs were, but I was at least financially stable for the time being. Now that the area is better, it's closer to them paying half.
Save money
So let's say that you're one of the lucky people that have excess money when you look at your plan. Don't plan how to spend it. I recommend opening another bank account, setting up a regular automatic transfer, and then acting like the money isn't there.
I started doing this when I was in the military and used to get blindsided by holiday shopping. I figured out that if I could put $25 a month into another account, I would have $300 at the end of the year for gifts. That's a big chunk of money when you're semi-broke and it hits you all at once. So having that in reserve was useful.
Again, using quicken, you can see what you can put aside without completely depleting your checking account.
Also, any pay raise you get, just don't increase your standard of living, and set that money aside. It will be a great emergency fund.
Buying stuff.
I was STUPID when I got out of the military. I lived in a place that was furnished when I was in, so when I got out and had money, I bought some nice furniture. I think I blew around $8K thanks to Raymour & Flanigan. It was basically Afghanistan deployment money. I bought a nice table, chairs, a mattress and some other stuff, all for way too much.
You know where you can also get some nice stuff? Craigslist, which is where I'm currently trying to sell that nice table for a lot less than I bought it for. $200 Ikea bed frames in very good condition are going for $50. $150 for a solid table and 4 chairs that someone else paid 800 for, and they may be in great condition.
Unless there is no way to get it cheaper, I don't by anything that's not on sale, and even then it's usually what I need.
There are some places where you usually don't want to go cheap, like shoes or a mattress, or tires if you own a car.
Buy things that will last but you don't need to do it all at once. You can always upgrade stuff later, but just make sure that you don't spend a lot on the placeholder stuff.
Eating
We all need food. And we all feel like there's no time. Cooking is not that hard. Yeah, you may screw up a recipe at first, but you will get better. Most meals you can make in 30 minutes, and if you want to get really efficient, you can do things like taking a day for weekly meal prep (I don't. I should but I haven't really gotten to it).
You can cook scrambled eggs like Gordon Ramsey in under 5 minutes. Your cost: 40 cents. The cost of a ham, egg, and cheese sandwich is maybe $1.25 if you do it yourself.
Buy cookbooks geared toward simplicity.
This was my first cookbook: Cooking Outside the Pizza Box. For many of us, it's aptly named. Other ones that I have and would recommend: Healthy Cooking for Two (or Just You) and Easy Menus for Dining In.
If you want to be really cheap, just go to http://allrecipes.com/ or some similar website.
I also invested in a good chef's knife (over $100), but a mediocre one for $30 will be okay, just realize that you will need to sharpen it a little more frequently (like every 3 months), so maybe invest in a whetstone and learn a skill. Sharp knives make cutting so much easier.. A dull knife means you use more force, and are more likely to cut yourself if it slips.
Most of your meals you can make for a fraction of the cost that you pay for it outside. Coffee is the easiest. Yes a coffee maker is pricey, but if you get one that has something like an automatic function, you can get one that you can set up to make you coffee in the morning so you can save time on your prep.
Something like this and a thermos will be invaluable.
Hanging out with friends
I like to be social. Unfortunately, there are few places in NYC that you can hang out, and most of them serve food and drinks, and it's going to cost you. Bars are just convenient. Also, you can meet new people there.
However, if you or a friend have a nice space, maybe try hosting gatherings. You could even do a potluck. The drinks are cheaper, people can bring food, and if it's your place, when the night ends everyone leaves and you're right next to your bed.
I had to break this into another comment due to per comment character limits.
The following previously belonged to the above comment, but was moved here due to the above mentioned limts.
> Something you can do now: Build a filament drybox. Seriously, some filaments such as certain Nylons can go bad in just a few hours, depending on ambient humidity levels. All filaments are susceptible to moisture absorption, and ideally should be kept in something like a Spannerhands holder, even while printing, but at worst you should store them in a big plastic tub with silica gel beads to keep them dry.
> If I had to give one last tip, don't stock up on too much filament yet! Seriously! I thought I would be printing mostly in PLA but now that I've had a few weeks to work with it, I've learned I prefer PETG more, and now I have so much extra PLA! I'm sure I'll find something to do with it, but for my final tip I would add "And get a good variety!". Services like MakerBox (referral) let you try a bunch of different filaments on the cheap. It's not a ton of each filament (about 50g), but I love the variety of materials and colors.
Original second level comment begins:
Final Tips: Bonus Round!
There are tons of other accessories you can get ahead of time. None of these are necessary, but are small things you might end up using (or wanting to try :P), and should help get you started getting a wishlist together. Besides the ones mentioned in this comment (and the one that precedes it) already:
Edit: Upon rereading my comment I realized I have a problem.. I own every product I just listed..
^^Except ^^for ^^the ^^nozzles ^^kit ^^so ^^it's ^^not ^^that ^^big ^^of ^^a ^^problem, ^^right?... ^^Right?!
Ohm's Law
Current = Voltage / Resistance. Probably the single most important thing you need to understand to keep yourself safe. Steam-engine.org is a very handy site for rebuilding, and it has a simple Ohm's Law calculator. This will allow you to determine the current (amps) and power (watts) at a given resistance and voltage. When determining the current for a build on a mechanical, you always want to use 4.2v for your voltage setting since that will be the voltage of the fully charged cell. Setting your voltage as such and lowering the resistance on the Ohm's Law calcultor, you will see the current increase. You want to keep the current below the max continuous discharge rate for the battery, and just to be safe, I like to keep my amps at least 10%-20% below that max continuous rating. So you can see that with a fully charged battery at 4.2v, and a build with a resistance of 0.21Ω, you would be right at 20A.
http://en.wikipedia.org/wiki/Ohm%27s_law
http://www.steam-engine.org/ohm.asp
Batteries
If you are mainly looking to sub-ohm, don't bother with 18350 or 18490/500 batteries, and stick with 18650s. The most important part of the battery specs for safe sub-ohm vaping is going to be the max continuous discharge rating for the cell. A few months ago, I would have only suggested Sony VTC4s or VTC5s, due to their 30A continuous discharge rating, but due to price gouging and a rash of fakes due to limited availability I don't think those are going to be your best option. Next best thing at the moment is either the Samsung 25R or the LG HE2. Both are solid 2500mAh batteries with 20A continuous discharge.
http://www.illumn.com/batteries-chargers-and-powerpax-carriers/batteries/18650-samsung-inr18650-25r-2500mah-high-discharge-flat-top.html
http://www.illumn.com/batteries-chargers-and-powerpax-carriers/batteries/18650-lg-icr18650he2-2500mah-high-discharge-flat-top.html
Charger
The most important part of your gear to prevent your house from burning down, definitely don't skimp on the charger. I have an Efest LUC v4 which works wonderfully, and the Nitecore i-series chargers are also great, and you can't beat the price for the quality.
http://www.illumn.com/batteries-chargers-and-powerpax-carriers/chargers/efest-luc-v4-charger.html
http://www.illumn.com/batteries-chargers-and-powerpax-carriers/chargers/nitecore-intellicharge-i2.html
http://www.illumn.com/batteries-chargers-and-powerpax-carriers/chargers/nitecore-i4-intellicharger-2014-edition.html
Ohm Meter
Having an ohm meter is a must have when rebuilding. This is going to tell you what the resistance of your build is once you get it on your RBA. The last thing you want is to vent a battery in a mod you are using, and if you have a short in your build, venting is definitely a possibility. You can just get yourself a cheap multimeter from some place like harbor freight, but I prefer the ohm meters that have the 510 connection. Less hassle, and it gives you a nice solid base for building on your RBA.
http://101vape.com/meters/170-ohms-meter.html
Wick
There are a number of different wicking materials in use, but the most common is cotton. I started out using organic cotton balls from my local pharmacy, but now I only use japanese cotton pads. The japanese cotton has blown up, mainly because of its form factor (very easy to cut strips to size from a square pad) and excellent wicking ability.
http://www.sephora.com/pure-cotton-P300602
http://www.cvs.com/shop/baby-child/bath-skin-care/cotton-swabs/cvs-100-cotton-triple-size-organic-cotton-balls-skuid-405326
Wire
There are also some different types of wire available, but the most used (by far) would have to be Kanthal. I generally suggest picking up a couple different gauges to start. At the very least, I would say grab some 28ga and 26ga. If you are planning to try building below something like 0.4Ω, I would also grab some 24ga.
http://www.lightningvapes.com/products/kanthal-a1-resistance-wire
Wire Snips
Soemthing to cut your wire, whether it is a small pair of wire snips, or even a set of nail clippers will work for most common gauges of Kanthal.
http://www.amazon.com/Hakko-CHP-170-Stand-off-Construction-21-Degree/dp/B00FZPDG1K/ref=sr_1_1?ie=UTF8&qid=1418241774&sr=8-1&keywords=wire+snips
Coil Jig/Mandrel
You are going to need something to wrap your coils on. A lot of people use drill bits since they have standardized sizes and that will help you determine (using something like http://www.steam-engine.org/coil.asp) how many wraps at a given inner diameter will give you the resistance you are looking for. You can also get small coil jigs that come with a set of rods of varying diameters. I prefer to use something like a jump ring mandrel. It has multiple diameters on the one tool to wrap on.
http://101vape.com/accessories-/362-rba-coil-jig.html
http://www.fasttech.com/products/0/10010836/1926001-vaping-coil-winding-jig-tool-for-rebuildable
Mechanical Mod
This and the section about RBAs is going to be very subjective. Plenty of mech mods out there function perfectly well, so when it comes to picking your mech, a lot of it will be aesthetics and form. In the end, all the mechanical mod is is a metal tube with a switch at one end and a 510 connector at the other. The two things that I tend to focus on when looking at a mech mod are how well the button functions (nothing more annoying to me than a crunchy button), and will I be able to easily adjust for battery rattle. There may be other feature that you are more concerned with, like does the unit have some sort of locking ring to prevent unintentional firing of the mod. Something to definitely consider if you are going to be carrying the mod in such a way that it could accidentally fire without your knowledge. I guess I will just link some of the mods that I prefer, like the SMPL, Pegasus, Colonial, and Vanilla. And I may as well throw a link in there for a Nemesis, since it is the go-to suggestion for first mech mod, and still a solid mod. Also, keep in mind that most if not all of these mods come in multiple color and/or metal options, including copper, brass, and stainless steel.
http://www.fasttech.com/products/0/10010820/1924800-smpl-style-18650-mechanical-mod
http://www.fasttech.com/products/0/10008266/1739802-pegasus-style-mechanical-mod
http://www.fasttech.com/products/0/10008332/1910000-penny-v2-style-18650-copper-mechanical-mod
http://www.fasttech.com/products/0/10008560/1776902-vanilla-style-mechanical-mod
http://www.fasttech.com/products/0/10009160/1448300-nemesis-style-mechanical-mod
RBA
So when it comes to rebuildable atomizers, you basically have two options. Either you will be using an RDA (rebuildable dripping atomizer) or an RTA (rebuildable tank atomizer). Your RDAs have you dripping juice directly onto your coils with relatively little juice in reserve, whereas your RTAs have a tank that is filled, and then juice is wicked from the tank to the coils. As a general rule, RTAs give you the ability to have to fill/drip less often, but tend to be more restrictive on build space and airflow. On the other hand, you will have to repeatedly drip juice onto your build as you vape with an RDA, but will have more options for different builds and be able to provide the necessary airflow for hotter builds. Again, these are just general rules, as specific models of RDAs and RTAs have different features. As far as breaking down the specifics on all the different models of RDA and RTA...yeah, there are just too many to even start. Recently, I have mainly been using a Mephisto v1 clone. I like having the ability to run either dual or single coil, I like the changeable airflow rings, I like the available airflow, the well isn't too small, and it has large post holes and screws. I am also going to throw in a link for the TOBH, since it is the obligatory "first dripper" suggetsion. Since this single item is probably going to do the most to affect your experience, I would suggest just taking some time and looking at what RTAs and RDAs are available, and then check out some reviews of them on YouTube.
http://www.fasttech.com/products/0/10009074/1802100-mephisto-style-rebuildable-dripping-atomizer
http://www.fasttech.com/products/0/10007863/1716603-tobh-atty-v2-style-rebuildable-dripping-atomzier
Hey! Great questions! And good on you for asking them!
Part I
------
------
So first off, building your own coils is ABSOLUTELY the way to go, it is much cheaper, more customizable, a better vape, and just plain fun. You are going to need a few things though.
Now that you have everything you can go to town! Remember, all of this is just my personal opinion and experience, do what works for you.
------
Planning: The Kanger works best at around 1.19 ohms at 50 watts but can go as low 0.4 ohms. To get an idea of how factors like different wire gauges or multiple coils will affect your resistance try simulating it on this page.
------
Wire Work: There are plenty of videos and tutorials out there for different coils but my advice would be to start simple. Once you can build a coil that has good tight wraps and learn how to remove the hot spots from it and are generally just comfortable coiling then move on to more fancy builds. The advantage of (almost all) advanced coils is more surface area for better wicking and juice retention, there are also the offbeat ones like staged (dual) heating. I am a big fan of simple twisted wire coils, they are incredibly easy and work much better than simple single wire coils.
--------
Prepping The Wire: When you pull the wire off the spool be careful, if you don't hold tension the whole thing is prone to come unwrapped rather quickly. Work in longer lengths than you will actually need, screw ups are frequent and wire is cheap. Cut off a length of wire and you'll notice that it isn't exactly straight, or really at all, but this has an easy fix.
To straighten your wire: At one of the wire make a small 90 degree bend, insert this end into your drill with the wire centered and the bend sticking out the side, the bend allows the pincers to grab onto the wire. Grab the other end with a pair of pliers and apply light pressure (too much will cause the wire to snap). Start up your drill noting the direction it is spinning. It doesn't take more than a second or two, if the wire snaps it has spun more than enough (it tends to snap at either end but can be in the middle in which case you have to start over).
Annealing the wire: Thin wire like we use tends to be 'springy' making your coils unwind when you release tension, the thinner the wire the worse it gets. But again I have an easy fix. Holding the wire straight with tension, either with a vice grip or the drill or pliers or whatever you have, use a BIC lighter or a small flame to apply heat along the length of the wire. You want it to just start to heat up, not glow orange, if you see smoke coming off the wire move to another area because that one is done. Some people recommend dunking the wire in water when done but I just let it air cool.
[Optional] Making twisted wire: Take however many strands you wish to twist up and line up all of the ends with the 90 degree bend, cut the other end so that they are all equal lengths. Before inserting into your drill I find it helps to make a few 'starter twists' to keep the wires even and from coming undone. Remember how I said to make note of the direction your drill is spinning? Well it is time to spin in the opposite direction. Clamp your wire down in your pliers (not the drill) with the bent end sticking out a few millimeters. Grabbing the wires by the bends twist them by hand a couple times in the same direction as your drill is now spinning (opposite of the direction you used to straighten the wire). Now you can insert them into your drill. Start the drill slowly and don't go past a medium-high speed overall or the wire is more likely to snap, if it does it will 'unstraighten' on the end near the drill and become a mess to work with. If you are using a long length of wire (I would say over 8" but YMMV) it is best to release the wire halfway through and insert the opposite end into the drill (you do not need to reverse the direction of spin on the drill, it will work as is) because the end nearest the drill will twist the fastest this will provide a more even twist across the entire wire. It is totally up to you how much you want to twist the wire, if it snaps though it means you either went too fast on the drill or it has reached its limit of twisting (you can usually reinsert it and get a few more seconds of twisting out of it though).
-------
Building a coil with the linked jig: I'm only going to cover using the jig I recommended up above because if I didn't I would be here for all eternity, ask 10 people how to make a coil and you will get 12 answers. That jig is super easy to use, cheap, and makes coils better than you ever will be able to by hand.
Start by selecting the inner diameter of your coil, the jig provides nails ranging from 1mm to 3mm. Unscrew the cap from the base unit, insert your chosen nail, and screw the cap back on over it. Insert your wire from the top through the small hole on the base and grip down on the end of the wire with your thumb, you only need to pull the wire down to where the cap screws on to get plenty long leads. Taking the other end of the wire (the long portion sticking out the top) give it a small start around the nail, a quarter or half turn is all it needs. Put the piece with the corresponding size hole (the piece you the nail is originally stored in / marked with the sizes) over the top of the nail, push it down making sure the wire is between the screw and the nail. Twist the corresponding piece to wrap the wire around the nail, this requires almost no pressure if you do apply pressure you will end up with a pancake and not a coil.
Once you have however many wraps you want push down on the base piece and the corresponding piece to put pressure/sandwich the coil. Hold this for at least 30 seconds to a minute, it will help tighten the coils and keep them from unwinding. Some people pull on the wire leads with pliers to tighten them up but I do not like doing this personally because it changes the number of wraps as well as causes the leads to be made from part of the coil (as in not straight leads).
-------
Mounting your coil: Insert your coil leads onto your post and tighten them down. Be careful about over tightening or having your leads at strange angles as this can cause the coil to bend such that on one side the wraps do not touch and on the other overlap, it can also cause other weird deformities that ruin all the work up to this point. Roughly position your coils, using the nail from the coiling rig will help to keep the coil from getting bent. Make sure the coils are not touching anything as this will cause them to short. Clip your leads.
With your mod on a low to medium power setting begin to slowly pulse the device until the coils begin to glow. You want them to glow from the inside out, evenly, and at the same time. This will pretty much never happen right away. You are looking for spots that heat up unevenly. Using your ceramic tweezers squeeze and manipulate the coils, this is hard to describe but you'll understand it right away I'm sure. You can also use the coil jig nail to turn the coil and tighten the wraps (i.e. if the coil was originally inserted parallel to the deck insert the nail and twist it upwards to a 45 degree angle or even vertical, the amount varies from coil to coil but you can tell very easily by looking at it as you twist).
-------------
Permalink to Part II: https://www.reddit.com/r/RBA/comments/3xo2lv/rba_coil_question_newbie/cy6qbta
edit: Oh, and for those curious, I am currently running 3mm quad coils made from 2 strands of 32awg kanthal at 14 wraps each on the Sub Ohm Innovations RDA and the Kanger KBOX. They read in at 1.4 ohms and I fire them at 35-40 watts.
Seems pretty legit, but Yohimbine is cheaper at smartpowders. Although the chocamine dosage seems a tiny bit low because the only study I've seen dosed at 1g/day.
-------------------
You could make it a year supply if you wanted?
6/9g Yohimbe for $12/18, 16.5/25mg a day
20/40g Theanine for $7/14, 55/110mg/day
400g Inositol for $20, 1.1g/day
250g Chocamine for $25, 685mg/day (a bit closer to 1g I guess)
-----------------
Things to potentially add:
500g Choline Citrate for $12, 1.4g/day. It's good for exercise related stuff too and you know how much silvy loves Choline.
200g/400 Tyrosine for $8/17, 0.55/1.1g/day. It's a precursor for dopamine and norephinephrine, great for a pump and also helpful too supplement during times of stress and such.
500g Taurine for $8, 1.4g/day. It's great for the heart (potentially preventing any problems associated with Yohimbine or even Tyrosine), and an anxiolytic too. Definitely one of the top supps I'd recommend you consider adding.
36.5/73g of Caffeine(but you'd have to buy 400g) for $12, 100/200mg/day. Or you could alternatively just start drinking more tea (less coffee though =P)
500g of ALCAR for $17, 1.4g/day. It's a great 'kinda stimulant', great for the brain and heart, and also helps you better burn fuel (both fat and carbohydrates). It also improves exercise performance long term if you use it long enough, helps you retain muscle mass and lose fat mass. There's also a study in rats showing that caffeine+alcar+choline = weight loss, but I'm sure it was probably mostly the caffeine.
Total cost for the year with all these additions: $121-143, or $0.33-$0.40/day.
------------------------------
In terms of pairing though, the things I would add together:
Yohimbine, Chocamine(although you may want to check with silvy if this is okay to take pre-workout, I don't know enough about it), Caffeine(optional), Tyrosine(optional but recommended), Choline(optional but highly recommended), and ALCAR(optional but recommended) all taken preworkout.
Theanine, Inositol, and Taurine(optional but highly recommended) at night, like an hour before bed. All have relaxing effects
-----------------------
Oh also, for $8 you can get these glasses that'll help you get to sleep. Just throw them on a couple of hours before sleep and be surprised that glasses that make you look you like a total douchenozzle also help you get to sleep. But you're already used to that right, with your douchey kettlebell on your desk, and douchebag 300 pound bench (congrats again!). Also, flux (which I'm sure you've already installed because I recommend it to the same people like twice a week).
----------------
That of course is all just for stress/fat loss/appetite suppressant type stuff (but of course a lot of them are useful for a bajillion things too). If you wanted to add other crap (for workout) so you stop buying at GNC-yourwalletbecomeempty.
500g/1000g of Beta-alanine for $17/34, 1.4/2.8g/day (although silvy uses I think like 5g a day). It's great for improving long term exercise performance (endurance stuff), and I remember reading a rat study showing taurine and beta-alanine having stress relieving/anxiolytic effects together.
1000/2000g of Creatine for $12/24. 2.8/5g/day. This one doesn't even need an explanation =P.
Pushing your total cost to: $150-201/year, or $0.41-$0.55/day (not including the glasses).
You can stick beta-alanine and creatine into the preworkout mix obviously, although I'm still not 100% sure if chocamine should be in there. But I know a lot of people toss cocoa powder into their preworkout shake, so there's that.
-----
/wall-of text
You're new to the industry, and new to cooking. Quite frankly, your skills are at the point where you won't really have a huge preference one way or the other, and you won't perform any differently with a 50 dollars knife versus a 5000 dollar knife. Similarly, fancy whetstones, glass stones, sharpening systems, etc won't make a difference either.
Right now, get the basics. Good solid stuff that's relatively cheap so that you can figure out what you like, and don't like. You have 1300-1500 to spend-- Good. Save it for now. Industry doesn't pay much. Here's the basics to start you out that has the best bang for buck, and gives you some different styles and feels to try out, so that you can figure out what you'll eventually enjoy the most. If you want more information on any of the knives, let me know.
https://www.amazon.com/Tojiro-DP-Gyutou-8-2-21cm/dp/B000UAPQGS
This is a knife that's full tang, VG-10 steel(same as Shun), and has decent heat treat. Western style handle, with a westernized santoku Japanese style blade. At 60 bucks, it's a steal.
https://www.amazon.com/Victorinox-Fibrox-45520-Frustration-Packaging/dp/B008M5U1C2
Ubiquitous western style knife. Steel is the same as the more expensive Wustofs, Mercers, and anything that claims to use "German Stainless Steel". It's all x50crmov15, with slightly different heat treats. Victorinox does it right.
http://www.chefknivestogo.com/kohawagy21.html
HAP40 high speed tool steel. This is the high tech stuff used in blade competitions. Japanese style handle, maintains a really sharp edge for a really long time. A little more expensive, but that kind of steel for that price is really, really worth it.
https://www.amazon.com/Winco-Chinese-Cleaver-Wooden-Handle/dp/B001CDVXUK/ref=sr_1_7?s=kitchen&ie=UTF8&qid=1485154695&sr=1-7&keywords=cleaver
Look, a cleaver's a cleaver. You don't need fancy steels or anything-- You just need a whole lotta force behind a whole lotta steel. Hone and sharpen often, and this'll do great for you.
Speaking of cleavers, though...
http://www.chefknivestogo.com/cckcleaver2.html
Chinese cleavers are awesome. They're not actually cleavers though, don't use them on bones and the like-- They're the Chinese version of the all purpose chef knife or gyuto knife. Chinese chefs are expected to be able to do everything with this knife, from fileting to tourne to peeling to chopping to brunoise, so they're actually quite versatile. Speaking of which-- This also fills in for the Japanese Nakiri role. Tons of fun to use.
https://www.amazon.com/King-Sided-Sharpening-Stone-Base/dp/B001DT1X9O/ref=sr_1_1?s=kitchen&ie=UTF8&qid=1485154779&sr=1-1&keywords=king+1000+6000
This is a fantastic stone, one that Master Bladesmith Murray Carter uses. I ran a knife sharpening service, and this is the one I used for most knives as well. Since you won't have to deal with weird recurves and tantos and nightmare grinds and the like that can show up on folding knives, this will serve you very well.
https://www.amazon.com/dp/B00004WFU8/ref=twister_B010SQ9IXK?_encoding=UTF8&psc=1
This is in case you get some gnarly chips on any knives. This'll get it out quick and easy. Bonus-- Use it to flatten and maintain your King stone. This and the King stone is all you really need for sharpening. You can easily get a shaving edge with it.
Besides those, stick with what you got in the Mercer kit for the specialty knives. You really don't need fancy versions of those. You also really don't need a serrated utility knife at all. In the professional kitchen, the three knives that saw the most work were the overall chef knife(even for fileting and some light butchering), the 4 dollar Victorinox paring knife(quick and easy to sharpen), and the Mercer tourne knife.
Buying all this will amount to 431.31, giving you a combination sharpening stone, a flattening/reprofiling stone, and 5 fun knives of all different kinds to play with, at a fraction of the cost. You'll notice I didn't put any Super Blue or White #1 steels in there-- That's because A) They're more difficult to take care of, and B) They're really overpriced for what they are, simply because their "japanese" moniker makes people think they're super laser swords from a land of secret steels(they're not). The HAP40 steel beats these steels in pretty much every category.
Hope you found it helpful! Have fun with whatever you decide to choose.
> I originally was considering something like Lava Cables or maybe even the Evidence SIS kit, but those seem to be unreliable enough to give me pause. So, now I’m thinking that I’ll buy some plugs and cable and solder them myself (important note: at present I don’t know how to solder, but it doesn’t seem complicated, especially since it’s only cables).
Seriously, its way easier than you think. you can honestly learn how to solder going from absolutely zero experience to being able to solder cables in under a half hour. Id actually bet it takes less time then having to learn how to use the solderless solutions, which are a massive hassle.
Just last month I taught my friend how to solder and he went from knowing nothing to putting together a sweet diy keyboard in a single night.
Its also dead cheap to solder your own cables. Even the more "premium" cables come in under $1/ft and you can get pancake plugs off tayda.com for $0.50 each. Compare that to evidence charging 8$ per plug
so some quick math to maybe convince you some more
Evidence audio SIS plugs = $8 each.
pancake plugs = $0.50 each.
you need 48 plugs
848= $384 for the SIS plugs.
$0.5024= $24 for pancake plugs.
And then to add to that, the soldered plugs are going to be objectively more durable.
Also heres a little copy paste I made to help you know how little you'd actually need to spend to get started soldering. But if you have any other questions id be happy to help
if you don't plan on doing much soldering in the future and it's more of a one time thing, there's really no reason to get anything bore expensive than this. I spend easily 60 hours of solid soldering on the earlier version of this (same thing just without the leds) and I only ever replaced it because the tips were getting worn out (although you can replace the tips for cheap) and because I thought I deserved a more solid iron considering how much soldering I do.
if you do plan on doing lots of soldering in the future then I would recommend getting something other than a weller, they're honestly just one of those things that for years have been the industry standard but honestly have gone down hill. I've used a dozen different wellers, some old some new, some cheap some costing 300$ but none of them are really good. I, along with almost everyone in electronic repair industry like Luis Rossmann recommend a brang called hakko. I use atd absolutely love the hakko fx888d. It's really honestly just magic. It heats up to 700+ in under 30 seconds, with a live temperature readout (my old weller would take close to 15 minutes), atd the tips are really just magic, they just don't get corroded at all like every other brand I've used.
It's also worth mentioning for anyone new to soldering that the type of solder used makes a world of difference. What your going to want in rosin core, leaded solder (preferably 63/37 but 60/40 will work too). You want rosin core because it makes it a ton easier to not have to worry about flux, atd unless your doing really tiny electronic you won't need flux beyond the rosin core. You want leaded solder for a few reasons. First off, it melts at a way lower temperature (leaded solder melts at about 360f ish where lead free is closer to 460-480f, but saying that that's not at all the temps you wound use to actually solder at, it ranges from 400 - 700f depending on the application ). Leaded also has a way better surface tension, and melts more evenly, all this really just adds up to making it 100 times easier to work with, ESPECIALLY if you need to desolder anything.
Greetings all!
My main suggestion to anyone wanting to get into vaping it is to skip the ego-starter kits, MVP2 (cheapish Vv or Vw boxes), non-rebuildable tanks (Protanks, Nautilus) and just drive right into the mechanical mod / box mod world. I say this because the vaping experience is so much better with rebuildables. I went with the all of the above, and I personally wished that someone would’ve told me to just dive right in, because all that stuff is sitting around not being used. The people that I’ve talked to are typically hesitant to do so because of the coil building, but there are so many YouTube tutorials, suggestions and information on /r/RBA and /r/electronic_cigarette that it’s much easier than it seems. Anyway, if I were to start all over again, these are the things which I’d buy.
Must Haves
These are the things which I consider essential to starting off the on the right foot. I’ve purchased a lot of things, and these are the things which I suggest to my friends. Most of the links are from Amazon, because it’s what I’ve primarily used.
Battery - Sony VTC5
http://www.eciggity.com/2-pc-sony-18650vtc5-2600mah-30a-battery/
These are pretty much the standard when it comes to “safe” batteries. They’re affordable, good amp limit and have been recommended many times. If you purchase from the link above, they also give you a plastic carrying case!
Charger - Nitecore i2 or Nitecore i4
http://www.amazon.com/Nitecore-IntelliCharger-i4-Battery-Charger/dp/B005UAI372/ref=sr_1_1?ie=UTF8&qid=1404287334&sr=8-1&keywords=nitecore
Affordable, reliable and these won’t “overcharge” your batteries. The difference between the i2 and i4 is the amount of batteries they can charge at a single time. They also have a new fancier one out, called the Digicharger D2 and Digicharger D4. Those are nice because it has a LCD panel that displays a lot more information than the i2 and i4. I personally use an just an i2.
Mechanical Mod - Stingray
http://www.vaperoyalty.com/hcigar-stingray-mod-stainless-steel/
Now, 90% of what is suggested for an actual mechanical mod is going to be of personal taste. The Stingray is the “older brother” of the Nemesis. This is what I purchased when I first started out vaping. The unit is very easy to break apart, clean, has a locking ring, has a floating 510 connection and venting holes in case of a battery leak. Almost everyone I know has a Stingray.
Rebuildable Dripping Atomizer - Magma by Infinite
http://101vape.com/rebuildable-atomizers-tanks/309-magma-atomizer-clone-by-infinite.html
One of the best purchases I’ve made. The juice wells are very deep compared to everything else on the market (that doesn’t have a tank system). Threads are nice, easy to build on, post holes are large and the air-flow is easy to manipulate. You can run this on a single coil or a dual coil. Blows almost all the other RDAs I have out of the water. This is my main RDA.
Organic Cotton - Maxim Hygiene Products Organic Cotton Balls
http://www.amazon.com/Organic-Cotton-Balls-Triple-count/dp/B00E8T2X36/ref=sr_1_3?ie=UTF8&qid=1404288337&sr=8-3&keywords=organic+cotton
I suggest using un-bleached, organic cotton. Some people take it one step further by washing them, I think thats taking it a bit far and I don’t do it. You can pick them up from any convenience store or supermarket (CVS, Walgreens, Target, Whole Foods), a 100 count will last you AGES.
Kanthal - AWG A1 26 Gauge
http://www.amazon.com/Kanthal-Gauge-100ft-0-40386-Resistance/dp/B00HALND7Y/ref=sr_1_1?ie=UTF8&qid=1404288659&sr=8-1&keywords=kanthal+26
I like to use 26g kanthal wire for my dual coil builds. 26g is a bit thicker than what a lot of people suggest (28g), but for me, because it’s thicker, it’s easier to work with.
Screwdrivers - Stanley 6 Piece Screwdriver set
http://www.amazon.com/gp/product/B00009OYGV/ref=oh_details_o05_s01_i02?ie=UTF8&psc=1
The screwdrivers which come with your RDAs are short, small and crappy. I like these screw drivers because they come in a variety of sizes and you do not need to mess with a drill-bit. What I really like about these, is at the end of the drill bit is a small little ledge (can’t think of a better word), where you can push your coil and scrunch it up a bit.
Ohm meter / Multimeter - Any generic ohm reader or Innova 3300
http://101vape.com/meters/170-ohms-meter.html
http://www.amazon.com/gp/product/B001O1X65A/ref=oh_details_o02_s01_i01?ie=UTF8&psc=1
You can use a multimeter to do basically the same thing as an ohm reader. The multimeter has an added benefit of being able to read the volts are your battery as well. I have both, but I prefer to use a “regular” ohm reader. This video below can teach you how to use a multimeter for that purpose.
https://www.youtube.com/watch?v=wgXAmPBAO5g&index=2&list=LLU7AM2JUxXCrj4TSCDQDffw
Optional items
Things that I’ve purchased that you can probably substitute with something in your house. They’re nice to have, most people have these, but I decided to link these anyway, because I didn’t have some stuff (my scissors were too large).
Scissors - Generic surgical scissors
http://www.amazon.com/Amercian-Diagnostic-Corporation-3425-Stainless/dp/B000GHIUR2/ref=sr_1_5?ie=UTF8&qid=1404289491&sr=8-5&keywords=surgical+scissors
To cut your cotton. Small, sharp and gets the job done.
Tweezers - Ceramic tweezers
http://www.fasttech.com/products/0/10007588/1655800-heat-resistant-stainless-steel-tweezers-for-e
Allows you to hold your coil together and torch them without heating up the tweezers.
Wire cutters - Hakko CHP-170
http://www.amazon.com/gp/product/B00FZPDG1K/ref=oh_details_o03_s00_i02?ie=UTF8&psc=1
For cutting your kanthal off that spool!
Atomizer holder - Plano 23630-01
http://www.amazon.com/Plano-23630-01-Stowaway-Adjustable-Dividers/dp/B000E3FKVC/ref=sr_1_4?ie=UTF8&qid=1404289861&sr=8-4&keywords=plano
You’re gonna buy a bunch of atomizers. Everyone buys a bunch. You’re not going to be able to help yourself. I use this plastic case to keep everything neat and separated.
Building deck - Tenderfoot Stands
https://www.facebook.com/tenderfoot.stands?fref=ts
You don’t need this. But it makes building RDAs easier. You can also place your juice filled RDAs on here.
Torch - Mini Jet Flame 503
http://www.amazon.com/gp/product/B007A9YSPW/ref=oh_details_o00_s00_i00?ie=UTF8&psc=1
This will help you get those coils nice and tight, without having to fire off your mechanical mod.
Battery Case - Bluecell
http://www.amazon.com/gp/product/B007Q6PJO8/ref=oh_details_o03_s00_i00?ie=UTF8&psc=1
If you don’t buy the batteries from the link above, you’re gonna want a battery case. Do not keep your batteries loose in your pocket or floating around your bag. They can come in contact with something metal and potentially damage the battery.
Strap in, this got kind of long! I hope it's useful to someone.
I too have the "need a lot of bins and boxes and whatnot" situation because of my and my partner's hobbies. I sew and crochet and embroider and work with leather, and he works with electronics and 3d printers and so on. We share a small (10' x 10') room for our workspace and all of our most commonly accessed supplies.
Being someone who gets fixated on ideas frequently, I suggest that you open up your search to other options other than interlocking boxes. The reason I say this is that I am surrounded by bins and have been working with various sized bins to access things for a long time and I am tired of them. The problem is similar to what many other posters have mentioned: Getting items out of the boxes (even if they are small) is an Ordeal, especially if you have multiple boxes out, or if the box is very full and hard to put back together.
In general, a rule of thumb is to think about how you'll put your item away rather than how you'll access it. When we want access to something, it doesn't seem like a big deal to undo bins, bags, boxes, slide heavy things around, etc. because we get a reward at the end (yay, it's the thing! shiny!). After that, the idea of undoing all that stuff seems like a pain in the arse, and we just don't want to do it? (and what if we might need another thing from that bin? So, consider how you'll put it away, rather than how you'll get it out when designing a storage solution.
So, I am now moving away from the lidded box approach and encouraging my partner to do the same. Having watched Adam Savage's video describing first order retrievability, I am moving in that direction (although not yet to his ninjery level). Here's the video: https://www.youtube.com/watch?v=TWQAYfGxsPE.
I suggest the following types of storage for smaller objects. Bins still work OK for larger objects but someday I'd like to move away from that too.
5 knives
Above is a link to 5 folding knives that may or may not fit what you're looking for and 4 are well within your price range of under $120. One is slightly above at 139.00 on Amazon, but the Chrome extension called Honey is currently allowing a $10 discount. All are made by Kershaw/ZT.
NOT PICTURED but I do also have the Kershaw Blur which Amazon is listing at ~$35 currently which is HIGHLY recommended even though it doesn't have a flipper. It's spring assisted opening and a very comfortable grip for larger hands. That price is so good, they're normally $55-$60 that I'm grabbing one of them again as an extra.
I could list like 4-5 more Kershaw knives but my comment is too long already. If you would prefer more variety in recommendation, Spyderco has some solid options but if you want to go BALLS DEEP into tacticool, one of my most valued knives because it was bought for me as a gift was the Cold Steel AK-47. This knife is quite a bit larger than the ZT shown but is nearly the same price at ~$125-130 on Amazon. You might be able to find it cheaper on Ebay. Be careful though, there is the regular and mini version!
Ya I could give some recommendations.
First, that 200 lumens claimed by Black Diamond is more than likely inflated. How long do they claim that lasts?
Second, a lot of people who enjoy the outdoors believe that a red light is best for keeping night vision. Over at r/flashlight it has been debated a lot and the general consensus is that a "sub-lumen mode" is better than a red light for keeping night vision. That would be a mode that is below 1 lumen, and I could not agree more.
Now for the recommendations (Please note I did not have time to find the best deals out there, so please look around for better pricing. Also, I recommend for all the below recommendations that you go with the WARMEST tint.):
Wowtac A2S- Well regarded as one of the best starter headlamps out there at a great price. Comes with a rechargeable battery.
Skillhunt H03- Another highly praised light at a decent price. Does not come with a battery. This light would require a battery that could be charged or a battery with a charger.
Olight H1R Honestly, I don't know much about this one as I am not a fan of Olight. However, Olight is a well regarded brand and I gurantee many people out there enjoy that light.
Armytek Wizard Pro- My personal favorite of the group. Very well regarded light with an amazing beam pattern and vast range of setting. Although a little expensive, this is an amazing light I have no problem recommending. Also check out the Elf and the Tiara
Zebralight Again, I don't know much about Zebralight. However, most people over at r/flashlight debate whether Zebralight or Armytek makes the best headlamp. If you like Zebralight and want a specific model recommendation, check over in the sub reddit.
There are a lot more out there. u/parametrek has created a database where you can put in your requirements and it will show you basically every light under the sun that is a good fit. Check it out http://flashlights.parametrek.com/index.html
Pretty much any single cell 18650 light will do that with the utmost ease. The best way to describe the performance of a single 18650 1000 lumen light that hasn't used one is that it's brighter than you expect it will be multiple times over.
The wowtac a2s in neutral white is a great low cost high quality light. It's a headlamp, but it can be removed from the headband for handheld use. Being able to do both is very useful.
Someone else reccomended the wowtac a1s. It's great too. Its handheld with a better user interface. Better at handheld use. I just reccomend the headlamp since it does both and you might end up using it more than you expect.
Make sure to get the verson with the s at the end, the plain a2 is a 500 lumen cheaper model and the amazon page tries to merge them for some reason.
It comes with a usb rechargeable battery, but i consider it a freebie, not something to depend on permanently in my opinion. The charger built into the battery gets kinda hot and the cell is of unknown quality and true capacity. The ones i gifted to people at Christmas are still going strong though with heavy use. You could very well just buy the light and see how the included battery does.
If you decide on a higher quality battery get an NCR18650GA and an xtar ant mc1 plus. This light needs long protected cells so that one is perfect.
Links:
Wowtac A2S https://www.amazon.com/dp/B075ZN5LJY/ref=cm_sw_r_cp_apa_-BnQAbZY2WE4A
MAKE SURE A2S NEUTRAL WHITE IS SELECTED. Annoying shared page with the a2 and cool white version (tint of light emitted).
Recommended battery.
http://www.mtnelectronics.com/index.php?route=product/product&path=59_88&product_id=55&sort=rating&order=DESC
Inexpensive and good charger:
http://www.mtnelectronics.com/index.php?route=product/product&path=79&product_id=496
A little late to the party... You are following the same trajectory as me. I'm just now expanding into fixed blades, but before you put the brakes on budget folders you should check out a few more options.
The Coast FX350 (9cr18mov, G-10, frame lock, 3-position clip) is a beauty for under $20. The BX315 (9cr18mov, rubberized handle, lock back) is great for wet work and is currently selling for just under $15—it has a sheath instead of a clip because the large rubberized grip doesn't slide in and out of pockets very well. The BX315 also has a little brother, the BX300.
If you like the Kershaw Link's profile then you should try a Flock (8cr13mov, FRN, tip-up clip) that's going for $15. It is a dealer exclusive that was poorly marketed and escaped most people's notice. Probably one of the best Kershaw deals going right now.
Spyderco's Spy-DK is currently selling for $30. It's a special non-locking model for Denmark knife laws. It's old school slip joint action but you get a N690Co blade that is a step up from their more expensive budget folders.
Back to fixed blades...
As I mentioned in another comment, Schrade is a good place to start for budget fixed blades—check out the SCHF36 Frontier for under $30. One thing to note is many fixed blades in this category are going to use 1095 steel which typically requires some maintenance, but most are powder coated to address this. Don't let 1095 scare you away from some nice options.
Now, I know you are looking for budget knives but there is a mid-range option that you may want on your wishlist. If you have an Ontario Rat folder (which you should) then you might want to compliment it with a Rat 3, 5, or 7. Like I said, I wouldn't consider Ontario fixed blades as 'budget' but they're a bargain compared to brands like Tops.
I hope this helps and have fun exploring, this rabbit hole runs DEEP.
there are about 5-6 other components that I could still replace in the horizontal linearity circuit and I will probably do this. I do think it will solve the issue but I will likely try because of how much effort and money I have invested into this set. I love the set other than the geometry problems and the geometry issue isn't really that noticeable in 3D games. I don't notice it at all when playing Super Mario 64 and N64 looks great on the JVC D201 set. Also, keep in mind that when you are dealing with geometry issues, you only need to focus on the horizontal and vertical linearity circuits which contain 20-30 aluminum electrolytic capacitors combined. Replacing capacitors isn't hard at all with the right tools. I did make sure to watch a ton of videos on how to solder and desolder and I bought my tools based on recommendations in Youtube videos and on several electronics forums.
 
I use this soldering iron and it works great, https://www.amazon.com/Hakko-FX888D-23BY-Digital-Soldering-Station/dp/B00ANZRT4M/ref=sr_1_3?keywords=hakko+soldering+iron&qid=1556333443&s=gateway&sr=8-3
 
I use this solder sucker and it is also great. You just have to make sure to push out the old solder with the pump after every 1-2 connections, https://www.amazon.com/Engineer-SS-02-Solder-Sucker/dp/B002MJMXD4/ref=sr_1_3?keywords=engineer+solder+sucker&qid=1556333566&s=gateway&sr=8-3
 
I recommend have a desoldering wick as backup as well. Use a no-clean solder wick of 2.0mm for general desoldering. As far as flux, flux paste is easier to use as it doesn't drip. The AMTECH NC-559-V2-TF no-clean tacky solder flux is good. Any no clean liquid flux from Kester or MG Chemicals will work fine as well. Definitely get some wire cutters for cutting solder and cutting component leads.
 
I use this solder (I recommend lead solder with a rosin core and also no clean) https://www.amazon.com/gp/product/B00068IJOU/ref=ppx_yo_dt_b_asin_title_o03_s00?ie=UTF8&psc=1
 
Any time you work on a CRT, you need to discharge the anode cap. This is very easy to do with the proper tools. For example, you could use a flat head screwdriver and an alligator clip wire to do this. You connect one end to the screw driver, the other end to a ground point on the CRT chassis (i.e. the metal frame around the CRT), slide the screwdriver under the rubber anode cap with the CRT unplugged until you hit the metal connector in the metal. Rub the screwdriver on this metal connector for about 5 seconds and it will be discharged. Retrotech on Youtube has a video on how to do this. I wouldn't say you need $80 electrical gloves to do this but at least wear a rubber or leather glove or both and only use one hand. Retrotech actually has quite a few videos on how to work on CRTs.
 
Overall, doing basic things like replacing capacitors in CRTs isn't that hard, you just have to spend the time to educate yourself, be patient and it will click. If you have any questions, just ask me or anyone else on here. If you ever work on any power circuit capacitors, make sure to discharge them with a high wattage and ohm rated resistor but using insulated pliers to hold the resistor legs to the capacitor legs for about 5 seconds to discharge the cap before you remove it.
If you can't get it with a Q-tip, it's nothing to worry about. Grab yourself a soldering iron on Amazon, as well as some quality solder and flux. I will link some in an edit to this comment in a few minutes. Also, screw everyone else in this thread, that is damn near the perfect amount of thermal paste.
EDIT: Here are my recommendations and reasons!
​
SOLDERING IRONS:
Cheapo soldering iron:
​
https://www.amazon.com/GLE2016-Soldering-Adjustable-Temperature-Different/dp/B01N413T8U/ref=sr_1_5?keywords=soldering+iron&qid=1554943755&s=gateway&sr=8-5
​
This one will do you some good for the quick fix, although I can't speak to the longevity of the iron or its ability to melt some of the higher temperature solders that factories use.
​
More expensive (but WAAAAAAY BETTER) iron:
​
https://www.amazon.com/Weller-WLC100-40-Watt-Soldering-Station/dp/B000AS28UC/ref=sr_1_6?keywords=soldering+iron&qid=1554943755&s=gateway&sr=8-6
​
This is a great soldering iron if you think electronics is something you'd like to get into. Quality replaceable tips are available, and it has a stand and comes with a cleaning sponge. I've used these, and absolutely love them. Honestly though, if this is going to be one of very few times you solder, just go for the cheap one.
​
​
​
SOLDER:
​
The cheap iron comes with some solder, and honestly you can probably get away with that for this one repair. If you decide to get the more premium iron though, here is some good solder:
​
https://www.amazon.com/Mudder-Solder-Electrical-Soldering-0-22lbs/dp/B01B61TWGY/ref=sr_1_5?keywords=solder&qid=1554944194&s=gateway&sr=8-5
​
OR (I've never used this particular solder but MG chemicals is a great brand)
​
https://www.amazon.com/MG-Chemicals-Leaded-Solder-Diameter/dp/B004258YDE/ref=sr_1_2_sspa?keywords=mg+chemicals+no+clean&qid=1554944408&s=gateway&sr=8-2-spons&psc=1
​
I usually stick to smaller diameter solders because you have a lot more control over how much you're putting onto a joint. This stuff is good, but really you just need to make sure it's lead solder because it melts a lot easier and is easier for beginners to work with.
​
​
​
FLUX:
​
If you want your joints to form and form well, you need some flux. At least coming from me, this is mandatory. Here's some good no-clean flux that you can use that will mostly evaporate off and shouldn't be much fuss to clean.
​
https://www.amazon.com/Paste-10-milliliters-Pneumatic-Dispenser/dp/B00425FUW2/ref=sr_1_3?keywords=mg+chemicals+no+clean&qid=1554944408&s=gateway&sr=8-3
​
​
​
TUTORIAL:
Although kind of slow, here's a pretty good soldering guide. This relates more to soldering electrical components, but most of the lessons remain the same.
https://www.youtube.com/watch?v=IpkkfK937mU
​
Best of luck!
Is Preonic worth the investment?
I have a Planck rather than a Preonic but OLKB designs sturdy and reliable boards that are also very interesting.
I honestly think the Planck is like twitter. Having a very low word (key) count makes people more creative in how they express themselves. The Preonic is more like tumbler where more things can be done more easily.
Moving keys to other layers is fine due to the extra thumbable keys on the bottom row. The Preonic doesn't require as many layers because it has so many more keys, so the extra thumb keys aren't really necessary.
That said, it's a nice compromise.
Is it a good build for a beginner?
It's the same difficulty as any other keyboard build that has PCB components soldered on. All you have to do is add switches and through-hole solder them. It's definitely a fine way to learn to solder as long as you follow a few rules.
Most keyboard kits come this way with the exception of those like the Lets Split which you have to solder diodes and a promicro onto also.
The only thing More difficult is getting a PCB printed and buying diodes, resisters, and chips from DigiKey and then using a heat gun or oven to cook all the little things on.
What is a good soldering station?
Cheap ones will work fine. People around here seem to like the Hakko 888d which is what I use. The cheaper ones like this will also work fine. The extra $80 doesn't change much about how you work. Turn on the iron, heat stuff, sponge occasionally, don't touch it to your skin, then put it away safely.
Soldering rules for beginners
There are a lot of little things to do to maximize soldering experience. You'll figure these out over time. I thing this short list is enough to keep your board intact and blood in your body.
People’s experiences can obviously vary, but I was diagnosed as depressed which then switched to bipolar II after my first (and arguably only) hypomanic episode, so my experience might have some good lessons for your girlfriend.
If you want, DM me and I’ll give you my cell number. I’m happy to talk to you or your girlfriend about it at length. She should know that my medical history looks a lot like hers and it hasn’t stopped from me from living a fulfilling, stable life.
I got an Eachine 250 racer about a month ago. It has been a lot of fun, but there are a lot of details. My next racer will probably be a smaller/lighter 180 frame.
For FPV goggles I have three ideas. One, is get the status quo Fatshark goggles at whatever level you can afford. Two, get the HeadPlay HD goggles I got. Three, get the Avegant Glyph, which has the really nice feature of letting you pop them up and down without a band. I do really like my HeadPlay HDs, but they are big and bulky. I haven't perfected how to adjust the straps to get them to stay on my head well.
Arms, managed to break one without breaking a prop.
http://www.amazon.com/gp/aw/d/B016Y5U1JO/ref=ya_aw_od_pi?ie=UTF8&psc=1
Capacitors, they pop off very easily. I lost a capacitor at the same time I broke an arm. Or a hot glue gun, I Highly recommend putting hot glue over the caps next to each arm to help avoid the loss in the first place. You want a low temperature hot glue gun to not melt any plastic or traces. I consider the capacitor issue a design defect, but you can work around it with hot glue. The original revision seems to have lacked the capacitors, from pictures I have seen online.
Capacitors for Eachine 250 racer:
http://www.amazon.com/gp/aw/d/B00W8YYMZA/ref=ya_aw_od_pi?ie=UTF8&psc=1
Youtube video exampling how to solder them:
https://www.youtube.com/watch?v=sLYVZUpL0K0
Get a Taranis X9D Plus. It is a great transmitter. Also get a X4R-SB receiver, and use SBUS. The D4R won't let you control the lights too, because it can't do PPM and PWM at the same time. You can control them with the X4R-SB, SBUS+PWM. SBUS has great latency, 5-10ms. I was recently talking to a sponsored racer who told me that PPM, which is supposed to be 27ms with the D4R, is really more like 100ms. It averages the four last frames together. This link includes a case and X8R, which I think will work as well as the X4R, but you should do the research. http://www.amazon.com/gp/aw/d/B014IYSXL6/ref=mp_s_a_1_5
To do SBUS+PWM, requires a special bind procedure. You want channels 1-8 as SBUS, and 9+ as PWM. The most relevant part is "jump S1&S3: SBUS, 9, 10, 11 or jump S2&S3: SBUS, 9, 10, 11 (No telemetry)" Here is a link that talks about it.
http://www.frsky-rc.com/BBS/viewtopic.php?f=4&t=6793
Small tie wraps like the ones already on the arms to hold the ESCs. You break an arm, and you will need to replace the tie wrap.
Soldering iron, solder, etc, because you have to desolder the ESC from the motor to replace an arm, and then resolder it.
http://www.amazon.com/gp/aw/d/B000BRC2XU/ref=ya_aw_od_pi?ie=UTF8&psc=1
Qtips and rubbing alcohol for cleaning. Mix the alcohol 50/50 with water. The flying field was muddy after lots of rain.
Carrying case of some kind. You don't want it banged around in transport, and same with the transmitter. It is best to get the X9D with the case, because people price gouge on the case stand alone.
http://www.amazon.com/gp/aw/d/B01ABQS7YI/ref=ya_aw_od_pi?ie=UTF8&psc=1
Batteries, you can burn through them very fast. But watch out for their height. I bought some of the new "Graphene" 4S batteries, and they are really too tall to fit. Some people remove the back LEDs to make battery installation easier.
Battery charging/carrying bags to help with uncontrolled fires started by batteries. I have two, one for charging, and one for carrying.
http://www.amazon.com/gp/aw/d/B005HTH78W/ref=ya_aw_od_pi?ie=UTF8&psc=1
A battery charger if you want to use 4S batteries. The included charger is 2S/3S only. I have a Hi-tech X1 which will only charge one battery at a time. You can also get the X4 which will do four at once.
Battery charger for 4S batteries:
http://www.amazon.com/gp/aw/d/B005LH3392/ref=ya_aw_od_pi?ie=UTF8&psc=1
XT60 banana plug cable for charging with the above charger:
http://www.amazon.com/gp/aw/d/B00XBSBYCG/ref=ya_aw_od_pi?ie=UTF8&psc=1
A V shaped antenna mount to get the receiver antennas up in the air. When over head the carbon fiber body blocks the signal well.
http://www.amazon.com/gp/aw/d/B00WV04P62/ref=ya_aw_od_pi?ie=UTF8&psc=1
A voltage monitor so you know to land when your battery voltage is low. The video signal includes the battery voltage as part of the OSD, but I prefer LoS while learning to fly. It lets me keep an eye on where I am in relation to trees. On the other hand I have yet to find a good place to mount a voltage monitor. With the length of the balance cable on batteries you are likely going to need a balance cable extension for 3S and another for 4S.
Voltage monitor:
http://www.amazon.com/gp/aw/d/B00EXPPF80/ref=ya_aw_od_pi?ie=UTF8&psc=1
3S balance cable extension:
http://www.amazon.com/gp/aw/d/B00XP4IO88/ref=ya_aw_od_pi?ie=UTF8&psc=1
4S balance cable extension:
http://www.amazon.com/gp/aw/d/B00JBP1RGG/ref=ya_aw_od_pi?ie=UTF8&psc=1
Double sided tape to mount things on the top of the body, like the antenna mount and receiver.
http://www.amazon.com/gp/aw/d/B009NP1JQC/ref=ya_aw_od_pi?ie=UTF8&psc=1
Small x-acto knife to help remove the double sided tape.
Electrical tape to tape down wires for lights and receiver.
Size 2.0 hex wrench for the frame screws. It will be needed to replace arms.
Scale that can measure grams. You want to knowing and control weight.
http://www.amazon.com/gp/aw/d/B010HKEDPK/ref=ya_aw_od_pi?ie=UTF8&psc=1
Sunglasses to avoid problems seeing on sunny days. Lets say you are flying LoS, and look into the direction of the sun. You can't see the quad well enough to control it, because of glare from the sun.
ESC flashing adapters to change/upgrade the firmware. I am not sure these are the right ones for the ESCs on the Eachine. I think they are, but I haven't tried it yet.
Atmel socket flashing tool:
http://www.amazon.com/gp/aw/d/B00V2W467I/ref=ya_aw_od_pi?ie=UTF8&psc=1
Atmel USB programmer:
http://www.amazon.com/gp/aw/d/B0051SRZWC/ref=ya_aw_od_pi?ie=UTF8&psc=1
USB cable to use with transmitters and simulators. It is best to learn the basics in a sim, instead of replacing lots of parts.
USB cable for simulators:
https://www.amazon.com/gp/aw/d/B00DFDTU9G/ref=ya_aw_od_pi?ie=UTF8&psc=1
Old post of mine on learning in a simulator:
https://www.reddit.com/r/Multicopter/comments/3zr8o0/cheap_fpv_acro_simulator_with_real_transmitters/
Be sure to set a fail-safe, which is very easy with the Taranis. I had a fly away with my first Eachine, because of a defective Spektrum DX6 and lack of fail-safe. After that I switched to the Taranis, which doesn't cost much more and has way more capacity.
May I recommend my two lights (I walk 1-3hrs most nights) that I use in heavily wooded counrtyside:
How I use my lights: I walk a lot, and wear the headlamp and carry the S70S on the included sling. My hands are free. The headlamp is on all the time (High) and when I need huge reach, it's one button press away on the handy S70S. No fumbling around. The headlamp lights the way for my feet (especially important because of where I walk), and about 40 yards ahead. The S70S is great for seeing the wildlife (deer, coyotes, etc) across fields. My observation on distance: If you can't make out details you care about, at 500 yards in the day time, don't expect it at night with any light. Your eyes are a limiting factor.
Finally, a headlamp is a no brainer if you need to work with your hands in the dark.
I'm going to start with battery recommendations, basically the best combination of power and size is a cell called the 18650. It's slightly bigger than an AA, though one of them has the power of about 5 AA cells. They're are a bit fatter, but nowhere near C size. A light that uses one of them is likely your best bet for both EDC and a weapon mount.
For the EDC light, assuming the single-18650 is small enough (tons of people carry them with no issue) I'm going to recommend a Thrunite Neutron 2C. It has as ramping interface, hold the button down and it will gradually increase to the highest level, then back the other way. Let go to choose exactly how much light you want. Additionally, it has shortcuts to the lowest mode (hold down), last used mode (click) and highest mode (double click.) It comes with a battery, and has a built in charger. While it has a strobe, you have to deliberately try to get it, it isn't in the main modes. It's a very commonly recommended first light on here, and I think would serve you quite well.
If that sounds too big, we have a bunch of recommendations for AA-size lights as well. Any of them on this list are awesome.
​
For a handgun light, I recently picked up an Olight PL-Mini Valkyrie, and it's awesome. It's a great, compact fit on my Carry-length Sig P320, has as built-in battery with magnetic charging that does a pretty consistent 400 lumen for about 80 minutes, has a good beam shape, and intuitive controls.
​
For an AR Mount, we're going to use a bit of your leftover pistol light budget. An Armtek Predator would be a good way to go, it has an optional remote switch. It's a ~1" body tube, so it fits into any mount (theirs isn't the greatest.) Here's a cheap option for that, better are certainly available.
With that light you'll need a couple of batteries and a charger. These will also be compatible with your Neutron 2C. I like getting batteries from Illumn, as Amazon has a not-insignificant danger of getting sketchy counterfeits.
​
​
You may find a few other opinions on here, but these will all serve you quite well.
Well to replace the battery you'll need to open the cart, carefully desolder the old battery, and solder in the new one. It's fairly straightforward and easy, but you can go look up a youtube video for a walkthrough. In theory you can tape in a new untabbed one in, but going with the original design/intention is preferable and won't come loose and lose your save if done properly. However, you'll need the following:
optional:
I got my batteries and screwdriver from a online store that sells gameboy stuff:
https://www.mortoffgames.com/cr2025-coin-cell-battery-with-tabs-panasonic-
https://www.mortoffgames.com/gameboy-color/repair-and-replacement-parts35/game-repair-parts39/38mm-security-screw-driver
From Amazon:
https://www.amazon.com/Steel-3-8mm-Screwdriver-Security-Nintendo/dp/B000F8GWH2/ (3.8mm security bit)
https://www.amazon.com/Super-Nintendo-Genesis-Master-System-Advance/dp/B00ES2B0CI/ (CR2025 w/solder tabs)
https://www.amazon.com/Weller-WLC100-40-Watt-Soldering-Station/dp/B000AS28UC
https://www.amazon.com/WYCTIN-Solder-Electrical-Solderding-0-11lbs/dp/B071G1J3W6/
^ lots of options, this is close to what I use --- 60/40 Sn-Pb, rosin core, 0.6mm diameter -- it don't think it's that much solder for the price, but I probably paid at least twice that at least and I've done lots of stuff and I still have way more than I needed. You can probably use a smaller diameter for this specific job, but that size is easy to hold.
It seems like a lot of money, but you got a pretty good deal on the unit and game. They can go for $20-30 and $12-18 respectively. Also, the screwdriver/bit and soldering iron are one-time investments in being able to do it again later and also do other soldering work.
If you don't mind making separate purchases the other source I mentioned has way better battery prices and their screwdriver is a bit cheaper and has a handle, I have one myself and it works fine. In general though I recommend going for the best quality one just so you don't have cheap, crappy tools. Sometimes that means you pay a little one more, and sometimes pricing is about the same.
Yes, sleep hygiene is very underrated (to the point that most people probably haven't even heard of such term). I'll add a few more good tips:
I used to have utterly fucked up sleeping patterns for years and finally managed to make myself a healthy sleeper, all of those helped me immensely.
I also have one theory that I've never seen explained this way anywhere, but it makes perfect sense for me: most people would agree that if you wake up too late in the morning, you wouldn't be able to fall asleep easily if you went to bed very early that day, you simply wouldn't feel tired yet. However, I noticed that if I'm used to that sort of pattern, even waking up early one morning still doesn't make it easier to fall asleep that day, even though I'm supposed to feel more tired. It's not exactly a new theory, it's all about circadian rhythm, but my view is, the internal clock in our bodies expects the day (the "awake" part of our day) last a certain amount of time, and it gets so used to that amount of time that even being more tired can't instantly change it. I just don't feel like the day is over yet, it doesn't really register as "night" for me yet. I figured out that for me, the "awake" part of the day has to last 15-16 hours (I need a bit less sleep in summer). So even if I don't go to bed at the same time, I try to make my "day" the same length. For example, if I get up at 7am, I'll go to bed around 11, and then get up at 7 again, which would give me 8 hours of sleep that I need and fit neatly into 24 hours so that I can have the same schedule every day. Or I can push it around accordingly as I see fit or as needed. I could wake up at 9am and then would go to bed at 12am, maybe it would take me longer to fall asleep and next morning I would wake up before 9, but it would still be similar enough.
Not sure if there's a way you can gift him a gift certificate to a local gym for a day pass or spa that has a sauna? My dads side of the family was Finnish and whenever we'd go visit we'd always take saunas together as a family. Part of that tradition was reading the "Finnish sauna rules" which I think were half joking, half real. Anyway here's a sign that he could maybe hang in his bathroom? Not sure if it's framed, so could get it framed and shipped. Timing may be trickier though..
Okay and this is a really weird gift and a little personal, but again popular with my dad (man with the Finnish blood who's in his mid-60s) and pretty much my whole family has one now. An attachable bidet for an existing toilet. It could honestly make his quality of life a little better. Installation is pretty simple too.
Also you could get him an immersion blender. Easy way to purée soups, smoothies, etc. and they're generally only $30.
Then there's this that could play into his mad scientist side. Again another popular gift that my Dad was into.
Hope this helps and you all have a great Christmas. So nice to hear that you're taking care of your father and keep in touch with him. I'm sure it means a lot to him.
I'm a professional mechanical engineer and a Certified Energy Auditor per the AEE.
Here's a couple things I did for my house that helped. They might help you.
Weatherize the garage: Add a floor threshold to the garage. Best done in the summer. Replace the weather seal on the top and sides. Replace the garage door threshold. All Amazon links. Measure your door and get the correct dimensions. I just linked to general items.
Weatherize your outlets and light switches: All holes through the wall allow tempered air to leak out. (nice warm air in the winter, nice cool air in the summer). With a flathead screwdriver, you can add gasket seals to all of your switches and outlets to reduce air leakage.
Weatherize doors and windows: If there are doors and windows that you don't use often, or don't use for a season, seal them off. If you use a door more frequently, there's lots of draft dodgers to help seal the door. Growing up, if it got super cold, we'd take a spare down comforter and nail it to the wall, totally covering the door.
As far as thermostats go, changing out the thermostat to a wifi thermostat and/or a programmable thermostat will go a long ways towards energy savings. Nest is definitely the best thermostat out there, but I recognize that it's the most expensive. In my opinion, the Nest is the best one because it has the best developed home/away sensors, has a clean and slick easy-to-use app (even for 8 thermostats like you'd have), and easiest to use scheduler. Don't change just one thermostat. Change all of them. At the very least, change the thermostat to a programmable one.
In general, it would help to go through the weatherproofing page of Amazon and buy and install anything that applies to your home and apartment.
As far as capital equipment, replacing boilers with condensing boilers can help, but remember that condensing boilers provide the most savings at the
temperature extremes.during shoulder seasons. Consult a local professional mechanical engineer to determine if they will really benefit your location.edit: had a brain fart when i wrote this. condensing boilers provide the most savings at the shoulder seasons. take a place like Fairbanks, AK, which, aside from this winter, generally spends most of the winter at the design outdoor temperature of -40. a condensing boiler operating at the design limit doesn't provide any more savings than a "standard" 80% AFUE efficient boiler. just doing my part to avoid spreading misinformation on the internet.
This one on Amazon seems to have pretty good reviews. I'd recommend getting a stand like this to go with it for safety reasons. (I decided to solder without mine a few weeks ago, and wouldn't you know it, the one time I decide I don't need the stand, I burn myself!)
You can easily spend a lot more on irons, and if you start doing a lot more soldering you may want to make a bigger investment. A lot of people really like the Hakko FX888D, but I personally prefer the Weller WTCPT-60 because I don't like fussing with knobs. (Despite not having a knob, the Weller actually does have very precise temperature control, but depending on what temperature you want you have to buy different tips, which isn't worth the hassle for most people. I use only one kind of solder so it doesn't matter for me, but I digress.)
I've never found any tutorials I really like, and my advice is to just get busy! You'll make a lot of mistakes and do a lot of projects slowly before you get good, and I don't think there's a tutorial out there that will let you skip that. To help you stay pointed in the right direction, here are a few things I look for in a good solder joint:
There are a few intuition issues you should be aware of that I've observed while teaching students to solder. For instance, most of the stuff you'll be soldering is so small that it will be "cold" (as in "too cold to melt solder") the instant you pull the iron away, and cool enough to touch within seconds. Try it if you don't believe me. The part will only stay hot as long as the iron is touching it. You'd be surprised how many people can't get their head around this.
Also, oxygen is your enemy. The longer the part is hot, the more oxidized the surface will become and the harder it will be for solder to stick. This is true even when the joint is hot, but not hot enough to melt solder! So once the iron contacts the work, you have to be expedient. Most joints can be finished in 5 seconds or less, and if you're holding the iron on there for 10 seconds or more but the solder still isn't melting, stop and reexamine what you're doing. You may want to get some fine-grit sandpaper to clean the conductors off before you start again.
Keeping oxygen out of your solder joint is the job of flux, and like /u/avialex (edit: fixed) said it's very helpful (provided everything is relatively clean to begin with). But again it's a balancing act. If you use too much flux you'll make a mess, and raw flux is slightly corrosive and can be very difficult to clean off your work.
There are lots of other tricks you'll learn through practice too. I guess that's where tutorials might come in handy. You'll probably learn to splice wires (probably the most difficult thing to do with a soldering iron) much more quickly from someone with experience on Youtube than struggling through it 20,000 times yourself, doing it a harder way because you didn't know any better.
At the same time though, there's no substitute for practice. This went on a lot longer than I intended, but I think now you have plenty of information to keep in mind as you get started. Good luck and happy soldering!
Nice! It is rewarding knowing that you can repair and modify your guitar's wiring as you please, just gotta break the seal and do it that first time. As with anything, practice makes perfect. My solder jobs looked pretty terrible and messy the first several times I tried it, but the more I do it the cleaner and more professional they look. Youtube instruction videos are super helpful as well, and having a decent iron that's at least 40 watts makes things much easier (doesn't have to be too expensive, I use one of these and am very happy with it).
Also, Seth Lovers are a great call. I have them in my Les Paul and they're the definition of the classic PAF sound, lots of snap and clarity but also totally lush and warm and punchy. Perfect for pretty much anything short of metal imo.
Of course man! This is a very helpful sub, so keep coming back for help if you need on your knife journey whether it be sharpening or other suggestions.
And if you have the want, and know you’re gonna get something in the future anyways, there’s nothing wrong with grabbing a new one! You’d definitely have every right lol... Just imo proper care comes first. You don’t want to sharpen it yourself before you know how because you don’t want to scuff or scratch it, but at the same time it’s pretty much impossible to ruin a knife beyond repair...
As for whetstones, you have a couple options. The King 1k/6k is probably one of the most popular and recommended, but I would recommend spending a bit more and going with the Imanishi combo 1k/6k. I think it’s a much better stone and I can more comfortably sharpen any of my knives, whether it be my cheap Tojiro DP, “hard to sharpen” Misono UX10, or some carbon knives. People have said the King is “slow and sloppy” and doesn’t work as well on higher end steels. Never used one, but I love my Imanishi. You should be able to sharpen anything to arm-hair-shaving sharpness with that.
You can also guy with a solo 1k, as 1,000 grit is really all you need to keep your knives sharp... This would obviously open a lot more doors as well. I love my splash and go Shapton pro, very good stone that you would have good use for when you upgraded and got better with other stones. Instead of listing off a bunch of 1k stones, I’ll leave it with just the one and you can let me know if you have other questions. I’d suggest going with the combo still.
>Wondering what people think of AAA vs rechargeable headlamps? Any reason I should avoid the rechargeable ones?
No. You should avoid 3xAAA for all of the reasons you've mentioned. It's a stupid way of powering a device.
>I am most familiar with Black Diamond or Petzl that are easy to buy in store, but right or wrong am a little hesitant to go with a "no name"/discount brand due to reliability.
Black Diamond and Petzl are liked among climbers because they're lightweight. For literally any other purpose, a headlamp from another brand will be better, mainly because of better battery types. We won't recommend any no name headlamps, but I'm sure they'll be brands that you haven't heard of. These headlamps might also surprise you with their prices after seeing what BD and Petzl headlamps cost, but trust us, we know what's good.
All that being said, it seems like you're after some sort of rechargeable headlamp. Great choice! What's your budget? The Wowtac A2S is a fantastic value, and definitely worth looking at. Good headlamp for a great price.
Good breakdown from /u/Koridel - this guy's pretty much right on point, OP. I've got a Minigrip and a couple Delicas, about the same sentiment as he holds but less experience with using the BM, so less wear-related problems experienced. I don't really carry the minigrip because it's a bit too small to fit my palm/pinky securely whereas the grip on the Delica's great. I carried a Delica as an EDC for over a year, still break it into the rotation just for nostalgia - it's a great little knife.
One question - doesn't seem like funds are a huge issue, but have you looked at a Skyline? You can pick one up for ~$33 from Amazon and it's been a sleeper hit for me. There's a pretty strong following for that knife and I'd heard good things about it before, but I didn't really think much about it until I YOLO-bought one of the damascus models off BladeHQ. Handle ergos are great, the blade is a great size for how slim the knife is when folded.. eh, just something to consider if you don't want a big thump to your wallet. Only thing is that, being a flipper, it'll be a bit more noticeable while deploying if you snap it out, otherwise it'll be slightly less natural/comfortable when going with just the thumbstud than others.
Hope that helps some
I recommend going slow with hand tools. Buy them one or two at a time, and then learn to use, sharpen, and care for those before buying more. This will help you get the best stuff for you while spending as little as possible. Let your projects guide your tool purchases.
Amazon isn't a great place to buy hand tools. Most people shop at either Lee Valley, Lie-Nielsen, or eBay for planes, chisels, saws, rasps, etc. That said, there's a surprising amount of stuff you'll need that's not the tools themselves. Personally, I wouldn't want to saddle myself with an inferior tool just to use a gift certificate.
Anyways. Stuff you SHOULD buy on amazon:
Hand Tools
Clamps
Measuring/Marking
Sharpening Gear
Consumables
Safety Gear
I've bought several things from Amazon for the shop, and they're just the sorts of things that /u/abnormal_human suggests; Woodcraft also sells through Amazon, so you can get some decent hand tools that way, but that's not really "amazon" per se. For a recent birthday my wife went a little nuts on my Amazon wishlist and I received two waterstones, a lapping plate, and this shoulder plane - very extravagant gifts.
Amazon is also a pretty good place to shop for some woodworking machinery if you want to buy new and especially if you happen to have Amazon prime; free delivery on a drill press or a band saw can be kind of a big deal. Those are on my "dream shop" wish list...not going to happen any time soon, but if I can't dream on the Internet...where can I?
Another neat thing that I didn't know about until recently is camelcamelcamel which is an amazon price tracker. Companies adjust their retail price on amazon all the time, and you can set thresholds at which you would like to be notified. For example, here is the price history for the drill press I linked above. Helps to see if it's a good time to buy, or if you should maybe wait.
Have fun!
Ah, something I'm unfortunately an expert at! Skip to point 3 if you just want to read about the light, I'm pasting in something I wrote on a different thread. I have suffered from really dramatic SAD for years (Minnesota) and have finally got a handle on it.
For me, it revolves around 3 categories: Exercise, Vitamin D, and Light. Especially blue light. Also, I didn't realize until I started really digging into it how poorly researched SAD is. . .
Wear blue-blocking glasses every night starting 90 minutes before bed. Richard actually got me turned on to these, and they seem to work really well: https://www.amazon.com/Uvex-Blocking-Computer-SCT-Orange-S1933X/dp/B000USRG90
Wire up some LED's in the specific blue wavelength to use at my desk at work. However, I happened to find an (overly expensive) ready to go solution to this from Phillips: https://www.amazon.com/gp/product/B00M3SGCUE This sits on my desk just below my monitor and beams JUST blue light into my face, within my field of vision. I can comfortably have this on for several hours in the morning, and it seems to make a huge difference. I think.
The light and the glasses seem to agree, as wearing the glasses makes the light very nearly disappear. . .
TL;DR: Use a LOT of blue light in the morning, block blue light late at night.
Has he applied for any jobs yet? I was given one of those leather pads with paper inside and a holder for resumes (something like this) except it was from my undergrad university with their emblem. Definitely gives you some confidence for interviews and recruiting sessions. Also you can get him some nice resume paper to go with it. That lasted me for years.
I also enjoyed having one or two of these demotivational posters in my room. Depends on his humor and if he has barren walls like I did.
If you know more details about which raspberry pi he has, you could get some shield extensions. These are boards that expand its capabilities. There are also newer boards with better specs. Also with two boards you can of course make them talk to each other ;)
Depends on his area of interest and your budget, but you could get him some kind of [introductory FPGA kit] (http://store.digilentinc.com/fpga-programmable-logic/) or DE0-Nano.
Tools... so many tools he might be interested in. USB logic analyzers are so cheap these days and go well with hobby boards. Again not sure your budget, so you can go all sorts of ranges here (Open Workbench Logic Sniffer or scanaplus or Saleae Logic 8 or a china clone of Saleae Logic 8). Saleae or the knockoff I think are the better options for the software compatibility. He may be in need of a soldering iron or a multimeter.
Something else unique, you could get him a "gift card" (they don't really sell them) or an IOU to a PCB printing service. Ask him to design his own board and you'll pay $X of the service. You'll want to make sure he knows the price structure on the website because they charge per square inch and it depends on his design how many layers he may need. He makes the schematic and they will print some circuit boards for him. They won't mount the parts, just do the schematic and he would have to hand solder the components.
If he likes old videogames you could get him some old school USB controllers and tell him to install lakka on his rasberry pi, or just get him a new Raspberry Pi3 to dedicate it as an old-school console emulator. It is quite impressive how many consoles they have emulated.
And back to more tools... more micro screwdriver bits than you would actually need. You can get him a starter pack of resistors, capacitors, and other assorted electronics sparkfun. There are also so many buttons, switches, LED screen displays, etc. that he probably wouldn't want to buy on his own. Maybe you could get a container with an assortment of circuit components (resistors, capacitors, transistors, and other sensors). Careful! This can add up real quick. All types of sensors exist... ultrasonic rangefinder, stress, photocell, temperature, etc. etc. endless!.
I have Crohn's and have had 2 setons in place for 6 months while I wait for Remicade to hopefully shrink my fistulas. I can't comment on the constipation issue as I didn't have that problem but I'll share this...
Setons are challenging to your peace of mind, hygiene, and health. You have digestive acids and fecal particles slowly draining onto your skin and that can lead to skin irritation. Additionally, the seton material can cause friction pain in your butt cheeks if you walk vigorously or walk a lot. I find that talking wide strides or stretching my legs in any way causes the setons to pull on the skin that it goes through which also causes pain. Lastly, and perhaps most significantly, the setons make it very difficult to wipe effectively after a bowel movement because they can interfere with wiping motion while using toilet paper.
Given all that here are some recommendations:
I'm sorry to dump all this on you. It's an overwhelming time and throwing all this info at you may just make you feel more overwhelmed. But I hope that you'll come to find this information helpful and that it helps you maintain your dignity and sanity as you wait for the fistulas to heal.
Bidet links: I own #2 and #3
1 - Base $35 model, cold water only https://www.amazon.com/dp/B00A0RHSJO
2 - Deluxe $60 model, hot and cold water. Note that you'll need a hot water line close enough to the bidet to be able to run a line from the hot water source to the bidet. Check your bathroom before buying. https://www.amazon.com/dp/B00A0RX2UI
3 - Travel Bidet:
Not as effective as the built in models but I'm oh so glad to have it when I have to move my bowels if I'm not at home. https://www.amazon.com/dp/B008CSDKSQ
Glad it was helpful!
The RDA looks good, not sure the cost of a Plume Veil clone from eciggity, but you might wanna check - it'll come much faster and if you ever need to replace something, the chance of finding a part that fits is more likely, but again for $10, you probably wouldn't pay to fix that.
I'm not super familiar with mech mods, I've got two, but almost always use my Sigelei now, but just make sure you are familiar with battery safety, ohms law, battery limits, etc.
Other items you'll need (let me know if you need links for these items, you can get everything listed below of Amazon):
I hope this all helps, good luck and be safe, ALWAYS, ALWAYS use your ohm meter in conjunction with www.steam-engine.org
Here was my last RDA build that I took pictures of, if it helps at all
Lol, alright for example:
There are a LOT more suggestions I could add...
1-It should, but you'll have to use the extension tube.
2-I'd suggest getting a good clone first. That way if you don't like it, you're not out $100+ dollars. I'll throw another vote in for the EHPro Kayfun Lite Plus V2 being about the best clone out there right now. Eciggity is a reliable vendor and they've got them for $35. They also have a "dual airflow hole" version for five bucks more. Either way, they're great quality and it's still less than half of what you'd pay for an authentic. If you end up really liking them, you can always splurge on an authentic in the future (and trust me, more Kayfuns is more better!)
3-It depends, but probably. A lot of the replaceable coil head tanks tend to use NiChrome resistance wire, which wears out faster than Kanthal. But regardless, you'll end up saving quite a bit of money over replacement Kanger or Aspire heads: a 100' spool of Kanthal is only around $6 directly from TEMco, and a bag of organic cotton balls is about $3 at most drugstores and WalMart. For the price of two boxes of replacement coil heads, you'll have enough wire to make literally hundreds of coils and one bag of organic cotton balls will last you months. It's a huge savings.
4-Same as most everyone else has mentioned: ohm reader (or digital multimeter) and drill bits (especially 1/16", 5/64" and 3/32") for sure. Wire "dikes" (aka nippers, aka snips, aka all sorts of different names) are handy, but a pair of nail clippers works just fine too. If you really want to get wire cutters, this Hakko CHP cutter is excellent and under $5 (or pick up something similarly small.) A "build stand" is really handy, and you can either buy one or make your own by epoxying a spare 510 connector into a piece of wood with a hole drilled in it. Not totally necessary, but it'll make rebuilding a lot less fidgety. I made mine by taking the base of an old EVOD tank (the internal "coil head" threads are actually 510), drilling a hole in a nice piece of flamed walnut I've had forever and epoxied it in with JB Weld.
Oh yeah, and a pair of small-tipped tweezers! Total lifesavers! A pair of needlenose pliers will work too, but I use my tweezers every single time I build a new coil and they're easy to get into small spaces. Totally worth the $4 at your local grocery store or Walgreens or wherever.
This is the one I have. You can buy one that has a hook up for hot water as well but my tap water isn't cold for whatever reason so it doesn't bother me to just have a cold water line. It uses the water that would eventually run to the tank. It's basically like using the water from your sink line--I know a lot of people think that its uses "toilet bowl" water but it doesn't. It's really easy to install. I actually have reinstalled it on a different toilet in my house and it worked on both. You do have to buy little spacers to attach to the bottom of your toilet seat since the bidet attachment makes the back of the seat sit a bit higher than the front. Again, they're really easy to install/uninstall. Definitely get the ones that screw on so they don't fall off one day into the toilet.
To use you just stay seated and SLOWLY turn on the knob. The one I have linked has SUPER HIGH water pressure but maybe there are models that aren't so strong. Do NOT turn it on while you're standing in front of it "just to make sure it works". I shot myself in the chest the first time I tested it hahahaha. Lots of guests also get curious and turn it on while standing in front of the toilet instead of sitting and end up getting shot in the chest or face. It's hilarious. My father in law for shot in the forehead with the water!
All in all its a 45$ investment if you use the same set up I did--definitely worth the money and if you can always upgrade to a different model if you end up liking it!
There are handheld type options that look like a shower head but they require maneuvering on the toilet and seem like more trouble than just staying seated.
I tried moist wipes for a while but a lot of them have alcohol in them and seemed to dry out more than they helped.
Sorry for the long winded response, hope it was helpful!
I am not actively treating lyme currently. I have done longterm antibiotics and haven't seen good results. Due to concerns about longterm abx and gut flora issues, I have decided to treat mold issues and detox first and then come back around to eliminating lyme. I am currently not on any pharmaceuticals.
Mold/ Mycotoxin Binders: I am on activated charcoal (Bulletproof activated charcoal) to help bind and excrete mycotoxins. I couldn't tolerate Cholestyramine (Compounded without aspartame), it made me very ill. I also cycle chlorella. I go slowly because personally, when I take binders, I feel very sick and get very weird mentally, especially in regards to anxiety.
I also couldn't tolerate welchol, which made me suicidal but after going off it I felt fine.
Other considerations:
-Moved out of a water damaged building
Supplements:
Other:
-Bluelight blocking glasses at night Heres some cheap ones: (https://www.amazon.com/Uvex-Blocking-Computer-SCT-Orange-S1933X/dp/B000USRG90)
-Clean diet, organic as much as possible, No gluten, low sugar, and I play around with dairy. Lots of grass fed beef and good veggies. (I was dairy free for a few years however when I eat it I feel fine.)
-Avoidance of conventional household products. Instead: Natural detergents, soaps, toothpaste, shampoo, etc... I do use conventional aluminum containing deodorant because I have some less than ideal odor if I don't.
-Air oasis filter to improve indoor air quality (bedroom)
-Water filter in shower, Reverse Osmosis filter to drink from. (Ideally, you'd have a whole house filter but I do not.)
-Exercise as tolerated. (I can only lift sometimes, I cannot tolerate cardio.) DO NOT overdo it.
Things I will try soon:
-More regular sun exposure
-epsom salt baths
-Alka seltzer gold (Helps alleviate detox and herxheimer symptoms in some people.)
-Actual sauna (Not infrared)
For more info on mold check out:
(Ritchie shoemakers site, not a huge fan of his personally, I disagree with a few things he says but still worth reading and learning what he has to say.)
The best article I have found: (Non-Shoemaker)
https://www.hindawi.com/journals/tswj/2013/767482/
I have summarized here but feel free to ask questions and I will go into further detail. Good luck to everyone in regaining health. Cheers.
I've started to get into electronics myself, and I can say that soldering is easy, but you need the right tools for the job.
You'll need an adjustable temperature soldering iron and 1/2 milimeter iron/lead solder as the bare minimum.
I suggest grabbing some tip tinner, solder wick & vacuum, and some cheap boards to practice soldering.
This video shows how to do the actual soldering, while this video covers the tools you'll need and explains their use. These videos are made by EEV Blog and explain soldering in GREAT detail, which is how I learned to do it.
As far as making actual circuits, you have to have an idea AND parts to fulfill your idea. The Arduino UNO is a great way to program and test circuits. It's essentially a small comptuer designed to repeat whatver task you give it over and over. Alternatively, there's the Raspberry Pi, which comes in a few different models. The difference between the Pi and the Arduino is that the Pi is essentially a mini computer. You can literally hook it up to a monitor via hdmi and slam an operating system into it.
Both boards typically come in kits like this one for the Ardunio, or this one for the Raspberry Pi. The Ardunio kits with come with a lot of peripherals, like sensors and LEDs that actually do things, while you'll have to invest more with a Raspberry Pi. These kits come with detailed instructions, code you can copy and paste, and are a great way to learn how circuitry works, and is exactly what I'm doing right now. I'm no expert by any stretch of the imagination, I've just done a decent amount of research to find out what's what.
There are two ways to hook up circuits - temporarily and (somewhat) permanently. Breadboards are used to prototype circuits without having to solder anything, typically using these wires to link different parts of the circuits together. Soldering components to those green boards I linked earlier is what you'd do when you have your circuit up and running and want to move it to something more permanent. I say "more" permanent because you can usually de-solder stuff if you needed a component for something.
Adafruit has a decently sized library of projects you can try. They often sell stuff in kits where you get everything you need to make something -- for example, this DIY MIDI controller.
Sparkfun has a great series of articles that explain the very basics of circuits and electricity
Hopefully I've explained everything enough so that you can venture off on your own. Feel free to ask questions!
I spent nearly 20 years as a cook-then-sous-then-exec in fine dining kitchens. I've bought cheap knives, and I've bought expensive knives. I finally found my sweet spot split between Misono Swedish Carbon and Misono UX10s. I have a few different styles of knives in each, and they each have their ups and downs. The downside to either of those is that they're not exactly cheap (but you can spend way more if you're so inclined).
On the cheap side of things, this series of knives form Victorinox is probably the best value out there. For a home cook, these are absolutely bifl, but they're not exactly sexy.
My recommendation when anyone asks me a question like this is to go for the Mac Professional Series. They're fancy enough to be a little special, but not so special that you're afraid to use them. Full disclosure, I still use a Chef Series Mac 5.5" utility knife. In a professional kitchen, your utility knife gets so much more use than you'd imagine, so having a cheap one without the bolster is nice in case someone drops it in the fryer and kills the temper, or kicks it under the dish station etc. For home, I'd get the nice (pro series) version.
Anyway, for a first investment in nice knives, I'd go for an 8" chef's knife, dimples or not, it makes no real difference, and a 5.5" utility knife. The second addition would be 10-12" carving knife. Of course, a serrated bread knife and a small paring knife are necessary, but that's where those Victorinox knives I linked above are perfect.
I'm sure the bifl crowd here will crucify me for recommending stainless, but unless you're using your knives every day for hours a day, it's way too easy to get lazy and you end up with pitting and rust on all those fancy carbon knives, and that makes you less likely to use them.
For sharpening, get a 1000/6000 grit whetstone. When I was cheffing for a living, I hit the 6000 every day, and the 1000 once a week. Now, I cook dinner maybe 4 times a week, and I hit the 6000 once a month, and the 1000 like once or twice a year. Keeping the knives in cases helps with this. Drawers will kill the edge. Youtube has plenty of tutorials on how to use a whetstone and keep everything straight.
As far as "sharpening" steels go, it's nice having one around if you're doing a ton of knife work and need a quick touch up, but slapping a knife on a steel is not the same as sharpening it, and if you let the edge get truly dull (by hitting the steel instead of sharpening it), you'll have a bear of a time getting the edge true again.
Anyway, if you buy something made by an ancient Japanese craftsman who's older than the volcano he forges in, sure, it'll be cool and have fancy wavy lines. If you buy garbage it'll be garbage. Whatever you do, just know that nothing screams recent culinary school graduate than a Shun santoku.
note: I've written "you" a bunch in here. It's less pretentious than saying "one may sharpen..." and less clumsy than referring to your partner at all times . I hope you'll forgive me.
edit: tl;dr get the Macs
I'm a huge advocate for dice boxes. Don't get me wrong, I love dice bags, but I'll take a box over a bag for general use any day.
Best place to get them is a thrift store. Comb through and I guarantee you'll stumble across something wonderful. Old jewelry boxes are the best, you can find ones from the 40's and 50's made of solid wood and they're virtually indestructible and most already have felt inlaid in them already.
You can use these for storage and rolling if you get the right one. If the lid comes off, some felt will turn it into a handy dice tray for rolling. You can buy a dice tray if your storage box doesn't allow for it. They're relatively inexpensive and it'll be the best thing you can buy for gaming since dice.
Craft stores will have ready-made boxes that you can stain and sand if you're feeling DIY but I avoid these generally because the woods are a bit softer and the boxes themselves are not very well constructed. On top of that, they can be expensive and you still have to do a lot of the work yourself. Best to go with a Goodwill find; much cheaper and you get a better box out of it in the end.
For general storage, I tend to go for a screw case. They're dirt cheap and keep everything sorted but be sure you get one with wells deep enough for your dice.
I use an open top box lined with felt that I got as a giftbox years back in conjunction with a bag. I have an amazingly soft purple leather pouch that I use to transport the dice I'm going to use for that game then I just roll in the box. Everything goes back into the screw case when I get home and no dice get lost.
...I really need to stop watching Good Eats.
Everyone here is recommending you buy a soldering station - which is 3 times the cost of the full kit you linked which is absurd. The Hakko 888 is fantastic, but not what should be recommended in this scenario.
​
Honestly what you linked is likely crap and will probably frustrate you away from the hobby. If you get something with easy-to-buy interchangeable tips, it will help you a lot. Something like: https://www.amazon.com/dp/B000AS28UC/ may be a bit better of a deal and will be fine for learning. Also grab yourself some well-reviewed solder (rosin-core is fine), a cheap solder wick, cheap solder sucker, and a flux pen (flux will only be necessary if you are re-working - something you may do a lot when you start).
​
If you are looking for a cheap multimeter as well, anything will likely be good enough. Buy whatever has a feature set you think you need. Just note, that I wouldn't recommend measuring anything like mains AC with a cheap meter. Stick to low voltage ( < 50V) DC and you'l be fine. One of my favorite meters is the VC921 pocket DMM. It can be had for ~$10 and is accurate enough for me with a good feature set. Just note that it doesn't do current measurements. If you think you may get into electronics long term I recommend investing a nice meter. Fluke is the go-to brand-name, but there are many who will work just as well. Fluke 101 is ~$40 and will do everything besides current readings. If you want current, I recommend stepping up to the Fluke 107.
&#x200B;
Also not a fan of all of the tools in that kit you linked. A lot seem un-necessary or extra cheap. These are expensive, but Adafruit and Sparkfun are great and reliable sources for hobbyists and have similar kits:
&#x200B;
https://www.adafruit.com/product/136
https://www.sparkfun.com/products/14681
This is my first EDC post, hope you all enjoy
Kershaw 1830 OSO Sweet Pocket Knife
Kershaw 1304BW blackwash: this came in the kershaw walmart gift set (2015)
Streamlight 66318 MicroStream C4 LED Pen Flashlight
ThorFire PF01 Tactical LED Flashlight Pen Light
Pebble Smartwatch Black I wear this one the most, as I love being able to control my music with it
Invicta Signature model 7376 This is my Fancy watch. I bought it on a cruise a couple years ago, I only wear it for special occasions.
That’s it.
No problem! Just wanted to also add that since I made this post, I've actually done a little more research into smart home stuff. From my understanding, if you don't have bluetooth built into your receiver, you may actually not need Smart Things if you want to be able to control the outlet at the same time as the music mode.
If you get a wifi controlled smart plug (like this one), Alexa will be able to discover it over wifi without a hub like Smart Things. Once you get Harmony all set up and working with your setup, you can then get a phone app and Alexa skill called Yonomi. It basically discovers all your smart devices and lets you set up custom activities for them in the app, and lets them be discoverable by Alexa through the skill. If you then recreate all your Harmony activities within Yonomi as Yonomi activities (basically by making a new activity called whatever you want within Yonomi, that when invoked, activates the Harmony activity of your choosing), all your Harmony activities will then be treated as devices in the Alexa app.
This means that you can make a group within the Alexa app consisting of your Music Mode activity (the one made in Yonomi that calls the one made in Harmony to turn on the correct devices), as well as your smart plug. Then just name that group Music Mode (or whatever you want to call it). Then you can just say "Alexa, turn on Music Mode" and she'll power on the plug and have Harmony turn on the right stuff. At least this is how it works from what I've seen. Definitely a bit of work, especially if you're planning on making a lot of activities for Harmony, but arguably ultimately worth it since you don't have to drop the extra $100 for a Smart Things hub.
Now, if you plan on getting into the smart home scene down the road, Smart Things opens up a lot of neat things you can do. So if that's the case, it may still be worth the investment to get a Smart Things hub. Then you could get a wifi smart plug, or a plug compatible with smart things (one that works using Z-wave, for example). But hey, you know, just another option.
I'm in the process of building my first FPV drone with my 11 year old son. Tools I owned or have purchased for this are:
A set of small screw drivers. I found a set in the bargain bin at NAPA Auto that had straight, philips, a few hex, a few sockets.
A decent electronics soldering station. Not the gun. I have a digital Weller that is easy to control, but the analog is just as good for these purposes.
A third hand. There are many different kinds. I got a cheap $5 one at Harbor Freight. Not great, but does the job.
Solder, de-soldering wick, flux (maybe)
Depending on where you're doing your work, might want an air-filter or fan.
A magnifying lamp is helpful but not necessary.
An assortment of board stand-offs/spacers is handy.
A good small pair of wire snips.
Wire stripper
A digital multimeter is not a bad idea.
Those are all the major tools you might need. Plus all the drone parts. batteries/charger. Radio/receiver. Camera/receiver(goggles or screen).
In short, it's a lot of stuff. The drone parts end up being the least expensive part, honestly.
Above links are just examples, not necessarily endorsements.
You mentioned you're on a budget, which I totally understand. Building is not the cheapest route, but it's been a lot of fun so far. People who've done it for a while tend to forget the cost of tools. Once you've built one, subsequent drones are relatively cheap. You can re-use batteries, the charger, most decent radios, even the receiver.
If you're not in a hurry, Bangood is a good source for cheap(er) parts. You're on your own for support, usually, but there's lots of help out there.
Before anything else: Someone else said jack stands - get them. Don't die under a car. I almost did, it's easier to fuck up than you think.
I have the 1.5 ton HF aluminum jack, I wish I had gone for something a little bigger. It doesn't really have the lift height for bigger jobs.
Another thing I don't see mentioned: LIGHTS. I keep two of each of these in my garage:
https://www.amazon.com/gp/product/B06W2HTGFL/ref=ppx_yo_dt_b_search_asin_title?ie=UTF8&amp;psc=1
https://www.amazon.com/gp/product/B0015UC17E/ref=ppx_yo_dt_b_search_asin_title?ie=UTF8&amp;psc=1
Plus I have the Braun (HF) flexible work light:
https://www.harborfreight.com/390-lumen-magnetic-slim-bar-folding-led-work-light-63958.html
This thing is great, but I have the typical HF complaints about quality especially around its willingness to charge all the time. I put a washer on the battery and that seems to have solved the issue for now.
I wouldn't mess with a pneumatic impact unless you find yourself in a situation where you really need one and can't afford an electric. Your compressor flow rate has a lot more to do with its ability to run air tools than anything else, and unless you really have a shop quality compressor you won't run a pneumatic impact very long.
I'd wait until you really need an impact and if you find you do, I'd suggest this one:
https://www.lowes.com/pd/DEWALT-XR-20-Volt-Max-1-2-in-Drive-Variable-Brushless-Cordless-Impact-Wrench-1-Battery-Included-and-Charger-Included/999947862
Now it's not the best electric impact you can get - the Milwaukee and Makita versions are both marginally better - but it's available at every big box store, and when you factor in the cost of batteries it's WAY cheaper.
For hand tools, I'd go 100% harbor freight (pittsburgh). Most things can be done with 3/8" and a lot of extensions, but having 1/2" is really helpful. If you use it enough to break it, upgrade then. I use 1/4" for lots of things but it's a luxury for the most part. Get metric deep and standard depth sockets. I also consider ratcheting box wrenches nearly a necessity. Again, the pittsburgh set is a great deal for what you get. Get all the lengths of extensions you can.
If you find you want (or need) nicer hand tools, my next step up is generally gearwrench. This set is one of the few things I might consider a splurge on out of the gate:
https://www.amazon.com/gp/product/B00BTEXPDK/ref=ppx_yo_dt_b_search_asin_title?ie=UTF8&amp;psc=1
You need a torque wrench. Someone else suggested the tekton 1/2" drive and I 100% concur if you had to pick one to start with. Make sure you learn how to use it and how to properly store it. A deep lug socket (19mm or 21mm usually) is your friend, figure out what size your lug nuts are.
I can't live without a couple pairs of vice grips. They're by far my favorite tool for grabbing spring-loaded hose clamps.
You need at least one dead blow hammer. They're cheap as hell at harbor freight (noticing a theme?)
Magnet trays are usually free at harbor freight with a coupon and purchase. Get a nice stack of them, they're priceless.
Other Odds and ends that I use a bunch:
Finally, abuse www.hfqpdb.com - there is often a coupon for whatever the hell it is you're gonna buy at harbor freight. If not, use the 20%.
I'm sure I'll think of a bunch more stuff later on
Edit: I told you I'd forget some stuff.
Prybars are a must have
A pick set is nearly a must-have
One of my favorite things I've done is get a big bulk food scoop from GFS and put it in a 5-gallon bucket of oil dry. You end up needing it a lot.
Ok, so there are a lot of things I'd probably change :)
&#x200B;
Motors - SabotageRC Booty 2306-2300kV, they're cheaper and significantly higher quality than the DYS you're looking at (they are made by DYS, as well, but with much higher quality components and build quality)
&#x200B;
ESC - beware Racerstar. Some things they OEM and you get a good product for a good price, but others you get significant drops in quality. I would pay a few cents more apiece and get Spedix ES-20 Lite ESCs.
&#x200B;
VTX - the one you selected is decent, but your soldering skills need to be up to par, the wires come undone from the VTX extremely easily and are incredibly difficult to reattach. I would recommend a few dollars more to get an AKK VTX with either larger pads or a connector.
&#x200B;
VTX antennas - There are better ones out there. Lumenier Axii is one of the best and most durable (and significantly lighter), pagoda antennas being slightly better in some regards but more fragile.
&#x200B;
Radio - The Turnigy Evolution is about the same price now and is a better choice than the FS-i6. Still uses the Flysky AFHDS2A protocol, so it will work with the receiver you selected (and there are now others that are good, as well). If the phonebook style radio appeals to you, then the i6 is the only cheap choice, but keep in mind it is a CHEAP radio, not an inexpensive one.
&#x200B;
Wire - I would suggest ordering some 14, 16, 18, 20, 22, 24, 26, 28 gauge wire from Hobbyking (as much as they suck, they're the only place that sells lengths of wire inexpensively). Getting 1m of each wire in both black and red should only be 10-15 bucks IIRC.
&#x200B;
Power supply for charger - get a supply that is at least 19v and 200 watts, like this: https://www.amazon.com/MEAN-WELL-LRS-200-24-211-2W-Switchable/dp/B00YMA7I7C/ it is a few dollars more, but you can also run your charger at its full output, which will come in handy for charging your batteries in a timely fashion.
&#x200B;
Soldering iron - get a quality one, you're going to need it. https://www.amazon.com/Weller-WLC100-40-Watt-Soldering-Station/dp/B000AS28UC/
&#x200B;
You should also get some no-clean flux: https://www.amazon.com/MG-Chemicals-milliliters-Pneumatic-Dispensing/dp/B00425FUW2/
&#x200B;
Decent solder: https://www.amazon.com/MAIYUM-63-37-solder-electrical-soldering/dp/B076QF1Y85/
&#x200B;
And a tip cleaner: https://www.amazon.com/Hakko-599B-02-Wire-type-soldering-cleaner/dp/B00FZPGDLA/
&#x200B;
That should get you well on your way - still on a budget, but you'll hate yourself WAY less when you go to build it and have decent equipment. :)
MFC Molex Extractor | $10.99 | This is the most important tool you'll need, don't cheap out here. This one from MainFrame Customs is the best I've used
Side Cutters | $5 | You'll want these to cut the sleeving. It works way better than scissors
Now those are the basic tools, if that's all you want to get away with then be very careful and take your time while extracting the pins. Otherwise you'll want the following to re-crimp the broken pins.
Tool | Price | Description
Crimping Tool | $23 | Great quality crimping tool, works for all PC pin types (atx goes in the larger slot :) )
Stripper | $41 | Great stripper, makes it very easy to get consistent strips, ideal for crimping, however you could use regular stippers
ATX female pins | $0.30 for 5 | Replacement pins
If you end up needing to get these tools, one benefit is you can cut your cables to the lengths you need which will make it very clean for cable management. Lastly, if you are going to use paracord and are not re-crimping the pins, I would recommend this Paracord threader. It'll keep the pins from tearing the paracord and make sleeving a lot easier. If you are going with PET Teleios Sleeve, you wont need it, as PET expands enough to make it easy to sleeve over the connector.
> Knife sharpening. I've tried searching this sub for knife sharpening suggestions and while the most common suggestion is to pay someone to do it once or twice a year, I've read horror stories and I'd like to learn myself either with a sharpening stone or a system made to guarantee the angle. Any suggestions here?
Lot of options here. You can find places that will do knife sharpening. There's one near me that's just a small storefront but they do work for local restaurants and regular Joe walk-ins for a flat rate of $6 a blade.
However, it's really pretty easy to get into doing your own sharpening. Can find decent starter stones on Amazon, for example, as well as good online tutorials that'll give you the process. From there it's just hands-on time.
Doesn't matter if you're not perfect the first time you do it - can always go back and put a better edge on a knife later when you get better at it. Probably most important thing is to know how to hold and maintain an angle - conveniently you can come up with good rules of thumb using trig. For a typical western angle of 22.5 degrees per side, you need to hold the spine up off the stone 3/8" per inch of blade height. For a more typical Japanese angle of 15 degrees it's 1/4" per inch of blade height. Just have to take a look at what that is with a ruler, then you can put your thumb up against it and find where you need to "lock in" and hold it.
I enjoy doing it myself, picked it up pretty quickly over the summer, and I'd say my knives tend to have a better-than-new edge on them. 1-2 times per year seems sufficient, maybe 3 - really depends on type of steel and use.
I've been researching this myself. I do think you need to specify a few things first though:
The ones I'm considering are mostly mentioned in this thread, but I'll list a few:
Headlamps:
Regular lights / slightly cheaper:
Battery options:
From my research, the best values batteries are these, depending on category:
Highest capacity, current good for maybe 6A (some say 10A):
Panasonic 35E or Sanyo NCR18650GA
Need high current: (10-20A)
Sony VTC6 or Samsung 30Q
waterstones for sharpening and a honing rod for western knives (guessing that's what you have).
Something cheap but good for value like a King 1k/6k to get you going first.
Once you get better, you can always upgrade to nicer stones like Shapton, Naniwa, Suehiro, etc.
I use Japanese knives so I don't have a honing rod and can't recommend you one.
&#x200B;
Gist of it
Soak stone 10 mins
Start 1k grit side, run each side 5 - 10 times (look up what a burr is)
Start 6k grit side, run each side 5 - 10 times (polishing)
optional - you can also strop it to make it sharper using newspaper, cardboard, leather
hone the knife (5-10 passes) end of every week after use
&#x200B;
There are really good playlists like Korin or JKI but they can get pretty serious, detailed and sometimes overwhelming.
I like to watch Burrfection where it's more casual content.
Yes, carbon usually has a much more significant edge stability. However, since you're not using it often, carbon represents quite a bit of maintenance (it will rust). Even with oil, if it's in long term storage, it tends to get small spots of rust that need to be polished off. If you use it frequently, rust usually isn't a huge issue. Long-term storage is where the rust really becomes a problem. Snow could present more issues with rust, but I haven't had to deal with that in my climate setting.
If you have a honing rod, that should fix a rolled edge better than a pull-through sharpener. But a knife is no knife at all without a properly sharpened edge.
Since it seems like you're not doing heavy woodwork...maybe a folder would be best for you.
For minimal maintenance, good edge retention, and as long as you're not doing heavy wood work, try the BRK Avispa or Zancudo (links go to Amazon). Alternatively the OKC RAT and RAT II are essentially the same knives but with different styling. I believe these are all in AUS-8 Stainless Steel and have pretty hard edges. The edge should last a while with no sharpening (use your honing rod, though). The Avispa and RAT 1 are both quite large--I think the blades are about 4 inches long. The Zancudo and RAT II have ~2.5 inch blades and are much better suited for every day carry.
Opinels are great for culinary applications, but I don't personally like them for woodworking. Great for spreading cheese, and cutting summer sausages though! I also don't entirely trust the locking mechanism. But they are super cool knives. The stainless loses its edge very quickly to rolling.
&#x200B;
Do you mind me asking: what is your version of 'flashy'?
I really like this sub, but sometimes it has some strange articles on it that I don't personally believe in (everyone's entitled to an opinion), which can also turn other people off to the idea behind it. Not all good alternative health options have studies to back them up, but its good to at least try and find some science to back up the claims.
Anyways, I worked in Ophthalmology for a few years and found that reducing blue light at night is a great way to aid in better sleep (and has other positive effects). This is especially important for ages 0-20.
There is a relatively easy way to lessen the effects. Get glasses lenses that block blue light (they look kind of orange) which is the most effective (amazon has cheap options http://www.amazon.com/Uvex-S1933X-Eyewear-SCT-Orange-Anti-Fog/dp/B000USRG90). Another option which is less effective is to download an app that lowers the amount of blue light given off from screens (I think its called twilight for android, f.lux for windows, not sure about ios). This should be used about 2 or more hours before bed.
Another tip:
For eye fatigue (which is good for people on the computer all day as well as using handheld devices): the 20/20/20 method: every 20 minutes look 20 feet away for 20 seconds or blinks to let your eyes relax.
Expected but icky answer: Kershaw Skyline (two words: butter knife)
Good answer: any of a million or so inexpensive CRKT flippers with IKBS, like the odd-looking but fantastic Ikoma Carajas.
Best answer that I know of currently: save $14.89 more and buy a Kizer 3404, then thank me later.
Bonus option I've-never-tried-but-will-at-some-point: a Russian Kizlyar Supreme Biker Z
Title | Vaping Coil Winding Jig Tool
Description | Fasttech Vaping Coil Winding Jig Tool for Rebuildable Atomizers https://www.fasttech.com/p/1926001 stainless steel / 1.5mm + 2.0mm + 2.5mm + 3.0mm + 3.5mm sections SKU 1926001
Length | 0:01:17
SECTION | CONTENT
Title | UD Coil Jig V3 - Demonstration
Description | UD Coil Jig V3 http://www.vapetime.co.uk This is a quick demonstration of the Coil Jig V3 by Youde Technology. For more information please visit: http://www.vapetime.co.uk/ud-coil-jig-v3/ If you have any questions please do not hesitate to call, contact us or leave a comment. We are always happy to help :)
Length | 0:04:00
SECTION | CONTENT
Title | Quick and Effective coil build for RDA atomizers
Description | ::EDIT:: It's a good idea to check your resistance ( ohms ) BEFORE you attempt to glow and fiddle with your coils. The resistance will change as your coils get more even. So check before, then check again after. Thanks. Hey everyone! If i'm being 100% honest. I mostly shot this video for my brother who recently got into the world of rebuilding. He was really struggling with it. Rebuilding has become such second nature to me that I often forget how it feels to be building for the first time and that sense of frustration that sets in quickly. So hopefully some other people will find this video helpful. Rebuilding honestly just takes practice and patience. ANYONE can do a solid simple build that will produce both great flavor and large clouds ( if you want ) The build in this video came out to 0.3ohms, which will work great on a mech mod, or on a higher wattage regulated device like the Sigelei 150w or iStick 50w I used 24g Kanthal, 6 wraps around a 2.5mm screwdriver. Below I have links to most everything I used in this video. Including some "beginner friendly" RDA atomizers. Precision screw drivers http://www.amazon.com/Stanley-66-052-6-Piece-Precision-Screwdriver/dp/B00009OYGV/ref=sr_1_1?ie=UTF8&amp;qid=1435336275&amp;sr=8-1&amp;keywords=precision+screwdriver+set&amp;pebp=1435336344707&amp;perid=1M11EBNKQ3Z63A7B0VQ8 Wire Clippers http://www.amazon.com/Hakko-CHP-170-Stand-off-Construction-21-Degree/dp/B00FZPDG1K/ref=sr_1_1?ie=UTF8&amp;qid=1435336368&amp;sr=8-1&amp;keywords=Wire+Clippers 24g Kanthal http://www.amazon.com/Genuine-Lightning-Vapes-Kanthal-Resistance/dp/B00JWYIHLY/ref=sr_1_1?ie=UTF8&amp;qid=1435336391&amp;sr=8-1&amp;keywords=Kanthal&amp;pebp=1435336399204&amp;perid=0Q2SHF5N87Q64YJT5F9E Organic Japanese Cotton http://www.amazon.com/Japanese-Organic-Cotton-Organic-unbleached-Largest/dp/B00P219C5Q Unfortunately the VapeKit has been discontinued. They are doing a V2 kit, but in the meantime check this one out http://www.coil-master.net/product/diy-kit Some good RDA's for new builders IMO Mutation X V4 http://www.vapordna.com/Project-Sub-Ohm-Designed-Mutation-X-V4-RDA-p/psmxv4.htm The Mako http://www.beyondvape.com/store/import-cat-c-1_2/beyond-vape-mako-rda-p-1927.html The IMP http://www.empiremods.com/product_p/youdimp.htm Thanks so much for watching everyone! hope this is helpful. Feel free to follow me on Instagram http://instagram.com/grimmgreen/ Twitter https://twitter.com/GrimmGreen Facebook https://www.facebook.com/GrimmGreen Also please remember that unless you make it so I can reply to you. I will be un-able to reply to your comments.
Length | 0:22:32
****
^(I am a bot, this is an auto-generated reply | )^Info ^| ^Feedback ^| ^(Reply STOP to opt out permanently)
I have a lot of different Smart outlets being used around the home. It really depends on what your use is going to be.
For a cheap outlet where space is not an issues, these from KMC have worked well for me. They are pretty dependable even in areas with weak WiFi signal and the energy monitoring is nice for things like air filters or fans.
KMC also makes a nice multi outlet plug. I personally use this to control the multiple led light strips at my garage workbench.
For anything 15A, I would say TP-Link is the way to go. These have been great for me, but the newer HS105 does have a better form factor. I have used these for my garage fridge, windows AC unit, and tools at my workbench. There is an energy monitoring variant as well, the HS110
You may see that there are a ton of the cheap round shaped smart plugs on Amazon and other sites. I have found all of these to be almost exactly the same, no matter what company they come from. They work well enough for simple devices like lamps, but they have tended to have issues in anywhere, but perfect WiFi signal areas.
Let me know if you have any questions on this or any other devices. After a few years of upgrades, I am at over 110 smart devices, so I can tell you what not to get...
I have my own stethescope; I'm not a fan of other peoples junk in my ears. It's easy to go down the path of having all the gadgets, but honestly, most of the stuff you'll cary will be ambulance/company stock. Things like pens, penlights, trauma sheers, extra gloves.
I always have a small folding blade on me (I'm in NH so no clue whats legal there). As far as essential supplies I keep on hand all the time, a bottle of 5 hour energy for that 3AM transfer, a pack of gum and a zippo. Multitools are pretty standard fair, as well as a beefier penlight. I like mine cause It beats the giant maglights we keep on the truck and it's useful for probing into pockets (You told me there weren't any needles on you, and yet what's this in your breast pocket?)
Remember it's less of what you have and more of how it is presented. Dont be this guy
What do you use the Skeletool most for?
If you use the knife on it constantly and daily, then yeah, get a good knife. If the stuff that you do cut makes you nervous with the Skeletool then definitely get a dedicated knife.
If you use the bit driver or pliers on the Skeletool the most then you probably don't need to carry a dedicated knife.
Give the Sage 5 a good look as well if you are considering the Para3. I'd also strongly recommend finding a Spyderco/Benchmade/Zero Tolerance dealer and fondling a bunch of knives before making a decision on which knife to buy.
If you have never carried a dedicated knife before it would be a good idea to buy a cheaper knife or two before spending $100+ on a knife.
Could try something like the Spyderco Byrd Cara Cara 2:
https://www.amazon.com/Spyderco-Cara2-Lightweight-black-PlainEdge/dp/B0049AYJP4/ref=sr_1_1?s=sporting-goods&amp;ie=UTF8&amp;qid=1499523866&amp;sr=1-1&amp;keywords=Byrd+Cara+Cara2
The Ontario Rat I/II
https://www.amazon.com/Ontario-Knife-Sp-Black-Folding-7Inches/dp/B00BBPAOCW/ref=sr_1_2?ie=UTF8&amp;qid=1499523684&amp;sr=8-2&amp;keywords=ontario+rat+2
https://www.amazon.com/Ontario-8848-Folding-Knife-Black/dp/B0013ASG3E/ref=sr_1_1?ie=UTF8&amp;qid=1499523956&amp;sr=8-1-spons&amp;keywords=ontario+rat+1&amp;psc=1
Kershaw Cryo
https://www.amazon.com/Kershaw-1555TI-SpeedSafe-Folding-Knife/dp/B0074FI28Q/ref=sr_1_1?ie=UTF8&amp;qid=1499523664&amp;sr=8-1&amp;keywords=kershaw+cryo
CRKT Squid
https://www.amazon.com/Columbia-River-Knife-Tool-Folding/dp/B00TFY39EQ/ref=sr_1_1?s=hi&amp;ie=UTF8&amp;qid=1499524020&amp;sr=1-1&amp;keywords=crkt+squid
Try some under $30 knives, pick one that looks like something you would like to carry, and pick something that is dang near the polar opposite. It will let you know what you like in a knife much cheaper. Differences in blade size, blade shape, handle shape and how they are used might change your opinion on what you think you need in a knife after using a dedicated knife for awhile. After that you can make a truly informed decision on a high-end knife.
Do you know what they currently have at all?
A really coarse stone with another side for finishing on would be this - useful for fixing chipped blades and overall getting a very sharp edge. It's diamond so it does not need maintained. It's quite heavy so it can be set down on something and used anywhere with a splash of water, or even without water. But better with..sorry it exceeds your budget a bit. It was 7$ cheaper a few months ago: Sk11-sided Diamond Whetstone # 150 / # 600 https://www.amazon.com/dp/B003EIE8LC/ref=cm_sw_r_cp_apa_i_K765Ab44NE259
A good at home stone in your price range would be this one, you have to soak it in water for 5-20min before using (each time, until it stops bubbling in the water) but it's a great stone that is widely used: KING KW65 1000/6000 Grit Combination Whetstone with Plastic Base https://www.amazon.com/dp/B001DT1X9O/ref=cm_sw_r_cp_apa_i_n565AbSFCV7EG
Anything 'bearmoo' or 'sharp pebble' or anything looking like those ones honestly is not going to be enjoyable or comparable in quality to the above.
Another great stone worth mentioning: Shapton Ha No Kuromaku Ceramic Whetstone Medium Grit #1000 https://www.amazon.com/dp/B001TPFT0G/ref=cm_sw_r_cp_apa_i_o-65AbB1PMZ8B
If they already have some bench stones, maybe they can use a holder - super useful!: POWERTEC 71013 Sharpening Stone Holder, 5-1/2-Inch to 9-Inch https://www.amazon.com/dp/B00NFB2MTI/ref=cm_sw_r_cp_apa_i_h.65AbP2HAJ5W
If you're spending $100, most well known brands will be sharp and strong. The rest depends on taste and preference. But a few options
Triad lock is really tough, CTS-XHP is a great steel. Cold Steel knives always come razor sharp, and are known for being indestructible.
And most likely every person reading this will have another knife to recommend. It's a lot about personal preference. What look do you like, what lock do you like.
edit; Thanks kind stranger for the gold!
For day to day stuff, I think a folding knife is more than enough. Multitools are heavy and I wouldn't want to have to lug it around all day on my belt or in my pocket.
As far as recommendations go, you can buy a very nice folding knife for under 50. A lot of people here are going to recommend Spyderco knives, but keep in mind that they are much bigger than other folders in terms of height. (To be more clear, they are not heavier than other knives or necessarily have a longer or thicker blade or handle, but the blades are very wide and that translates to it taking much more room in your pocket.)
I would reccomend a Buck Nobleman. It is nothing fancy, but it has a nice wide blade, comes sharp, has a sturdy liner lock, and a good clip. You can remove the clip is you want. In my opinion, it is the best knife you can buy for 20 bucks.
I can also recommend the Kershaw Leek (this is an assisted opening knife, so research whether or not that is something you'd like) and the Kershaw Skyline.
If you want to spend a little more on a knife that will likely last you forever, from a company that has great customer service, I can recommend a Benchmade Mini-Griptilian.
I have a Streamlight Microstream. Using the pocket clip, I forget it's there until I want it. Using the recommended AAA batteries, it's brighter than a phone's LED, but I ran it almost exclusively on 10440 lithium-ion batteries, on which it is many times brighter at a cost of short battery life and heat. It has a forward-clicky switch, meaning that pressing the switch will activate the light before it actually clicks, for momentary use.
The trouble is, the switch broke after a month. While I'm sure I can get it repaired under warranty, I don't want to rely on it anymore and don't recommend it to others. I'm told the Pelican 1910 is a better version of the same thing, and I think I'll get one of those to replace it.
As others have covered, your bigger light should probably run on a single 18650 and it should not be from a Chinese brand with a name ending in "fire". Many of these have the option of running on CR123 lithium primaries as well. It's probably not a bad idea to keep a few of these around as they have a shelf life of at least 10 years so you can be sure you have working spares for emergencies. These lights usually use a Cree XM-L2 emitter and put out 600-900 lumens.
For situations where I think I'll need a light, I have a Nitecore SRT5. I like this light a lot, mostly due to its mode select ring. Lights like these usually either have a bunch of modes with a user interface that requires something akin to keying in Morse code using the main switch, or if they're generous, a separate mode select button all with the light on, or very limited functionality, such as high/low only, selected by turning the head to one side or the other. The SRT series uses a ring to select from several blinky modes and continuous dimming from a very low moonlight mode to 750 lumens on high. It's possible to tell by feel which mode the light is in before turning it on and to select a different mode while the light is off. I find that having a lot of modes does not get in the way with this UI, and given that, I do like having the beacon, strobe and SOS modes. There's also an extra red/blue LED, which I find minimally useful.
The SRT6 and SRT7 are similar lights with larger, longer-throw heads, but I like that the SRT5 fits in my pocket more or less comfortably. SRT5 kits with a battery or two and a charger go for about $100. An SRT5 by itself is around $75. The kits seem to be a good value. There are some other lights with mode select rings, and I listed a few in this thread. Absent from that list is the Thrunite Lynx, which seems to have limited availability and an MSRP of $130. The Lynx puts the selector ring at the rear of the light so it's easier to operate from the same grip as the power switch.
Edit: illumn.com has the Lynx in stock, but only two of them at the time of this post: http://www.illumn.com/flashlights/thrunite-lynx-xm-l2-1000-lumens-1-x-18650-2-x-cr123a.html
there's some good stuff in there.
I'd like to add a couple that aren't so well known.
You can actually heat up the plastic water bottles it mentions right on your campfire coals... it's not going to melt, surprisingly.
video
also for clothing, I like they mentioned wool -- really great even if it gets wet... but they didn't mention layers. This is important. You don't want to sweat when it's cold out, so if you're active you gotta shed some layers.
also use your spare grocery bags from home to wrap everything up in, especially clothes... just in case things get wet.
oh and silicone spray is great for water repellent, be it your jacket, boots or tent. Don't buy the "special water repellent stuff", it's just silicone spray. You'll save a couple bucks.
As far as hatchets/knives... you don't need anything big. You might think you do but you really don't. I would recommend a good brand like Benchmade or Kershaw. A regular pocket knife like that is gonna do all you need -- just don't use it as a prybar please.
oh and hobo stoves are pretty cool.
so is a rocket stove -- though the one here is kinda elaborate -- you can dig a hole in the ground and accomplish the same thing you just need the basic shape, airflow. really low fuel and insane concentrated heat from them.
oh and a hoopy frood always knows where his towel's at.
Wow, I'm amazed you guys haven't heard about the massive importance of lights on your energy level. I'd actually rate is as way more important than any kind of supplement/nootropic.
Light in the blue spectrum boosts the production of seretonin, giving you great, pure and clean energy. I often go from being grumpy, borderline depressed in the early morning to downright joyful after using my lamp for around 30 minutes.
The lamp I have is a Philips goLITE BLU. It's downright awesome. It's small, effective, easy to use (touchscreen) and portable. Some may think it's expensive, but it's actually not considering how big an impact it'll have on your life and for how many years it'll last you.
While blue light is great during the day it's harmful in the evening, since it prevents you from producing melatonin (the sleep hormone), both reducing your tiredness/ease of falling asleep and your sleep quality when you eventually do. To combat that I use glasses that filters out the whole blue spectrum, Uvex S1993X - just $8. It's much more effective than solutions like F.lux (it covers everything, not just your computer screen - and Flux can't stop all the blue light from the screen), and much easier to use too.
http://www.amazon.com/Uvex-S1933X-Eyewear-SCT-Orange-Anti-Fog/dp/B000USRG90.
A good quality soldering iron will ensure that you can get the solder hot enough to make good joints. A soldering iron that does 40 watts is recommended. I started out with a Weller WLC-100, ($40) but am now using an 898D ($70-100) soldering / rework station which uses the Hakko tips (much cheaper than weller tips). The Weller worked pretty well, but the 898D can get hotter and has a digital temperature control. I use a small needle tip, but some people prefer a bit larger tip because you can get better heat transfer.
Use 60/40 rosin core solder, which works great for electronics and RC, and flows very well. You may also want to get some solder paste (flux) which will also help flow the solder and go where you want it to. Usually a solder diameter around .03 inch is good. I use this solder from Radioshack.
If you're just dipping your toe in the water, grab that Weller I linked. It's under $40, but is a well respected budget iron. I personally own a Weller WES51. It's a fantastic iron, but if you're not convinced that soldering things is going to become a hobby, save your money.
Hakko is also a popular brand, but I'm not as familiar with their lower-end gear. If you get an adjustable temp iron from Hakko or Weller, you'll be set for a while.
Some other handy items are:
Other things to consider are goggles, a small fan to pull the fumes away from you (DON'T BLOW ON THE JOINTS), and something to solder on top of. If you don't care about your work surface, it's no big deal. But I use my desk, and sometimes the kitchen table, so I have an old 1 foot ceramic tile that I solder on top of -- the soldering iron base doesn't get hot, but you can drip/splatter solder if you're being careless, and it gives you a hard surface to use that you don't have to worry about getting hot/burned.
Yo! Honestly I have the same problem and have always had issues sleeping. Lots of things you can do to help sleep.
https://www.amazon.com/Uvex-Blocking-Computer-SCT-Orange-S1933X/dp/B000USRG90/ref=sr_1_4?ie=UTF8&qid=1537638419&sr=8-4&keywords=blue+light+blocking+glasses
Hopefully this helps somewhat. Definitely worth the $8 investment for the glasses, the others are if great if you don't mind supplements.
If you plan on doing more hobby work that involves soldering, I would highly recommend getting a better iron, prefererably one with a variable temperature range. There are plenty of good options from Hako and Wells that don't break the bank and are much easier to use than the cheap irons.
I have this station
Weller WES51 Analog Soldering Station https://www.amazon.com/dp/B000BRC2XU/ref=cm_sw_r_cp_apa_i_oeAYCbQNC90JB
And this pack of tips
https://www.amazon.com/dp/B01ARYBXLI/ref=cm_sw_r_cp_apa_i_SfAYCbG6XDDXE
Voultar (a great modder to follow, check out his soldering videos for inspiration) posted a good video on a decent iron station he found
https://youtu.be/cGdHJ3BTh_c
Good solder goes a long way to helping make soldering a lot better.
And yes, the clip on loupe is amazing! It magnifies tiny smd stuff really well. I can't recommend it enough.
Might be worth getting a solder wick for when you inevitably screw up. Solder vacuum isn't a terrible idea either. I have both, I use them for different things. A third hand is also useful. I find myself using the glass more than the arms but it's all useful. If the iron you buy doesn't come with one a brass ball is great for keeping your tip clean without cooling it off like a sponge will. Micro-cutter is useful, not sure if angled or straight is better, up to you I guess. Last but not least a pair of angled tweezers. You can get those anywhere.
These are all the things I have within arm's reach when I'm doing a project. Have fun!
Okay since there definitely seems to be some interested in the details of the set up i figured i'd go more into detail,forgive the poor quality photos please.
So first of here are the links to everything I'm using right now:
Polyscience Immersion Circulator
Cheap cooler
Smart Wall Plugs
Temperature Data Logger
So a couple note on these things. The only reason I'm still using the Polyscience is i paid way too much for it back when there weren't many other option and it still works. I'd like to get an Anova eventually. The whole reason for this project was I was trying to see if i could do what the Mellow Sous Vide has promised but not delivered on after waiting forever on my preorder.
This was just a test run and if I decide to cancel my preorder I'd most likely go with This cooler as it seems a lot nicer and still has the side cooler.
To answer in some more detail why I don't go with just an ice bath is honestly, I want to take all the food safety guess work out of this, and to me just hoping that you put enough ice in and that it will last long enough on that given day just doesn't work for me.
Here is a link to some photos of the set up as well as the app i use and a temp chart recorded with the data logger, that i'm using to figure out the time needed to get the cooler to food safe ranges.
I know this is a lengthy post but i hope it helps
Not the manufacturer, just a regular guy who loves gadgets and toys. I've had this thing in my living room, which has a really high ceiling, for years and yes, I genuinely recommend it. It's amazing for setting the mood in a dark room, very cool and soothing. You can even adjust the level of aurora. Would work in a bedroom too if you're into that sort of thing. I have Amazon Echo so I hooked it up with a TP-Link smart plug and now can just say "Alexa, turn on the stars" and it works. Great party trick when friends are over. Also a real panty dropper when you're getting cozy with the ladies. Trust me on this and get one. You won't regret it.
Is your litterbox enclosed? Because a good option if you're of the tinkering type would be to take one of those sewer tubes and attaching it to the top of the enclosure, then running the other end to the nearest window, attaching it to a window fan set to blow outward (towards the great outdoors) and insulating the window part with some foam board to save on the energy bill. The easy way to control the fan would be to unplug and replug it. A better way would be to use a smart outlet adapter to control it with your smart device, and the best option would be to set up a sensor that detects when the box has been used and waits until the cat leaves and turns on the fan until manually turned off/time limit is reached.
edit 1: make sure you use some sort of fencing to cover the hole for the sewer pipe, we don't want cat nuggets :P
okay, so... as far as cheap sharpening goes, stay away from pull thru sharpeners they give a mediocre edge and take years off the steel.
a cheap-ish way is to get a stone but learning to free hand sharpen is a pain and can take years to truly get the hang of. also chosing grits and a good stone that wont crumble and scratch the shit out of your knife.
you can get a lansky for 35-40$
or you can get a spyderco sharpmaker for 50-60$
i use one of these for rough stuff, really bad edges and reprofiling. i would recommend this because if you arent going to be sharpening often and dont need a razor edge itll be fine.
a good strop can get expensive but honestly you can just pick one for 15-20$ and some buffing compound for 3-10$
you can also use one of these to get a mirror edge, closer to finishing, freehand sharpening again has a larger learning curve, practice on a crappy knife. seriously. you will fuck up at first. you should see my first knife, gross...
if you decide in the freedom of freehand sharpening, check out atomedges guide in the sidebar. pretty helpful.
Most people will suggest skipping GW for paint and hobby tools to save money. I suggest hitting amazon for a pair of flush cutters, set of needle files, and pack of testors model cement. Krylon camo black spray paint is a fine substitute for expensive primers. Vallejo paints are a top reccomended brand, and there is a conversion chart to convert old and new gw colors to vallejo colors.
A set of just standard tac marines is a great place to start, you'll use them for sure and theres plenty there to work on technique, hit up the warhammer youtube channel, as they have painting tutorials that are really great, watch as many as possible as each has something you can use even if they aren't painting space marine models.
http://www.amazon.com/gp/aw/d/B00FZPDG1K/ref=mp_s_a_1_1?qid=1459352340&amp;sr=8-1&amp;pi=SX200_QL40&amp;keywords=flush+cutter&amp;dpPl=1&amp;dpID=414t7uLh8KL&amp;ref=plSrch
https://www.amazon.com/gp/aw/d/B0013E68SU/ref=yo_ii_img?ie=UTF8&amp;psc=1
(Starting out you should be fine with just a zero, but if you really have moneh burnig a hole in your pocket a 1 and 00 would also come in handy eventually. Never leave your brush sitting in your water cup, don't let paint dry in your brush, and keep paint out of the metal part.)
http://www.amazon.com/gp/aw/d/B0013D53CS/ref=mp_s_a_1_2?qid=1459352997&amp;sr=8-2&amp;pi=SY200_QL40&amp;keywords=testors+model+glue&amp;dpPl=1&amp;dpID=51QQU8wrc-L&amp;ref=plSrch
https://www.amazon.com/gp/aw/d/B000NPUKYS/ref=mp_s_a_1_2?qid=1459352697&amp;sr=8-2&amp;pi=SX200_QL40&amp;keywords=needle+file+set+for+metal&amp;dpPl=1&amp;dpID=412lincr%2B5L&amp;ref=plSrch
Add an xacto and tube of superglue from your local superstore and you have all the tools needed to crank out perfectly acceptable models. I'll admit the brush is a bit overkill, but you're saving so much money on the rest of the tools, and a good brush makes the experience much more enjoyable, I suggest splurging there. Also don't bee fooled into buying a basing kit, regular old sand does just fine,
True. I meant the whole fraud but as a general statement, not directed towards you, or what you have mentioned.
A lot of these companies aren't bad to deal with if you're honest. And have good luck.
Didn't actually know they were glass reinforced, which makes total sense that they are. My limit to experience with drones is some little cheapies. I'd really like to get into it, just seems expensive (yet I've spent around $200 in Wera screwdrivers this year).
EDIT: Also, I highly recommend these little buggers for soft, fine wire. They will instantaneously deform on use of anything heavy, but it's an inexpensive mistake. Good, consistent build quality (on the whole 3 I've seen), good feel in the hand. https://www.amazon.com/dp/B00FZPDG1K
No one taught me how to solder, I just kinda did it. Buy a soldering iron (like I said get one in the $50 range, obviously if you have money to burn a $100-$200 one is going to be 'better'. I use a WLC100 http://www.amazon.ca/Weller-WLC100-40-Watt-Soldering-Station/dp/B000AS28UC ) some solder, and start connecting components together. I would also pick up a desoldering tool, I use one of those bulbs but there are better/different types out there.
You can use use a breadboard with wires. That's sorta the recommended way to experiment. I tend to move things to protoboard pretty quickly as I find things get messy quickly and it's easy to disconnect things.
I should say I'm not an expert - I'm actually more of a beginner in the world of electronics, but I thought I would share my experiences of how I got started because the path is not totally clear.
I really wish someone told me that ebay/china was the place to go for components. It's stupid but it's just so much cheaper. (I got burned with sparkfun when I was building a project, $100 of parts, $50 shipping - I wanted it fast and it wasn't that much more - then the kicker $50 in import fees/duty at my door) After that I learned mouser was good, $200 and you get free shipping and duty - ended up ordering lots of random things and lots of things in bulk - need one resistor? Might as well get 1000 :). I recently learned digikey is in canada and does fairly cheap shipping so I tend to order from there now if I NEED something fast.
Ebay is the best though for stuff if you're in no rush though, and totally the best place to get stuff like protoboard, breadboard, jumper wires, resistor packs (assorted resistors) LED's, assorted IC's, etc.
I didn't have the dorm experience, but I lived far enough from campus that I would hang out there all day most days.
Quality shoes - you will be walking quite a bit. Depending on your style, consider something like a waterproof hiking shoe that will last through some like snows.
Reusable water bottle that will fit in your backpack well. Sparty's will fill it up, or you can use the drinking fountains.
I'm a fan of some of the /r/edc stuff as well, a small flashlight can be very useful, and shouldn't run over $20.
A small plug splitter, would be very useful. I have a more complicated one, but if I did it again, I'd get this. A lot easier to charge your laptop/phone when you don't have to convince someone to unplug theirs.
Either a collapsible umbrella or packable raincoat.
Extra headphones. I'm lucky enough to have accumulated several pairs of iphone earbuds, so if I lose/break one, I'm still okay.
Honorable Mention: Case knives. Traditional lockbacks. Hard as nails and pretty to boot. True pocket knives. Your grandfather (possibly great grandfather) had one. Good stuff the lot of them. $25-50 will get you a legacy knife that you can carry and use and then pass to your kid.
You don't need to spend $200 to get a quality, durable, reliable knife. I've owned all of these knives at one time or another and loved every one of them. Sure they needed sharpening more often and sometimes something a little more drastic (Sanrenmus are often cheaper to replace than fix) but the value is insane. Plus, lets face facts; we're much more likely to break out our Cadet when we get box duty than our Sebenza.
Knife enthusiasts (brothers) if there's a weighed and measured cheapo that I forgot, let me know.
It has been said by others, but let me repeat for emphasis: Layers. I know lots of people that bitch about the cold but only wear a coat over a T-shirt. Come winter, I'm wearing some kind of undershirt/thermal, a flannel/chamois/wool shirt, a vest and then a coat. Merino wool socks are awesome. Smartwool is the name brand, but you can find store brands that are much cheaper. I would suggest some kind of waterproof shoe or boot for the snow.
Get several pairs of gloves. You will lose them and going to the store with one glove sucks. I personally think glommits are the bee's knees. Warmth+dexterity when needed. Embrace the hat and have fun with it.
People have talked about a winter kit for your car, which is a good idea, but how about your house? If you have newer, quality windows (double pane Low E glass) you probably don't need to do anything, but if you live in an older house with old, drafty windows getting window film might be a good idea. If you have a drafty door, there are many adhesive-backed foam strip products to help seal those up.
Bundle up and try to enjoy winter. To me there are few things as beautiful as a crisp sunny day after a fresh snow, where everything sparkles and glimmers. So long as you're inside and drinking a cup of coffee that is.
EDIT: spaces after links.
Edit: https://docs.google.com/spreadsheets/d/1crvzMnt_8NJXAsABinoIhcOjE8l3h7s0L82Zlh1vkL8/htmlview?utm_source=share&amp;utm_medium=ios_app#gid=0
Also to remove supports buy one of these and use the flat side towards the mini itself:
Micro Cutter https://www.amazon.com/dp/B00FZPDG1K?ref=ppx_pop_mob_ap_share
Eh, soldering just takes a bit of practice, and there are tons of Youtube videos that explain in detail the best ways to do so.
(I'd recommend this channel https://www.youtube.com/channel/UChbLnX8JcsN9bH4BNgJZ6wA)
Really it's all about not holding the iron on the board too long. Once you get that down, it's easy. Learning the wire gauges and all that is also very easy as most boards have recommendations in the paperwork. (if it carries power, big wire... If it carries signal, smaller wire). These new DNA boards are about the easiest thing ever to work with, and even someone with little to no experience could solder them with ease. (now the DNA20/30/40, notsomuch)
If you're looking for a good soldering iron, you want something with wattage control, and while weller has been the standard for decades, they are overpriced and a bit hardcore unless you are a pro. I'd highly recommend the Hakko FX888D http://amzn.com/B00ANZRT4M which is what pretty much everyone uses, or what I personally use, the Aoyue 9378 http://amzn.com/B00BSW69LI which has served me very well. There are others for considerably less, and if you aren't planning on making this a hobby, then something like the Aoyue 469 http://amzn.com/B00MCVCHJM would be perfectly fine. (60w is about a low as you'll want for a variable wattage iron, so you'll have a little wiggle room)
That is not a terrible starter, but you can find a better quality King comb stone.
https://www.amazon.com/KING-KW65-Combination-Whetstone-Plastic/dp/B001DT1X9O/ref=sr_1_5?keywords=whetstone+knife+sharpener+king&amp;qid=1551396328&amp;s=gateway&amp;sr=8-5.
A Shapton 1500 can be had for around $40usd, & will produce a very fine edge & will not dish as quickly. I have sharpened half a dozen knives and there is no visible dishing. Plus it is a splash & go, no soaking needed.
https://www.amazon.com/Whetstone-Sharpening-Shapton-Ceramic-KUROMAKU/dp/B001TPJARE/ref=sr_1_1?keywords=shapton+1500&amp;qid=1551396805&amp;s=gateway&amp;sr=8-1
The thing with that Pebble is the 1000 grit side will dish pretty easily and fast. We have one at work. One of my cooks bought it. It will produce a nice edge, and the 6000 side will polish pretty nicely. The base is actually pretty nice.
So, right off the bat you've got two criteria that tend to start fights around here:
Ignoring those criteria, I'm going to suggest a Thrunite Neutron 2C. Click the button for on/off, push and hold to smoothly raise or lower brightness. Includes a good-quality 18650 and charges on USB.
And grab a BIC lighter for your fires. If you want something fancier, get a Zippo and a butane insert that won't dry out every three days.
>That's it - just two solder connections?
Yep. If you buy from Mountain Electronics and select the option for wires on the driver, then you just need to thread the wires through the pill and solder them onto the LED board (you might need to shorten them first). /u/potatoworld made a video that should be helpful: https://www.youtube.com/watch?v=1ngJaTn_rjE. There will be some differences with the Convoy.
> What would you recommend, for a high quality soldering iron, and what type of solder works best for flashlight work?
Lots of option out there for an iron. I've seen good reviews of this one for a budget option. For a solid station you'll use for a decade or two, this Hakko is probably the most popular. Make sure to pick up a few extra tips.
For solder, make sure it's 63/37 eutectic. This means it goes directly from liquid to solid without the pasty time in-between, which makes it flow better and leads to less "cold" joints. I like Kester 44 0.031in (you can find it elsewhere cheaper, just make sure it's the right one, they have lots of different blends and thicknesses).
Your intended type, volume, and roughness of use, and your sharpening willingness and skills will play a role in what knife and steel you get, though the cheaper you go, you lose some options. Do you want a folding knife or would you consider a fixed blade? Do you know how long a blade you might like? I think about 3.5" is basically "full" size in folding knives, with 3.0" being medium and particularly EDC-friendly, while smaller than that gets into mini territory. Lots of options in all sizes, plus big bigger ones. Are you a drop point guy? A reverse tanto blade shape guy? Spear point? Clip point? And do you prefer a liner lock, frame lock, axis lock, other lock? Do you prefer to open via thumb stud, front flipper, rear flipper, assisted open? Do you want plastic, rubber, G10, CF, metal, or something else on the handle? Do you want clip options for left carry, right carry, tip up, or tip down? Do you care if it's heavier? Do you need ultralight? Average weight?
Just searching Amazon for Ganzo (or Sanrenmu) will give you a bevy of cheap options, many of which look suspiciously familiar.
If you've got an extra four bucks and change and would prefer something American made and smaller, you can get the knife community's go-to recommendation for a great deal on a reliable smallish-midsize workhorse, the Ontario Rat 2. Get a ruler and imagine what you'd think of a 7 inch knife with a 4 inch handle an a 3 inch blade. Watch some review videos to get a better idea of size. A nice bonus is four-way reversible pocket clip for your choice of left/right and tip-up/tip-down carry. This cheaper version is in AUS-8 steel, which is easier to sharpen but holds an edge less well than the more expensive and harder to sharpen D2 version, which gets up closer to $40.. And at that price you could bump up to the larger Rat 1 in D2 if you wanted to for a buck or two more, though we're trying to hit $20 here. That one's got a 3.625" blade for 8.625" overall.
Anyway if you can answer some of the questions in the first paragraph, it will help people narrow things down for you and give you better recommendations. What would your ideal knife have? Fill in the blanks on fixed/folding, blade length, blade shape, handle material, open type, lock type, pocket clip preferences, and anything else like color, weight, etc.
And check out /r/Ganzo_Knives and /r/BudgetBlades for additional ideas.
Do you mean put the whole light in/on some kind of charging cradle? Those are available, but you'd be limiting your options greatly.
USB charging is more common. There are a number of great lights that'd meet your requirements that have USB or magnetic charging, so you plug a charging cable to the light. Again, your options will be more limited than if you were okay with removing the battery and charging it in a charger, but you'd have more options than if you require a cradle.
For a light with built-in charging you can buy on Amazon, and considering you can probably fit a 1x 18650 light in your shorts pretty easily, I'd recommend the Thrunite Neutron 2C Neutral White. Up to 1,100 lumens with useful lower modes and smooth brightness ramping.
EDIT: Although, the Neutron 2C is closer to 5 inches long than 4. If you want something really small (3.64" by 1") and high quality, you should take a look at the BLF FW3A (not on Amazon and not USB-rechargeable though).
First off, many of these things are intentionally cheap, because I do tend to break and/or lose things, so... Here goes.
All have Amazon links, because that was what was easiest.
Jewelry:
Right front pocket:
Left front pocket:
Wallet highlights:
Left back pocket:
Not shown:
After a headlamp for long miles but don't want to break the bank because it's a potential christmas gift?
Get the Wowtac A2S a 18650 L shaped headlamp and it's perfect for running (unless you're in fog or the clouds and its dark!)
https://www.amazon.com/Headlamp-Headlight-Rechargeable-Waterproof-Headlamps/dp/B071HW5XQH/&amp;tag=crtrftrd-20
Been running with this for a few months now and it's incredible, has firefly 1 lumen mode which apparently lasts weeks, then 10, 60, 200 lumen modes, i run with the 60lumen mode around the mountains and it's perfect, occasionaly clicking in to the 200 lumens to see ahead. Also has turbo and strode modes which I don't use but might one day for some photography stuff.
The reason I got it is that the 63lumen mode can run for 19+ hours, and it's 18650. Everyone needs to start migrating to 18650 running headlamps/torches. It's also a third of the price of any petzl or other "named" headlamp runners use and imo better. If you head over to /r/flashlight they will all say the same.
I am comparing this to a Nextorch Eco star (2xAAA) headlamp which is fantastic but comes in at 40lumens which just wasn't bright enough for some runs. Many different torches (I have a big collection) and i've tested friends petzls and other overpriced head torches, the wowtac beats it hands down!
Correct me if I'm wrong, but I noticed a glaring omission from your coffers.
Lineman's pliers, I'd recommend these Channellock's, or if you have a few dollars more their Code Blue line. They also have models with fishtape pullers if you need them.
Other things you could probably use are a good pair of wire nips. You won't find a better value than these Hakkos, A non-marring hammer/deadblow hammer is quite handy to have around. A pair of needlenose pliers. A variety of precision screwdrivers or an encompassing bit set, I like this Tekton Everybit set (confession, mine was a gift from Tekton rather recently but it is still an honest opinion)..
And where are your safety glasses, hmm?
BTW That is a nice selection of tools, this isn't really criticism, just trying to think of things you might find useful that you don't already have...
This is really all I needed to be happy and dangerous. I was actually just doing more research when I saw your reply come though. I just didn't know if it was even possible to wire these connections. My basic understanding is that it should be possible but there's so much I don't know.
&#x200B;
As for my soldering skills, they are probably "Beginners moderate" which is a thing I just made up. I've got the right gear to do the work but, as I'm sure you know, having the right gear is 10% of the job. Burned through 2 Teensy ++ 2.0's before I got it right with my last project.
&#x200B;
And I'm totally comfortable ruining some more hardware to try this. I'm actually excited by the prospect. I think I kept those teensy's. If I can find them, I'll practice by trying to remove the smt micro usb ports on those. Not nearly as hard but a better start.
&#x200B;
Anyway, really appreciated the reply. If you have the time to confirm I'm trying this with the right hardware, that would be just gravy. You've already done more than enough, though.
&#x200B;
I'm planning on using my:
- Hakko FX888D-23BY Digital Soldering Station
- T18-BR02 Tip
- and the thinnest solder I could find that still has a rosin core
&#x200B;
Anything look like the wrong choice? Tip and rosin?
&#x200B;
Thanks again for all the help
Good quality as in: Will work for Nerf stuff for a while, or solid build quality where you won't have to replace it often?
If you want to go for something that's no-worries and will probably last for the foreseeable future, the Hakko FX888 is SOLID.
Anything else I'd consider "nice" would have to have a soldering iron holder and temperature control that I trust. Very nice features, because if you leave the iron sitting for a while and don't tin the tip, the heat will start to oxidize/damage the finish of the tip and become unusable. This can also happen on any iron if you leave it running hot for a while, but something that's temperature-controlled rather than with an arbitrary power knob will keep your iron tip intact much longer.
Mid-tier would be something with variable power control but not temp control. You might be able to get away with lowering the power while you work instead of turning it off.
The "Amazon Special" that UNW1 linked is a fantastic soldering iron for the price, plenty of power whereas other cheap irons won't heat up quickly enough. I'd recommend it for most people starting out, since it's great for learning the basics + soldering iron care. There is practically no temperature control on the thing though. I turned it way down to minimum (Claimed 200-250C, which is nowhere near hot enough to melt solder) and it still threatened to overheat.
I've heard of irons that are even better than the Hakko/similar models in terms of where the heating element's located, other features... but I don't have much expertise in the field and haven't seen a need for those. As far as I'm concerned, $100 is as high as you need to go for now, and $50 can probably get you set up with a solid iron.
Here are 113 lights that run on an 18650, have a sub-lumen mode, cost below $90, and have a max output of at least 900 lumens.
Right angle lights double as headlamps and are super versatile. The Armytek Wizard Pro is an amazing option that comes with a battery and integrated charging for $55, and the Wowtac A2S is a budget option with a rechargeable battery for $30
The Zebralight SC64c is special because it has high CRI, which means it renders colors better than typical LEDs - this could be extremely useful for an EMT. Zebralights are very well built and most people that have them love them. They also have similar headlamps, such as the H604c. These lights don't come with a battery or a charger.
If you need more help then help us by narrowing down exactly what you're looking for.
Do you have a soldering iron at hand already? I wouldn't recommend this as your first soldering ever, they're pretty small connections and if you heat up the wrong part for too long you can damage them permanently. It takes a good amount of looking through the forums and researching but it can be done. I didn't have much soldering experience beforehand but I modded a different pair first to really figure out the wiring situation. I bought this soldering iron to do it and it works really well and I've been using it since for a bunch of other things. Just look up some tutorials on learning to solder before buying it to see if you think you can do it.
I wouldn't recommend that cable I have pictured, it's pretty hard to carry around and it makes a ton of noise when you tap it. I started making my own cables, which is a whole other process, but also a great way to learn soldering without the chance of fucking anything up.
I modded the hole slightly differently than how I saw other people doing it. Most people use a dremel to widen the hole a bit to get the jack to fit, but I didn't have one, so I ended up melting the edges a bit with my soldering iron. Would not recommend, it was super messy and probably dangerous.
You can ask me anything you need to here and I'll help you out, the process was tough without anyone to walk me through it so I know how it feels, but it's amazing when it's done. Very accomplished feeling.
You may have heard the old saying:
>The road to success is through experience.
>
>The road to experience is through failure.
It sounds like you have already achieved some failure, so this means you are well on your way on the road to success!
Let me add another old saying that I just made up:
>Good technique may overcome a bad soldering iron.
>
>A great soldering iron will never overcome bad technique.
You didn't mention what kind of iron and what kind of solder you are using now. But if you are getting cold joints, that is more likely a sign of bad technique rather than the wrong iron.
Cold joints happen when you heat the solder instead of heating the work material. The hot solder hits the cold metal and freezes in place instead of flowing onto the hot metal.
You need to heat the work material itself first. If it's a through-hole component, then after you turn the board upside down, touch the iron to both the component's wire lead and the board's pad. Only after both of those heat up do you apply the rosin core solder to melt onto and into them. Then you will have a beautiful shiny solder joint.
This does take some finesse and attention to timing. So I would do this Heathkit style. The Heathkits I bought when I was a teenager always came with clear instructions on how to solder, and most importantly, some extra pieces to practice with. I learned to get the technique down on those before tackling the kit itself. So practice on scrap material until you have it down.
Of course a good iron and good solder will help. If you're using lead-free solder, I might suggest a traditional lead-tin solder instead, as it is easier to work with.
For an iron, you didn't mention what you're using now, or what your budget might be. If something around $100 works for you, you can't go wrong with the Hakko FX888D. You might want some extra tips of various sizes too.
Desoldering is an art to itself. Do you have some desoldering braid? I used to use the "soldapullit" suction pumps and similar things, but the braid always gave me better results. It comes in different widths so you can pick one that fits the work you're doing.
I hope these notes are helpful. Holler back with any questions, and happy soldering!
The SOG Flash 1 is spring assisted. It is a kickass blade and extremely lightweight. Around $35.
Then there is the Benchmade Emissary 470. Just a brilliant, brilliant blade. Practically sexy. $160-ish though, so I'll never have one in my pocket.
I just did a huge amount of research and decided against the spring assist. I like the super fast deployment, a lot; however, I found that many knives deploy just as fast because they are made so damn well. I just picked up the Kershaw Skyline 1760 for $35 and it is awesome. Spring assists have more parts to break, and more parts mean higher manufacturing costs.
Notable mention, the Kershaw Chill for about $16 most places.
Sorry for the amazon links, they are just easy to find. Also, I am new to this game so wait for some constructive criticism from more experienced users about my recommendations. And finally check some youtube reviews, I trust nutnfancy's reviews all day.
You look like you are using a proper soldering iron. But I don't know for sure.
Nicer irons used for electronics have proper temperature sensors and can dump a lot of energy into the tip to maintain the desired temperature as much as possible.
Something like this: https://www.amazon.com/Hakko-FX888D-23BY-Digital-Soldering-Station/dp/B00ANZRT4M
Cheaper soldering irons you can typically pick up in a hardware store depend more on a sort of 'slow equalization' were the amount of energy used is a pretty much constant. The 'temperature control' really is just mostly a resistor that limits the energy going into the tip.
The big 300w irons work a lot better because they have large thermal mass. They can maintain their temperature better then the cheap hardware store ones because of this.
The problem with using a cheap iron is that it takes much longer to get the surface of whatever you are soldering too up to the proper temperature. This gives a lot of time for the heat to soak into whatever you are soldering and by the time you get the lead hot enough you have dumped a massive amount of heat into your work piece.
If you have a nice iron then it maintains it's temperature better and gets the surface hotter faster. This means that it takes a lot less time to get the surface to the proper temperature and less heat is needed overall.
You probably would of had a easier time getting proper looking 'tinning' of the battery with more surface prep. Solder works through capillary action as it 'follows the heat'. The solder wants to get 'sucked' into joints that are hot. So using rough sand paper (80 grit) to scrape up the surface probably would of helped. I would of sanded the bottom and then used acetone or alchohol to clean everything.
Another thing that would of likely helped is brushing on soldering paste onto the surface. The resin/paste is a acid that helps prep the surface when it heats up. The solder isn't going to want to join to surfaces with oxidation, oils, or other things. The resin cleans the surface to help. The resin core is there to do that as well, but it's usually useful to brush more onto the work piece.
Also you don't want to hold it for a pre-determined amount of time. You can tell if you are doing good job by the surface tension on the blob of solder and seeing it flow.... which you were having a difficult time doing on the bottom... which is perfectly understandable and expected.
All in all I think the video is a good demonstration of the problems with using solder. I think you gave a fair shake.
-a good workbench with clamps and a lot of surface area
-a soldering STATION. I have this. also buy LEAD solder, and those little things of cleaner/tinner are super useful.
-fume extractor (optional, but very easy to build with a fan and some ducting. Worth it.)
-pliers, wire cutters, crimpers, and strippers,
-lots of extra wire
-heat shrink tubing and something to heat it with.
-lots of extra screws/zip ties/fasteners
-somewhere to put screws. A flat tray works nicely, but magnetic ones are the best.
-a multimeter or oscilloscope. I use this.
-prop balancer. Very necessary, especially if doing video or using cheap props. (They can explode if not balanced.)
-lots of lamps and light sources.
-a pair of Helping Hands for soldering.
-hex wrenches/screwdrivers
-good hacksaw/hobby saw/Xacto knife.
-calipers/rulers
-drill/dremel
The Ontario RAT1 might be a good choice for your first blade. It's an incredibly good knife for the price. Check out the reviews. I highly recommend it, it's a great value:
http://www.amazon.com/Ontario-8848-Folding-Knife-Black/dp/B0013ASG3E/ref=sr_1_1?ie=UTF8&amp;qid=1418727072&amp;sr=8-1&amp;keywords=rat1
If you want something with a cord/strap cutter feature, you might like the SOG Trident:
http://www.amazon.com/SOG-Specialty-Knives-TF22-CP-3-15-Inch/dp/B004WN59KW/ref=sr_1_44?s=hunting-fishing&amp;ie=UTF8&amp;qid=1418726833&amp;sr=1-44&amp;keywords=SOG+Knives
Kershaw is another brand you might like, there are many great models in your price range. There are other good choices out there as well. Check out the sidebar for the Knife Recommendation Guide
I’d be happy to offer you guidance on your journey into the amazing world of bidets.
I started out with this one:
https://www.amazon.com/gp/aw/d/B00A0RHSJO/ref=mp_s_a_1_3?ie=UTF8&amp;qid=1523776662&amp;sr=8-3&amp;pi=AC_SX236_SY340_QL65&amp;keywords=bidet&amp;dpPl=1&amp;dpID=419LXSZM6YL&amp;ref=plSrch
It’s an awesome bidet and does the job perfectly, is super easy to install and for $35 you can’t go wrong.
However about six months ago I decided to splurge and get the king of all bidets, the Toto Washlet:
https://www.amazon.com/gp/aw/d/B00UCIOWRM/ref=mp_s_a_1_1?ie=UTF8&amp;qid=1523776789&amp;sr=8-1&amp;pi=AC_SX236_SY340_QL65&amp;keywords=toto+washlet&amp;dpPl=1&amp;dpID=31uvbuDPUAL&amp;ref=plSrch
It’s expensive but worth it; the water is heated, it has different speeds and the nozzle can move back and forth, and the best part is that it dries your butt afterwards, which is amazing.
One thing about bidets though—for us guys, unless you don’t mind your balls being sprayed with water, it is kind of necessary to make sure they’re out of the way, or figure out a position where the water doesn’t hit them.
These will be your best friend. It's like saran wrap that you wrap the window frame (and window) in. You use a hairdryer to get it all tight and it creates a pocket of air for insulation. It doesn't help quite as much with sound, but it's shocking how well it helps with heat retention. That and curtains will help immensely (and will help with sound too) look for really thick ones, or the "blackout AND insulated" ones and it will help with heat and noise.
Or you can get a space heater, those things rock.
You also can talk to your roommate about it. "Hey, I've noticed it's been a bit chilly lately--" and see what happens.
I hope you get warm soon! Enjoy basking in your showers in the meantime!
I'm two weeks post-op.
People here all have fantastic suggestions so far!
I used:
I don't use this, but wonder if it meets your spec? https://www.amazon.com/TP-Link-Required-Control-Anywhere-HS100/dp/B0178IC734/ref=sr_1_3?ie=UTF8&amp;qid=1485319546&amp;sr=8-3&amp;keywords=smart+outlet Wi-fi, no hub required, and if you put "tasker" into the search bar above "Customer Questions and Answers, you see the following response:
Only reason I took off a star is because this doesn't have an ifttt channel, as of yet. I'm sure that will change though. For the techies, it's doable though Android and the tasker app, but those don't don't like to fiddle with apps and code, go with the WeMo switch if you're looking for ifttt.
This does work with my Alexa, and works as advertised. You simply download the app and set a timer, done. This works great for my tomato plants, and I have one controlling a small space heater in my garage. Again, I'd love to automate everything with ifttt, if the temp drops to a certain degree outside, it would turn on the heater, but there are work around like i stated above.
Nice little device for $25
Edit: just realized you want one that does NOT require wi-fi. Sounds like this would not work, sorry!
Yep, I've been building stuff for a while, although this is the most intense set of builds I've done. Get yourself a good soldering iron and a couple of spare tips (Weller makes some good ones-- don't go for super-cheap unless you want to replace it a bunch of times). This thing here is about the lowest-end I'd suggest (I use one): https://www.amazon.com/Weller-WLC100-40-Watt-Soldering-Station/dp/B000AS28UC
Get some little noise toys, like an Atari Punk Console or even something silly like an LED Christmas tree kit and put it together. There are some really good soldering instructions here:
https://learn.adafruit.com/adafruit-guide-excellent-soldering/tools
They list more info on tools, too.
Some kits are more complex than others, too-- the Befaco kits are pretty complicated, and anything with an oscillator will probably require some calibration. Synthrotek make pretty good little kits and have good info on building them.
You can do it, though. It's not difficult. 8) Just take your time and check each step as you go and you'll be fine.
They absolutely help. Some types of blinds are better than others-- and some are even given r-value ratings. For most types of blinds, it's not that they're particularly good insulators-- it's just that bare window glass is so terrible that nearly any additional material is an improvement.
Some types, like cellular shades, can have pretty respectable r-values on their own, though.
If your roommates demand the view, though, tell them to chip in on one of the shrink-wrap window insulation kits for the winter. They're like $20, and you can almost certainly get them locally at a hardware store. They're even more helpful if the windows are old and drafty, since in addition to roughly doubling the r-value of a single-pane window, they make a nice vacuum seal around it.
As someone who takes narcotics for pain, may I recommend Miralax? It dissolves in coffee easily and helps keep the constipation to a minimum.
Softer poop will be much easier to pass, talk to the docs about how much Miralax you need.
(I'm not a medical professional, please talk to an expert before taking new drugs!)
You're also going to need a bidet attachment for your toilet. That will help clean your butt without lots of painful wiping. I recommend this one, it's easy to install and use: "Luxe Bidet Neo 120 - Self Cleaning Nozzle - Fresh Water Non-Electric Mechanical Bidet Toilet Attachment (blue and white)" https://smile.amazon.com/dp/B00A0RHSJO/
Good luck with your butthole, OP, I hope you heal quickly. Remember that the embarrassment will fade, accidents happen :)
For mainly camping get a Cold Steel GI Tanto on Amazon. I usually don't like tango style blades but Cold Steel's has a thick edge that's great for bushcraft while the secondary edge/tip is great for prying and other heavy duty tasks. It is 1055 carbon steel so do clean it after every use. I recommend you modify the grip to something better though, I personally use tennis over grips as they are cheap and amazing.
Or if you want something smaller for both camping and EDC I suggest a Kershaw Skyline
CHP-170 Micro Cutter https://www.amazon.com/dp/B00FZPDG1K/ref=cm_sw_r_cp_apa_NYI1AbCK4Y43D
This one works perfect for me. Never tried much cutting with the tip but never overlaps and cuts pieces out perfectly, and a very tight fit when closed. Not expensive, in fact an add on item u have to purchase with a larger order, but might be able to find the same as a stand alone. Have gotten one for my gf and brother both and they have never had overlap issues. They are flush and I highly recommend.
Edit: they say flush in the description but might be the same as the other poster u/bluetrombonium linked to idk. But they work for me well and seem sharp, but again don't use tip cutting for anything.
Edit2: I think they are exactly the same but with red handles. Also 3 dollars cheaper for some reason but out of stock on the other site, but seem to have exact same specs. Probably this is your best bet lol https://www.hakkousa.com/products/chp-tools/chp-hand-tools/cutters/chp-170-d.html
Hi. The number of drawers is really dependent on your piece size and variety.
As for categorization, I think I can help! It's definitely not practical to keep each part in its own drawer. Instead most people sort by part (not color!), then decide on classifications as far as what to keep together. You want to keep your categories sufficiently broad, so you can easily know where to find things like plates, arches, bricks, technic pieces, etc but not be so cumbersome that you can't keep up with where things are. Labeling your drawers once you have them is very useful for this as well. As for the specific categories themselves, it really depends on your unique collection but I find this to be a good starting point: https://www.reddit.com/r/lego/comments/ayp1wt/print_out_of_rebrickable_taxonomy_poster_at_300/
&#x200B;
You can branch out from there based on the pieces you have more/less of. The first modification I would recommend is to keep all 1x1 bricks/tiles/plates separate because they just sink to the bottom of a big drawer otherwise and are hard to track down. I have a bunch of tiny bins just for them in a Stanley organizer like this: https://www.amazon.com/Stanley-25-Removable-Compartment-Professional-Organizer/dp/B00005QWYF/ref=sr_1_1?keywords=stanley+25+container&qid=1554229435&s=gateway&sr=8-1 but the akro mils drawers are also highly recommended here
&#x200B;
Hope this helps!
I am out of town, but can try to help..
Cheap soldering kits make it hard to get a good, consistent temperature on the tip, and the recovery time (time for the tip to get hot again after bringing it down by cleaning, etc) is poor. You'd want to get an adjustable one if possible. You could easily be working too hot and causing yourself problems. Lead free solder is harder to work with. I have a Hakko that I love, but something in this range would be a worthwhile investment and a fine iron.
As for the soldering, you really are just jamming the iron into the two pieces of metal you are trying to join, and then slowly feeding the solder into the junction. Use as little as you need to get a tiny, clean joint, and never a 'bubble'.
Removing solder is a horse of a different color. That is a pain in the ass. For that, you will want a lot of flux and a hot-hot iron (as hot as you can go before you start damaging things/burning down the house like you say). It's not fun to remove these components. Sometimes you get lazy and snip out the old one and try to work out the lead with a needle-nose and the iron (fluxed up hole) at the same time. Helping hands or a good vise can be crucial for this.
I'm no great master at it, but it's really one of those things you can pick up watching a few youtube videos or hearing instructions (with the right equipment) and pick up. I taught a friend the other day for a project they are working on. It really is just practice to get good, and that seems to happen quickly once you get a feel for working the solder.
Soldering is actually not that big a deal. A little practice and you’re good to go. THeres lots of YouTube tutorials. and you can find wiring diagrams all over the Internet.
Get an iron with variable setting like this one it’s a bit more than the $15 for just a plain iron, but it’s worth it and you can use it forever.
Looks like you’re painting it. You can try all sorts of different techniques; I’d maybe go solid color the first time. guitar reranch sells rattle cans of nitrocellulose based paints and clear coats (that’s what expensive guitars use as opposed to poly)
He uses chips from old guitars and cars(fender used leftover paint from car companies for many of the original classic colors) to match proper color and hue, and they come with two different spray nozzles. Again, a little pricier than cans from the hardware store, but nitro finishes are so nice:)
One of the best parts is researching everything! Lots of time on the google machine:)
Enjoy
Victornox makes pretty dang good knives at a great price. I would also recommend the RAT 1 as a great, incredibly solid knife. It is, however, a rather heavy duty knife, so if you are looking for something a little lighter I'd recommend browsing THIS budget knife list for one you like best.
I'm 28, in the Navy, and here's what I'm usually carrying.
Maxpedition Pocket Organizer
NM Flag patch
Old coin given to me a while ago
Sparrow's Tuxedo Pick Set It's a great set, and a cool thing to learn. The linked set has a different case, I guess they don't do the leather cases anymore. I also had them put rubber handles on mine when I ordered, makes all the difference.
USB cord that came with my phone
Tekton 4" adjustable wrench
Zebra pen. Forgot which specific one...you probably know it though, it's one of the popular choices on this sub. My main pen I keep in my breast pocket, the Fisher Bullet. That's the best pen I've ever had, hands down.
Fine point Sharpie
Rite in the Rain notebook. It's ok. I much prefer Field Notes Expedition which I also keep in mind that breast pocket. Just wish the pages were perforated.
Streamlight Microstream. Awesome little light, and the AAA battery it takes lasts quite a while.
Chapstick
ThermoWorks surface thermometer. Sorry, can't find a link. My buddy gave me this last Christmas. Comes in real handy in the field, to see if my JetBoil is too hot to put away. Also, I dunno, I can tell you if stuff is hot or cold or whatever. Neat.
Hello,
Profitability is always changing when mining. You can use Whattomine.com to check out profitable for specific hardware and electricity rates.
Also if you are planning to mine for a long time I recommend getting a smart plug to help track you kw/h usage more accurately. (Kasa Smart Wi-Fi Plug https://www.amazon.com/dp/B0178IC734/ref=cm_sw_r_cp_apa_lzHUBbX0FXV2P)
Some people who live where electricity is expensive find alternative solutions as well. We see many users try to find places where electricity is included with rent. Rural miners using solar panels, or building small hydro electric generators in streams, etc.
You may also find newer hardware is more efficient and uses less electricity. A 960 is powerful but not very efficient.
Lastly there are other reasons to mine besides profitability. If you are at break even costs you are still stacking BTC while providing a service to the networks' of the coins you are mining. Mining not only creates coins as a reward, but verifies transactions and increases the security of the entire network.
Keep a close eye on the profitability.
Thanks #GetThatHoney
If cost isn't an issue, then one of the all-in-one kits should get you just about everything you need: Resistance meter, micro screwdrivers, pliers, coil wrapping tool/mandrels, scissors and some tweezers(Preferably ceramic tipped)
If you're tight on cash, there's a few routes to go. If there's a Harbor Freight nearby, you can get most of what you need there.
Resistance Meter: Also referred to as an Ohm reader (shudders). If you're ever going to get into mechs, this is a necessity. Hell, when first building, it's a nice thing to have to check your build for shorts before you slap it on your mod. You can spend as low as $5 usd, or $35-$45 dollars for a Tab unit that can actually fire the coil to work out hot spots.
Finally, cotton and wire. This has been bandied about ad nauseum about which type of wire and gauge is best, and the debate on wicking materials still comes up from time to time. So, I'll give you my two cents and leave it at that.
Wire: 26 gauge kanthal. Why? It's easy to work with, provides good flavor and doesn't need to be run at insane wattage levels for great results. If high wattage vaping is your thing, get some 24 gauge. Better still, get both! I like 26 and 28 gauge(Twisted wire YAY!), you'll find your preference as you go. I didn't care for 24 gauge as it made the vape a bit too warm for my liking.
Cotton for wicking? I swear by Labo Puffs. No "Fresh cotton" taste, easy to work with and lasts for EVAR. I'm still using the 120 pad bag I bought over a year ago, and it'll still be another six months before I need more. Here's the Amazon link for the Prime eligible pads. There are cheaper sellers, but they are in Japan and it can take a week to get to you.
What's left? Wire cutters, of course! Nail clippers work alright, but something like this works even better!
There's my suggestions and whatnot. Take or leave what you will, and welcome to the world of building!
I recently made two purchases which have rocked my shitting world. The first is the Squatty Potty - crappy name, good idea. It changes your pooping posture to one more like squatting, which means less pushing, less hemorrhoids and less wiping. After hearing about this, I tried for a while just putting my feet on the trash can and other things, but it's way easier and more comfortable to just get the stool (in my opinion). EDIT: Read closer and see that you're already squatting, but I still recommend the stool if you don't have one.
Second, I got a bidet attachment for my toilet. There are MANY to choose from, but I got the lowest priced one on Amazon and have been very pleased. This is a simple device that just provides a stream of cool water to your bum to spray off the poo. Then you use a bit of toilet paper or cloth (your bum is clean, so no poo stains to wash off) to just dry off.
Between the two, I barely use toilet paper anymore, and I also used to need to use quite a lot to clean up. The downside to these purchases is that I'm now completely spoiled at home and miss them deeply when I travel.
An inexpensive stone or two will be worth a shot. There is a lot of evidence that shows its not about the stone but the technique. Without knowing what the local shop by you sells, or the current condition of knives you are using, I typically recommend 3000 and 6000 for a two stone set. That is enough to set a bevel (with a lot of time and energy) and enough to polish most knives. Throw a 1000 grit stone and you would be set.
That being said, you can get more consistently good results easier with higher quality stones. I would recommend the combo king stone. They are around $25 and hit the mark in terms of quality and price. A lot of experienced sharpeners recommend king, Murry Carter being the biggest proponent. With whatever stone you get, remember, it's about angle and pressure. Keep both consistent and proper for the tool and steel you are using.
p.s. you don't 'need' any accessories. but like every hobby, people love them.
edit: the ps
If you're re-doing your bathroom, maybe a fancy mom-level bidet is in the cards for you, but a year ago or so I bought one of these Astor Bidets from Amazon. $25, I feel at this point, everyone should be blasting their asshole with water. Super easy to install, seems to be a laser guided, heat seeking water stream as it hits the spot with stunning accuracy.
Has variable speeds, but full blast is total hole destruction, unnecessary. The downside versus a pro-bidet is the water is cold only, I'd imagine warm water bidets feel amazing but surprisingly, the cold water isn't bad at all.
It's a gamechanger, best $25 I ever spent.
Like several others have mentioned, /r/diypedals is a good place to go. As long as we've got you here, though... I had already practiced soldering before and wanted to start with a kit. That way you have everything you need and just have to assemble. A very easy and inexpensive first build was [this] (http://www.generalguitargadgets.com/effects-projects/boosters/stratoblaster-booster/) boost pedal. Don't let the simplicity fool you. I still have this boost pedal on my board to this day and love it. Also, I picked up [this] (https://www.amazon.com/Weller-WLC100-40-Watt-Soldering-Station/dp/B000AS28UC/ref=sr_1_2?ie=UTF8&amp;qid=1483458417&amp;sr=8-2&amp;keywords=weller+soldering+station) Weller soldering station. Crazy cheap, but I've been using it for over 6 years with no issues. Finally, just read, read, read and read some more! There's tons of great info in various forums, books and youtube videos to get you on your way. Best of luck and have fun with it!
So, it's not hard for a knife to be BIFL. In fact, I have some $10 knives that probably are. What you pay for with a knife is edge quality, geometry, balance, and handle. In a lot of ways, having something to sharpen said knives with is the most important thing, as otherwise your knives will inevitably end up just as dull as your grandmother's.
How much time and effort are you interested in putting into your knives? There are a variety of options. Purists tend to prefer a sharpening stone, as it offers the greatest control. If you want to nerd about your knives, this allows you to control the edge angle and exactly how much material you remove from the knife. It's also the hardest though, and the one you're most likely to slack off from. The Lansky System offers nearly as much control and greater ease of use, and many people like this option.
If you know that both of those options are realistically not going to happen, get a pull through. It'll take a bit more metal from the edge when you sharpen it, but it's worth it if it's what you'll use. I got my parents one, actually. If you get a Western knife, you can pretty much get any pull through. If you get at least one Asian knife, get this pull through so that you can control the angle, as Asian knives are generally sharpened to a more acute angle.
As for knives? You can get really nice ones like Tojiro and Shun, you can get well reviewed ones like Victorinox, and as long as you don't get the super cheapo micro serrated knives, you'll probably be fine. I've got some Tramontina knives from Costco that are quite reasonable, and some Kom Kom knives which I adore and which are stupid cheap. Don't stick wood handled knives in the dishwasher (in general, the dishwasher dulls knives, but it also really is not kind to wood handles), and full tang knives are much better when you're talking wood handles, because they add extra stability.
Don't bother spending a ton of money on bread knives: they're incredibly difficult to sharpen, so it's really not worth it.
My most used meter is this cheap $15 GE box. I have some nice ones, and if you're only going to have one get one that does >500V, but this one is compact and reads well enough that I tend to use it the most. I have a couple nice meters which also do caps, diodes, transistors, auto ranging, up to 1000V reads, etc. They're very handy.
Get some bias probes. The kind that plug into your meter are good and inexpensive, if you want to go spendy the eurotubes box that reads out plate voltage and current directly is a nice piece of gear. Get a soldering iron with adjustable range and replaceable tips. I had one of the cheaper weller irons, it eventually shorted the pot so it's on full all the time (something I could fix but haven't) so I used that as an excuse to get a nicer iron. If you plan to do any solid state something ESD safe if a good idea.
https://nutritionfacts.org/video/chicken-out-of-utis/ Click on the "View transcript" button below the video if you don't want to watch. It has the benefit of being evidence based.
**Edit to add: https://nutritionfacts.org/video/avoiding-chicken-to-avoid-bladder-infections/
I got my bidet off Woot, but Amazon has them for under $30. You'll want to get a better connector than the plastic one they come with, but it's been a godsend for me.
https://www.amazon.com/TP70-Handheld-Personal-Portable-Capacity/dp/B00O92IF6Q/ref=sr_1_7?crid=7YUMED4AGJKQ is a cheap and easy tester for the portable ones.
https://www.amazon.com/Luxe-Bidet-Neo-120-Non-Electric/dp/B00A0RHSJO/ref=sr_1_4 is what Woot.com had for about the same price, and I love it.
A few tips to help you out OP:
edit:
A few other useful items you should get either now or later, most of this you should have around the house already:
Yes and no, phone flashlights can help find something on the floor or follow a path in a pinch but having a dedicated light last longer, is much brighter, can see farther, and can be used in many more types of situations. A phone light will kill your battery very quickly also.
But, again it’s personal preference, really. I like to be prepared for those unique moments. Friends always ask me for my flashlight and I get to be the hero every once in a while lol.
Check out the stream light microstream
microstream
Or the olight s1r or I3T EOS
Olight
Bright, tiny, and cheap. You will get hooked if you get one of these.
http://www.steam-engine.org/ (or there are plenty of apps for smart phones)
I recommend against B & M builds unless you truly trust your B & M. I've heard way too many horror stories hear about unscrupulous B & M's and their building practices. If you have a friend that build have them walk you through it and teach you the ropes, watch YouTube, post questions here, but be sure you know 100% what you are doing before you actually fire or vape off your own coil. Be safe, build safe, vape safe.
Snip them with wire cutters (I use something similar to this Amazon) or nail clippers. With a three post setup and doing dual coils I snip the negative posts but then use my needle nose pliers to bend the positive tails back and forth until they snap off. B/c I like this method I generally make the positive tails longer to make this easier.
There are a lot of factors that come into play on how much it will cost. Even with DIY you have options. You can do real DIY, where you have to find schematics, source the parts, make your own pcbs, make your own front panels...or you can buy kits. I cant read schematics so I went the kits route.
It still cost me some money to buy equipment: soldering iron, solder, circuit board holder, tweezers, wire cutter, headband magnifier.
From there I mostly stuck with products from AI Synthesis, Trogotronic, and Befaco. Those companies all sell kits with very clear instructions. I was new to soldering so this was key for me. Some other kits I bought had very poorly written instructions and their support was just as well done as their manuals.
If you know what you are doing then you may have better luck. You can also try modules that require SMD soldering. Mutable Instruments has released all their code. Amazing Synth is a great resource for high quality pcb's. They dont sell the parts though so you gotta find the BOM and source the parts. Amazing Synth has the BOM's for most, if not all, of the modules. You'll also need to do some programming and upload the code from a computer to the modules.
To try to answer "how much will it cost" it really depends on how many modules you plan on making and what method you choose.
There's a whole subreddit dedicated to those of us who DIY...come check out /r/synthdiy
So here's all the parts you need.
Maxipad - http://www.switchtop.com/product/gamepad-macropad-pcbs
Diodes - http://www.mouser.com/ProductDetail/Fairchild-Semiconductor/1N4148/ (I'd just buy a roll of 100, they're $0.019 each at that point)
Switches - http://www.switchtop.com/product/gateron-switches
Teensy (your controller) - http://www.mouser.com/search/ProductDetail.aspx?R=0virtualkey0virtualkey199
Plates you'll have to find somewhere, but there are some on here that can make them for you. I have the DXF I used here that you can share with someone who can make the plates for you, it'll end up coming out looking like this if you use those (material and color are your choice, those are clear acrylic).
You'll also I guess need an iron, but that can be seen as an investment into multiple boards, rather than just this one. Best bang for your buck is going to be this one.
Soldering through-hole diodes is easy, and the Teensy comes with header pins that you use to solder it.
Important note: Solder the switches and diodes before the Teensy, as you can see that the area covers some of the switch headers. :)
I can help you along the way with any issues, so let me know if you need any help.
That reminds me to go dumpster diving myself. I've got a coworker who goes all the time with his wife and I don't know how but they are always scoring a lot of goodies.
Anyway it seems like there are some lights out there many would skip over because of better a little more expensive alternatives, but those lights also seem to fit your needs pretty well so there may not be any need to spend the extra money. One such light is the Wowtac A2S I saw reviewed not too long ago. There's also the A2 for ten bucks cheaper but it's half as bright. It's your basic angled 18650 XP-L headlamp that comes with a battery with the built in microUSB recharging port. Again, not the best light for the price range, not the best included battery, but it sounds like you would get good use from it in an all inclusive package.
I don't know about making repro crats, but I do know about mods and repairs. I have done an overclock mod and 2 s-video mods on my genesis consoles, as well as lots of repairs on other consoles.
I have the basic tools like screw drivers, needle-nose pliers, and some tiny cutters just like these.
My soldering iron is a cheap 35 watt fixed temperature hunk of crap. Get a better one. I don't have any recommendations, but this one is linked to from this subreddit's sidebar. It has good reviews, but I haven't tried it myself.
I also have a spool of thin rosin core solder that is about 1mm thick. I also have a spool of de-solder wick which comes in handy.
To hold down and/or secure wires I use some rubbery electrical tape or hot glue. I use the electrical tape whenever I can, since it is easier to remove than the hot glue. The hot glue is useful in small amounts to keep wires from getting accidentally pulled out of place.
A multimeter is very useful. You probably won't need a really fancy one, just a basic $10 one.
I bought one of those parallel cables that all the old printer's used for only $1.99 at a thrift store. It's packed with different colored wires, that are just the right thickness to use for most console repairs/mods.
Kershaw Skyline. It's a great folder for EDC use and yet very affordable.
Super lightweight, reliable, easy to operate, ergonomical, safe to use, great blade size and form, and so cheap it's almost disposable.
A great first knife to see what you like about it and later on maybe spend more on something else.
Agreeing with others that it does have blue light. Here's a great guide
https://fluxometer.com/rainbow/#!id=Kindle%20Paperwhite/Kindle%20Paperwhite
The key things to look at is the Melanopic lux, getting that below 5 in the few hours before bed is the goal. Also the spectrum between about 420 and 540, shown on that page as a transparent curve in the background.
The kindle paperwhite is at 12, vs iphone/android phones at about 50. At half power (light level 13) the kindle is down at 2, which is pretty good.
You can also use blue light filter glasses. They should look orange, any that are clear will not work at all. Yes, the advertising is lying.
I like these
https://www.amazon.com/Uvex-Blocking-Computer-SCT-Orange-S1933X/dp/B000USRG90/
Which are also great for looking at your phone, or going to the bathroom.
It's a great site, it'll answer most of your blue light questions with every variation of device you can think of.
How good?
Here is one that will last you pretty much for whatever no matter what you do with it, its the soldering iron I have used for the past several years and has been great on a number of projects: https://www.amazon.com/Hakko-FX888D-23BY-Digital-Soldering-Station/dp/B00ANZRT4M/
Here is one that will do just fine but isn't great or anything:
https://www.amazon.com/Weller-WLC100-40-Watt-Soldering-Station/dp/B000AS28UC
The most important feature for a good soldering station is variable temperature.
The only other things you will need is solder:
https://www.amazon.com/WYCTIN-Solder-Electrical-Soldering-0-11lbs/dp/B071G1J3W6, a solder wick: https://www.amazon.com/MIYAKO-Desoldering-Wire-Handy-Dispenser/dp/B010VMHR5M, and possibly wire cutters if you don't have them: https://www.amazon.com/Hakko-CHP-170-Micro-Cutter/dp/B00FZPDG1K
Some personal advice is get the best one you can afford if you thing you will use it a lot, the difference between a okay one and a great one is huge. I hated soldering till I got a good iron.
Had some free time so I wrote this:
If anyone wants to do Soldering,
&nbsp;
Soldering is extremely fun, rewarding, can motivate you about electronics, save you money, and convinces your friends to think you are some kind of "fire stick-wand wielding wizard of electronic black magic" (+7 to charisma!).
But remember to solder safely!
Salam
Jazak Allah Khair for helping him out. No need to get angry. Remember that what you teach him will be written as a reward for you every time he does it. It's a great opportunity to gain a lot of rewards.
I am not sure about which you are talking.
If it's about Wudu, then explain to him that we are taught as Muslims to not waste water. And that getting water to where it should be is enough (i.e., in Wudu)
If it's cleaning up after visiting the bathroom then maybe you could consider [this] (http://www.amazon.com/Astor-Non-Electric-Mechanical-Toilet-Attachment/dp/B003TPGPUW/ref=sr_1_1?ie=UTF8&amp;qid=1404518306&amp;sr=8-1&amp;keywords=bidet) Or maybe swing by Home Depot and explain to them that you want to install a water spray bidet. It's very doable and here is a [video] (https://www.youtube.com/watch?v=4sT_wfTv7UI).
Good luck and May Allah reward you.
I'd say so. It would take a bit of reading and practice, but you could do the version look mum has in his tutorial pretty easily with larger components..
The biggest challenge/cost sink I would say will be getting a decent soldering iron and learning to use it.. But with the stripboard he's using, it should be pretty painless.
Good Soldering iron
https://www.amazon.com/Hakko-FX888D-23BY-Digital-Soldering-Station/dp/B00ANZRT4M/ref=sr_1_28?s=hi&amp;ie=UTF8&amp;qid=1541069778&amp;sr=1-28&amp;keywords=weller+soldering+iron
cheap (but good starter) iron
https://www.amazon.com/Aoyue-Programmable-Station-ESD-Switchable-Configurable/dp/B000I30QBW/ref=sr_1_7?s=hi&amp;ie=UTF8&amp;qid=1541069874&amp;sr=1-7&amp;keywords=aoyue+soldering+iron&amp;dpID=41lx2CM8bML&amp;preST=_SY300_QL70_&amp;dpSrc=srch
Lead-free Solder
https://www.amazon.com/Lead-Free-Solder-Wire-0-5-2mm/dp/B071GKC3L5/ref=sr_1_2?s=hi&amp;ie=UTF8&amp;qid=1541069977&amp;sr=1-2&amp;keywords=solder%2B2mm&amp;th=1
stripboard
https://www.ebay.com/itm/Strip-Board-Stripboard-PCB-Choice-of-110x93mm-or-94x53mm/222345513198?epid=1055105041&amp;hash=item33c4d348ee:m:m-UAITK6Q2h19Ao6VjMWGoQ:rk:28:pf:0
I may end up putting together some kits if I can figure out how to streamline some of this while keeping it affordable..
Depends on what you need it for. [Wowtac A1S] (https://www.amazon.com/A1S-Flashlight-Pocket-Sized-WOWTAC-NW/dp/B07M5BV8P7/ref=sxin_3_ac_d_rm?ac_md=0-0-d293dGFjIGExcw%3D%3D-ac_d_rm&amp;keywords=wowtac+a1s&amp;pd_rd_i=B07M5BV8P7&amp;pd_rd_r=87edd49d-3423-4285-b39a-a400c6f26d02&amp;pd_rd_w=3a87c&amp;pd_rd_wg=aj6I2&amp;pf_rd_p=983984df-2ad2-4c97-ba7f-4c5a90291c2b&amp;pf_rd_r=SQZ7VJBHA7P696C8KF1D&amp;psc=1&amp;qid=1570875957) or [Sofirn SP31 v2.0] (https://www.amazon.com/Tactical-Flashlight-Features-Rechargeable-Battery/dp/B07FKJDH93/ref=sr_1_1?keywords=sofirn+sp31+v2&amp;qid=1570875985&amp;sr=8-1) for good budget edc lights, $26 and $36 respectively and both come with batteries. Looks like there's a 10% off coupon for the Sofirn on the listing so that's closer to $33. [Skilhunt H03] (https://www.amazon.com/dp/B07QNPHB43/?coliid=IO5EZ9P7F0TH8&amp;colid=LVIYOC1TPTP9&amp;psc=1&amp;ref_=lv_ov_lig_dp_it) for a good right angle headlamp that you can use as an edc, about $50 for the bundle that comes with a battery. [Sofirn SP40] (https://www.amazon.com/dp/B07XKST56M/?coliid=I28PCTS2ZHHV8I&amp;colid=LVIYOC1TPTP9&amp;psc=1&amp;ref_=lv_ov_lig_dp_it) for a more wallet friendly headlamp/edc thing, $31 and comes with a battery. [Sofirn C8T] (https://www.amazon.com/Flashlight-Lumens-Powered-Battery-Included/dp/B07PGNVTY9/ref=sr_1_1?keywords=sofirn+c8t&amp;qid=1570877317&amp;sr=8-1) for a super budget friendly throwy light, $23 and comes with a battery. Others mentioned are good, the [SP36] (https://www.amazon.com/Powerful-Flashlight-Rechargeable-Brightest-Excluded/dp/B07KFF5BGZ/ref=sr_1_3?keywords=sofirn+sp36&amp;qid=1570878581&amp;sr=8-3) would be right around your max if you have batteries laying around. $70 for the bundle that comes with batteries.
It really depends on whether you want a nice soldering iron or just something that will allow you to try it for a few hours. There is a huge price difference. Of course there is also a huge difference in quality. You could get a very nice iron like this for around $250. Or you could get something much less expensive, like this for around $40.
The first one I listed is very similar to one of the best irons I've ever used. The second one is still head and shoulders above the piece of crap I used for the first several years I was soldering. It was like this, at around $5, and as long as I kept the tip sharpened with a file it worked pretty well.
Of course! There are a view inexpensive and promising ones. I chose this . Not exactly dirt cheap, but cheap compared to its similarly highly-rated competitors. There are cheaper ones out there.
We honestly talked about them and found the idea to be a good one, I just didn’t think he’d commit to the idea. Now he has to try it! I’ll keep the sub updated 😆
Happy early birthday wishes to your husband!!!
It depends what you are working on, but if you are working on through-hole and SMT in the under $40 price range I'd go with a Weller WLC100. It was my first iron and I used it for a long time before I finally upgraded (I still use it sometimes).
The stock tip was a little big for my taste so I bought a replacement (ST7) tip. The ST7 is a smaller conical tip. You can also find these on Amazon, but pay attention to the shipping if you order it off Amazon Marketplace, some 3rd party tool vendors will gouge you!
For the Fume extraction you should buy a fume extractor... heh. Pretty simple. I built my first fume extractor from an old PC power supply, an old exhaust fan, an articulating lamp base, some activated charcoal pads, and a length of dryer hose.
You can certainly go that route and build your own. It's nice if you already have the parts on hand, but eventually it became too unwieldy so I bought a Weller Fume Extractor. You can buy something similar for about half the price on Marlin P. Jones, but I was never able to catch them in stock.
Either way, look around, have fun, and good luck!
I don't use a blowtorch or a lighter. When the coil heats up from the you can just adjust it easily with tweezers and the thing you wrapped around. OK well I'm too lazy to rephrase this, but here's a big list of scattered supplies:
$250 is way too much for what you listed, you can get way cheaper than that. Keep in mind you really don't NEED 100W to use an RDA. My homemade DNA30 is great for a cool vape on something with a bit more restricted airflow than the Mutation, but that will still work just fine. I would stick with your current Sigelei 30W until you know for sure you want to upgrade, because that is going to cost you the single most amount of money.
If you want the mutation x v2, grab it here for $30, its worth getting this one authentic and not a clone because its so cheap to begin with and most clones do not have the wide bore drip tip.
Japanese Cotton is what I usually use.
For the rest of your gear, Lightning Vapes has a good selection of well priced rebuilding supplies:
Ohm Meter $14.75
I recommend Ceramic Tweezers $12.95
I mostly use 28ga Kanthal (100 feet for $6.25) with my 30W box mod, with mechs I use lower gauges
I would also find a pair of flush cutters to snip wires as close to the posts as you can, and some nice small scissors to cut your cotton.
OH! Almost forgot, this is what I use to wrap my coils.
As a general rule of thumb, don't buy wire or wick from websites that sell mostly juice or hardware, it will almost always be overpriced.
If you want to get REALLY cheap and don't mind waiting, go check out Fasttech
TASTAK's seem like they could be fine, especially since your drill/driver only has a soft case to go with it. Tastak may well be a better solution than that.
As far as other tools though, the TASTAK's seem optimized to hold a large power tool well in the lower compartment and then fasteners and hardware in the top sorting bins. This part is what i would call less than ideal. Plenty of people like these stanley cases for organization of small parts. but having that integrated into the top of the box... i am not sure how i would want to use that.
If i had to pick from the TASTAK line the two storage things that look the most appealing to me are the Deep Box and the Drawers
the bottom like is that anything you pick up is going to need some custom organization solutions. I just got the 13" Milwaukee box and am looking at building some custom organizers today out of 1/2" acrylic and wood for the prototype and later 3D printed ABS. i don't think there is a perfect solution for everyone because everyone has different tools in their box.
This is an awesome giveaway. Thank you!
Listed at $29.99, Wowtac A2S LED Headlamp Headlight 5 Modes Max 1050 Lumen USB Rechargeable 18650 Battery Waterproof Headlamps, Super Bright Outdoor Sports Running Walking Camping Reading Hiking Fishing Neutral White https://www.amazon.com/dp/B075ZN5LJY/ref=cm_sw_r_cp_api_ILP1Ab2PV9A36
And
Listed at $7.99, Flashlight, DLTND Super Bright 500lumens Water-resistant 3.7" Mini Tactical Flashlight for Camping Hiking Fishing Hunting Outdoor Emergency Hurricanes Stormes Outages https://www.amazon.com/dp/B0721FFT8Y/ref=cm_sw_r_cp_api_0IP1AbFSMFWG7
I have to say I like the format of setting a dollar amount and letting the recipient pick their prize.
I have a Weller WES51 Analog Soldering Station, and I highly recommend it for just about any kind of work. https://www.amazon.com/gp/aw/d/B000BRC2XU/ref=mp_s_a_1_3?ie=UTF8&amp;qid=1518809457&amp;sr=8-3&amp;pi=AC_SX236_SY340_QL65&amp;keywords=weller+wes51&amp;dpPl=1&amp;dpID=41WVs6AdNqL&amp;ref=plSrch
The slightly more expensive digital version doesn’t solder any better, it just has buttons and a display instead of an adjustment knob.
If you’re working on tiny components, then you’ll just need to buy a few smaller tips, but there are plenty of sizes and shapes out there for Weller irons. I’ve always just bought cheaper knockoff tips, like the ones where you can get a variety pack of 10 for ~$30 on amazon. I don’t think tips are really worth spending a premium for the Weller brand, unlike the iron itself. Something like this: https://www.amazon.com/gp/aw/d/B00VFYPKN2/ref=mp_s_a_1_fkmr2_2?ie=UTF8&amp;qid=1518809384&amp;sr=8-2-fkmr2&amp;pi=AC_SX236_SY340_QL65&amp;keywords=weller+replacement+tip+set+wes51
I’d also recommend a good vise or workstation to hold things steady, because there’s nothing worse than trying to use crappy little helping hands or just solder on a bench top. I use a Panavise like this, just as an idea, but there are probably some decent cheaper options out there: https://www.amazon.com/gp/aw/d/B00011QA0M/ref=mp_s_a_1_1?ie=UTF8&amp;qid=1518809613&amp;sr=8-1&amp;pi=AC_SX236_SY340_QL65&amp;keywords=panavise+350&amp;dpPl=1&amp;dpID=41smUr9QAlL&amp;ref=plSrch
All I've used are Luxe Bidet brand, though I've used several different models.
The first 3 installs I did were essentially this one, though I think slightly different:
MB110: http://www.amazon.com/Luxe-MB110-Non-Electric-Mechanical-Attachment/dp/B001KKRCFA/ref=sr_1_5?s=hi&amp;ie=UTF8&amp;qid=1421506832&amp;sr=1-5&amp;keywords=luxe+bidet
Afterwards, woot.com had a sale on the Neo line, and I picked up one fresh water (http://www.amazon.com/Luxe-Bidet-Neo-180-Non-Electric/dp/B00A0RMQ1E/ref=sr_1_1?s=hi&amp;ie=UTF8&amp;qid=1421506832&amp;sr=1-1&amp;keywords=luxe+bidet) and one heated (http://www.amazon.com/Luxe-Bidet-Neo-320-Non-Electric/dp/B00A0RX2UI/ref=sr_1_2?s=hi&amp;ie=UTF8&amp;qid=1421506832&amp;sr=1-2&amp;keywords=luxe+bidet).
Given my experience, I really do prefer either of the Neos.
Temperature: I'm indifferent about the temperature honestly. Only the 320 model has hot water piped in. It's like washing your hands. Wait for the warm/hot water or just live with the not-cold water coming through? Pro-tip: If you want to pre-warm the water, turn on the sink's hot water while doing your business.
Cleaning: Neos have a self-clean function and shield for the spigots. The old one only is shielded while the spigot is up.
"Front cleaning": Neos have two spigots. One aimed at the front, one aimed at the back. I have never had the need to clean my junk after I pee, so I've not used it, but the wife appreciates it.
Control: The old one has a turn dial to control flow. The neos have a nice lever that would remind you of how you control flow with modern sinks.
Hope this helps. Feel free to PM with any more questions.
For fixed blade if you are gonna be using the knife for hard use then I would not recommend a folder. I'm more knowledgeable on folders so someone else may find a better choice. If they don't, this is still a very solid choice, I have never had one, but I did have an izula (which is very similar).
For folder I would go with the Ontario rat, they make this is d2 blade steel which would be better and they make a smaller version (rat 2) but any version of this knife you choose will be the best for the money.
Another fixed blade that is similar to picture is this Schrade. Schrade usually isn't the best company but 1095 is definitely a cheap, good steel. With the blade thickness and steel, I would trust this knife any day.
I'm a sound guy, I can help:
-Six pack of plain black tee shirts
-Pack of black hair ties for his pony tail
-Gift card to Old Navy (so he can restock on cargo shorts)
-Nice beard trimmer for his goatee
All kidding aside, a simple but often appreciated gift would be something like a nice small flashlight. You can never have too many. I like this one.
Dirt cheap, low on features but OK quality: https://www.sparkfun.com/products/9141
Avoid the Wal Mart multimeter...I'm not happy to see a non category rated meter from GE of all companies. It's actually a rip off at $20....I've seen similar meters online for $5 and had the unfortunate experience of using one.
http://www.amazon.com/Extech-EX430-Autoranging-Multimeter-Capacitance/dp/B0000WU1AC
The Extech 430 is a good all rounder. It's Cat III with auto ranging and has bare bones capacitance and frequency counting. True RMS measurement allows you to measure AC things other than just 60Hz sine waves. (you need true RMS for checking amp output at 1kHz among other things) I own one and aside from the nasty yellow-green backlight and somewhat short battery life, it rocks. Comes with a temperature probe too, which you'll find useful.
If you're serious and want data logging without going all out on a $300-500 industrial meter from the likes of Fluke, give this a try. It looks cool as heck but possibly has a bit of a learning curve due to the menu instead of a dial. Cat III to 600V too. It does everything the Extech 430 does and more. https://www.circuitspecialists.com/dm620.html
Soldering Irons...
The classic pencil tip "fire starter": https://www.radioshack.com/product/index.jsp?productId=2062758&amp;filterName=Type&amp;filterValue=Soldering+irons
You get what you pay for there but I've fixed many things with ones just like this. Larger joints may need more heat, they make 40 and 60W irons for that. Tip life on these cheap irons is poor. Poor tips make poor joints. Replace them if they go bad. Do not sharpen one.
BUT...instead of having 3 low quality irons knocking around the shop, I recommend people go straight for an adjustable heat soldering station like this one: https://www.sparkfun.com/products/10707
Buy a couple spare tips if you order a soldering station. Local availability of these is nil. The stations usually have better irons, heat control that actually works and far better tips.
This soldering station and its more expensive digital counterpart, the WESD51 are a bit pricey. On the other hand, they're totally awesome and the gold standard in many shops: http://www.amazon.com/Weller-WES51-Analog-Soldering-Station/dp/B000BRC2XU
Once you get a station, you'll wonder how you ever got along without one. Good tools make the best repairs.
You are going to want to balance tools and parts.
TOOLS (must haves)
.
.
TOOLS (eventually)
.
.
PARTS (vaguely in order of usefullness)
(Of couse you don't have to get the Elenco kits, those are just the ones I use and really like)
.
.
.
I think that's all for now...
I am one that uses a flashlight a lot. I don't have a dozen different lights in my collection, I have 2. Those two are very similar, but there are a couple of differences.
The Thrunite Neutron 2C V3. I like this light a lot. It's my "use it 10+ times a day" light. It runs off of 1x 18650 cell (battery), 2xCR123, or a couple of other options. It has built in USB charging, it comes with a 18650 cell, it has adjustable brightness (ramping), and goes from .5 lm to 1040 lm. This thing is bright! Or dim, whichever you want. It just feels good.
My only 2 gigs against it: It takes a while to get used to finding the flat side switch in the dark. I no longer have any problem locating it, but when I first got it, it was a bit challenging. Second gig is that the lens is not replaceable. The lens being broken on mine has not affected the operation in the least, but I would like to replace it. Thrunite says that it's glued in and is not replaceable. ~$50 USD
https://www.amazon.com/dp/B06XXFC1VN
My other light is a Thorfire TK18. It's pretty similar to the Neutron, but it has a tail switch. It does NOT come with a battery. It does not have On-board USB (or any other) charging, which means that you would need to buy cells and at least one charger. It feels ok in my hand, but I prefer the feel of the Neutron.
It is also adjustable brightness, but also has a Low/Med/High/Turbo mode which I prefer on this light. ~$29 + cell & charger.
https://www.amazon.com/dp/B0787Z97ZK
Avoid those Atomic lights and their clones.
This is exactly what you are NOT looking for but I'll say it anyway... just to hear myself talk:
I just bought a Whetstone from amazon and am amazed how easy it is with the right equipment. I was using a diamond stone and gave up. This was cheap and I get a perfect edge in minutes. The edge lasts longer than using the diamond. Don't forget to use a steel everytime you use the knife anyway.
https://www.amazon.com/Japanese-Sharpening-Stone-Whetstone-Combination/dp/B001DT1X9O/ref=sr_1_4?ie=UTF8&amp;qid=1496761905&amp;sr=8-4&amp;keywords=wet+stones+for+sharpening+knives
For us, day 10 things started calming down with less urgent bodily alarms to hit the bathroom and the return of more normal density, thank goodness. As of now, I actually feel like my inner workings are functioning better than pre-keto, which is surprising. I really hope things calm down for you soon!
As a side note Someone in r/keto recommended this little godsend to literally save our butts during the process. It really helps as I completely understand how clean up can become a literal pain in the ass.
https://www.amazon.com/Astor-Non-Electric-Mechanical-Attachment-CB-1000/dp/B003TPGPUW
Talk to your oncologist first but you may want to get on some probiotics. Chemo really kills the gut flora and sometimes a little push (probiotics / yogurt) can help get things back on track.
Also we ordered this to help with hubbys post-chemo & post RPLND bathroom time, and it's been great. Highly recommend.
Good luck!
$14 link for a solid basic soldering iron.
Here's one that costs a little more, but has more adjustability $39 link.
Anything from Weller is going to be pretty good.
Here's a pretty good basic soldering video.
It's not hard, but takes a little practice to get the feel for it. I would recommend finding a broken electronic that you can pull a circuit board out of and just practice soldering by removing parts from the board and putting them back.
Have fun!
I have this one. It's not great, but it's been good enough for my purposes for a few years. It's about $40.
https://smile.amazon.com/Weller-WLC100-40-Watt-Soldering-Station/dp/B000AS28UC/
There are ones on Amazon that are a little cheaper. This one sounds pretty comparable and is in your price range.
https://smile.amazon.com/Aoyue-Variable-Soldering-Station-Removable/dp/B00MCVCHJM/
For really basic soldering, you actually can get away without a temperature control, but it's hard to recommend that for anything involving a printed circuit board.
For my part, I'm thinking of upgrading to a hot air reflow station, to make it easier to work with solder paste and surface-mount components, as well as heat-shrink tubing. But the basic adjustable Weller was good enough for several years of tinkering.
You can get okay ones for $50-100. Are you looking for a soldering station or just a soldering pencil/gun?
I would recommend a wall unit, as opposed to a butane unit, because butane ones are mainly for people soldering in the field. They are nice and portable, but you have more wall outlets than butane canisters in your place, so it's easier
..
Weller and Hakko are great brands, their tips are a bit pricey too, but trust me, they last a lot longer than the cheap irons and their cheap tips.
You can't go wrong with any of these:
Weller
Hakko
Feel free to ask me other questions.
3x Northern Lights From Sensi Seeds
1x [Mars Hyrdo] (https://www.amazon.de/MARS-HYDRO-Wachsen-Vollspektrum-Pflanze/dp/B078Y74D67/ref=sr_1_1?ie=UTF8&amp;qid=1546344239&amp;sr=8-1&amp;keywords=mars%2Bhydro%2B600w%2Bled&amp;th=1)
Pulling 217W from the wall, honestly cant complain with the results so far.
I would have went with a QB if I knew about them earlier on, will switch it out once this one runs out I think.
Avg Temp is 24 degrees or 75,2 fahrenheit - The light is super cool and has two massive fans above it. This entire grow, the temperature was never an issue.
1 x Secret Jardin Hydro Shoot 80 R2.00 80x80x160 cm - Honestly a bit too small for 3 plants, will be running 2 next time around.
2 x Smart Plug - I got these from another site, at a higher price but they have been great. They allow me to see my exact wattage from the wall, my usages over 24hours/7days/1month. You can build in a schedule for your light and intake fan - that's why I got 2. Its all via an app, which has a kill switch built in so if you need to turn the setup off in seconds, you can do that remotely.
1 x AC Infinity Intake Fan + Carbon Filter
1x AC Infinity Multifan
1 x C02 Bag
3 x 5 Gallon Smart Pots (20L)
Nutrients
I have honestly no idea what I'm doing - I can provide an entire list of everything I ended up using if you want :)
It's easy. I used a wrench and a socket set and I think a flathead. I'm not very "handy" and I got it installed perfectly with no problems. This is the one I added to my other toilet:
Astor Bidet Fresh Water Spray Non-Electric Mechanical Bidet Toilet Seat Attachment CB-1000 https://www.amazon.com/dp/B003TPGPUW/ref=cm_sw_r_cp_api_q.aBxbNSS18MT
I don't know why the price went up like $40. Seems it's only available via third party sellers right now. Look up similar ones. They're all pretty much the same.
As for guests seeing it, my dad fell in love with it so I ordered him one last year for Father's Day. My gf was apprehensive then admitted she liked it.
Pen Light It's probably a little too bright but it's still awesome none-the-less
http://www.amazon.com/dp/B00008BFS5 The stylus might be more appropriate
I have also heard great things about the book The House of God even if you are not religious. I have not had a chance to read it yet but it's on my list.
If you are trying to spend a little more money an engraves stethoscope (I recommend the Cardiology III) is always appreciated.
Scissors are no good. I got these clippers from Amazon. They are actually wire clippers, but the $5 is well spent.
All the models in the Misaki box are Ten Thunders, except Misaki and Shang (the totem) who are dual faction. However, Misaki has a special rule that allows her to hire four "Last Blossom" models into her crew regardless of declared faction, so if you declare her as Outcasts you can still hire the whole crew box.
Each boxed set comes with all the bases you need, so don't worry on that front.
For competitive play with the Guild Masters, you'd probably want to have both boxes as the Judge and Francisco are excellent henchmen, and Death Marshals are good minions, and Nino is a good Enforcer.
Ultimately when you get fully competitive (think: Magic the Gathering) you end up having every model in the faction.
That's about all I can think of for now.