(Part 2) Best products from r/prusa3d
We found 46 comments on r/prusa3d discussing the most recommended products. We ran sentiment analysis on each of these comments to determine how redditors feel about different products. We found 221 products and ranked them based on the amount of positive reactions they received. Here are the products ranked 21-40. You can also go back to the previous section.
21. kuman Raspberry Pi Screen 3.5 Inch TFT LCD Display with Touch Screen, Touch Pen for Raspberry Pi 3B+/ Pi 2B, Pi Zero W, Pi A/B
- The 3. 5 in touch screen can support two screens simultaneous display(the Raspberry Pi can be connected to this screen and another HDMI screen at the same time).
- This 3. 5 inch resistive touch screen can be directly inserted into any version of the Raspberry Pi (Raspberry Pi zero, zero w, a, A+, b, B+, 2B, 3B, 3B+).
- This Touch screen Support for Raspbian/Ubuntu/Kali/RETROPIE systems, We provide drivers and image freely. (Please scan the QR code on the instruction to download it)
- The Raspberry Pi screen can work with fbcp software driver, you can adjust the resolution by the software (The RPI screen original resolution is 320×480).
- The Raspberry Pi Display support 125MHz SPI signal input, It can display stable without Flicker. When it work with Raspberry Pi, the refresh rate is about 50fps, it is enough to play the video and game.
Features:
 ▼ Read Reddit mentions
22. 3D Solutech ST175CLPLA Natural Clear 1.75mm 3D Printer PLA Filament, Dimensional Accuracy +/- 0.03 mm, 2.2 LBS (1.0KG), Silver
1.75mm see through white pla filamentFor common 3d printers such as makerbot, RepRap, afinia, up, Mendel, flash forge, solidoodle 2, printrbot lc, makergear m2 and etc.Temperature range is 190 degree C - 220 degree C
 ▼ Read Reddit mentions
23. Liquid Push Down Alcohol Dispenser- Clear Bottle- Labeled - 9 Oz Bottle by Tech-Med
Liquid Push Down Alcohol Dispenser- Clear Bottle- Labeled - 9 Oz Bottle
 ▼ Read Reddit mentions
24. Kimberly-Clark Kimtech Science Kimwipes Delicate Task Disposable Wiper, 8-25/64" Length x 4-25/64" Width, White (Pack of 3)
Low lint and low extractableAbsorbs 18 percent more water than other private label wipersAbsorbs water 24 percent faster than other private label wipersOne at a time dispensingWon't scratch delicate surfaces when wet
 ▼ Read Reddit mentions
25. HICTOP Cartridge Heater 24V 40W for Creality Ender 3 3 Pro Ender 5 CR-10S Pro 3D Printer Prusa Mendel (Pack of 3)
- ender 3 heater cartridge material : Stainless steel (304)
- 24V heater cartridge voltage and power : 24V/40W.
- Application of the 24v heater cartridge 40W: Creality ender 3, ender 3 Pro, ender 6 CR-10S Pro etc. 3D Printers Prusa Mendel
- Diameter of the ender 3 pro heater cartridge : 6mm. Length: 20mm,Wire Length:1M
- Temperature of the ender 3 V2 heater cartridge: It can take up to 280 ° C
Features:
 ▼ Read Reddit mentions
26. 3D Printing Filament PLA Dimensional Accuracy +/- 0.05 mm, 2.2 LBS Spool, 1.75 mm (Yellow)
- Material: PLA; Color: Yellow; Diameter: 1.75mm
- Weight: 1 KG (approximately 2.20 lbs) Spool
- Vacuum Sealed Packaging: Put it in the sealed bag with silica packets to avoid moisturing, which is a proper way to storage your PLA.
- Suggest print temperature:180°C - 210°C (356°F - 410°F)
- Usage: in almost any industry or profession or just for fun
Features:
 ▼ Read Reddit mentions
27. Athorbot 3D Printing Build Surface, Black (Pack of 3) (310mm X 310mm) for CR-10 CR-10S 3D printer
- 1.Excellent adhesion: easy to install and no bubbles, print adheres well
- 2.Easy to take off: take off easily and cleanly
- 3.Great durability: can be used for many times of cycle print
- 4.Work on many surface: apply to many 3d filament types printing, such as PLA, ABS and so on
- 5.Withstand high temperature: resistant to high temperatures making it perfect for the filaments requiring heated build beds such as ABS
Features:
 ▼ Read Reddit mentions
28. ANYCUBIC 3D Printer Heating Controller MKS MOSFET for Heatbed Extruder MOS Module
Each one has done functional testSuperior performance of MOSFET (Max 280A)Extra large heat sink , the maximum current can be up to 30A or moreCan use hot bed output signal of Ramp1.4 and MKS series to controlCan use digital signal of 5-24v to control
 ▼ Read Reddit mentions
29. Albanese Confecetionery Sugar Free Assorted Fruit Gummi Bears, 5 Pound Bag
- SWEET, NO SUGAR: Everything you love about the delicious flavor Albanese gummies, minus the sugar. After one bite or our delicious, sugar-free gummies you'll taste the difference of fresh fruit flavors & a soft chew you won't find with any other gummies.
- STOCK UP THE FLAVOR: Whether you like them sweet, sour, big or small, Albanese gummi candies burst with fresh fruit flavors & you can stock up with a bulk pack of your favorite flavor. Delight your tastebuds with Albanese gummy worms, gummy bears & more!
- PERFECT SNACK: Fat free, gluten free, and dairy free, Albanese assorted gummy candies are your new perfect sweet and soft snack. There's a reason Albanese gummies are the world's best & once you try our deliciously fruity assortment, we know you'll agree.
- ALLERGY FRIENDLY: Peanut free, tree nut free, dairy free, MSG free, gluten free, and with no artificial sweeteners, Albanese gummy candies are an allergy friendly snack packed with a sweet, fruity flavor everyone can enjoy. Sweet gummies, giant flavor.
- RECIPE FOR SUCCESS: For over 30 years Albanese has been making delicious treats with high-quality ingredients here in the United States. Taste the difference in our gummies, chocolates, nuts, & mixes!
Features:
 ▼ Read Reddit mentions
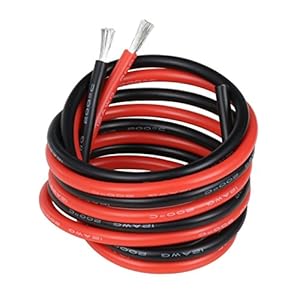
30. BNTECHGO 12 Gauge Silicone Wire 10 ft red and 10 ft Black Flexible 12 AWG Stranded Copper Wire
- High Quality Ultra Flexible Soft Silicone Rubber Copper Wire!Super Low Impedance,Highly Efficient!
- High strand count copper core,12 AWG silicone stranded wire has 680 strands 0.08 mm tinned copper wire,the copper strands are tinned,protecting them from corrosion and making it easier to solder.
- They are constructed with premium silicone rubber insulation.High temperature resistance 200 degree C,Low temperature resistance,in extreme cold -60 degree C.Rated Voltage: 600 volts.Outside diameter 4.5 mm,tolerance +/- 0.1 mm.
- 12 gauge silicone wire kit: 2 colors,red and black,each color 10 ft,total 20 feet.
- BNTECHGO silicone wire are widely used for model planes,model cars,model ships,lamps,household appliances,electric heating appliances,meters,instruments,motor and digital fields.
Features:
 ▼ Read Reddit mentions
31. Swisspers Premium 100% Cotton Rounds, Hypoallergenic, 240 Count
- Includes 240 cotton rounds
- Features two sides: embossed side is for gentle cleansing, while the smooth side is ideal for applying lotions and astringents.
- Premium quality cotton rounds are perfect for removing cosmetics and nail polish and for applying astringents, toners and lotions.
- Patented stitched edge technology binds all layers together to ensure a durable, lint-free pad that will not separate during use.
- Hypoallergenic - made from 100% cotton - plush core provides ideal softness, absorbency and thickness
Features:
 ▼ Read Reddit mentions
33. eSUN 3D 1.75mm PETG Black Filament 1kg (2.2lb), PETG 3D Printer Filament, 1.75mm Solid Opaque Black
1KG net (approximately 2.2 lbs) Filament with Clear SpooleSUN PETG 3D Printer Filament Vacuumed Sealed With Desiccant1.75mm Filament Diameter (Dimensional Accuracy +/- 0.05mm)Recommended Extrusion/Nozzle Temperature 240C - 255CSpool Diameter: 8" - Spool Width: 2.50" - Spool Hub Hole Diameter: 2.05" ...
 ▼ Read Reddit mentions
34. FYSETC Prusa i3 MK3 Cooling Fan 5015 50x50x15mm 5V DC 0.35A Hotend Cooler Blow Radiator Sleeve Bearing for 3D Printer Parts Accessories, 2Pcs
Brushless DC Blower Fan, best DIY replacement extruder hotend parts for Prusa i3 MK3.Size: About 50x50x15mm/ 1.9x1.9x0.59 inch; Cable Length: about 750mm/ 29.5 inchRated Voltage: 5V, 0.35APlease Note: the fan has two sides,but the side with sticker must be always facing the hotend (not visible when ...
 ▼ Read Reddit mentions
35. Liqui Moly 1080 Schmierfish Additive 50 g
- Schmierfix is a particularly strong-holding, water-resistant and transparent special paste with many possible applications.
- Can be universally used in the workshop, industry, house, hobby, garden etc. For safe application on bearings, hinges, gliding surfaces, seat rails, sun roofs, door locks
- For gasoline and diesel engines including common rail and pumped jet injection
- Also suitable for gas-driven vehicles (CNG/LPG) and vehicles with a diesel particulate filter (DPF), even if retrofitted
Features:
 ▼ Read Reddit mentions
36. YOTINO PC4-M10 Male Straight Pneumatic PTFE Tube Push in Quick Fitting Connector for E3D-V6 Long-Distance Bowden Extruder 3D Printer (Pack of 10pcs)
10 x PC4-M10 pneumatic male straight quick connector for E3D-V6 long-distance bowden extruder 3D printerPTFE Tubing Outer Diameter: 4 mm. Thread: 6mmThe upper part(black) can be inserted PTFE tube and self-lockingMade of high quality stainless steel, oxidation resistant and rust resistant, increase ...
 ▼ Read Reddit mentions
37. uxcell Nylon Flat Washers M3 6mm OD 3mm ID 0.5mm Thickness Sealing Gasket for Faucet Pipe Water Hose, Clear, Pack of 200
- [Size] - 6mm(0.24 Inch) OD 3mm(0.12 Inch) ID 0.5mm(0.02 Inch) Thickness
- [Application] - Used for faucet pipe, hose bolt, valve, or other gardening maintenance or retrofit
- [Function] - It can prevent the pipe from leaking and provide positive shut off, stop leaks to save energy
- [Advantage] - Durable nylon with wear-resisting, anti-corrosion, strong sealing, and can be insulated
- [NOTE] - Please confirm the required size and material before purchase, and put it in the right place
Features:
 ▼ Read Reddit mentions
38. K&S Precision Metals 9862 Round Brass Rod, 1.5mm Diameter X 300mm Long, 5 Pieces per Pack, Made in The USA
- Alloys 260 1/4 hard ASTM B134
- High Quality; Pure Brass
- REACH/ROHS/Hazardous Minerals Compliant
- Made in the USA
Features:
 ▼ Read Reddit mentions
39. Olsson Ruby Nozzle 0.4mm - 1.75mm Filament
- ONE NOZZLE: The Olsson Ruby will work with a huge range of materials. PLA, ABS, CPE/PET, Nylon, and composites with abrasive additives such as Carbon fibre, Steel, Wood, Boron Carbide, Tungsten and Phosphorescent pigment, are some of the materials sucessfully tested so far.
- HIGHLY WEAR RESISTANT: The ruby mounted at the tip makes sure that even the toughest materials will be printable. It was originally designed for printing with Boron Carbide (B4C), the third hardest known material in the world.
- EXCELLENT HEAT CONDUCTIVITY: Since most of the Olsson Ruby is made from brass, with its excellent heat conductivity, performance and throughput is first-class.
- VERIFIED PERFORMANCE: People all over the world have been testing different iterations of the ruby nozzle since early 2016. We are very happy to have received only good printing results from this community.
- MANUFACTURING QUALITY: The Olsson Ruby is manufactured, assembled and tested in a high-quality facility in Sweden. This is why 3DVerkstan guarantees the very best quality and tolerances.
Features:
 ▼ Read Reddit mentions
Top comments mentioning products on r/prusa3d:
Summary
21. kuman Raspberry Pi Screen 3.5 Inch TFT LCD Display with Touch Screen, Touch Pen for Raspberry Pi 3B+/ Pi 2B, Pi Zero W, Pi A/B
- The 3. 5 in touch screen can support two screens simultaneous display(the Raspberry Pi can be connected to this screen and another HDMI screen at the same time).
- This 3. 5 inch resistive touch screen can be directly inserted into any version of the Raspberry Pi (Raspberry Pi zero, zero w, a, A+, b, B+, 2B, 3B, 3B+).
- This Touch screen Support for Raspbian/Ubuntu/Kali/RETROPIE systems, We provide drivers and image freely. (Please scan the QR code on the instruction to download it)
- The Raspberry Pi screen can work with fbcp software driver, you can adjust the resolution by the software (The RPI screen original resolution is 320×480).
- The Raspberry Pi Display support 125MHz SPI signal input, It can display stable without Flicker. When it work with Raspberry Pi, the refresh rate is about 50fps, it is enough to play the video and game.
Features:
▼ Read Reddit mentions22. 3D Solutech ST175CLPLA Natural Clear 1.75mm 3D Printer PLA Filament, Dimensional Accuracy +/- 0.03 mm, 2.2 LBS (1.0KG), Silver
1.75mm see through white pla filamentFor common 3d printers such as makerbot, RepRap, afinia, up, Mendel, flash forge, solidoodle 2, printrbot lc, makergear m2 and etc.Temperature range is 190 degree C - 220 degree C
▼ Read Reddit mentions23. Liquid Push Down Alcohol Dispenser- Clear Bottle- Labeled - 9 Oz Bottle by Tech-Med
Liquid Push Down Alcohol Dispenser- Clear Bottle- Labeled - 9 Oz Bottle
▼ Read Reddit mentions24. Kimberly-Clark Kimtech Science Kimwipes Delicate Task Disposable Wiper, 8-25/64" Length x 4-25/64" Width, White (Pack of 3)
Low lint and low extractableAbsorbs 18 percent more water than other private label wipersAbsorbs water 24 percent faster than other private label wipersOne at a time dispensingWon't scratch delicate surfaces when wet
▼ Read Reddit mentions25. HICTOP Cartridge Heater 24V 40W for Creality Ender 3 3 Pro Ender 5 CR-10S Pro 3D Printer Prusa Mendel (Pack of 3)
- ender 3 heater cartridge material : Stainless steel (304)
- 24V heater cartridge voltage and power : 24V/40W.
- Application of the 24v heater cartridge 40W: Creality ender 3, ender 3 Pro, ender 6 CR-10S Pro etc. 3D Printers Prusa Mendel
- Diameter of the ender 3 pro heater cartridge : 6mm. Length: 20mm,Wire Length:1M
- Temperature of the ender 3 V2 heater cartridge: It can take up to 280 ° C
Features:
▼ Read Reddit mentions26. 3D Printing Filament PLA Dimensional Accuracy +/- 0.05 mm, 2.2 LBS Spool, 1.75 mm (Yellow)
- Material: PLA; Color: Yellow; Diameter: 1.75mm
- Weight: 1 KG (approximately 2.20 lbs) Spool
- Vacuum Sealed Packaging: Put it in the sealed bag with silica packets to avoid moisturing, which is a proper way to storage your PLA.
- Suggest print temperature:180°C - 210°C (356°F - 410°F)
- Usage: in almost any industry or profession or just for fun
Features:
▼ Read Reddit mentions27. Athorbot 3D Printing Build Surface, Black (Pack of 3) (310mm X 310mm) for CR-10 CR-10S 3D printer
- 1.Excellent adhesion: easy to install and no bubbles, print adheres well
- 2.Easy to take off: take off easily and cleanly
- 3.Great durability: can be used for many times of cycle print
- 4.Work on many surface: apply to many 3d filament types printing, such as PLA, ABS and so on
- 5.Withstand high temperature: resistant to high temperatures making it perfect for the filaments requiring heated build beds such as ABS
Features:
▼ Read Reddit mentions28. ANYCUBIC 3D Printer Heating Controller MKS MOSFET for Heatbed Extruder MOS Module
Each one has done functional testSuperior performance of MOSFET (Max 280A)Extra large heat sink , the maximum current can be up to 30A or moreCan use hot bed output signal of Ramp1.4 and MKS series to controlCan use digital signal of 5-24v to control
▼ Read Reddit mentions29. Albanese Confecetionery Sugar Free Assorted Fruit Gummi Bears, 5 Pound Bag
- SWEET, NO SUGAR: Everything you love about the delicious flavor Albanese gummies, minus the sugar. After one bite or our delicious, sugar-free gummies you'll taste the difference of fresh fruit flavors & a soft chew you won't find with any other gummies.
- STOCK UP THE FLAVOR: Whether you like them sweet, sour, big or small, Albanese gummi candies burst with fresh fruit flavors & you can stock up with a bulk pack of your favorite flavor. Delight your tastebuds with Albanese gummy worms, gummy bears & more!
- PERFECT SNACK: Fat free, gluten free, and dairy free, Albanese assorted gummy candies are your new perfect sweet and soft snack. There's a reason Albanese gummies are the world's best & once you try our deliciously fruity assortment, we know you'll agree.
- ALLERGY FRIENDLY: Peanut free, tree nut free, dairy free, MSG free, gluten free, and with no artificial sweeteners, Albanese gummy candies are an allergy friendly snack packed with a sweet, fruity flavor everyone can enjoy. Sweet gummies, giant flavor.
- RECIPE FOR SUCCESS: For over 30 years Albanese has been making delicious treats with high-quality ingredients here in the United States. Taste the difference in our gummies, chocolates, nuts, & mixes!
Features:
▼ Read Reddit mentions30. BNTECHGO 12 Gauge Silicone Wire 10 ft red and 10 ft Black Flexible 12 AWG Stranded Copper Wire
- High Quality Ultra Flexible Soft Silicone Rubber Copper Wire!Super Low Impedance,Highly Efficient!
- High strand count copper core,12 AWG silicone stranded wire has 680 strands 0.08 mm tinned copper wire,the copper strands are tinned,protecting them from corrosion and making it easier to solder.
- They are constructed with premium silicone rubber insulation.High temperature resistance 200 degree C,Low temperature resistance,in extreme cold -60 degree C.Rated Voltage: 600 volts.Outside diameter 4.5 mm,tolerance +/- 0.1 mm.
- 12 gauge silicone wire kit: 2 colors,red and black,each color 10 ft,total 20 feet.
- BNTECHGO silicone wire are widely used for model planes,model cars,model ships,lamps,household appliances,electric heating appliances,meters,instruments,motor and digital fields.
Features:
▼ Read Reddit mentions31. Swisspers Premium 100% Cotton Rounds, Hypoallergenic, 240 Count
- Includes 240 cotton rounds
- Features two sides: embossed side is for gentle cleansing, while the smooth side is ideal for applying lotions and astringents.
- Premium quality cotton rounds are perfect for removing cosmetics and nail polish and for applying astringents, toners and lotions.
- Patented stitched edge technology binds all layers together to ensure a durable, lint-free pad that will not separate during use.
- Hypoallergenic - made from 100% cotton - plush core provides ideal softness, absorbency and thickness
Features:
▼ Read Reddit mentions33. eSUN 3D 1.75mm PETG Black Filament 1kg (2.2lb), PETG 3D Printer Filament, 1.75mm Solid Opaque Black
1KG net (approximately 2.2 lbs) Filament with Clear SpooleSUN PETG 3D Printer Filament Vacuumed Sealed With Desiccant1.75mm Filament Diameter (Dimensional Accuracy +/- 0.05mm)Recommended Extrusion/Nozzle Temperature 240C - 255CSpool Diameter: 8" - Spool Width: 2.50" - Spool Hub Hole Diameter: 2.05" ...
▼ Read Reddit mentions34. FYSETC Prusa i3 MK3 Cooling Fan 5015 50x50x15mm 5V DC 0.35A Hotend Cooler Blow Radiator Sleeve Bearing for 3D Printer Parts Accessories, 2Pcs
Brushless DC Blower Fan, best DIY replacement extruder hotend parts for Prusa i3 MK3.Size: About 50x50x15mm/ 1.9x1.9x0.59 inch; Cable Length: about 750mm/ 29.5 inchRated Voltage: 5V, 0.35APlease Note: the fan has two sides,but the side with sticker must be always facing the hotend (not visible when ...
▼ Read Reddit mentions35. Liqui Moly 1080 Schmierfish Additive 50 g
- Schmierfix is a particularly strong-holding, water-resistant and transparent special paste with many possible applications.
- Can be universally used in the workshop, industry, house, hobby, garden etc. For safe application on bearings, hinges, gliding surfaces, seat rails, sun roofs, door locks
- For gasoline and diesel engines including common rail and pumped jet injection
- Also suitable for gas-driven vehicles (CNG/LPG) and vehicles with a diesel particulate filter (DPF), even if retrofitted
Features:
▼ Read Reddit mentions36. YOTINO PC4-M10 Male Straight Pneumatic PTFE Tube Push in Quick Fitting Connector for E3D-V6 Long-Distance Bowden Extruder 3D Printer (Pack of 10pcs)
10 x PC4-M10 pneumatic male straight quick connector for E3D-V6 long-distance bowden extruder 3D printerPTFE Tubing Outer Diameter: 4 mm. Thread: 6mmThe upper part(black) can be inserted PTFE tube and self-lockingMade of high quality stainless steel, oxidation resistant and rust resistant, increase ...
▼ Read Reddit mentions37. uxcell Nylon Flat Washers M3 6mm OD 3mm ID 0.5mm Thickness Sealing Gasket for Faucet Pipe Water Hose, Clear, Pack of 200
- [Size] - 6mm(0.24 Inch) OD 3mm(0.12 Inch) ID 0.5mm(0.02 Inch) Thickness
- [Application] - Used for faucet pipe, hose bolt, valve, or other gardening maintenance or retrofit
- [Function] - It can prevent the pipe from leaking and provide positive shut off, stop leaks to save energy
- [Advantage] - Durable nylon with wear-resisting, anti-corrosion, strong sealing, and can be insulated
- [NOTE] - Please confirm the required size and material before purchase, and put it in the right place
Features:
▼ Read Reddit mentions38. K&S Precision Metals 9862 Round Brass Rod, 1.5mm Diameter X 300mm Long, 5 Pieces per Pack, Made in The USA
- Alloys 260 1/4 hard ASTM B134
- High Quality; Pure Brass
- REACH/ROHS/Hazardous Minerals Compliant
- Made in the USA
Features:
▼ Read Reddit mentions39. Olsson Ruby Nozzle 0.4mm - 1.75mm Filament
- ONE NOZZLE: The Olsson Ruby will work with a huge range of materials. PLA, ABS, CPE/PET, Nylon, and composites with abrasive additives such as Carbon fibre, Steel, Wood, Boron Carbide, Tungsten and Phosphorescent pigment, are some of the materials sucessfully tested so far.
- HIGHLY WEAR RESISTANT: The ruby mounted at the tip makes sure that even the toughest materials will be printable. It was originally designed for printing with Boron Carbide (B4C), the third hardest known material in the world.
- EXCELLENT HEAT CONDUCTIVITY: Since most of the Olsson Ruby is made from brass, with its excellent heat conductivity, performance and throughput is first-class.
- VERIFIED PERFORMANCE: People all over the world have been testing different iterations of the ruby nozzle since early 2016. We are very happy to have received only good printing results from this community.
- MANUFACTURING QUALITY: The Olsson Ruby is manufactured, assembled and tested in a high-quality facility in Sweden. This is why 3DVerkstan guarantees the very best quality and tolerances.
Features:
▼ Read Reddit mentions
Look for a fysetc prusa (3 wire) fan on amazon for quick replacement with the correct molex connector and then order a few sets from Ali express (also fysetc) for super cheap to have on hand.
Their hot end fan is way better than the noctua if a bit louder.
FYSETC Prusa i3 MK3 Cooling Fan 5015 50x50x15mm 5V DC 0.35A Hotend Cooler Blow Radiator Sleeve Bearing for 3D Printer Parts Accessories, 2Pcs https://www.amazon.com/dp/B07NTKG9K4/ref=cm_sw_r_cp_api_i_r2GSDb2DT4CRQ
FYSETC Prusa i3 MK3 Cool Blower Fan 4010 40x40x10mm DC 5V 0.2A Hotend Cooler Radiator for 3D Printer DIY Parts Accessories, 2Pcs https://www.amazon.com/dp/B07NTNQ5HF/ref=cm_sw_r_cp_api_i_O4GSDb8K22KAQ
I use #000 steel wool to refresh my PEI sheet.
WARNING: don't do this anywhere near the printer or you will get steel wool dust all over your magnetic bed and it stinks to get off. I speak from my own stupid experience.
After roughing up the surface just a little, I use a handheld magnet to collect most of the steel wool dust, wash with dish soap and water, then go back to vigorous 99% IPA with one wet cotton pad and one clean cotton pad before each print. I can usually use these cotton pads for about 5 prints before I need to get a new one, but they are so cheap that two per print wouldn't even be bad.
The OP has done everything I did to try and get good adhesions (except maybe the roughing up the PEI bit). I now get great adhesion and one of my products has a 100mm x 100mm fairly thin-walled box. Before getting the adhesion down, they were always pulling up at the corners in the middle of the print. Now they stay perfectly flat for the whole print.
I had the same issue.
It's actually really easy to take apart and get to the extruder if you want to check everything.
Unscrew the fans and let them dangle to the side, then you unscrew the parts that are holding the extruder in there. After that you should be able to wiggle the whole thing out.
But honestly, just by looking at your picture, it doesn't look like you have heat creep, or plastic issues. So I doubt it's going to be an issue with the heat break, block, or anything like that. So probably just the heater cartridge.
I was just in your shoes, and successfully spliced a new heater cartridge onto my old wires.
Basically snip off the old wire about 6-8 inches down, strip the wire coating, and splice on a new heater cartridge.
This is the bundle of heater cartridges I got from Amazon. They work perfectly with my MK3. The cartridge itself is slightly longer than the base, but still works without issues.
Also to make splicing easier and faster I got these and they have been working really great.
I actually bought this one: https://www.amazon.com/gp/product/B07P7TLLRN/ref=ppx_yo_dt_b_asin_title_o00_s00?ie=UTF8&psc=1
Setup was fairly straightforward and the screen quality seems good, calibration was spot on out of the box as well. The issue I have is that it doesn't have the two mounting screw holes that hang off of it like the Adafruit one does, so I have the pi and screen zip tied to the enclosure to hold it in place. You can see this if you zoom in on the photo. I'm working on a more permanent mounting solution. In hindsight I wish I had spent the extra money on the adafruit version to make mounting easier.
I'd also
I can dig up the Amazon link for the ones I bought. By popular demand, I used these: https://www.amazon.com/gp/product/B013G5XSB8The nylock mod is amazing and when combined with the 7x7 mesh bed leveling you can safely use the entire surface of your heated bed without having to worry about prints coming loose due to bed level variance.
Thank you so much for the reply! The filament is a couple weeks old now, but is a transparent PLA, the other filament I was having similar issues with was a black PLA+. I had originally thought it was a nozzle issue, so I actually just replaced the nozzle with a hardened steel 0.4mm nozzle. I just picked up some standard Inland Gray PLA, so I will give that a shot and see if I see similar results or not (maybe it is just the filament)
The filament I was using is https://www.amazon.com/gp/product/B00MB3CV6K/ref=ppx_yo_dt_b_asin_title_o02_s00?ie=UTF8&psc=1
Some possibly relevant notes: This was printed at 210, I tried printing it at 205 (that caused layer adhesion issues) but noticed even at 210 I was getting weak layer adhesion,, so I upped it to 220 which seemed a bit better, and while I'm still seeing stringing, at least its adhering a bit better, but still pretty brittle.
When I started, I was looking for 91% or 99% wipes and didn't have much luck. Today on Amazon I see 91% wipes: Box of 50 for $18. Ridiculous. Spray would work well, but I also like to feel the bed in case there are small bumps that need to be cleaned off.
I've settled on using: 91% iso alcohol (ultra cheap, from Walgreens or WalMart, probably), a push-down alcohol dispenser https://www.amazon.com/gp/product/B000MI85FC ($5, singe purchase), and Kimtech Wipes (also great for glasses, etc.) https://www.amazon.com/gp/product/B008UB6IKC (280 wipes per box, 3 boxes for $8.40). Using this method, I actually use the Alcohol+wipes on lots of things.
I need to find a local source for 99% iso. The stuff online all feels expensive.
The yellow filament is the cheapest yellow filament I could find on amazon that got good reviews https://www.amazon.com/gp/product/B07MBCBRMN/ , the roll that showed up was branded label pros, this was my first print with it and I'm pretty impressed considering it I see no difference between it and the blue and the white (hatchbox) and the black (amazon basics).
I really want to try soluble filament but the BVOH is just too expensive for me, do you know of any good PVA filament? I don't mind having to fight a bit as long as it works in the end, I was looking at the eSUN PVA but at $40 for 0.5KG I want to be sure I can make it work before paying that much for it.
He gives an instruction sheet with it. Let me snap a picture.
https://imgur.com/a/YMTTaj1
Sorry about the cell phone pictures. I don't have a scanner anymore since I went to a cheap color laser printer.
edited to say: I need to break down my MK3s and put in those tubes but haven't done it yet as I'm waiting to finish doing upgrades to my ender3 and setup my anycubic photon, basically I can't be without a 3d printer and have been limping by with my MK3s with the jamming issue. I currently follow this guide: http://projects.ttlexceeded.com/3dprinting_jams.html
and bought these brass rods on Amazon which is working perfectly: https://www.amazon.com/gp/product/B01C6LUO5Q
Buy some [3D printer surfaces](https://www.amazon.com/gp/product/B073TW738G/ref=ppx_yo_dt_b_asin_title_o04_s01?ie=UTF8&psc=1) off of Amazon, cut it to shape and use it to replace the PEI. I've had much success also sticking one on the spring steel sheet and using the steel side for super sticky PETG and the other side for everything else.
Yeah, a second external mosfet. One of these: https://www.amazon.com/TriGorilla-Printer-Heating-Controller-Extruder/dp/B01HCVJ3K2/ref=sr_1_19?ie=UTF8&qid=1526154992&sr=8-19&keywords=mosfet The MK2/S has had a history of having arching and melting in the plug they use to hook the heat bed to the RAMBO. That's why the MK3 uses screw terminals so its less necessary. They're much safer and more robust. The PSU has a spare empty 12V +/- terminal. So I desoldered the heatbed end. Ran those leads to the on/off signal input of the external mosfet. The RAMBO bed output now becomes a lower amperage enable/disable signal. Then I ran new power leads from the PSU to the power in on the mosfet then power out to the bed, soldering those new leads onto the bed. Printed a small enclosure and use some self adhesive velcro to stick it to my rambo case. Aint pretty, but the risk of a meltdown is greatly reduced. Probably overkill but better safe than sorry.
I vote that at every RepRap festival there should be a Prusa build-off competition where they replace the Haribo Gold Bears with the Albanese Sugar Free kind instead. Anyone who manages to finish building the printer gets to keep it.https://www.amazon.com/Albanese-Candy-Sugar-Assorted-5-pound/dp/B00DE4GWWY/
I'm not sure where you can get the terminated cable (did you check the Prusa shop?), but I think it's just bog standard silicone wire. I imagine you can pick some up from the usual suspects, 12 AWG would likely be ample. A nice perk of it being a 24v system is half the current needed. Searching randomly (not vouching for this product) https://www.amazon.com/BNTECHGO-Silicone-Flexible-Strands-Stranded/dp/B01ABOPMEI seems like it'd do just fine. I have some in a bag branded TUOFENG that I can vouch for actually being wire?
Okay,
Would this cartridge be okay for my prusa mk2s?
HICTOP Cartridge Heater 24V 40W for 3D Printer Prusa Mendel (Pack Of 3) https://www.amazon.ca/dp/B01HGIMI2G/ref=cm_sw_r_cp_api_i_EGG0CbER0SBFZ
Thanks for the help, I got worried that I would have to disassemble the whole extruder part or have to do some sketchy welding^^
it could be used for more than just the R3 parts. plenty of good petg on amazon that will work for about $25 shipped. might even be able to find some cheaper elsewhere too. just a thought.
​
https://www.amazon.com/MG-Chemicals-Black-Printer-Filament/dp/B01LZ5P5VN/ref=sr_1_18?s=industrial&ie=UTF8&qid=1536140768&sr=1-18&keywords=petg
​
https://www.amazon.com/eSUN-1-75mm-Filament-Printer-Opaque/dp/B00ZAUQZTA/ref=sr_1_4?s=industrial&ie=UTF8&qid=1536140768&sr=1-4&keywords=petg
Hey..thank you for your reply..
​
concerning 3) the print is not getting prperly squished in the middle... and i a adjust Live Z then , it will be oversquished on the right...
​
​
Concerning 5) i have the printer on a dense felt pading ( like the on for furnitures)..i removed the rubber feet.
and i am planing to grease the bearings...using https://www.amazon.de/gp/product/B00295AZ90/ref=ox_sc_act_title_1?smid=A3JWKAKR8XB7XF&psc=1 ...i dont know if its ok
The biggest changes are the passthrough ptfe fitting which requires:
https://www.thingiverse.com/thing:3541897 or https://www.thingiverse.com/thing:3541897 and https://www.amazon.com/gp/product/B078SRBDS7/ref=ppx_yo_dt_b_search_asin_title?ie=UTF8&psc=1
The 'rewind' spool holders: https://www.thingiverse.com/thing:3338467
And this revised selector: https://www.thingiverse.com/thing:3310038
Would you be interested in a longer post of my troubleshooting process?
You just need a hardened steel nozzle, but the ruby one is cased in brass so you get the awesome conductivity with the durability of ruby. It comes in a freaking jewelry box. Anyway here you go. https://www.amazon.com/Olsson-Ruby-Nozzle-0-4mm-Filament/dp/B07FQRN67K/ref=sr_1_1?ie=UTF8&qid=1536892984&sr=8-1&keywords=olsson+ruby
I'm about 1/2 way through my assembly. Here's a few tips:
As recommended, these are the one's I bought. Here's a picture as they have arrived.
you should get this https://www.amazon.com/FYSETC-Cooling-50x50x15mm-Radiator-Accessories/dp/B07NTKG9K4/ref=sr_1_2?keywords=prusa+print+fan&qid=1573783857&sr=8-2, it is a drop in replacement. I got this when I broke my print fan, and it works exactly the same.