Best products from r/prusa3d
We found 78 comments on r/prusa3d discussing the most recommended products. We ran sentiment analysis on each of these comments to determine how redditors feel about different products. We found 221 products and ranked them based on the amount of positive reactions they received. Here are the top 20.
1. Genuine E3D V6 Socks Pro (Pack of 3) (V6-SOCK-PRO-3PACK)
- Genuine E3D Parts
- ONLY works for HotEnds which use the E3D V6 style heater block
- 3 Pack of original high temperature non-stick silicone socks for E3D V6 HotEnds
- These socks will keep your nozzle clean
- These socks really helps with sticky materials like Co-Polyesters and filled materials that like to build up on nozzles
Features:
 ▼ Read Reddit mentions
2. MEAN WELL LRS-350-24 350.4W 24V 14.6 Amp Single Output Switchable Power
- Primary output voltage (vdc): 24
- Output current (a): 14.6
- Maximum output power (w): 350
- Family: lrs-350
- Input voltage (vac): 90 to 132, 180 to 264
Features:
 ▼ Read Reddit mentions
3. Thekkiinngg Prusa MK3 /S Double-Sided Textured Pei Powder-Coated Sheet V4
Made of high strength spring steel sheet Made of steel from U.S.A. with Pei Powder coat . We guarantee that this Bed plate contains Ultem PEI .Special coating that helps your pieces to adhere better than any other plates on market .Easy to separate the plastic parts when cooling.Rough finish of bott...
 ▼ Read Reddit mentions
4. eSUN 3D Printer Cleaning Filament 1.75mm Natural 0.1kg for All 1.75mm FDM 3D Printers, 1.75mm Cleaning
- Industry's first 3D cleaning filament
- Excellent heat stability, Wide cleaning temperature range of 150 to 260 celsius.
- Cleans the extruder's interior by removing accumulated residual filaments.
- Possesses a certain level of adhesive quality. Will not clog extruder.
- Clean the 3D printer's extruder before and after printing for better extruder protection.
Features:
 ▼ Read Reddit mentions
5. Genuine E3D V6 Silicone Sock Original 3 Pack
- DVD
- AC-3, Dolby, Dubbed
- English (Audio Description), French (Subtitled), Spanish (Subtitled)
- 1
- 116
Features:
 ▼ Read Reddit mentions
6. AIWAN LEZHI 5 Meters GT2 Timing Belt Width 6mm Fit
- Material:Rubber,Width:6mm,Model:GT2,Length: 5M
- Belt is rubber, fiberglass reinforced, 6mm Width Timing Synchronous Belt For 3D printer
- The aluminum pulley has high quality shiny surface appearance and robust construction.
- Suitable for dishwashers, packaging machinery, motorcycles, automobile, dryer, food machinery, inkjet printer, conveyor, bonders ect.
- 100% MONEY BACK GUARANTEE. ORDER NOW! WORRY FREE! Any problem please feel free to contact us.
Features:
 ▼ Read Reddit mentions
7. 3D Printer Solid Polymer LM8UU Bearing 8mm shaft - Igus Drylin RJ4JP-01-08 for Anet A8 Prusa i3 3D Printer RepRap
- Replaces stock LM8UU Bearing commonly used in many 3D Printers
- Fits Perfectly in 3D Printer Pillow Block. Please be aware of people who leave one star reviews, these only work if your rods are not bent. IF rods are bent, they lock up and don't work correctly. These do not need any lube or grease, they are self lubricating. The Drylin has the lubrication built in.
- High Quality Authentic Igus RJ4JP-01-08 Sold polymer Linear bearing
- Comes in Pack of 7 to replace X and Y axis
- Lubrication is built into the polymer, no need to use any oil or grease. These slowly release lubrication as they slide, and using additional lubrication will decrease the life and could cause performance issues.
Features:
 ▼ Read Reddit mentions
8. 3D Printer Nozzles + 4 DIY Tools for J-Head E3D V5 V6 0.2mm 0.3mm 0.4mm 0.5mm 0.6mm 0.8mm Nozzle Tool for Nozzle Replacement, Spanner, Installation Tools …
No more burnt fingers for you! This is a must have tool for changing print nozzles. Having the right tools makes all the difference in the world!Multi-size High-precision extruder nozzle: 0.2mm 0.3mm 0.4mm 0.5mm 0.6mm 0.8mmCompliant all M6 thread 3D printer: The nozzles used M6 thread, same as MK8 M...
 ▼ Read Reddit mentions
9. Eva Dry Wireless Mini Dehumidifier. Top Moisture Absorber for Small Spaces. Rechargeable & Portable. Perfect for Bedrooms, Closets, Cars, RV & Gun Safes. Removes Humidity & Helps Prevent Mold Growth
- EASY TO USE: This mini dehumidifier is spill and mess free. Just hang and go! Non-toxic, child and pet safe! Your small rooms will be dry and odor free. Works for areas up to 333 cubic feet
- MINI DEHUMIDIFIER GOES A LONG WAY: Super dry dehumidifier unit lasts 20-30 days before recharging the silica gel beads. Absorbing capacity up to 6oz
- SMALL, SLEEK DESIGN: This portable small design lets you hang or conveniently place the dehumidifier anywhere to fight pesky humidity! Cars, closets, boats, cabinets, gun safes, and even gym bags! A very convenient cool gift for everyone!
- 100% CORDLESS DEHUMIDIFIER: Moisture out: Cords out! No cables or batteries required. Just charge your device and say bye-bye humidity! Renewable and rechargeable moisture absorber. Lasts up to 4 weeks before recharge
- SATISFACTION GUARANTEED: SUPER DRY ODOR-FREE LIFE! Our dehumidifiers are top quality! Super durable and reliable. Comes with an industry-leading 5 year warranty guarantee so you can get rid of moisture and not worry about mold or leaks!
Features:
 ▼ Read Reddit mentions
10. Bondhus 10687 Set of 7 Balldriver Screwdrivers, ProGuard Finish, sizes 1.27-5mm
Angle entry up to 25 degrees on sizes 1.27, 1.5, 2, 2.5, 3, 4, and 5mmComfortGrip handles are designed for maximum torque with ultimate comfort and gripTools are Made in the USA with Bondhus proprietary Protanium steel and are up to 20% stronger than competitor toolsProGuard Finish is 5 times more e...
 ▼ Read Reddit mentions
11. Super Lube Synthetic Multi-Purpose Grease, 3 Oz.
- Patented synthetic NLGI grade 2 heavy-duty, multipurpose lubricant
- Dielectric, Food Grade, Clean
- NSF Rating H-1, safe for incidental food contact
- Will not drip, run or evaporate
Features:
 ▼ Read Reddit mentions
12. TrendBox 5M 196" 5.5mm Waterproof IP67 Android Lens 6 LED Endoscope Inspection Camera Micro USB Cable for Android Smartphones
- Allowing you see objects in vivid details. With 6 built-in LED lights, you'll be able to see every detail of each object in a dark area.
- Can take Photo video and Sound recording, and the photos & video file will directly stored in your Android mobile phone.
- Ideal for intraoral camera system, underwater camera, waterproof Micro-cameras, motor vehicle detector, sewer pipeline detector, etc.
- An IP67 Waterproof Camera. With a MICRo to USB line, It can also be used for computers.
- There's also a turning wheel used for adjust the brightness of six LED lights so that work in some area without enough light.
Features:
 ▼ Read Reddit mentions
13. Red Devil 4718 3-Piece Plastic Knife Set
3 PACK: Includes 1 1/2" Putty Knife, 3" Spreader & 6" Taping KnifeQUALITY PLASTIC CONSTRUCTION: Provides strength and flexibilityECONOMICAL: An excellent alternative to metal knife optionsGREAT VALUE: Provides multiple options for your repairs at a low costDISPOSABLE: Can be disposed of once the pro...
 ▼ Read Reddit mentions
14. PANA Brand 7oz. (Quantity: 2 Pieces) Professional Push Down Liquid Pumping Empty Bottle Dispenser (Silver Lid Clear Bottle, NO WORDING!!)
- Capacity: 7 Ounces, Quantity: 2 Pieces
- Polyethylene Empty Bottle with No Wording on the Bottle, Absolutely Clear!!
- Convenient Swing SILVER Lid, Reduces Odors and Maintains Purity
- Large Opening for Easily Filling
- Perfect for Dispensing Liquid on Cotton Ball, Swabs and Brushes
Features:
 ▼ Read Reddit mentions
15. Hakko CHP PN-2007 Long-Nose Pliers, Flat Nose, Flat Outside Edge, Serrated Jaws, 32mm Jaw Length, 3mm Nose Width, 3mm Thick Steel
Long flat-nose pliers with 3mm width for general purpose electronics applications32mm serrated jaw with precision-ground surfaces provides smooth operationFlat outside edge eases access to recessed or component-dense areasDolphin-style nonslip hand grips provide comfort and control, and curved fore-...
 ▼ Read Reddit mentions
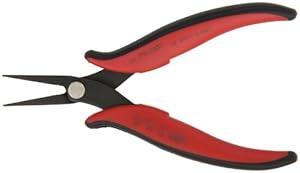
16. Xcelite 378M Thin Profile Long Reach Electronic Plier, Serrated Jaw, 5-1/2" Length, 1-1/4" Jaw Length
- Thin profile
- For access into tight spaces
- Lightweight for maximum comfort
- For use in precision electronic assembly applications
- Features serrated jaws
Features:
 ▼ Read Reddit mentions
17. Bondhus 10946 Set of 6 Balldriver L-wrenches, sizes 1.5-5mm
Angle entry up to 25 degrees on sizes 1.5, 2, 2.5, 3, 4, and 5mmThe original Balldriver® L-wrenches save time in hard to reach and blind locationsTools are Made in the USA with Bondhus proprietary Protanium® steel and are up to 20% stronger than competitor toolsProGuard Finish is 5 times more effe...
 ▼ Read Reddit mentions
18. AmazonBasics PLA 3D Printer Filament, 1.75mm, Gray, 1 kg Spool
3D printer filament with 1.75 mm diameter + / - .05 mm; designed to fit most common 3D printers (check spool size for compatibility); Gray; 1 kg spoolMade of PLA, a commonly used thermoplastic material known for its lower melting temperature and ease of use (no heated bed required), plus it’s low-...
 ▼ Read Reddit mentions
19. iFixit Mako Driver Kit - 64 Precision Bits for Electronics Repair
- COMPLETE: This precision bit set includes 64 of the most essential precision bits, a premium 4 mm aluminum screwdriver handle with magnetic socket, knurled grip, and swivel top—plus a flexible extension.
- UNIVERSAL: From PS5 to Nintendo Switch, iPhone to Android, laptops, and more, the perfect selection of bits to fix your tech. With basic bits like Torx, and security screws like triwing and Pentalobe, you'll have what you need all in one kit.
- PORTABLE STORAGE: The engineered foam insert and magnetic case will keep tools, components, and bits safely stored and transported. The inside of the lid serves as a convenient organizer and sorting tray.
- MUST-HAVE: Whether you're an advanced IT technician, basic household hobby fixer, want to start a repair business, or are looking for the best gift ideas, get the gift on everyone's list—the ultimate tool set foundation that will last a lifetime.
- Covered by iFixit's Lifetime Warranty.
Features:
 ▼ Read Reddit mentions
20. MG Chemicals 99.9% Isopropyl Alcohol Electronics Cleaner, 945 mL Liquid Bottle
- 99.9% Anhydrous solvent—Removes water and humidity from components leaving them dry
- Meets reagent ACS
- Meets MIL Spec TT-I-735A and ASTM D770
- Less than 0.001 g/100 mL non-volatile residues
- Suitable for use in food facilities as a non-food chemical. NSF International registration #144029
Features:
 ▼ Read Reddit mentions
Top comments mentioning products on r/prusa3d:
Summary
1. Genuine E3D V6 Socks Pro (Pack of 3) (V6-SOCK-PRO-3PACK)
- Genuine E3D Parts
- ONLY works for HotEnds which use the E3D V6 style heater block
- 3 Pack of original high temperature non-stick silicone socks for E3D V6 HotEnds
- These socks will keep your nozzle clean
- These socks really helps with sticky materials like Co-Polyesters and filled materials that like to build up on nozzles
Features:
▼ Read Reddit mentions2. MEAN WELL LRS-350-24 350.4W 24V 14.6 Amp Single Output Switchable Power
- Primary output voltage (vdc): 24
- Output current (a): 14.6
- Maximum output power (w): 350
- Family: lrs-350
- Input voltage (vac): 90 to 132, 180 to 264
Features:
▼ Read Reddit mentions3. Thekkiinngg Prusa MK3 /S Double-Sided Textured Pei Powder-Coated Sheet V4
Made of high strength spring steel sheet Made of steel from U.S.A. with Pei Powder coat . We guarantee that this Bed plate contains Ultem PEI .Special coating that helps your pieces to adhere better than any other plates on market .Easy to separate the plastic parts when cooling.Rough finish of bott...
▼ Read Reddit mentions4. eSUN 3D Printer Cleaning Filament 1.75mm Natural 0.1kg for All 1.75mm FDM 3D Printers, 1.75mm Cleaning
- Industry's first 3D cleaning filament
- Excellent heat stability, Wide cleaning temperature range of 150 to 260 celsius.
- Cleans the extruder's interior by removing accumulated residual filaments.
- Possesses a certain level of adhesive quality. Will not clog extruder.
- Clean the 3D printer's extruder before and after printing for better extruder protection.
Features:
▼ Read Reddit mentions5. Genuine E3D V6 Silicone Sock Original 3 Pack
- DVD
- AC-3, Dolby, Dubbed
- English (Audio Description), French (Subtitled), Spanish (Subtitled)
- 1
- 116
Features:
▼ Read Reddit mentions6. AIWAN LEZHI 5 Meters GT2 Timing Belt Width 6mm Fit
- Material:Rubber,Width:6mm,Model:GT2,Length: 5M
- Belt is rubber, fiberglass reinforced, 6mm Width Timing Synchronous Belt For 3D printer
- The aluminum pulley has high quality shiny surface appearance and robust construction.
- Suitable for dishwashers, packaging machinery, motorcycles, automobile, dryer, food machinery, inkjet printer, conveyor, bonders ect.
- 100% MONEY BACK GUARANTEE. ORDER NOW! WORRY FREE! Any problem please feel free to contact us.
Features:
▼ Read Reddit mentions7. 3D Printer Solid Polymer LM8UU Bearing 8mm shaft - Igus Drylin RJ4JP-01-08 for Anet A8 Prusa i3 3D Printer RepRap
- Replaces stock LM8UU Bearing commonly used in many 3D Printers
- Fits Perfectly in 3D Printer Pillow Block. Please be aware of people who leave one star reviews, these only work if your rods are not bent. IF rods are bent, they lock up and don't work correctly. These do not need any lube or grease, they are self lubricating. The Drylin has the lubrication built in.
- High Quality Authentic Igus RJ4JP-01-08 Sold polymer Linear bearing
- Comes in Pack of 7 to replace X and Y axis
- Lubrication is built into the polymer, no need to use any oil or grease. These slowly release lubrication as they slide, and using additional lubrication will decrease the life and could cause performance issues.
Features:
▼ Read Reddit mentions8. 3D Printer Nozzles + 4 DIY Tools for J-Head E3D V5 V6 0.2mm 0.3mm 0.4mm 0.5mm 0.6mm 0.8mm Nozzle Tool for Nozzle Replacement, Spanner, Installation Tools …
No more burnt fingers for you! This is a must have tool for changing print nozzles. Having the right tools makes all the difference in the world!Multi-size High-precision extruder nozzle: 0.2mm 0.3mm 0.4mm 0.5mm 0.6mm 0.8mmCompliant all M6 thread 3D printer: The nozzles used M6 thread, same as MK8 M...
▼ Read Reddit mentions9. Eva Dry Wireless Mini Dehumidifier. Top Moisture Absorber for Small Spaces. Rechargeable & Portable. Perfect for Bedrooms, Closets, Cars, RV & Gun Safes. Removes Humidity & Helps Prevent Mold Growth
- EASY TO USE: This mini dehumidifier is spill and mess free. Just hang and go! Non-toxic, child and pet safe! Your small rooms will be dry and odor free. Works for areas up to 333 cubic feet
- MINI DEHUMIDIFIER GOES A LONG WAY: Super dry dehumidifier unit lasts 20-30 days before recharging the silica gel beads. Absorbing capacity up to 6oz
- SMALL, SLEEK DESIGN: This portable small design lets you hang or conveniently place the dehumidifier anywhere to fight pesky humidity! Cars, closets, boats, cabinets, gun safes, and even gym bags! A very convenient cool gift for everyone!
- 100% CORDLESS DEHUMIDIFIER: Moisture out: Cords out! No cables or batteries required. Just charge your device and say bye-bye humidity! Renewable and rechargeable moisture absorber. Lasts up to 4 weeks before recharge
- SATISFACTION GUARANTEED: SUPER DRY ODOR-FREE LIFE! Our dehumidifiers are top quality! Super durable and reliable. Comes with an industry-leading 5 year warranty guarantee so you can get rid of moisture and not worry about mold or leaks!
Features:
▼ Read Reddit mentions10. Bondhus 10687 Set of 7 Balldriver Screwdrivers, ProGuard Finish, sizes 1.27-5mm
Angle entry up to 25 degrees on sizes 1.27, 1.5, 2, 2.5, 3, 4, and 5mmComfortGrip handles are designed for maximum torque with ultimate comfort and gripTools are Made in the USA with Bondhus proprietary Protanium steel and are up to 20% stronger than competitor toolsProGuard Finish is 5 times more e...
▼ Read Reddit mentions11. Super Lube Synthetic Multi-Purpose Grease, 3 Oz.
- Patented synthetic NLGI grade 2 heavy-duty, multipurpose lubricant
- Dielectric, Food Grade, Clean
- NSF Rating H-1, safe for incidental food contact
- Will not drip, run or evaporate
Features:
▼ Read Reddit mentions12. TrendBox 5M 196" 5.5mm Waterproof IP67 Android Lens 6 LED Endoscope Inspection Camera Micro USB Cable for Android Smartphones
- Allowing you see objects in vivid details. With 6 built-in LED lights, you'll be able to see every detail of each object in a dark area.
- Can take Photo video and Sound recording, and the photos & video file will directly stored in your Android mobile phone.
- Ideal for intraoral camera system, underwater camera, waterproof Micro-cameras, motor vehicle detector, sewer pipeline detector, etc.
- An IP67 Waterproof Camera. With a MICRo to USB line, It can also be used for computers.
- There's also a turning wheel used for adjust the brightness of six LED lights so that work in some area without enough light.
Features:
▼ Read Reddit mentions13. Red Devil 4718 3-Piece Plastic Knife Set
3 PACK: Includes 1 1/2" Putty Knife, 3" Spreader & 6" Taping KnifeQUALITY PLASTIC CONSTRUCTION: Provides strength and flexibilityECONOMICAL: An excellent alternative to metal knife optionsGREAT VALUE: Provides multiple options for your repairs at a low costDISPOSABLE: Can be disposed of once the pro...
▼ Read Reddit mentions14. PANA Brand 7oz. (Quantity: 2 Pieces) Professional Push Down Liquid Pumping Empty Bottle Dispenser (Silver Lid Clear Bottle, NO WORDING!!)
- Capacity: 7 Ounces, Quantity: 2 Pieces
- Polyethylene Empty Bottle with No Wording on the Bottle, Absolutely Clear!!
- Convenient Swing SILVER Lid, Reduces Odors and Maintains Purity
- Large Opening for Easily Filling
- Perfect for Dispensing Liquid on Cotton Ball, Swabs and Brushes
Features:
▼ Read Reddit mentions15. Hakko CHP PN-2007 Long-Nose Pliers, Flat Nose, Flat Outside Edge, Serrated Jaws, 32mm Jaw Length, 3mm Nose Width, 3mm Thick Steel
Long flat-nose pliers with 3mm width for general purpose electronics applications32mm serrated jaw with precision-ground surfaces provides smooth operationFlat outside edge eases access to recessed or component-dense areasDolphin-style nonslip hand grips provide comfort and control, and curved fore-...
▼ Read Reddit mentions16. Xcelite 378M Thin Profile Long Reach Electronic Plier, Serrated Jaw, 5-1/2" Length, 1-1/4" Jaw Length
- Thin profile
- For access into tight spaces
- Lightweight for maximum comfort
- For use in precision electronic assembly applications
- Features serrated jaws
Features:
▼ Read Reddit mentions17. Bondhus 10946 Set of 6 Balldriver L-wrenches, sizes 1.5-5mm
Angle entry up to 25 degrees on sizes 1.5, 2, 2.5, 3, 4, and 5mmThe original Balldriver® L-wrenches save time in hard to reach and blind locationsTools are Made in the USA with Bondhus proprietary Protanium® steel and are up to 20% stronger than competitor toolsProGuard Finish is 5 times more effe...
▼ Read Reddit mentions18. AmazonBasics PLA 3D Printer Filament, 1.75mm, Gray, 1 kg Spool
3D printer filament with 1.75 mm diameter + / - .05 mm; designed to fit most common 3D printers (check spool size for compatibility); Gray; 1 kg spoolMade of PLA, a commonly used thermoplastic material known for its lower melting temperature and ease of use (no heated bed required), plus it’s low-...
▼ Read Reddit mentions19. iFixit Mako Driver Kit - 64 Precision Bits for Electronics Repair
- COMPLETE: This precision bit set includes 64 of the most essential precision bits, a premium 4 mm aluminum screwdriver handle with magnetic socket, knurled grip, and swivel top—plus a flexible extension.
- UNIVERSAL: From PS5 to Nintendo Switch, iPhone to Android, laptops, and more, the perfect selection of bits to fix your tech. With basic bits like Torx, and security screws like triwing and Pentalobe, you'll have what you need all in one kit.
- PORTABLE STORAGE: The engineered foam insert and magnetic case will keep tools, components, and bits safely stored and transported. The inside of the lid serves as a convenient organizer and sorting tray.
- MUST-HAVE: Whether you're an advanced IT technician, basic household hobby fixer, want to start a repair business, or are looking for the best gift ideas, get the gift on everyone's list—the ultimate tool set foundation that will last a lifetime.
- Covered by iFixit's Lifetime Warranty.
Features:
▼ Read Reddit mentions20. MG Chemicals 99.9% Isopropyl Alcohol Electronics Cleaner, 945 mL Liquid Bottle
- 99.9% Anhydrous solvent—Removes water and humidity from components leaving them dry
- Meets reagent ACS
- Meets MIL Spec TT-I-735A and ASTM D770
- Less than 0.001 g/100 mL non-volatile residues
- Suitable for use in food facilities as a non-food chemical. NSF International registration #144029
Features:
▼ Read Reddit mentions
These might be some more "advanced items" but I have found them all to be of extreme usefulness and not too expensive to justify. Note: Where provided Amazon links are for reference only and I have no financial interest in the sale of the item listed.
- A set of ball-tipped metric hex key wrenches. The ball end allows you to get around obstacles and still rotate the fastener. https://www.amazon.com/Bondhus-10946-Balldriver-L-wrenches-1-5-5mm/dp/B0006O4AEC Note: You'll only need, IIRC, three sizes but the set is still cheaper than buying the individual keys.
- A clean popsicle stick works great to "scrape" or swipe the occasional pre-print and post-print drip from a hot nozzle's orifice and cannot damage the metal. Actually a suggested tool by a lot of industrial hot melt adhesive system companies for the reasons I just stated.
- A small open topped container, about the size of a kids sand pail, for all the waste support, brim, raft and skirt material you'll be generating. I happened to have a clean empty plastic 1 gallon OJ jug and cut off the top where the jug started to narrow leaving me a 8" tall "bucket". Small enough to keep next to the machine because tiny bits of PLA...
- A small magnifying glass, good for layer quality inspections.
- A small AA powered penlight, I had one anyway on hand anyway but was surprised at how often I needed it around the printer that it now lives there full time.
- A plastic paint scraper since I do lots of technical prints that leave large amounts of random first layer support spaghetti stuck all over the build plate. https://www.amazon.com/Red-Devil-4718-3-Piece-Plastic/dp/B001SBJIA8 (I know for a fact this set I've linked to is soft enough not to scratch the PEI coating. You actually only want the smallest scraper in the set, the other two can be used for what ever but at $2.99 per set even if you never need the larger ones it's no big loss.)
- A small table-top digital humidity and temperature gauge to monitor your printer's local "micro-climate". At the beginning I found that there was some temp/humidity related print quality issues where I had first set up my printer that forced me to relocate it and the only way I figured that out was by using this gauge. https://www.amazon.com/gp/product/B0013BKDO8/
- Good quality needle nose pliers with some grip to them. The pliers Prusa included with the printer are, IMNSHO, junk. I have both of these and am satisfied with both:
Good: https://www.amazon.com/Xcelite-378M-Profile-Electronic-Serrated/dp/B004UNFK58
Better (and cheaper): https://www.amazon.com/gp/product/B00FZPHEW2/
I've had this issue recently myself (same silver PLA that came with my MK3 as well after using some NGEN and then Hatchbox PLA)
Took me forever to realize the issue was my sheet. I did a nice clean wipe with Acetone and then 91% Alcohol and like magic everything I thought wasn't sticking because of Z height was actually because it wasn't adhering to the bed properly...
Also, try using the following:
Better Z Layer and Bed Calibration Test: https://www.thingiverse.com/thing:1776031
Pretty PLA v3 Config INI... These are the magic bullet settings and are a thousand times better than the shit Slic3r comes with from Prusa: https://github.com/eoprede/prusa_profiles/tree/master/MK3/Slic3r#pretty-pla-v3
Also, make sure you're using a 0.4mm Nozzle to set the Z Layer Height
Using those, get your center square perfect with Z Layer height. Then start adjusting each side with the Bed Level Calibration. It'll take a few hours but I can now print a FULL sheet first layer perfectly.
BUT FIRST AND FOREMOST, clean your sheet with Acetone and then a wipe of 91% Alcohol (or better, but AT LEAST 90%). You can get both in big bottles from Walmart for a couple bucks each. Acetone will be with the makeup as it's a nail polish remover. DO NOT overuse the Acetone. It will wear down your sheet if you scrub with it. Just do a nice wipe down using a makeup pad. Here's what I use (thanks to my wife!) though she just got me a couple from the dollar store... They are incredibly useful:
https://www.amazon.com/dp/B07CPHJSW8/ref=sspa_dk_detail_0?psc=1&pd_rd_i=B07CPHJSW8&pf_rd_m=ATVPDKIKX0DER&pf_rd_p=21517efd-b385-405b-a405-9a37af61b5b4&pd_rd_wg=g7gbi&pf_rd_r=V23SS45VK3E88X4JZZQ2&pf_rd_s=desktop-dp-sims&pf_rd_t=40701&pd_rd_w=P3CXg&pf_rd_i=desktop-dp-sims&pd_rd_r=52355845-df2d-11e8-a2ad-edd834b3b7f7
8 bit boards are the reason prints are slow. They just can't calculate fast enough for precision. Some new affordable 32 bit boards are finally starting to show up. I'm guessing Prusa will design his own 32bit board.
​
Maybe a custom E3D hotend that can produce enough heat to keep up with faster print speeds.
​
I think a more polished way of doing the nylock mod will be part of the printer. I'm quite happy with the process of the nylock mod now in conjunction with the plugin that helps with the process big time.
​
I'd love to see a larger print volume at the very least in the z axis. I swapped the smooth rod bearings out for these and that took an already quiet quiet printer to a whole new level of quiet and NO MORE OIL. They are impregnated with lubricant.
​
I'd LOVE to see a better way to mount the whole extruder assembly to the z axis rails. You can over tighten the screws and put too much tension on the bearings (both my new ones and the stock metal ones) and restrict movement enough cause homing issues. I do my best not to ever over tighten certain screws and it still happens once in a while. I've gotten used to it but a better way to mount it would be appreciated.
​
Maybe a few built in LEDs around the hotend and even a more visible nozzle end. Have the fan duct on the back side or something.
​
One last thing would be a better main board housing that better handles the cables going into the bod. Maybe two entry points so securing the cables going into the box isn't so extremely tight fitting.
​
Ok, one last last thing. No more tiny pieces/tiny 'appendages' on large parts that can easily break off. I know that may not be possible but why not mention it.
> Even if I manage to get it to stick right, the booger on the nozzle starts pulling up my first layer.
Yeah, you should really get a sock for the hotend. Get the one with a tiny hole for the nozzle. Really. Order a few today from Amazon. Today. For me, it's not worth trying to print PETG without a sock.
Also, one thing I do is print a skirt (not brim) that is three lines wide (or even more for a small model), 15 mm away from the model, and only 1 layer deep. Any snot left on the nozzle from the purge gets wiped off. HOWEVER, that can leave a snot blob on the skirt, and so (a) the skirt can get pulled away from the sheet, and (b) if if not, the second layer of the skirt can fail. That's why I print the skirt 15 mm away from the model, and only one layer. If you manage to get the skirt printed this way (even with blobs and the skirt loose), and have a nozzle with a sock, chances are pretty good everything else will work. This has increased my yield with PETG prints dramatically.
Of course, you need a clean bed, etc.
It's actually pretty amazing --- I sometimes get horrible looking skirts, with portions detached from the heatbed, big blobs, etc., and then a beautiful part printed inside the skirt.
The one downside is that the single layer skirt can be really hard to remove. I use a part I printed (for another purpose) that is shaped a bit like an air hockey striker --- it's a disk with a handle essentially. I just slide the striker against the skirt to break it free.
> Sorry, I'm just feeling pretty defeated at the moment. I wish mr prusa would stop by and tune up my printer for me.
Have hope! Try my method. But if it works, you have to post your print!
> Damn thing start streaming filament out as soon as the temp hits 205C.
That's super weird. Either it's wet, or your hotend thermistor is way off.
Is this happening on a filament change? I've actually had residual Hatchbox PLA filament squirt out of the nozzle when loading PETG. But after loading everything was fine.
I believe that grease is actually ideal for bearings over oil in terms of longevity of the application and I was recommended some superlube synthetic PTFE grease. It’s pretty cheap on amazon and there are printable bearing packers on thingiverse you can use to get it all the way in the races. (Just noticed you said you didn’t have access to it!)
I actually didn’t have grease when I built it so I used some synthetic PTFE oil on the rods and that has seemed to be fine. From the good article below, the important thing is that you don’t apply different (synthetic vs. non-synthetic) lubricants at the same time. Hence ideally you degrease the oil they are shipped in with isopropanol before applying more oil/grease. However, I read that the shipping oil is synthetic so I just applied the synthetic PTFE oil to the rods without de-greasing. I am just about to tear down and revise the bearings with grease the proper way myself actually.
So bottom line is that if your oil with PTFE is synthetic you can just apply it directly, but the ideal would be to de-grease and then apply grease of your choice.
Here’s a great resource (though the link is borked with the new prusa site—google “set your bearings straight” and it’s the first one that comes up): https://prusacommunity.com/set-your-bearing-straight/
And the superlube: Super Lube 21030 Synthetic Grease (NLGI 2), 3 oz Tube https://www.amazon.com/dp/B000XBH9HI/ref=cm_sw_r_cp_api_i_7yCWCb21H21WM
Thingiverse link: https://www.thingiverse.com/thing:3328377
Not from Prusa, but here are some other things I use over and over and over and am glad I bought. These are not affiliate links and you can probably find some of these items cheaper elsewhere:
Thin craft spatulas for removing prints: https://www.amazon.com/gp/product/B075SLTY8B (some say "never scrape using a metal tool" but these are very thin and flexible and really help with some prints)
Cleaning filament: https://www.amazon.com/gp/product/B00MVIYNFW
Silicone socks: https://www.amazon.com/gp/product/B07779TP4S
Good quality hex drivers https://www.amazon.com/gp/product/B0006O5014 these will make assembly and maintenance MUCH easier than the included tools. Especially the smallest one that fits the set screw in the Bondtech extruder gear really well, much better than the "decent" hex keys I already had in my toolkit
these are the bushings that most people talk about for this printer. Igus doesn't make sleeved bushings that can fit as a drop-in replacement for the LM8UU bearings. IIRC last time I did the research, I found they do sell sleeved bushings that will fit in the Prusa (as in they have the correct outer diameter and length), but not with the correct inner diameter needed for the stock smooth rods. So if you went that route you'd need to not only get new bushings across the board, but you'd also need new rods everywhere too, and that pushed the cost up to about $75 when I last looked.
Honestly for the price I'm not really upset that I tried them, but I absolutely learned to just stick with stock unless it's giving me major issues.
Getting the y axis to move smoothly was a challenge, as the stock u-bolts would squeeze it vertically and leave wiggle room horizontally, which would allow the plate to cock sideways a bit and bind. With some finagling I was able to get it working, but there was a lot more resistance than I would have liked, it was consistent resistance across the whole range of movement, but it was still more than I wanted. The X axis I never got them fully working, as ANY force parallel to the smooth rods (but slightly offset in one direction) would cause binding by cocking the x carriage one way or another.
But don't let me be all doom and gloom, if someone is able to get them working and can talk about their experience, I'd love to hear! And I'm sure there are people out there who value the silence they provide over some unreliability or increased maintenance/tuning required, but I was overall unhappy with them and I won't try it again.
I installed the cheap Amazon replacement belt today and wow, what a world of a difference. I got my X axis down to 258 and my Y axis down to 259 which is good enough for me. I did a test print, and the prints look nicer than before. I looked at the old belts I took off (the kit stock belts) and they are indeed the gates GT2 belts. After further investigation, I think the issue was that the stock belts were slipping out of the locking groves where they fasten to the carriage. I measured the thickness of the stock belts and got 1.33mm, and measured the thickness of the Amazon belts and they are 1.54mm. Both belts are supposed to be 1.38mm, so the gates belts are under spec and the Amazon belts are way over spec. I think in this case though, the extra thickness of the Amazon belts help the belt stay tight, even if it's thicker than it's supposed to be. I can now strum the new belts and get a guitar sound, where as with the stock ones I couldn't. And now I have like 5 meters of extra belt left in my parts drawer!
Amazon basics or eSun PLA+ are great choices :)
​
Amazon Basics £15.99/kg:
​
https://www.amazon.co.uk/gp/product/B07D6C6HY6/ref=ppx_yo_dt_b_asin_title_o04__o00_s00?ie=UTF8&psc=1
​
eSun PLA+ £19.99 /kg:
​
https://www.amazon.co.uk/gp/product/B07FQDKR28/ref=ppx_yo_dt_b_asin_title_o05__o00_s00?ie=UTF8&psc=1
​
The basics pla is fairly standard PLA - the spool holder has a grams remaining indicator which is nice.
​
The eSun PLA+ is a nice, hard PLA and prints detail really well - I use it for minature printing a lot.
​
I use both regularly.
It look me about 8 hours to assemble my mk3. I've since assembled two more, 6 hours and then 5.5 hours. Read the manual carefully and I strongly recommend using a nice spinning hex driver like one from ifixit. They are much faster and easier to use than the included hex key.
​
I use this one: https://www.amazon.com/iFixit-IF145-299-4-Driver-Bit-64pc/dp/B0189YWOIO/ref=sr_1_3?crid=170VVH6C5JHFY&keywords=ifixit+tool+kit&qid=1558032622&s=gateway&sprefix=ifixit%2Caps%2C185&sr=8-3 (non-affiliate link, just sharing as an example)
Skip the ruby nozzle, it's only necessary if you are printing a lot of abrasive filaments like wood, magnetic, carbon fiber, etc. Get it when (if) you need it. The stock nozzle will print PLA and PETG for ages before requiring replacement.
Same goes for the smaller nozzle, again, unless you are planning on using it right away. Smaller nozzles are great for finer details, but will typically greatly reduce your print speed, especially on really low layer heights like 0.05mm. They also really require you to have your settings, extruder and Z-height dialed in, something you're not going to be ready for right away if you're new to 3D printing.
As for tools, what comes in the box will get you by (assuming you purchased a kit, not assembled). A pair of fine-tipped tweezers is also useful. Side-cutting pliers. Also, highly recommend a proper set of ball-end hex screwdrivers instead of those God-awful hex keys.
Thekkiinngg Prusa MK3/S Double-Sided Textured PEI Powder-Coated Sheet V4.
https://www.amazon.com/gp/product/B07HQZCWDV/ref=ppx_yo_dt_b_search_asin_title?
It's been great. I may have even gotten the V3- it discolored just a touch when I first printed on it, just kind of a weird rainbow effect in the right light... but it's been printing like a champ for the last 500 hours or so of use. In fact, I'm printing Terminator Rex on it right now. =)
So here is what you can do.
​
Trying out different nozzle sizes is a great upgrade. For $100, you can buy a quite a few hardened steel nozzles that will give you more to play with and be as effective as a single ruby. The ruby was designed for very exotic abrasive materials. For anything you're likely to print, hardened steel is more than enough.
If you're not going to be printing abrasive materials, plan brass or nickel-plated copper are even cheaper. You can have a lot of fun with $100 worth of nozzles. The nozzles aren't of the best quality, but this nozzle kit does include a 16mm spanner/wrench & 7mm socket, which really make swapping nozzles out much easier. The nozzles are fine for plain PLA and just trying things out. Start with that assortment, then buy the sizes you want to use most often in genuine E3D nozzles. I've gone with hardened steel 0.40mm, 0.60mm and nickel-plated copper 0.25mm E3D nozzles.
My notes on nozzle sizes and types here.
Just get one of these tools:
https://www.amazon.com/Printer-Nozzles-Replacement-Spanner-Installation/dp/B0796C4S5P/ref=sr_1_1?keywords=nozzle+tool&qid=1573594600&sr=8-1
The red handled one is the most important piece. If you just hold the heat block stable with a pair of pliers (like the ones that ship with the printer), and use the red tool, it will be super easy. Without it, it can be mildly tricky and/or frustrating. Highly recommend the tool as I change nozzles often and it has been really helpful for me.
Oh, and make sure to do all of this at 285C, careful not to touch anywhere near it so you don't burn yourself.
https://github.com/PrusaOwners/prusaowners/wiki/Bed_Leveling_without_Wave_Springs
https://www.amazon.com/Genuine-E3D-Socks-Pack-V6-SOCK-PRO-3PACK-x/dp/B07779TP4S
Once you have multiple rolls of filament, I'd suggest getting a well-sealing plastic box for them to store them with a mini dehumidifier. I got this one, no power needed except when refreshing it: https://smile.amazon.com/gp/product/B000H0XFCS/
I also found the following useful for the build which others had already mentioned:
Enjoy the build! I'd recommend using the online instructions and checking comments left by others.
Check this one out on Amazon. It's a meanwell as previously posted but slimmer. I bought this myself when my power source died recently. It has been perfect so far and is thinner than the factory one. I liked this but had to reprint the mount and lengthen the wires going to the board. Worth it in the end.
MEAN WELL LRS-350-24 350.4W 24V 14.6 Amp Single Output Switchable Power https://www.amazon.com/dp/B013ETVO12/ref=cm_sw_r_cp_apa_RmR2AbG1XW1EY
I am on my third psu now. Yes, that is the correct fuse and it supposed to be slow blow. It's an exact replacement.
Bad news is, I'm almost certain It's not just the fuse that is blown. The mk3's psu's are well known to fail, and while some people say that there are just bad apples, I think the psu can't handle the higher draw when printing higher temp materials. If you were to open up your psu, I'm almost certain you would find the permanent on board fuse soldered to the board to be blown as well, and possibly also one of the components busted and burnt where it failed. Prusa will replace the psu under warranty, but in my case it just happened a second time. Same thing.
So here is what I would do if I were you. Go on Amazon and buy this. Not only is this psu way more reliable than the cheap Chinese one prusa ships with, it is capable of much more and will not fail you. Well worth the 30 bucks. This is the mount you will need to print to attach it to the printer. This fits perfectly, and uses mostly the screws and nuts from the stock psu except for one kind of screw you need 5 of. I made the upgrade and it is so much better than the stock psu. It has a fan that makes the printer slightly louder and it runs intermittently, but it also gets rid of the ticking from the heated bet and makes everything run a bit smoother. You can either hook up the replacement prusa sends you temporarily in order to print the mount, or you can do what I did and hook the meanwell up next to the printer to print the mount then mount it properly. Just be careful if you do as there will be exposed terminals that could shock you.
There is a great write up on the prusa forum detailing exactly how to do this and everything you need
+1 for the silicone sock! I am now running those and they are great! Here is what I ordered https://www.amazon.com/dp/B07779TP4S I think you will be okay to heat up your hotend, the thermistor wires are definitely not going anywhere.
It could be "bad" ipa. Denatured ipa is not good for print bed cleaning. ( a bit on the subject https://sciencing.com/denatured-alcohol-vs-isopropyl-alcohol-5519636.html)
It is probably denatured with a oil based chemical , or has a weird additive, even a residue in the plastic bottle before filling at the factory.... Try another brand and get yourself some 99% ipa MG Chemicals 824-1L 99.9% Isopropyl Alcohol Liquid Cleaner, Clear , 945 mL (1 US Quart) https://www.amazon.com/dp/B005DNQX3C/
I'm personally curious about using DI water(deionized water) to clean instead of 99% ipa, or maybe a 50/50 mix. We use it at work on the industrial printers and it works really good.
Glue stick is definitely a great way to reduce adhesion. It works great until that one time when you forget to do it, and then you end up ruining your PEI sticker.. I've done that twice to mine.
I switched to the textured PEI sheet, and it's no worry at all- no glue stick needed, it cools and the prints pop right off even with PETG. Since the PRUSA sheet wasn't available, I ordered one from "Thekkiinnggg" on Amazon. Link here: https://www.amazon.com/Thekkiinngg-Double-Sided-Textured-Powder-Coated-Version/dp/B07HQZCWDV - it's a little pricey at $50 plus shipping, but works great.
MEAN WELL LRS-350-24 350.4W 24V
https://www.amazon.com/dp/B013ETVO12
This is the common replacement that people are using. There's some blog posts out there about the issue, as well as printed parts for this PSU.
If you're super concerned, it's a cheap upgrade.
You might even try something like this small dehumidifier. It's what I use in my "dry box". The box sits on top of my enclosure, and has a small hole leading down into the printer. I keep 2-3 rolls of filament in it at once, and that dehumidifier.
Once the crystals turn blue, I plug the dehumidifier into the wall for a couple of hours to dry it out, and right back in the box it goes.
This system has worked great for me for the past year, and was less than $30 total.
My silver PSU on my MK3 just died during a PETG print this week. Hoping Prusa will send me a new one, but from digging around all morning yesterday, it seems this PSU on Amazon is a good replacement with a little bit more power. This is my backup plan if my printer is not under warranty anymore.
PSU:
MEAN WELL LRS-350-24 350.4W 24V 14.6 Amp Single Output Switchable Power
https://www.amazon.com/dp/B013ETVO12/ref=cm_sw_r_cp_tai_DgnGDbHE4NVDW
PSU holder on Thingiverse:
https://www.thingiverse.com/thing:2812350
Maybe because it seems to be a referral link (and the bot doesn't care that it's an internal referral code)? I link Amazon quite a bit on this sub and remember having issues when I didn't properly sanitize the URL.
Try this one. This is the camera you linked in the video description so I assume it's the correct link.
For reference, the only part of the amazon link you need is the item code which is effectively
/dp/XXXXXXXXXX, for example https://smile.amazon.com/dp/B01EF92CKM/. Anything else is data Amazon is using internally, mostly for telemetric purposes, for example determining how you arrived at a specific item. Those a.co links can be used for affiliate/referral links, so AutoModerator is likely set to block them.As far as I know Amazon links are totally cool, as long as they're not affiliate or referral links (which may be banned).
Nozzle sock
I didn't get one at first and my nozzle/hot end got covered in all kinds of scrap that melted on and then burned on, and I started to get little dark blobs in my prints. Keeping it clean also makes it easier to change the nozzle.
Np, this is the one I have. Had it for a month now and had to dry it out only once so far.
New and Improved Eva-dry E-333... https://www.amazon.com/dp/B000H0XFCS?ref=yo_pop_ma_swf
Hey another commentor made me look into it again. It seems like Super Lube (synthetic grease with PTFE/Teflon) (Amazon link) is what is recommended these days.
The other two I mentioned before have been used by a lot of people over the years and I haven't heard anything bad about them, but the folks at Prusa seem to be recommending Super Lube these days (links here and here).
FWIW, I use machine oil and I'm going to keep using machine oil. As the second link mentions, mixing lubricants can cause reactions between the old and the new stuff which can wreck your shit.
Hope this helped.
Before you buy a new nozzle, have you tried cleaning filament yet?
eSUN 3D Printer CLEANING Filament 1.75mm Natural 0.1kg for all 1.75mm FDM 3D Printers, 1.75mm Cleaning https://www.amazon.com/dp/B00MVIYNFW/ref=cm_sw_r_cp_api_NetQBbX0VWR7E
This may help you get the gunk out of that nozzle. Run that thru it and do some cold pulls with it. It may revitalize your nozzle for a lot cheaper and you wouldn’t have to take apart your extruder to do it.
Enabling the 7x7 mode on my MK3 gave me such good bed adhesion that I don't need to use glue stick anymore. Now I just spray the bed with a some 99% alcohol and then print. https://www.amazon.com/gp/product/B005DNQX3C/ref=ppx_yo_dt_b_asin_title_o03_s00?ie=UTF8&psc=1
> Mean Well LRS 350-24 power supply
This one? https://www.amazon.com/dp/B013ETVO12/
Both are sold on Amazon in the US
https://www.amazon.com/Ziploc-Weathertight-Storage-60-Quart-Clear/dp/B01LXWZHWV/
https://www.amazon.com/Improved-Eva-dry-333-Renewable-Dehumidifier/dp/B000H0XFCS
Also been meaning to get a humidity sensor to see when the dehumidifier needs recharging: https://www.amazon.com/Veanic-Electronic-Temperature-Thermometer-Hygrometer/dp/B07GNMKYCZ
Genuine E3D V6 Socks Pro (Pack of 3) (V6-SOCK-PRO-3PACK) https://www.amazon.com/dp/B07779TP4S/ref=cm_sw_r_cp_apa_HkIRBbMK27K4Q
I bought some of these.
I haven't installed them yet, though.
I plan to do that when I do my Mk2.5 upgrade.
https://smile.amazon.com/gp/product/B06XPRCMJS/ref=oh_aui_search_detailpage?ie=UTF8&psc=1
https://www.amazon.com/gp/product/B07HQZCWDV/ref=oh_aui_detailpage_o05_s00?ie=UTF8&psc=1
https://www.amazon.com/gp/product/B0796C4S5P/ref=oh_aui_search_detailpage?ie=UTF8&psc=1
Buy some extruder socks to avoid this problem next time.
https://www.amazon.com/Genuine-E3D-Socks-Pack-V6-SOCK-PRO-3PACK/dp/B07779TP4S