(Part 3) Best products from r/HomeImprovement
We found 100 comments on r/HomeImprovement discussing the most recommended products. We ran sentiment analysis on each of these comments to determine how redditors feel about different products. We found 6,507 products and ranked them based on the amount of positive reactions they received. Here are the products ranked 41-60. You can also go back to the previous section.
41. DuPont WFPF13003B Universal Whole House 15,000-Gallon Water Filtration System
Filters Up To 15,000-Gallon For Home or OfficeFeatures Universal 500 Series Poly Block CartridgeStandard System has 3/4 in. inlets and outlets.Improves Clarity and Taste of Incoming Water, Also Protects At The Kitchen Tap3-Year Limited Warranty.
 ▼ Read Reddit mentions
42. Hitachi C10FCE2 15-Amp 10-inch Single Bevel Compound Miter Saw (Discontinued by Manufacturer)
- Hitachi Power Tools has renamed to Metabo HPT. Same great tools, with only a new name.
- 15 Amp motor, intense power for the toughest cutting jobs
- 0 to 52 degree miter angle range, to the right and left for increased flexibility
- 0 to 45 degree bevel range, to the left with adjustable bevel stops for precision cuts
- Horizontal handle with soft, vibration reducing Elastomer grip adds comfort and control
- Large extended flip fence, raises to 4 inch for cutting crown molding vertically
- Large table, provides better material support
- Thumb actuated positive stops, easy to use for quick miter adjustments
- Carbon brush access, allows user to replace brush as needed to greatly prolong the life of the tool
- Dust collector attachment, to minimize airborne particles
- Only 26.3 pounds to facilitate maneuverability and portability
- Includes: 10 inch 24T TCT Saw Blade (311128), Pivoting Flip Fence (326704), Dust Bag (322955), Vise Assembly (322952), 10 millimeter Box Wrench (940543), Material Support Extension (321549)
Features:
 ▼ Read Reddit mentions
43. Do-It-Yourself Housebuilding: The Complete Handbook
- Please check our size chart on the each color's left size pictures, instead of amazon size chart; Choose the size based on your waist size; This is not US size, please don't compare with general clothes's size
- Womens latex waist trainer vest; Spiral steel boned for waist cincher support and keep you in best posture which is flexible and durable, as soft as plastic bones, can bend easily but recover quickly to origin; If you worried about steel boned or not, you can test it with a magnet
- Steel boned waist cincher underbust corset, help for tummy control or hourglass shape, front with 3 rows of hook and eye closure to keep a tight fit, around your waist to achieve long lasting waist training effect of lose weight
- High compression latex shapewear great for pregnant women postpartum tummy control, also, it works for sports fans as a running sport gym outfit, whatever you are long torso or short torso, take this body shapers as your clothing under t-shirt, it helps to reduce at least 2 inches in waist
- Wearing tips: you need to shrink your belly before wearing this trainer corset, and it's a best choice to wear with other people's help when the waist trainer is so tight; Washing tips: hand wash separately in cold water, do not use machine
Features:
 ▼ Read Reddit mentions
45. Sperry Instruments STK001 Non-Contact Voltage Tester (VD6504) & GFCI Outlet / Receptacle Tester (GFI6302) Kit, Electrical AC Voltage Detector, Yellow & Black
VERIFIES VOLTAGE PRESENSE: Verifies the presence of AC Voltage prior to working on electrical installation or troubleshooting (GFI6302 and VD6504)DURABLE: Hi-Impact Resistant ABS housing with soft over-molded rubber grips with a compact ergonomic design (GFI6302 and VD6504)QUICKLY READ: Bright color...
 ▼ Read Reddit mentions
46. Fluidmaster 7530P8 Universal Better Than Wax Toilet Seal, Wax-Free Toilet Bowl Gasket
No wax, no mess and can be repositioned; No-rust brass bolts & hardwarePlunging won't cause leaks; 10-year warrantyFits any flange, any toiletNo minimum temperature required for installationSeals on uneven floors or over tile floors with recessed flanges
 ▼ Read Reddit mentions
47. Delta Faucet 2-Spray H2Okinetic Shower Head, Chrome 75152
- 3X Coverage: Delta H2Okinetic PowerDrench Spray provides 3X more coverage than a standard shower head (coverage measured in accordance with EPA WaterSense Specification for shower heads, March 4, 2010)
- More Intensity: Delta H2Okinetic Showers Sculpt Water into a Unique Wave Pattern, Creating a Shower That Provides More Warmth, Coverage and Intensity
- Easy to Clean: Efficient, Self-Cleaning Spray Holes Help to Prevent Lime and Mineral Build-Up over Time and Help to Reduce Time Spent Scrubbing and Cleaning
- Watersense Labeled: Watersense labeled so you can enjoy a warm, drenching shower experience while using 20% less water—saving you money without compromising performance
- Lifetime Limited Warranty: You Can Install with Confidence, Knowing This Delta Shower Head Is Backed by Delta Faucet’s Lifetime Limited Warranty
- LIFETIME LIMITED WARRANTY: You can install with confidence, knowing this Delta shower head is backed by Delta Faucet's Lifetime Limited Warranty
Features:
 ▼ Read Reddit mentions
48. HYDE Contour Scraper with 6 Changeable Blades , multicolor - 10450
The product is Contour Paint Scraper Kit With 6 Blades.Elegant and smooth finishThe product is manufactured in ChinaMaterial:High Carbon Stainless SteelRemoves paint, varnish, putty caulk or rust from virtually any surfaceSix specialized blades includedComfortable contoured handle keeps hand away fr...
 ▼ Read Reddit mentions
49. Superior Pump 91250 Utility Pump, 1/4 HP, Black
- 1/4 HP Utility pump moves up to 1,800 gallons per hour; pump will lift water up to 25' of vertical height
- Tough thermoplastic construction; 10' cord length
- 1-1/4 inch NPT discharge for high capacity pumping; includes 3/4 inch garden hose adapter
- Removable suction screen and handles up to 1/8 inch solids
- Superior Pumps are Built to Last, engineered with quality components and are 100% factory tested
Features:
 ▼ Read Reddit mentions
50. How Your House Works: A Visual Guide to Understanding and Maintaining Your Home, Updated and Expanded
How Your House Works A Visual Guide to Understanding and Maintaining Your Home Updated and Expanded
 ▼ Read Reddit mentions
51. Makita MAC700 Big Bore 2.0 HP Air Compressor
- Cast iron pump with big bore cylinder and piston, combined with greater bore and stroke, delivers maximum performance
- Substantially lower noise levels with a large 1,720 RPM pump, enabling greater displacement at lower RPM
- Low amp draw reduces incidences of tripped breakers and voltage drop that can cause premature motor failure
- Oil lubricated provides cooler running pump, minimizes wear
- One-year manufacturer's warranty
Features:
 ▼ Read Reddit mentions
52. Gila Heat Control Platinum Adhesive Residential DIY Window Film Sun Blocking Glare Reduction 3ft x 15ft (36in x 180in)
- ENERGY EFFICIENT: Rejects up to 71% of total Solar Energy
- PROTECTS INTERIORS: Blocks up to 99% of UV rays, helping to keep your interior from fading
- INCREASED COMFORT: Reduces glare up to 69%, making interiors more comfortable
- DAYTIME PRIVACY: Mirrored exterior appearance provides daytime privacy (when the sun is down and lights are on inside, film no longer conceals views)
- EASY INSTALL, LASTING RESULTS: Durable adhesive material is easy to handle and firmly sticks to windows for ongoing benefits
Features:
 ▼ Read Reddit mentions
53. WORX WA4092 Universal Fit Blowers Gutter Cleaning Kit, Basic Pack
- [CLEAN GUTTERS WITHOUT A LADDER] Safely clean your gutters while standing on the ground. Attaches to the leaf blower you already own
- [11 FEET OF REACH] The 8 feet of tubes, combined with an average person’s arm length, the angle from which you work, and the length of the blower give you approx. 11 feet
- [EASY TO ASSEMBLE] In less than 5 minutes, you’ll have the Universal Gutter Cleaning Kit attached and ready to use. And it comes apart just as easy for storage later
- [UNIVERSAL FIT] The adjustable adapter fits every major brand of blower on the market: Black & Decker, Husqvarna, Poulan, Craftsman, Ryobi, Toro, Murray, Worx, and more
- [DO IT YOURSELF. DO IT BETTER. DO IT WITH WORX.] WORX tools are engineered with cutting-edge technology, and above modern efficiency standards, so you can build a cost-effective tool collection that’s been designed to last
- [ADJUSTABLE LENGTH] The main tube is 3 separate pieces, so you can make it shorter if you need it to be
- [WHAT’S IN THE BOX?] Gutter tube nozzle, 3 gutter tube extensions, one gutter tube adapter, and a universal adapter to fit other brands
Features:
 ▼ Read Reddit mentions
54. Rain Harvesting Pty Ltd RHUL99 Leaf Eater Ultra Rain Head- 3 in. Round
- 95%+ Capture Efficiency
- Self-Cleaning
- 1000 Micron Screen
- Attractive Screen Cover
Features:
 ▼ Read Reddit mentions
55. Rain Harvesting Pty Ltd RHAD98 Leaf Eater Advanced Rain Head- 4 in. Round
- Compact, versatile downspout filter / rain head for quick and easy DIY installations.
- Single screen technology for advanced debris shedding.
- Minimal maintenance
- Pivot the outlet to suit vertical or horizontal (rear outlet) downspouts.
- Suits 4" downspouts
Features:
 ▼ Read Reddit mentions
56. Master Lock 265EC Door Security Bar, Pack of 1, White
- Heavy duty, dual-function door security bar prevents forced entry on hinged, patio, and sliding doors; Door stopper security bar is intended for indoor use
- Door security bar design is portable and compact making it easy to store and ideal for travel, providing enhanced security in hotels or on vacation
- Adjusts from 27-1/2 inch (70cm) - 42 inch (1.1m) to fit most standard doors and sliding patio doors. Top door knob jam is easily removed for sliding door applications
- Made with heavy duty 20-gauge steel for strength and security; Pivoting ball joint ensures door security bar has full contact with floor for secure fit while padded foot provides a strong grip without scratching
- No tools required, simply adjust the bar length using the release button, prop under door knob and easily adjusted as needed
Features:
 ▼ Read Reddit mentions
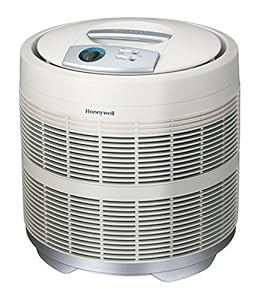
57. Honeywell 50250-S True HEPA Air Purifier, 390 sq. ft, White
LARGE ROOM AIR PURIFIER: This HEPA purifier captures up to 99.97% of microscopic allergens 0.3 microns & larger from the air that passes through the filters. Effective for large & extra large roomsSPECIAL FEATURES: This purifier features 3 air cleaning levels, SurroundSeal Technology to minimize air...
 ▼ Read Reddit mentions
58. Panasonic FV-11VQ5 WhisperCeiling 110 CFM Ceiling Mounted Fan, White
- Motor/Blower: Power rating of 120 volts and 60 Hz
- Motor/Blower: Fan is UL listed for tub/shower enclosure when used with a GFCI branch circuit wiring
- Can be run with no less than 110 CFM and no more than 0.3 sone.Duct Diameter (inches) 4 inches. Mounting Opening (inches sq.) 10.5 inches. Grille Size (inches sq.) 13 inches
- Housing: Double hanger bar system allows for ideal positioning
- Grille: Attached directly to housing with torsion springs, Motor type- Condenser, Grille Size: 13-Inches
Features:
 ▼ Read Reddit mentions
59. Reliance Controls 31410CRK Pro/Tran 10-Circuit 30 Amp Generator Transfer Switch Kit,Gray
- Convenient transfer switch kit, ideal for your circuitry and multi-wiring needs, is also made for reliably-fast installation in both residential and commercial applications
- Designed specifically for generators up to 7,500 maximum running watts
- 18-inch flexible conduit whip attaches easily to the load center
- Maximum single-pole circuits: 10 / Maximum double-pole circuits: 5
- Features a rugged, powder-coated steel cabinet. six combination knockouts and more
Features:
 ▼ Read Reddit mentions
60. LEDwholesalers 12 Volt DC Waterpoof LED Power Suppply Driver Transformer with 3-Prong Plug, 30W, 3207
- 12VDC constant voltage power supply with max. 30W output power
- Durable aluminum chassis with IP68 waterproof rating, suitable for use in dry and wet locations
- Output wire leads and input 3-prong plug for easy connections
- Automatic thermal & overload cut-off, short circuit protection
- Efficient, long life, stable, and reliable
Features:
 ▼ Read Reddit mentions
Top comments mentioning products on r/HomeImprovement:
Summary
41. DuPont WFPF13003B Universal Whole House 15,000-Gallon Water Filtration System
Filters Up To 15,000-Gallon For Home or OfficeFeatures Universal 500 Series Poly Block CartridgeStandard System has 3/4 in. inlets and outlets.Improves Clarity and Taste of Incoming Water, Also Protects At The Kitchen Tap3-Year Limited Warranty.
▼ Read Reddit mentions42. Hitachi C10FCE2 15-Amp 10-inch Single Bevel Compound Miter Saw (Discontinued by Manufacturer)
- Hitachi Power Tools has renamed to Metabo HPT. Same great tools, with only a new name.
- 15 Amp motor, intense power for the toughest cutting jobs
- 0 to 52 degree miter angle range, to the right and left for increased flexibility
- 0 to 45 degree bevel range, to the left with adjustable bevel stops for precision cuts
- Horizontal handle with soft, vibration reducing Elastomer grip adds comfort and control
- Large extended flip fence, raises to 4 inch for cutting crown molding vertically
- Large table, provides better material support
- Thumb actuated positive stops, easy to use for quick miter adjustments
- Carbon brush access, allows user to replace brush as needed to greatly prolong the life of the tool
- Dust collector attachment, to minimize airborne particles
- Only 26.3 pounds to facilitate maneuverability and portability
- Includes: 10 inch 24T TCT Saw Blade (311128), Pivoting Flip Fence (326704), Dust Bag (322955), Vise Assembly (322952), 10 millimeter Box Wrench (940543), Material Support Extension (321549)
Features:
▼ Read Reddit mentions43. Do-It-Yourself Housebuilding: The Complete Handbook
- Please check our size chart on the each color's left size pictures, instead of amazon size chart; Choose the size based on your waist size; This is not US size, please don't compare with general clothes's size
- Womens latex waist trainer vest; Spiral steel boned for waist cincher support and keep you in best posture which is flexible and durable, as soft as plastic bones, can bend easily but recover quickly to origin; If you worried about steel boned or not, you can test it with a magnet
- Steel boned waist cincher underbust corset, help for tummy control or hourglass shape, front with 3 rows of hook and eye closure to keep a tight fit, around your waist to achieve long lasting waist training effect of lose weight
- High compression latex shapewear great for pregnant women postpartum tummy control, also, it works for sports fans as a running sport gym outfit, whatever you are long torso or short torso, take this body shapers as your clothing under t-shirt, it helps to reduce at least 2 inches in waist
- Wearing tips: you need to shrink your belly before wearing this trainer corset, and it's a best choice to wear with other people's help when the waist trainer is so tight; Washing tips: hand wash separately in cold water, do not use machine
Features:
▼ Read Reddit mentions45. Sperry Instruments STK001 Non-Contact Voltage Tester (VD6504) & GFCI Outlet / Receptacle Tester (GFI6302) Kit, Electrical AC Voltage Detector, Yellow & Black
VERIFIES VOLTAGE PRESENSE: Verifies the presence of AC Voltage prior to working on electrical installation or troubleshooting (GFI6302 and VD6504)DURABLE: Hi-Impact Resistant ABS housing with soft over-molded rubber grips with a compact ergonomic design (GFI6302 and VD6504)QUICKLY READ: Bright color...
▼ Read Reddit mentions46. Fluidmaster 7530P8 Universal Better Than Wax Toilet Seal, Wax-Free Toilet Bowl Gasket
No wax, no mess and can be repositioned; No-rust brass bolts & hardwarePlunging won't cause leaks; 10-year warrantyFits any flange, any toiletNo minimum temperature required for installationSeals on uneven floors or over tile floors with recessed flanges
▼ Read Reddit mentions47. Delta Faucet 2-Spray H2Okinetic Shower Head, Chrome 75152
- 3X Coverage: Delta H2Okinetic PowerDrench Spray provides 3X more coverage than a standard shower head (coverage measured in accordance with EPA WaterSense Specification for shower heads, March 4, 2010)
- More Intensity: Delta H2Okinetic Showers Sculpt Water into a Unique Wave Pattern, Creating a Shower That Provides More Warmth, Coverage and Intensity
- Easy to Clean: Efficient, Self-Cleaning Spray Holes Help to Prevent Lime and Mineral Build-Up over Time and Help to Reduce Time Spent Scrubbing and Cleaning
- Watersense Labeled: Watersense labeled so you can enjoy a warm, drenching shower experience while using 20% less water—saving you money without compromising performance
- Lifetime Limited Warranty: You Can Install with Confidence, Knowing This Delta Shower Head Is Backed by Delta Faucet’s Lifetime Limited Warranty
- LIFETIME LIMITED WARRANTY: You can install with confidence, knowing this Delta shower head is backed by Delta Faucet's Lifetime Limited Warranty
Features:
▼ Read Reddit mentions48. HYDE Contour Scraper with 6 Changeable Blades , multicolor - 10450
The product is Contour Paint Scraper Kit With 6 Blades.Elegant and smooth finishThe product is manufactured in ChinaMaterial:High Carbon Stainless SteelRemoves paint, varnish, putty caulk or rust from virtually any surfaceSix specialized blades includedComfortable contoured handle keeps hand away fr...
▼ Read Reddit mentions49. Superior Pump 91250 Utility Pump, 1/4 HP, Black
- 1/4 HP Utility pump moves up to 1,800 gallons per hour; pump will lift water up to 25' of vertical height
- Tough thermoplastic construction; 10' cord length
- 1-1/4 inch NPT discharge for high capacity pumping; includes 3/4 inch garden hose adapter
- Removable suction screen and handles up to 1/8 inch solids
- Superior Pumps are Built to Last, engineered with quality components and are 100% factory tested
Features:
▼ Read Reddit mentions50. How Your House Works: A Visual Guide to Understanding and Maintaining Your Home, Updated and Expanded
How Your House Works A Visual Guide to Understanding and Maintaining Your Home Updated and Expanded
▼ Read Reddit mentions51. Makita MAC700 Big Bore 2.0 HP Air Compressor
- Cast iron pump with big bore cylinder and piston, combined with greater bore and stroke, delivers maximum performance
- Substantially lower noise levels with a large 1,720 RPM pump, enabling greater displacement at lower RPM
- Low amp draw reduces incidences of tripped breakers and voltage drop that can cause premature motor failure
- Oil lubricated provides cooler running pump, minimizes wear
- One-year manufacturer's warranty
Features:
▼ Read Reddit mentions52. Gila Heat Control Platinum Adhesive Residential DIY Window Film Sun Blocking Glare Reduction 3ft x 15ft (36in x 180in)
- ENERGY EFFICIENT: Rejects up to 71% of total Solar Energy
- PROTECTS INTERIORS: Blocks up to 99% of UV rays, helping to keep your interior from fading
- INCREASED COMFORT: Reduces glare up to 69%, making interiors more comfortable
- DAYTIME PRIVACY: Mirrored exterior appearance provides daytime privacy (when the sun is down and lights are on inside, film no longer conceals views)
- EASY INSTALL, LASTING RESULTS: Durable adhesive material is easy to handle and firmly sticks to windows for ongoing benefits
Features:
▼ Read Reddit mentions53. WORX WA4092 Universal Fit Blowers Gutter Cleaning Kit, Basic Pack
- [CLEAN GUTTERS WITHOUT A LADDER] Safely clean your gutters while standing on the ground. Attaches to the leaf blower you already own
- [11 FEET OF REACH] The 8 feet of tubes, combined with an average person’s arm length, the angle from which you work, and the length of the blower give you approx. 11 feet
- [EASY TO ASSEMBLE] In less than 5 minutes, you’ll have the Universal Gutter Cleaning Kit attached and ready to use. And it comes apart just as easy for storage later
- [UNIVERSAL FIT] The adjustable adapter fits every major brand of blower on the market: Black & Decker, Husqvarna, Poulan, Craftsman, Ryobi, Toro, Murray, Worx, and more
- [DO IT YOURSELF. DO IT BETTER. DO IT WITH WORX.] WORX tools are engineered with cutting-edge technology, and above modern efficiency standards, so you can build a cost-effective tool collection that’s been designed to last
- [ADJUSTABLE LENGTH] The main tube is 3 separate pieces, so you can make it shorter if you need it to be
- [WHAT’S IN THE BOX?] Gutter tube nozzle, 3 gutter tube extensions, one gutter tube adapter, and a universal adapter to fit other brands
Features:
▼ Read Reddit mentions54. Rain Harvesting Pty Ltd RHUL99 Leaf Eater Ultra Rain Head- 3 in. Round
- 95%+ Capture Efficiency
- Self-Cleaning
- 1000 Micron Screen
- Attractive Screen Cover
Features:
▼ Read Reddit mentions55. Rain Harvesting Pty Ltd RHAD98 Leaf Eater Advanced Rain Head- 4 in. Round
- Compact, versatile downspout filter / rain head for quick and easy DIY installations.
- Single screen technology for advanced debris shedding.
- Minimal maintenance
- Pivot the outlet to suit vertical or horizontal (rear outlet) downspouts.
- Suits 4" downspouts
Features:
▼ Read Reddit mentions56. Master Lock 265EC Door Security Bar, Pack of 1, White
- Heavy duty, dual-function door security bar prevents forced entry on hinged, patio, and sliding doors; Door stopper security bar is intended for indoor use
- Door security bar design is portable and compact making it easy to store and ideal for travel, providing enhanced security in hotels or on vacation
- Adjusts from 27-1/2 inch (70cm) - 42 inch (1.1m) to fit most standard doors and sliding patio doors. Top door knob jam is easily removed for sliding door applications
- Made with heavy duty 20-gauge steel for strength and security; Pivoting ball joint ensures door security bar has full contact with floor for secure fit while padded foot provides a strong grip without scratching
- No tools required, simply adjust the bar length using the release button, prop under door knob and easily adjusted as needed
Features:
▼ Read Reddit mentions57. Honeywell 50250-S True HEPA Air Purifier, 390 sq. ft, White
LARGE ROOM AIR PURIFIER: This HEPA purifier captures up to 99.97% of microscopic allergens 0.3 microns & larger from the air that passes through the filters. Effective for large & extra large roomsSPECIAL FEATURES: This purifier features 3 air cleaning levels, SurroundSeal Technology to minimize air...
▼ Read Reddit mentions58. Panasonic FV-11VQ5 WhisperCeiling 110 CFM Ceiling Mounted Fan, White
- Motor/Blower: Power rating of 120 volts and 60 Hz
- Motor/Blower: Fan is UL listed for tub/shower enclosure when used with a GFCI branch circuit wiring
- Can be run with no less than 110 CFM and no more than 0.3 sone.Duct Diameter (inches) 4 inches. Mounting Opening (inches sq.) 10.5 inches. Grille Size (inches sq.) 13 inches
- Housing: Double hanger bar system allows for ideal positioning
- Grille: Attached directly to housing with torsion springs, Motor type- Condenser, Grille Size: 13-Inches
Features:
▼ Read Reddit mentions59. Reliance Controls 31410CRK Pro/Tran 10-Circuit 30 Amp Generator Transfer Switch Kit,Gray
- Convenient transfer switch kit, ideal for your circuitry and multi-wiring needs, is also made for reliably-fast installation in both residential and commercial applications
- Designed specifically for generators up to 7,500 maximum running watts
- 18-inch flexible conduit whip attaches easily to the load center
- Maximum single-pole circuits: 10 / Maximum double-pole circuits: 5
- Features a rugged, powder-coated steel cabinet. six combination knockouts and more
Features:
▼ Read Reddit mentions60. LEDwholesalers 12 Volt DC Waterpoof LED Power Suppply Driver Transformer with 3-Prong Plug, 30W, 3207
- 12VDC constant voltage power supply with max. 30W output power
- Durable aluminum chassis with IP68 waterproof rating, suitable for use in dry and wet locations
- Output wire leads and input 3-prong plug for easy connections
- Automatic thermal & overload cut-off, short circuit protection
- Efficient, long life, stable, and reliable
Features:
▼ Read Reddit mentions
A good drill is key. It's silly to stick to one brand (many people have the bs brand loyalty fetish and I'm not sure why). You'll also want to get a variety of drill bits to go with drill. Go to garage sales and start hoarding nails, screws, etc at cheap prices.
My recommendations below are based on at least 5 hours of research and shopping around. There are some things I'd probably add to the list (like a hand saw and dremel) but this takes care of a lot of your big needs. I own everything on the list and am pleased with it all, especially in terms of a performance for value ratio.
The key is know what you want then shop around / wait for the best prices (track prices in spreadsheet). Use google shopping to compare prices and see who price matches plus has best ebates or Ibotta cash back % + consider buying gift cards at a discount on Raise or elsewhere to further maximize savings (or just go with whatever credit card gets best points on particular site). Add Google Chrome app "Honey" to have coupon codes auto applied (eliminates time searching for them).
Also, I'd strongly consider getting a credit card with a decent bonus that will essentially help you get these items for free (assuming you can achieve the bonus spend with money you're already paying on existing bills / monthly purchases - it's a no-brainer in this case) - Chase's Sapphire Preferred is a good place to start ($500 bonus for 4K spend in 3 months)
Consider waiting until Black Friday (and from Jan to end of feb) for the good deals.
Drill (get a decent to really good one - you'll use it often)
Circular Saw
Multi-tool
Miter saw
Respirator
Horse (the 'roided out version)
Sander (makes a huge difference): I've seen it in the low $40 range
As an old house lover (and fellow old house owner), I'm begging you to please restore those windows! It can be done!
I'm making this response extra long and detailed since this question comes up from time to time. Hopefully it can be a resource for others.
But I say this as a guy who bought a real wreck of a house where the previous owner had let everything go. We needed to fix all 45 openings at once as part of a major rehab, and after 6 weeks of effort, about $3000 of experimentation (including taking a week off work and hiring two people to help me), I finally gave up and put in vinyl windows. It completely broke my heart, and my house is uglier because of it. But sometimes, an old window is just too far gone to save. But in that process I learned a lot and I'd like to share a few things.
OK, on to your questions.
General resources and tools I found useful:
I just did this a few months back (same issue with the well pump). Was originally planning on hiring an electrician to do it, but after a few youtube videos, realized I could do it myself. Very simple - hardest part was figuring out which circuits I wanted to include and wrestling 10-3 UF-B wire. The electrical part was easy.
First question you got to figure out is what kind of switch you are going to use. If you have some free breaker space in your panel, you can get an interlock switch. This is the cheapest way to go and you could power your whole house with this method (if you generator is up to it). Downside is you have to be careful about balancing your loads.
I didn't have any space in my panel so got one of these badboys. Super easy to set up and use. Lets you choose up to 10 circuits that you want to be run off the generator. It includes a bunch of documentation on how to calcualte and balance loads for your generator to decide which side you hook each ciruit up to. Also nice because when the pwoer comes back on, you will know. I very highly recommend this box and company. Great instructions and customer support, very easy to install. Seems like really solid hardware, too. They sell these at the Lowes near me in case you can't wait for amazon shipping.
In either case, I also highly recommend the remote L14-30 input box (its included in the kit that I linked to). Have it mounted somewhere outside you house where the generator will be running. You can run the aforementioned 10-3 UF-B cable out to it. Its a lot cheaper than buying a super long equivalent extension cord to get the generator a safe distance away from your home, and you also don't have to wrestle that same cord every time you need the generator (those things are heavy AF and the last thing you want to deal with in the cold/dark/rain/snow/wet/wind that is happening when you lose power).
I've owned my first home for 3 years and two years ago I designed and was the general contractor for an incredible master bedroom/bath addition.
Suggestions, my house has a one piece sink/counter and it's wonderful and easy to clean and seamless - love it. Highly recommend. Rectangular sinks are popular right now, don't do it--most sinks are oval for a reason (I have rectangle and I've had to relearn how to use a sink and it's too shallow and I don't like it).
I'd recommend not doing tile in your bath/shower area and getting a single vinyl piece like what you currently have (but not green). The shower inserts are easy to clean, elegant, and you can even buy them with a tile design that looks real but is still super easy to clean. Showers should always have extendable shower head arms to make cleaning easier. I'd get one of those curved shower curtain rods to make the shower feel wider. Add recessed lighting above the shower and a few more recessed lights in the room.
For my bathroom addition, I got this fan: https://www.amazon.com/dp/B003TJAGO4/_encoding=UTF8?coliid=IG66NQLIR3JQR&colid=1BWCRY8EQNMEF and it's very quiet, not too expensive, and works really well - it was a Reddit recommendation in several different threads and I'm glad I got it.
How many bathrooms are in your house? Is this the master bathroom? That would determine some choices for me. Does that set of doors on the right hide a linen closet or is it the washer/dryer? If you're taking the room down to the studs and those doors hide a linen closet or a washer/dryer or something else? Consider how much linen closet space you need. If it's a linen closet and if this is the master bathroom or a 'kid' bathroom, I'd recommend trying to get a double sink in here and making the linen closet smaller. If it's laundry, then obviously keep it as a laundry room.
Good idea on removing all the tile and replacing with floor tile and drwall. I'd omit the cabinet above the sink and get a bathroom mirror that will show more of your reflection (especially make your belt area visible) and have storage behind the bathroom mirror. A mirror like this from Ikea would give you a lot of storage space (http://www.ikea.com/us/en/catalog/products/20205171/) - my bathroom mirror is similar but has mirror on the inside which is a nice feature. I wish I had installed the mirror cabinet flush with the wall instead of popping out a few inches. I had the electrician put an outlet near the bottom of the toilet (I saw in a bunch of magazines) and several near the sinks for shaving and electric toothbrushes. I also have a small linen closet in my bathroom and had the electrician put an outlet in there so I could leave my hair dryer plugged in all the time. It's the little things! Think about how you use your space and what you want out of it.
I went into my project with no experience but I read a bunch of info online and watched some videos. I’ve found I’m better at the paint stripping and my husband is better at the actual glazing.
I use a heat gun as well and usually put a large putty knife over the glass in the area I’m working then let it cool periodically. I try to be really careful so I can preserve the original glass.
Once I get the paint stripped I sand it down to bare wood then stain. I paint the exterior facing part of sash but use a water based finish on the inside. I also strip, stain and finish the interior trim. I’ve been pulling out the sash weights, adding new rope and putting them back together as well. To help with energy efficiency I’ve added bronze spring stripping to seal up some cracks. https://thecraftsmanblog.com/how-to-install-spring-bronze-weatherstripping/
The craftsman blog has a ton of awesome information all in one place but there is other info out there as well.
I’ve found the Hyde Contour tool to be incredibly helpful with the fine areas/detail work. You just lately scrape the paint off then use sand paper to gently smooth out the wood. It’s the best way I’ve found to get rid of the paint without losing the detail work. I believe that was also a recommendation from the craftsman blog.
Hyde Tools 10450 Contour Scraper with 6 Changeable Blades https://www.amazon.com/dp/B000W65L7E/ref=cm_sw_r_cp_api_i_fBfcBbANDB3D3
It’s a tedious project and I didn’t mean for it to escalate to this level. I’m now obsessed with my heat gun and have been removing paint from doors, trim, etc. Just slowly making my way through the house!
Based on your follow up questions, it's pretty clear that all this is pretty new to you. I'm a huge believer in do-it-yourselfing it, but I'm not really sure this is a good place for you to start.
It might cost you, I dunno, a hundred bucks to have an electrician come in and do this. It will be done right AND you get to watch the entire process. (Don't get in his space, but let him know you are just interested in learning). I think it's money well spent.
All this stuff is relatively easy once you have some experience, but it's also pretty easy for a newbie to make a mess of it. Here, you have old wiring w/o a ground, combined with an outlet going next to a sink. Also, you have to cut a hole in your sheetrock (?) or plaster wall to sink the new box. Again, easy enough, but consider the money spent on getting it done tuition.
I salute your efforts to learn. I was fortunate to watch my dad do a lot of handyman type stuff as a kid. I've learned a lot on my own since then, but my early experience gave me the confidence to know that it was doable.
BTW, consider purchasing this book. It's out of print but still available. It's mainly geared towards building your home, but building and doing repair work are two sides of the same coin. Knowing how something is built helps you know how to tackle the repair. It's an EXCELLENT book, and I highly recommend it.
https://www.amazon.com/Do-Yourself-Housebuilding-Complete-Handbook/dp/0806904240/ref=sr_1_4?ie=UTF8&qid=1480823080&sr=8-4&keywords=george+nash
I second Youtube, but I never really trust any one video, I have to watch a bunch of them and then go for whoever seems most trustworthy. It is nice to have a single expert resource you can turn to frequently.
I really, strongly recommend How Your House Works by Charlie Wing. It's got great cutaway illustrations for common features of the home, and he explains how they work and interact with each other. It's interesting to read, and also a good reference. It's written for beginners, and would be a nice way to start even if you intended to go into greater depth with some other book.
I am going to suggest two things:
(1) You need to know how things work, and why they work the way they do. So you need a Bible for this house. I recommend this book:
https://www.amazon.com/dp/0806904240/ref=olp_product_details?_encoding=UTF8&me=
Do-It-Yourself Housebuilding: The Complete Handbook by George Nash. At 700 pages, it's a beast. Here is what one reviewer has to say:
It has chapters on everything, starting with selecting a site and house plan and ending with landscaping. There are plenty of drawings, charts and photographs to illustrate the topics. For example there are almost three pages of drawings of various types of electrical boxes and their installation. The dialog is clear and easy to understand. You can learn why you need to do something, not just how to do it.
The chapter about stairs describes rise and run and how to figure out how to build and place stairs. Again there are lots of diagrams showing things like how to measure angles on stringers accurately and how to get the tread level.
Each chapter covers various types of building practices and materials and isn't limited to any particular style. For instance the roofing chapter covers asphalt shingles, wood shingles and shakes, concrete and clay tiles, and even what I was interested in - tin.
Not only are there pictures of how to do things correctly, but there are occasional shots of owner-builder mistakes. It helps to know what not to do as well as what to do.
If it's not covered in this book, there's a bibliography in the back with a section for each chapter.
This is perfect for your new/old house.
(2) If you are concerned about taking something back apart later, use screws in just about every phase of renovation. They are your friend. They hold everything together, yet you can take it back apart with ease.
And this is just me. You are going to make mistakes, and you are going to waste money. That is the nature of home renovation. But as you get better at this, those will become fewer and fewer.
It's not a crime to mess up now and then. It is only a crime if you cannot learn from those mistakes. And trust me on this; your time, and your money, are great motivators to learn and remember all that you can.
Best of luck to you guys. Take lots of pictures. This is one hell of a journey you are on, and it deserves to be documented. One day you'll look on those pictures and laugh, telling each other "Remember when it looked like THAT?!".
Thank you for this write-up.
This is the Gila film that I installed on my window. I'm not sure how that compares to the titanium, but I may look into upgrading to the titanium film if the difference is dramatic enough. I'm assuming this film is safe for my patio door?
I'll definitely look into thermal curtains. I've thought about doing something like this, essentially trying to keep the heat trapped in the area between my curtains and the door or putting something in the space my patio door sits to try to insulate that area better.
Unfortunately my AC unit is virtually new... I just had it installed less than two years ago. I'm curious what the seasonal efficiency rating is... I do know that he made some adjustments to what I previously had to account for the fact that I'm on the third floor and my unit gets a lot of sun exposure.
I'll have to look into an evaporative cooler. My place is pretty small, so it doesn't take much to cool it. If it weren't for the fact that I lived on the third floor and my unit baked like an oven during the hottest days of the summer, my power bill during the summer would be negligible because it would take so little to cool it. If I could put one of those units in the room at night for sleeping that may be worth it.
Thanks again for this write-up. It gives me a lot of ideas to look into.
This is why I'd never buy a smaller fan. Not only do you have to make up the difference, but you have to do it in such a small area, which is even tougher. If it were several inches, you could slap up some new drywall scraps and then mud/paint. But 3/4", that's like doing drywall surgery. Pain in the butt.
If possible, I'd go up in size. Even if it's just 3/4" in the other direction, it's just cutting drywall. That's easy.
Check out the Panasonic Whisper line. I installed one in my basement bath and it's awesome.
EDIT: I see now you're saying the bezel does cover the hole. In that case, I wouldn't worry about it so much. You can probably stick some foam backer rod or other cheap weatherstripping in there. It's going to be hidden, anyway.
EDIT 2: Someone else rec'd expanding foam. Indeed, that's probably the most ideal solution. But I wonder whether you'll have anything to back it. I'm imagining a 3/4" gap between drywall and the fan enclosure, with literally nothing above. Just open air. So, if you spray foam up there, it's just going to fly up into the joist bay. I suppose maybe you could spray it directly on the side of the enclosure. If it sticks, you can build it up that way. Also, expanding foam can get VERY messy and it sticks to everything. Have water and maybe even acetone nearby for cleanup. Wear gloves. Good luck!
the buy it for life crowd will always argue for superior quality and buying a good tool. However another random redditor once summarized a different pragmatic:
"Buy a cheap tool, if it does the job you win. If you use it enough to break it you now are justified on buying the good version that might last you a lifetime."
I love harbor freight for economy cheap hand tools.
My exception is buy a good drill/driver. My current house might be close to 50% held together by work from my Milwaukee at this point.
Other tools no one mentioned that will come in handy: Outlet tester/live circuit detector, A stud finder, a set of allen wrenches.
I bought these Kohler toilets for my house. They are great. Good flush and look great. Don't use the old wax seal, use the newer gaskets.
Good luck with your house!
I agree with you. And for about the same price, you get a much better and much quieter fan. I have two Panasonic WhisperCeiling 110 CFM fans and they are amazing. I paired them with a discrete timer switch and I feel like i'm living in luxury. Very easy to install. It appears Amazon is out of them right now, maybe discontinued the model, not sure.
The box you're looking at is called 2-gang, which is twice as wide as a single gang standard outlet box you're seeing everywhere else. Pull the plate off (looks like just one screw in there) and you'll see two different outlets. You can replace them both, but it's a good idea to figure out why the right one is different. Does the plug type look different? Are they on different breakers? Is the right one upside down (standard convention for an outlet connected to a light switch)?
If there's no difference you can replace both with the same two plug outlets. Having two plugs doesn't require different wiring, they're already tied together (though you can break the connection if one needs to be connected to a switch).
Before you touch anything make sure to flip all breakers that bring power to the box. Typically there's only one but there could be more than one. For example, there could be a a connection between two wires on a different circuit in the same box, unrelated to your plugs. I'd recommend a set of voltages testers like this: Sperry Instruments STK001 Non-Contact Voltage Tester (VD6504) & GFCI Outlet / Receptacle Tester (GFI6302) Kit, Electrical AC Voltage Detector, Yellow & Black https://www.amazon.com/dp/B002JGQAQ6/ref=cm_sw_r_cp_apa_i_Zi9wDbA8G76M5
Test the outlets with the plug tester to ensure they're off. Use the non-contact tester for any other wires you see in the box.
That's hardwood, my man! Refinish that floor!
Rent a drum sander and a floor edger, start at 60 and sand in line with the boards, 80 diagonally across, then 120 in line. Stain it up (I prefer Old Masters - avoid Minwax), wait 72 hours, then seal with a catalyzed two-stage sealer like StreetShoe NXT. Anything from General Finishes is also great stuff (both their stains and sealers are great).
After you do your first pass with 60 grit, fill any gaps, nail holes from the tack strip, or imperfections with a trowelable wood floor filler like Bona Pacific Filler or Rust-Oleum Parks (NO PLASTIC WOOD ON FLOORS). If you need to plug holes where wiring may have been passed through in the past, use corks.
Also a good time to refinish or replace baseboard. The whole project will add good value to your home and will look so much better than carpet.
I recommend consulting with your landlord to see what modifications you can make. You may find more help on r/homedefense. Off of the top of my head, you could trying using a door security bar like this. But read the reviews and see if there are better security bars out there.
It's a small thing but it made me happy.
I replaced all the doorknobs in the house with matching Kwikset Antique brass finished knobs.
When I moved in the house had all different knobs and most of them have paint on them and it just bothered me. Especially when I could see more than one style/color of knob in the same room.
I also upgraded my shower head with one of these:
http://www.amazon.com/dp/B000LV7W4K/ref=pe_1098610_137716200_cm_rv_eml_rv0_dp which feels super good.
I want to replace my ceiling fans next and fix up my cabinets.
So long as that's a standard faucet size (and I can't imagine why it wouldn't be, even though it all looks a bit odd because it's unfinished), swapping a showerhead is about the simplest diy in the world.
This showerhead is dirt cheap and gets great reviews: https://www.amazon.com/dp/B000LV7W4K/ref=cm_sw_r_cp_apa_Hoe8ybFX6DG57
We have one and it's great for the price.
You'll need a pair of pliers and some thread sealing (plumber's) tape. But pretty sure the Delta comes with some.
Easy peazy.
I’m sorry you’re going through this. If I were you and had the ability to do it, I’d invest in a few of these HEPA purifiers , or something like this.
You’d have to figure out delivery or pickup, but depending on your budget, I’d run as many as I could. They are loud, but should help.
Also check out air scrubbers. They move much more air, I’ve just never bought one.
Edit: try to seal off all openings at your house and only use one door. Make sure your weatherstripping looks good. They have plastic film that you put over windows (the whole window frame) that you heat up to seal air inside it during the winter. I’d do those too.
Not sliding but very accurate. For trim and flooring this is the best for the price. but a sliding one is ideal, this cant handle a 2x8.
https://www.amazon.com/Hitachi-C10FCE2-15-Amp-10-inch-Compound/dp/B000V5Z6RG
> There are also white noise machines that can help drown out noise...or sleeping with a fan blowing on your face can function the same way.
This. Go get a loud air filter. This is by far the easiest solution.
https://www.amazon.com/Honeywell-50250-S-True-HEPA-Purifier/dp/B00007E7RY/ref=sr_1_6?s=home-garden&ie=UTF8&qid=1523890177&sr=1-6&keywords=honeywell+air+purifier&dpID=51QYt9jPAlL&preST=_SY300_QL70_&dpSrc=srch
We have several of these we've been lucky enough to find at Goodwill. They are awesome. You'll only need one for noise. Put it right next to your bed.
I have this Makita compressor and I love it since it is pretty easy to haul around. I would stay away from the brands that you mentioned if you are looking for something you want for the long haul. I think you'll have to choose between portability and power though.
Allow me to save you a bunch of money.
Buy two of THESE
and something like THIS and THIS
Along with $15 worth of fittings from home depot you'll have many years of spare filters. If you're interested I can go take a picture of my setup. I have these two filters before my water softener.
> https://www.amazon.com/dp/B0001Q2VK0/ref=cm_sw_r_cp_api_qq2dAbFAT770D
I have this one as well and a Porter Cable brad nailer and a couple paslode guns.
That Makita compressor is hands down the best one I've ever used or owned. I'd highly recommend the OP get it and a good gun seperately.
With what your going to do I would get a 10 inch miter...not sliding. unless you just want to spend the extra money.
(whooops....link removed.....didn't realize we could only link products from blue/orange/amz.)
alternate link....https://www.amazon.com/Hitachi-C10FCE2-15-Amp-10-inch-Compound/dp/B000V5Z6RG
For the table saw...I would search craigslist and get a full size saw and add a set of wheels to it...like these
https://www.amazon.com/gp/product/B0000223CL
I would search craigslist for the table saw.
There are only a few reasons to even get a miter saw.
Its easier to crosscut long pieces accurately.
You get quick access to a dedicated crosscut blade instead of swapping one into table saw.
Other than that, I tend to use the table saw. Even when I am crosscutting a lot of short material, I use a crosscut sled on my table saw. I only use my miter saw to rough cut and break down long boards.
If I was you I would buy that 100 buck miter and lump that other 200 in on my table saw money, wait and watch craigslist to get a better table saw with a solid top.
I'm cutting the rectangular copper downspout to install one of these:
https://www.amazon.com/Rain-Harvesting-Pty-Ltd-Advanced/dp/B004VM9CMK
or
https://www.amazon.com/Rain-Harvesting-Pty-Ltd-RHUL99/dp/B004VMG13S/
or a simple mod on a generic flex gate like this:
https://www.youtube.com/watch?v=R6v-8r2jBsE
Debris gets in and easily clogs the downspout. The downspout is also too close to the ground and isn't diverting the water properly.
I learned that gutter guards require maintenance and don't work very well so my plan is to install the above and be able to remove the debris before it builds up. My hope is that I'll need to clean the gutters less frequently.
I tried gutting the old fluorescent fixtures and putting these strips in them with these power supplies. I only did two of the 6 so far because I wanted to see how they held up after a year or so.
So far so-so, its more work than its worth and I would rather buy some than do the rest of them, but I haven't found any that look good and are hard wired for 110V (most have plugs).
I suppose I will finish them eventually as I already have all the parts.
Also, I can control them all with this remote, which is nice.
First, I think it's admirable what you want to do and I'm sorry for the loss of your brother.
Now, if you're serious about this, you first need go consider whether there is any point to it. If you update a room, are your parents just going to let it go to hell again?
If you decide it's worth it, you can learn to be handy. Be confident to try things, but watch videos so you understand how it's supposed to go and know your limitations. Get help with anything structural and with utilities if you're changing anything (i.e., maybe you can handle replacing an old light switch or receptacle with the same type of switch or receptacle, but don't try to rewire a whole room unless you get an electrician to inspect the work before you reenergize). In the end, it's not the end of the world if you don't make it look quite as nice as a professional might, but you don't want to burn the house down or damage the structure.
If you want to get started on the basics, keep subbed go this site for ideas and questions. If you're a total newbie, I'll recommend this book. It'll give you a solid visual representation plus a description of how the systems in a house work.
I know this isn't quite what you're asking, and you may have your reasons for using wax, but they make a rubber ring with a flange that is a lot easier to install, and lasts a lot longer than a wax ring.
Example here: Fluidmaster 7530P8 Universal Better Than Wax Toilet Seal, Wax-Free Toilet Bowl Gasket https://www.amazon.com/dp/B00R7D35TQ/ref=cm_sw_r_cp_apa_i_P.zrDbZJ672YT
If your apartment gets full, direct sun, get some thermal curtains and reflective window film. Gila puts out a window film kit that works well and can be easily removed when you need to move. You can find it at Lowes and Home Depot. If you get the film, be sure you get the Application Kit for it too.
I had this same issue in my old apartment. The AC would run full tilt, without stopping, and I'd be lucky to see temps below 85F in the summer. I was on the top floor and got full afternoon sun. The curtains and film helped drop the temp a few degrees.
I have guards and they work really well. I would recommend them wholeheartedly, I have a couple trees near the house and I really don't ever have to mess with the gutters, I love it.
You can get an extension for your leaf blower so you don't have to get up there (https://www.amazon.com/WA4092-Universal-Gutter-Cleaning-Blowers/dp/B00EU6H4RW )
Also, you had a typo that I see a lot, adverse - you wanted "averse". :)
We used this one and a spare set of washing machine hoses - it was super easy: https://smile.amazon.com/gp/product/B000X05G1A/ref=ppx_yo_dt_b_search_asin_title?ie=UTF8&psc=1
Thanks! They were the first ones we put in - the BoM was super cheap too:
2 - LED rolls @ $11.64 (really used 1 1/4 of em)
1 - transformer @ $15.50
1 - connectors for the corners @ $4.99
Total cost was about $50.
The second set (under the sink and rangetop) is in parallel to the first because while the transformer could handle 1 1/2 strands, a continuous run may only be one strand
Just did a little digging through my amazon purchases.... here's the one I got:
https://www.amazon.com/Faucet-2-Spray-Shower-Chrome-75152/dp/B000LV7W4K/ref=sr_1_76?keywords=shower%2Bhead&qid=1572732840&sr=8-76&th=1&psc=1
I ended up installing the same one in my moms house as well, love it
Did you borrow your neighbors lawnmower and forget to give it back lol?
​
Get a metal door.
Also remove the existing screws from the hinges attached to the door jam and use 3 inch screws. Otherwise, it doesn't matter how great a door or lock you have. If they kick hard enough, either the hinges will rip out of the door jam or the entire door jam itself will come out. Same thing for the striker plate.
https://www.youtube.com/watch?v=1gtnf7eRiIQ
​
I would google "how to secure a door" and make sure there are no weak points.
You could also try something like this https://www.amazon.ca/Master-Lock-265DCCSEN-Dual-Function-Security/dp/B0002YUX8I/ref=sr_1_1?keywords=Buddybar+Door+Jammer+Home+Security+Door+Bar&linkCode=gs3&qid=1558661207&s=hi&sr=1-1-catcorr...
There are better devises out there though.
​
Another very simple way to improve security would be to install a motion sensor spotlight for nighttime.
I have this set: Sperry Instruments STK001 Non-Contact Voltage Tester (VD6504) & GFCI Outlet / Receptacle Tester (GFI6302) Kit, Electrical AC Voltage Detector, 2 Pc. Pk., Yellow & Black https://www.amazon.com/dp/B002JGQAQ6/ref=cm_sw_r_cp_api_PR6GAb5KTG4Y6
Basically the plug tests to make sure the outlet is wired properly. You can also use it in a short GFCI run and it will ensure it's wired properly and let you trip the GFCI outlet for testing sake.
Or if you pull the outlet out of the wall you can check to see if it is truly wired properly.
Edit: just remember too, just because that outlet is wired properly doesn't mean the whole run is. This is in regard to physical inspection.
I bought this driver: https://www.amazon.com/dp/B0034GUEY4/ref=cm_sw_r_cp_apa_o7BMybQDSS3MG
These LEDs: https://www.amazon.com/dp/B005EHHLD8/ref=cm_sw_r_cp_apa_t8BMybSXEXV0P
And this is the result: http://imgur.com/n3E2Fkh
The LEDs installed real easy, the adhesive is strong and I've not had any problems in 6 months of use
Buy this book:
https://www.amazon.com/Do-Yourself-Housebuilding-Complete-Handbook/dp/0806904240
I guarantee it will be the absolutely best $2.00 (plus shipping) that you'll ever spend.
I would skip the Harbor Freight tools. If you want a miter saw, you can go with the Hitachi C10FCE2 for $130 new Amazon or $117 from Amazon Warehouse. Or you can get the C10FCH2 for $170 new or $140 Amazon Warehouse.
If you can wait a little bit, you can find the C10FCE2 on sale for $100. I bought mine for that price at Lowes in the middle of June. Amazon had it for the same price at the time.
Of the miter saws you have I would go with the Ryobi 10"; it is better quality than the Harbor Freight tools even if it is not the best quality.
One tool you may not have that will make it a lot safer is a Non contact voltage meter basically you touch the outlet and it will beep if it detects a current. Just incase your breakers aren’t labeled correctly, etc, it’s cheap peace of mind.
Then it’s basically a Phillips head and flat head screw driver. The screws on the sides of the outlets are different colors, make sure they are connected to the correct wire, take pictures of the outlets before you unhook any wires so you’ll know how it goes.
I feel you are overpaying for the filters and housings. Here are some Dupont housings that are substantially cheaper. Also I noticed you have a water softening filter in there, you might want to just look at installing a real water softening solution, amazon has a nice one that would do a better job than just a single softening filter, especially because that filter is only rated at 2gpm
http://amzn.com/B000LV7W4K
Is what I have, pretty good jet that comes out.
Depending on what your water is like, you might not need something as expensive as that. I only need to filter sediment from my well and am not worried about heavy metals or pesticides, so these work fine:
https://www.amazon.com/DuPont-WFPF13003B-Universal-000-Gallon-Filtration/dp/B007VZ2O0Q
that grey water pump is excellent for a house, i just need a washing machine output used 2 x a week 1 adult+ 1 child in the house. bilge pumps look possible, and i lie the 12vdc power , the other sump/dirty water pumps are 110 vac, like this, $50 dirty water pump but they hook up to garden and hoses much easier
I got a reliance. I like it. Very easy to install and comes with a video.
https://www.amazon.com/gp/product/B000HS2L3O/ref=oh_aui_search_detailpage?ie=UTF8&psc=1
You probably don't want blackout curtains, that will absorb all the incident sun light and radiate heat indoors. You want something reflective to reflect the incoming sunlight back out the window. Something like this
http://www.amazon.com/gp/product/B000KKM8EG/ref=pd_lpo_sbs_dp_ss_1?pf_rd_p=1944687622&pf_rd_s=lpo-top-stripe-1&pf_rd_t=201&pf_rd_i=B00CST53LW&pf_rd_m=ATVPDKIKX0DER&pf_rd_r=0BFHK527AAVRR79DTKMD
or a simple white solar shade could be helpful.
You can make the same thing for less money if you have some plumbing knowledge.
Housing: https://www.amazon.com/dp/B007VZ2O0Q/ref=wl_it_dp_o_pC_nS_ttl?_encoding=UTF8&colid=3GPTD5IY4PUZ3&coliid=I29TBOOJZKNKD9
Stage 1: https://www.amazon.com/dp/B007VZ2O1U/ref=wl_it_dp_o_pC_nS_ttl?_encoding=UTF8&colid=3GPTD5IY4PUZ3&coliid=I3UH3UQDY1YG9G
Stage 2: https://www.amazon.com/dp/B007IJ1GVI/ref=wl_it_dp_o_pC_S_ttl?_encoding=UTF8&colid=3GPTD5IY4PUZ3&coliid=I2WPUSYXAAJ6PS
Stage 3: https://www.amazon.com/dp/B007JRDT96/ref=wl_it_dp_o_pC_nS_ttl?_encoding=UTF8&colid=3GPTD5IY4PUZ3&coliid=I2DR3294UM5E6K&psc=1
Just run them inline with whatever piping you're comfortable with, pex, galv, or copper will all work. 2 galv nipples between the three units and then an adapter to your other line will probably be cheapest.
This guy:
https://www.amazon.com/Honeywell-50250-S-True-HEPA-Purifier/dp/B00007E7RY?th=1
Honeywell 50250-S
It's a beast and loud, but wife's allergies are much improved -- which is why we needed it.
This is a great book: How Your House Works: A Visual Guide to Understanding and Maintaining Your Home, Updated and Expanded https://www.amazon.com/dp/1118099400
Pancake compressors are loud. Really loud. REALLY, REALLY loud.
I bought one of these and I've been very happy with it. It is quiet enough to have a conversation around it using a normal voice.
Just Take extra care when reinstalling the toilet. It is heavy and easy to mess up the wax wing.
​
I would use one of these.
https://www.amazon.com/Fluidmaster-7530P8-Universal-Better-Wax-Free/dp/B00R7D35TQ/ref=sr_1_3?keywords=toilet+wax+ring&qid=1564051440&s=gateway&sr=8-3
Consider something like this too: https://smile.amazon.com/Gila-LES361-Control-Residential-Platinum/dp/B000KKM8EG/ref=cm_cd_al_qh_dp_t
Made a huge diff in here.
If this is just a temporary situation, I get the feeling that it is, you can try to attach a hose to the shower/faucet to fill up whatever tub you come up with and then use a "sump pump" to drain it into the shower drain (https://www.amazon.com/Superior-Pump-Thermoplastic-Submersible-91250/dp/B000X05G1A/ref=sr_1_3?ie=UTF8&qid=1519395090&sr=8-3&keywords=submersible+pump)
Edit: Also a shower seat may be the safest option (https://www.amazon.com/Premium-Bathroom-Swivel-Locking-Mechanism/dp/B01NAND3IR/ref=sr_1_15_a_it?ie=UTF8&qid=1519395407&sr=8-15&keywords=bath+edge+seat)
So something like this? https://www.amazon.com/dp/B00EU6H4RW/ref=sspa_dk_detail_5?psc=1&spLa=ZW5jcnlwdGVkUXVhbGlmaWVyPUEyNFRMMksxMFNZQUNPJmVuY3J5cHRlZElkPUEwNzkwODY0Mkg4WUlVVjhXMDNFViZlbmNyeXB0ZWRBZElkPUEwMTI1NzU0VE00VVNGWTRSWjFQJndpZGdldE5hbWU9c3BfZGV0YWlsMiZhY3Rpb249Y2xpY2tSZWRpcmVjdCZkb05vdExvZ0NsaWNrPXRydWU=
I just wanted to second the vote for a separate purifier. Any filter more restrictive than a loose weave is effectively pretty hard on an HVAC unit. It makes a lot more sense to run a second unit.
We deal with allergies, and have three of these running in a 1500 square foot house, much more effective and less likely to cause thousands in HVAC damage:
https://www.amazon.com/gp/product/B00007E7RY/
You should redesign this and remove that as you call it 'fancy switch' and get a proper home automation system. I use Vera a vera Lite
Then you can do so much more. For example I use this on my RGBW light strips.
As for the power yes as other have said you need to use the existing outlets to power a 12 volt power supply. I use these for that.
Now that you have the Zwave hub then you can start to automate many other lights in the house.
Check out r/homeautomation/ for more ideas
They make shop vac attachments:
http://www.homedepot.com/p/RIDGID-Gutter-Cleaning-Kit-VT2515/203235222
And leafblower attachments so you can do it even without climbing on your roof:
https://smile.amazon.com/WA4092-Universal-Gutter-Cleaning-Blowers/dp/B00EU6H4RW?sa-no-redirect=1
Yes, especially if you're on well water you need/want a filter (not RO, just a solids filter) before the softener. The resin pellets in the softener will be destroyed by incoming silt or solids. It's cheap insurance.
Something like this:
https://www.amazon.com/gp/aw/d/B007VZ2O0Q/
Is all you need. Maybe a little bigger if you have many bathrooms.
I bought a small Makita that has an oiled compressor. Thing is awesome and is amazingly quiet - probably the best thing about it. I can run it in my basement doing work and no one knows. Not a huge air volume, but fine for my tasks.
Makita MAC700 Big Bore 2.0 HP Air Compressor https://www.amazon.com/dp/B0001Q2VK0/ref=cm_sw_r_cp_api_qq2dAbFAT770D
I can't say anything about the Silent Paint Remover, but it basically looks like a gigantic heat gun. Heat guns are fantastic for removing paint from trim, especially with a profile/contour scraper set. As long as you're not stripping the entire side of a house, you should be able to get away with a cheaper hairdryer style heat gun that runs around $40.
I highly recommend How Your House Works: A Visual Guide to Understanding and Maintaining Your Home.
It explains all the basic home ownership maintenance stuff in very simple terms, with pictures and easy-to-follow explanations.
They sell that now..
Worx WA4092 Universal Fit Gutter Cleaning Kit for Blowers https://www.amazon.com/dp/B00EU6H4RW/ref=cm_sw_r_cp_api_i_t8h2BbMVEJVMP
Something like this maybe? https://www.amazon.com/dp/B0002YUX8I/ref=cm_sw_em_r_mt_awdo_enmXCbJCGQV90
The NR-210A has no flow requirement according to Navien. The NR-210 model has a 0.5 gpm min flow rate. Which is the same as my Takagi.
Here's the pump I use for flushing my tankless once a year.
Some simple washing machine hoses will allow you to hook up to the clean out valves. Just dunk the pump in a 5 gallon bucket of white vinegar and run it through for about an hour with the tankless in off mode.
Get this book. Very simple visual explanations of what is involved in the systems that make up your home. It won't teach you how to do everything, but it will give you a solid grasp of the fundamentals of a wide range of subjects.
Get a security bar and use it every night. If you have windows that are easily accessible via bad guys, get something like this.
The lack of ventilation would point to negligence. Negligence type events aren't typically covered, it doesn't matter if you didn't know. This is a common book people recommend for first time home owners. A house isn't typically cheaper than rent, its just not throwing away your money since at the end you have something to sell. http://www.amazon.com/gp/aw/d/1118099400?pc_redir=1397706695&robot_redir=1
http://www.amazon.ca/gp/product/B000LV7W4K?redirect=true&ref_=s9_simh_gw_p60_d0_i3
https://www.amazon.com/Master-Lock-265DCCSEN-Dual-Function-Security/dp/B0002YUX8I Maybe use that and then find a peg that can go through all 4 holes and lock it that way?
I suppose I should have done that initially, lol.
3x - https://smile.amazon.com/gp/product/B007VZ2O0Q/
1x - https://smile.amazon.com/gp/product/B007JRDT96/
1x - https://smile.amazon.com/gp/product/B007IJ1GVI/
1x - https://smile.amazon.com/gp/product/B007VZ2O1U/
Then just whatever copper/PVC/PEX fittings you need to make it happen. I guess a bit over $100 but the filters drive that cost up a little and last ~3 months each so each pack is a half years worth.
I plumbed mine with a bypass too so I could bypass the filters for maintenance or if I had problems of if I'm doing a lot of outside watering (power washing).
EDIT: Pic here https://imgur.com/7ukQ9p4.jpg
I think it's roughly every 3 months, but filters are cheap. It also depends how much water you use and how dirty your water is. I think if you have well water a lot of people uses a 3 filter system. The first filter is a 10 micron then 2nd is a 5 micro the 3rd is a carbon filter. https://www.amazon.com/gp/aw/d/B007VZ2O0Q/ref=mp_s_a_1_9?ie=UTF8&qid=1518883549&sr=8-9&pi=AC_SX236_SY340_QL65&keywords=Water+filter+system&dpPl=1&dpID=41Nn7qeHteL&ref=plSrch