(Part 3) Best products from r/RetroPie
We found 82 comments on r/RetroPie discussing the most recommended products. We ran sentiment analysis on each of these comments to determine how redditors feel about different products. We found 755 products and ranked them based on the amount of positive reactions they received. Here are the products ranked 41-60. You can also go back to the previous section.
41. Matricom G-Pad XYBA Wireless Rechargeable Bluetooth Pro Game Pad Joystick Controller (Samsung Gear VR, PC, PS3, and G-Box Compatible!)
- High Precision Variable Resistant joysticks provide silky smooth gaming performance for your gaming pleasure. Dual mode connectivity makes this game pad highly compatible with all common platforms.
- Compatible with Samsung Gear VR, G-Box Q, PC, PS3 and most Bluetooth compatible input devices. PC requires cable connection (Cable is included!)
- High quality ABS plastic material with a matte and satin finish. Comfortable ergonomic design for long and comfortable play sessions.
- Rechargeable lithium ion battery provides hours of continuous gameplay. Running out of charge? No problem, plug in the micro USB cable to charge and play simultaneously!
- 16 button design with two high precision variable joysticks makes this one of the most useful and powerful game pads available today! Buttons: A, B, Y, X, D-Pad - Up, Down, Left, Right, Finger Triggers: L1, L2, R1, R2, Functions - Start, Select, Mode, Turbo.
Features:
 ▼ Read Reddit mentions
42. GeeekPi Retroflag MEGAPi Case with Functional Power and Reset Buttons Safe Shutdown and Safe Reset, with Cooling Fan & Heatsinks for Raspberry Pi 3 B+ & Raspberry Pi 3/2 Model B
Safe Shutdown and Safe Reset; Functional LED power indicator; Functional POWER and RESET buttons;MEGAPi CASE specifically designed for Raspberry Pi 3 B+ (B Plus) 2Easy access to the SD-Card and all other ports without opening the caseThe Cooling Fan and Heatsinks will solve the overheating problem o...
 ▼ Read Reddit mentions
43. C4Labs Zebra Case - Raspberry Pi 3B+, 3, Pi 2 and B+ (Purple Grapeshot) with Heatsinks
For Raspberry Pi 3B+, 3, Pi 2 and B+ (not included)Includes Power SupplyGPIO accessIncludes rubber feet and HeatsinksDesigned and Made in USA
 ▼ Read Reddit mentions
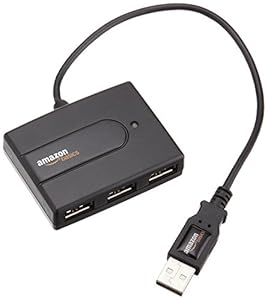
44. AmazonBasics 4-Port USB to USB 2.0 Ultra-Mini Hub Adapter
- USB 2.0 high-speed interface, supports data rates of 1.5/12/480 Mbps
- Backwards compatible with USB 1.1
- Automatic connection and speed detection
- Plug-and-Play; hot-plugging; driver free
- Over-current detection and protection
- Max output is 2.5W(5V/500MA) across all 4 ports
- Check your device loading current when used for charging (e.g. iPads/Tablets) or for high-power devices (e.g. hard drive); insufficient current may lead to slow charging or other failure.
Features:
 ▼ Read Reddit mentions
45. C4Labs Zebra Virtue Case for Raspberry Pi 4B, 3, 2 and B+ with Fan (Wood Mist)
- Specifically Designed to Accommodate the Increased Pi3 Heat
- For Raspberry Pi 4B, 3, B+, and Pi 2
- Pass-through for the GPIO cable and camera ribbon cables
- Designed and Made in Washington, USA
Features:
 ▼ Read Reddit mentions
46. Eleduino Raspberry Pi 3, 2 and B+ Case Aluminum with Fan (Black)
- Aluminum case ,Customize for Raspberry Pi 3/Raspberry Pi 2/ Raspberry Pi B+
- High dimensional accuracy, surface anodic oxidation process. Durable, good heat dissipation
- Good ventilation,easy carrying Simply Clicks Together Enclosure,good heat dissipation
- Smart design,not block the wifi/BT signals
- Access to all Raspberry Pi 3 /Raspberry Pi 2 / Raspberry Pi B+ consumer ports and GSI, camera and GPIO connectors
Features:
 ▼ Read Reddit mentions
48. 8Bitdo SN30 Pro Controller for Windows,Nintendo Switch,macOS, & Android
- Wireless Bluetooth, Rumble vibration, Motion controls, USB-C
- Rumble vibration, Motion controls, USB-C
- Wireless Bluetooth and direct USB connectable with built in lithium ion battery
- D-Input and X-Input functionality
- Compatibility Windows 7 and above bluetooth 4.0, Android 4.0 and above, macOS 10.7 and above, Steam Windows 7 and above macOS 10.9 and above, Switch 1.0.0 and above, Raspberry Pi Bluetooth 2.0 and above 2B, 2B+, 3B, Zero
Features:
 ▼ Read Reddit mentions
49. Gametown Full Housing Shell Cover Case Pack with Screwdriver for Nintendo Gameboy Classic/Original GB DMG-01 Repair Part-White
Platform: Game Boy DMG-01.Color:White.Package: As The Pictures Show.Replace Your Damaged Or Defective Shell,Makes It Look New All The Time.
 ▼ Read Reddit mentions
50. Retroflag SUPERPi Case with Wired Controller for Raspberry Pi 3B+ 2B 3B Deluxe Edition UCase Set
- Classic USB Controller included
- Safe Shutdown and Safe Reset
- Functional POWER and RESET buttons
- Easy access to the SD-Card and all other ports without opening the case
- Metadata in emulationstation will be saved when rebooting and shutting down
Features:
 ▼ Read Reddit mentions
51. KKmoon RFID Card Reader,IC Card Reader,Contactless 14443A with USB Interface,5pcs Cards,5pcs Key Fob,13.56MHZ RFID
【Small Size】It's small in size with USB interface,28 kinds of programmable output format.Configurable without opening the case or any configuration card.【Widely Use】Widely used in many RFID application systems such as personnel identification, logistics, access control, conference attendance...
 ▼ Read Reddit mentions
52. Easyget LED Arcade DIY Parts 2x Zero Delay USB Encoder + 2x 8 Way Joystick + 20x LED Illuminated Push Buttons for Mame Jamma Arcade Project Red + Blue Kits
- Beautiful LED Arace Game DIY Parts for MAME JAMMA Project!
- 100% Zero Delay USB Encoders and Perfect work for all windows systems!
- Perfect Parts for 2 Player Arcade MAME DIY Project!
- Made with highest quality materials!Heat resistant plastic!
- Perfect LED Kit for Arcade PC Game DIY Project! Easy Install!
Features:
 ▼ Read Reddit mentions
53. Samsung 128GB USB 3.0 Flash Drive Fit (MUF-128BB/AM)
- Metal casing for durability and a super-compact body
- Slim and sophisticated with a modern ultra-compact design
- NAND flash technology
- Water proof, shock proof, magnet proof, temp proof, and X-ray proof with a 5-year warranty
Features:
 ▼ Read Reddit mentions
54. 4 in 1 Professional Kit for Raspberry Pi 3 & Raspberry Pi 2 and Raspberry Pi B+,blue Sliced 9 Layers Case Box + Cooling Fan +micro USB Cable with Turn/on Switch ,Heatsinks
 ▼ Read Reddit mentions
55. Eleduino Raspberry Pi 3 Model B and Raspberry Pi 2 Model B/B+ (B Plus) Metal Case with Cooling Fan Black
High-quality aluminum box,Customize for Raspberry Pi 3/Raspberry Pi 2/ Raspberry Pi B+High dimensional accuracy, surface anodic oxidation process. Durable, never fadeGood ventilation,easy carrying Simply Clicks Together Enclosure,Plug and Play Cooling FanAccess to all Raspberry Pi 3 /Raspberry Pi 2 ...
 ▼ Read Reddit mentions
56. TOGUARD Portable Monitor 7 Inch IPS Small HDMI Security Monitor USB Powered HD 1024x600 Computer Display Screen with AV VGA Input, Touch Keys, Built-in Speakers, Remote Control for Raspberry Pi PC
【Visual Enjoyment】: The super 7 inch TFT monitor display screen with HD 1024*600 high resolution delivers excellent detail, work stable and anti-jamming, bright saturation image and high color reduction give you a pleasant visual enjoyment.【Support USB Powered & Portable Mini Size】 : This sm...
 ▼ Read Reddit mentions
57. Edimax EW-7811Un 150Mbps 11n Wi-Fi USB Adapter, Nano Size Lets You Plug it and Forget it, Ideal for Raspberry Pi / Pi2, Supports Windows, Mac OS, Linux (Black/Gold)
- Supports 150 Mbps 802.11n Wireless data rate - the latest wireless standard. Permits users to have the farthest range with the widest coverage. (Up to 6 times the speed and 3 times the coverage of 802.11b.).
- Power Saving designed to support smart transmit power control and auto-idle state adjustment
- Supports WMM (Wi-Fi Multimedia) Standard so that you can let different types of data have higher priority. It would allows better streaming of real-time data such as Video, Music, Skype etc
- Includes multi-language EZmax setup wizard
- Spec Standards IEEE 802.11n; backward compatible with 802.11b/g Wi-Fi Certified. Security 64/128 bit WEP Encryption and WPA-PSK, WPA2-PSK security; WPS compatible IEEE 802.1X
- Port 1 x 2.0 USB Type A. Wireless Data Rates Up to 150 Mbps. Modulation OFDM: BPSK, QPSK, 16-QAM, 64-QAM, DSSS. Frequency Band 2.4GHz - 2.4835GHz. Antenna internal chip antenna
- Channels (FCC) 2.4GHz : 1~11. Power Input USB Port (Self-Powered). Dimensions 0.28" x 0.59" x 0.73". Temperature 0 -40 degree C (32-104 degree F). Humidity 10 ~ 90% Non-Condensing. System XP/Vista/Win7, Mac, Linux
Features:
 ▼ Read Reddit mentions
58. Sabrent 4-Port USB 3.0 Hub with Individual LED Power Switches | 2 Ft Cable | Slim & Portable | for Mac & PC (HB-UM43)
- Expansion: Instantly add 4 USB 3.0 Ports to Any compatible device. Transform a single USB port into a full work station. The extended 2 ft cable allows for the perfect set up and easy access to out of the way ports.
- Convenience: LED Indicators display power status for each port. Individual on/off switches enable you to easily connect and disconnect your devices with the push of a button.
- Speed: Supports transfer speeds of up to 5Gbps (USB 3.0), 480Mbps (USB 2.0), & 12Mbps (USB 1.1).
- Compatibility: Reverse compatible with USB 2.0 and USB 1.1 devices. Use with PC, MacBook, iMac, Mac mini, XPS, Flash Drives, & any other USB compatible devices.
- Easy Setup: No driver installation required; Plug & Play and Hot Swappable. Does NOT support charging.
Features:
 ▼ Read Reddit mentions
59. Raspberry Pi RPI3CASE-BG Official Raspberry Pi 3 Case, Black/Grey
Official case for the Raspberry Pi from the Raspberry Pi foundationRemovable lid provides easy access to the camera and display portsRemovable side panels with easy access to the gpio portRemovable top frameDesigned with superior hat's in mind
 ▼ Read Reddit mentions
60. Cozysmart USB C Hub, USB Type C 3.1 to 4K HDMI Adapter, USB-C to Multiport Dock HDMI / USB 3.0 / USB 2.0 / 80W USB C PD Port for MacBook / Pro, Dell XPS, HP Spectre, Lenovo, Chromebook, Galaxy S8 / S9
【4K@30hz HDMI support 3D】: The USB C to HDMI adapter can steam ultra HD 4K 30Hz/ 2K/ 1080Percent /3D videos to your 4K TV/ Projector from laptop/Samsung phone, making your work more CONVENIENT or your family enjoy a better visual feast. (★Note: for 4K video, it only supports 30Hz refresh rate ...
 ▼ Read Reddit mentions
Top comments mentioning products on r/RetroPie:
Summary
41. Matricom G-Pad XYBA Wireless Rechargeable Bluetooth Pro Game Pad Joystick Controller (Samsung Gear VR, PC, PS3, and G-Box Compatible!)
- High Precision Variable Resistant joysticks provide silky smooth gaming performance for your gaming pleasure. Dual mode connectivity makes this game pad highly compatible with all common platforms.
- Compatible with Samsung Gear VR, G-Box Q, PC, PS3 and most Bluetooth compatible input devices. PC requires cable connection (Cable is included!)
- High quality ABS plastic material with a matte and satin finish. Comfortable ergonomic design for long and comfortable play sessions.
- Rechargeable lithium ion battery provides hours of continuous gameplay. Running out of charge? No problem, plug in the micro USB cable to charge and play simultaneously!
- 16 button design with two high precision variable joysticks makes this one of the most useful and powerful game pads available today! Buttons: A, B, Y, X, D-Pad - Up, Down, Left, Right, Finger Triggers: L1, L2, R1, R2, Functions - Start, Select, Mode, Turbo.
Features:
▼ Read Reddit mentions42. GeeekPi Retroflag MEGAPi Case with Functional Power and Reset Buttons Safe Shutdown and Safe Reset, with Cooling Fan & Heatsinks for Raspberry Pi 3 B+ & Raspberry Pi 3/2 Model B
Safe Shutdown and Safe Reset; Functional LED power indicator; Functional POWER and RESET buttons;MEGAPi CASE specifically designed for Raspberry Pi 3 B+ (B Plus) 2Easy access to the SD-Card and all other ports without opening the caseThe Cooling Fan and Heatsinks will solve the overheating problem o...
▼ Read Reddit mentions43. C4Labs Zebra Case - Raspberry Pi 3B+, 3, Pi 2 and B+ (Purple Grapeshot) with Heatsinks
For Raspberry Pi 3B+, 3, Pi 2 and B+ (not included)Includes Power SupplyGPIO accessIncludes rubber feet and HeatsinksDesigned and Made in USA
▼ Read Reddit mentions44. AmazonBasics 4-Port USB to USB 2.0 Ultra-Mini Hub Adapter
- USB 2.0 high-speed interface, supports data rates of 1.5/12/480 Mbps
- Backwards compatible with USB 1.1
- Automatic connection and speed detection
- Plug-and-Play; hot-plugging; driver free
- Over-current detection and protection
- Max output is 2.5W(5V/500MA) across all 4 ports
- Check your device loading current when used for charging (e.g. iPads/Tablets) or for high-power devices (e.g. hard drive); insufficient current may lead to slow charging or other failure.
Features:
▼ Read Reddit mentions45. C4Labs Zebra Virtue Case for Raspberry Pi 4B, 3, 2 and B+ with Fan (Wood Mist)
- Specifically Designed to Accommodate the Increased Pi3 Heat
- For Raspberry Pi 4B, 3, B+, and Pi 2
- Pass-through for the GPIO cable and camera ribbon cables
- Designed and Made in Washington, USA
Features:
▼ Read Reddit mentions46. Eleduino Raspberry Pi 3, 2 and B+ Case Aluminum with Fan (Black)
- Aluminum case ,Customize for Raspberry Pi 3/Raspberry Pi 2/ Raspberry Pi B+
- High dimensional accuracy, surface anodic oxidation process. Durable, good heat dissipation
- Good ventilation,easy carrying Simply Clicks Together Enclosure,good heat dissipation
- Smart design,not block the wifi/BT signals
- Access to all Raspberry Pi 3 /Raspberry Pi 2 / Raspberry Pi B+ consumer ports and GSI, camera and GPIO connectors
Features:
▼ Read Reddit mentions48. 8Bitdo SN30 Pro Controller for Windows,Nintendo Switch,macOS, & Android
- Wireless Bluetooth, Rumble vibration, Motion controls, USB-C
- Rumble vibration, Motion controls, USB-C
- Wireless Bluetooth and direct USB connectable with built in lithium ion battery
- D-Input and X-Input functionality
- Compatibility Windows 7 and above bluetooth 4.0, Android 4.0 and above, macOS 10.7 and above, Steam Windows 7 and above macOS 10.9 and above, Switch 1.0.0 and above, Raspberry Pi Bluetooth 2.0 and above 2B, 2B+, 3B, Zero
Features:
▼ Read Reddit mentions49. Gametown Full Housing Shell Cover Case Pack with Screwdriver for Nintendo Gameboy Classic/Original GB DMG-01 Repair Part-White
Platform: Game Boy DMG-01.Color:White.Package: As The Pictures Show.Replace Your Damaged Or Defective Shell,Makes It Look New All The Time.
▼ Read Reddit mentions50. Retroflag SUPERPi Case with Wired Controller for Raspberry Pi 3B+ 2B 3B Deluxe Edition UCase Set
- Classic USB Controller included
- Safe Shutdown and Safe Reset
- Functional POWER and RESET buttons
- Easy access to the SD-Card and all other ports without opening the case
- Metadata in emulationstation will be saved when rebooting and shutting down
Features:
▼ Read Reddit mentions51. KKmoon RFID Card Reader,IC Card Reader,Contactless 14443A with USB Interface,5pcs Cards,5pcs Key Fob,13.56MHZ RFID
【Small Size】It's small in size with USB interface,28 kinds of programmable output format.Configurable without opening the case or any configuration card.【Widely Use】Widely used in many RFID application systems such as personnel identification, logistics, access control, conference attendance...
▼ Read Reddit mentions52. Easyget LED Arcade DIY Parts 2x Zero Delay USB Encoder + 2x 8 Way Joystick + 20x LED Illuminated Push Buttons for Mame Jamma Arcade Project Red + Blue Kits
- Beautiful LED Arace Game DIY Parts for MAME JAMMA Project!
- 100% Zero Delay USB Encoders and Perfect work for all windows systems!
- Perfect Parts for 2 Player Arcade MAME DIY Project!
- Made with highest quality materials!Heat resistant plastic!
- Perfect LED Kit for Arcade PC Game DIY Project! Easy Install!
Features:
▼ Read Reddit mentions53. Samsung 128GB USB 3.0 Flash Drive Fit (MUF-128BB/AM)
- Metal casing for durability and a super-compact body
- Slim and sophisticated with a modern ultra-compact design
- NAND flash technology
- Water proof, shock proof, magnet proof, temp proof, and X-ray proof with a 5-year warranty
Features:
▼ Read Reddit mentions54. 4 in 1 Professional Kit for Raspberry Pi 3 & Raspberry Pi 2 and Raspberry Pi B+,blue Sliced 9 Layers Case Box + Cooling Fan +micro USB Cable with Turn/on Switch ,Heatsinks
▼ Read Reddit mentions55. Eleduino Raspberry Pi 3 Model B and Raspberry Pi 2 Model B/B+ (B Plus) Metal Case with Cooling Fan Black
High-quality aluminum box,Customize for Raspberry Pi 3/Raspberry Pi 2/ Raspberry Pi B+High dimensional accuracy, surface anodic oxidation process. Durable, never fadeGood ventilation,easy carrying Simply Clicks Together Enclosure,Plug and Play Cooling FanAccess to all Raspberry Pi 3 /Raspberry Pi 2 ...
▼ Read Reddit mentions56. TOGUARD Portable Monitor 7 Inch IPS Small HDMI Security Monitor USB Powered HD 1024x600 Computer Display Screen with AV VGA Input, Touch Keys, Built-in Speakers, Remote Control for Raspberry Pi PC
【Visual Enjoyment】: The super 7 inch TFT monitor display screen with HD 1024*600 high resolution delivers excellent detail, work stable and anti-jamming, bright saturation image and high color reduction give you a pleasant visual enjoyment.【Support USB Powered & Portable Mini Size】 : This sm...
▼ Read Reddit mentions57. Edimax EW-7811Un 150Mbps 11n Wi-Fi USB Adapter, Nano Size Lets You Plug it and Forget it, Ideal for Raspberry Pi / Pi2, Supports Windows, Mac OS, Linux (Black/Gold)
- Supports 150 Mbps 802.11n Wireless data rate - the latest wireless standard. Permits users to have the farthest range with the widest coverage. (Up to 6 times the speed and 3 times the coverage of 802.11b.).
- Power Saving designed to support smart transmit power control and auto-idle state adjustment
- Supports WMM (Wi-Fi Multimedia) Standard so that you can let different types of data have higher priority. It would allows better streaming of real-time data such as Video, Music, Skype etc
- Includes multi-language EZmax setup wizard
- Spec Standards IEEE 802.11n; backward compatible with 802.11b/g Wi-Fi Certified. Security 64/128 bit WEP Encryption and WPA-PSK, WPA2-PSK security; WPS compatible IEEE 802.1X
- Port 1 x 2.0 USB Type A. Wireless Data Rates Up to 150 Mbps. Modulation OFDM: BPSK, QPSK, 16-QAM, 64-QAM, DSSS. Frequency Band 2.4GHz - 2.4835GHz. Antenna internal chip antenna
- Channels (FCC) 2.4GHz : 1~11. Power Input USB Port (Self-Powered). Dimensions 0.28" x 0.59" x 0.73". Temperature 0 -40 degree C (32-104 degree F). Humidity 10 ~ 90% Non-Condensing. System XP/Vista/Win7, Mac, Linux
Features:
▼ Read Reddit mentions58. Sabrent 4-Port USB 3.0 Hub with Individual LED Power Switches | 2 Ft Cable | Slim & Portable | for Mac & PC (HB-UM43)
- Expansion: Instantly add 4 USB 3.0 Ports to Any compatible device. Transform a single USB port into a full work station. The extended 2 ft cable allows for the perfect set up and easy access to out of the way ports.
- Convenience: LED Indicators display power status for each port. Individual on/off switches enable you to easily connect and disconnect your devices with the push of a button.
- Speed: Supports transfer speeds of up to 5Gbps (USB 3.0), 480Mbps (USB 2.0), & 12Mbps (USB 1.1).
- Compatibility: Reverse compatible with USB 2.0 and USB 1.1 devices. Use with PC, MacBook, iMac, Mac mini, XPS, Flash Drives, & any other USB compatible devices.
- Easy Setup: No driver installation required; Plug & Play and Hot Swappable. Does NOT support charging.
Features:
▼ Read Reddit mentions59. Raspberry Pi RPI3CASE-BG Official Raspberry Pi 3 Case, Black/Grey
Official case for the Raspberry Pi from the Raspberry Pi foundationRemovable lid provides easy access to the camera and display portsRemovable side panels with easy access to the gpio portRemovable top frameDesigned with superior hat's in mind
▼ Read Reddit mentions60. Cozysmart USB C Hub, USB Type C 3.1 to 4K HDMI Adapter, USB-C to Multiport Dock HDMI / USB 3.0 / USB 2.0 / 80W USB C PD Port for MacBook / Pro, Dell XPS, HP Spectre, Lenovo, Chromebook, Galaxy S8 / S9
【4K@30hz HDMI support 3D】: The USB C to HDMI adapter can steam ultra HD 4K 30Hz/ 2K/ 1080Percent /3D videos to your 4K TV/ Projector from laptop/Samsung phone, making your work more CONVENIENT or your family enjoy a better visual feast. (★Note: for 4K video, it only supports 30Hz refresh rate ...
▼ Read Reddit mentions
I haven't used any handheld pi. I guess there are some good alternatives though.
​
​
NDS with charger. $25 - $40 (I would get the DSi) (DSlite bumpers and things tend to wearout)
A flash cart for NDS. $15 - $20 (DSTT I hear is best) (Acekard2i is great) (R4 is hard to tell the model) (DSTWO flashcart drains battery life, is overpriced, but has built in cpu and emulators for gba snes and genesis) All are compatible with 3ds, NDS, DSi.
MicroSD. $10. Samsung EVO 32gb on amazon is a good deal
The DS has a lot of great games, snes and genesis emulators work okay but not the best. GBA emulation only works with dstwo or ez-flash.
Total $50 - $70.
​
​
PSVITA w/ charger $110 - $150. Never used one, cfw is available for firmware up to 3.68. The firmware 3.69 is not hackable.
Vita Memory Card + microsd $20. Since the proprietary memory card are so expensive.
PSVITA & TV are cfw compatible up to 3.67 - 3.68, however there may be some homebrew incompatibility on these firmwares. 3.69 is not compatible yet. CFW can load PSP homebrew as well as play PS1.
Total $130 - $170
​
​
Wii U complete console $140. Used - Very good
SD card. $15 Sandisk 64gb Extreme SDXC
DS Virtual Console Game $10 From E-shop, needed to play DS on Console/Gamepad screens.
Emulates Nintendo up to DS, has an abandoned PSX emulator from the wii. Portable and Console for TV.
Total $165
​
The consoles and handhelds fluctuate in price. PSvita TV was low as $40 at one time, they are a bit inflated right now but collectors items will hold value. Finding one second hand or used for half-price is probable a used PSP is easy to find for $40 but not online.
​
​
RPI $25 - $40 RPI3b+ is what I have connected to my TV. The RPI2 is similar to RPI0 and emulates PSX but not all, as per the RPI3B+. There are many SBCs, I think the OdroidC2 and Tinkerboard and NanoPI M4 are all interesting but I have not used them.
Case + Heatsink and fan $25 - $30 There are other cases Argon One, SuperPI Retroflag, many others, some bundles heatsink and fan are necessary for the rpi3b+. The retroflag controllers are not preferred.
Power Supply $15 or official raspberry pi power supply.
MicroSD $10
Controllers $15 - $35 There are a lot of options here, recycle your PS3 or XBOX360 controller, Buy a corded Ibuffalo Snes, 8bitdo SF30, logitech, retro-bit/retrolink n64. I think only the RPI3B+ and RPI Zero W have bluetooth, else an adapter is needed.
Total $75 - $130
​
&&&
​
$50 (zero W + microsd + psu) + all the parts for building a gameboy zero
battery ~15
powerblock ~20
usb teensy ~15
controllermodule ~10
lcd and shield ~30
case ~20?
main buttons ~10?
audio amp and speaker ~10?
extra buttons and switches, wheels ~15?
Total ~$195
So I was gonna go buy a ibuffalo gamepad on Amazon and noticed it was 10 dollars more expensive, I inquired here and someone posted a link saying the game pad had been discontinued. Someone else pointed out the Elecom gamepad and so I decided to give it a try. It was 11 and some change with prime shipping. Got it today not expecting much, but happy to report it's basically identical to the ibuffalo. Tried out Contra and shooting diagonally was super easy. All the buttons have a nice tactile feel and a nice click. Shoulder buttons feel "clickier" to me too. The seller I got it for ran out quick, but I found that elecom is selling them directly also with free prime shipping for 14.63. purchased myself another one too. Here is the link.
https://www.amazon.com/gp/aw/d/B01HGGWOMC/ref=mp_s_a_1_fkmr1_1?ie=UTF8&qid=1492315852&sr=8-1-fkmr1&pi=AC_SX236_SY340_FMwebp_QL65&keywords=elecom+usb+gamepad+for+pc
For safe shut downs, charging warnings, and charging status - Adafruit PowerBoost 1000 Charger - Rechargeable 5V Lipo USB Boost @ 1A - 1000C-Purchased from amazon, https://www.amazon.com/gp/product/B01BMRBTH2/ref=ppx_yo_dt_b_asin_title_o08_s00?ie=UTF8&psc=1
Shell used-Gametown® Full Housing Shell Cover Case Pack with Screwdriver for Nintendo Gameboy Classic/Original GB DMG-01 Repair Part-White (pick whatever color you want)-Purchased from amazon, https://www.amazon.com/gp/product/B01K1C2L1C/ref=ppx_yo_dt_b_asin_title_o06_s00?ie=UTF8&psc=1
Screen used- BW 3.5 Inch TFT LCD Monitor For Car/Automobile – purchased from amazon, https://www.amazon.com/gp/product/B0045IIZKU/ref=ppx_yo_dt_b_asin_title_o09_s00?ie=UTF8&psc=1 (side note here is that in order to make this fit nicer, I installed it upside down in the case.
Speak used - uxcell 16pcs 27mm External Magnetic Speaker Loudspeaker 8 Ohm 0.25W, purchased from amazon, https://www.amazon.com/gp/product/B010V4RAAW/ref=ppx_yo_dt_b_asin_title_o04_s00?ie=UTF8&psc=1 (do not put ANYTHING on the top of the speaker when you install or it will not work.
Prototyping bread board, I purchased from amazon but it is no longer available at the link.
I used this PCB for the buttons on 1 build, the drill guide is VERY useful for this project. - 4 Button PCB For Gameboy DMG-01DIY Pi Zero Made In USA With Grounds and Hole Guide BY:Atomic Market, purchased at amazon, https://www.amazon.com/gp/product/B01JKJCQVM/ref=ppx_yo_dt_b_asin_title_o07_s00?ie=UTF8&psc=1
L-R buttons- 100 Pcs 6 x 6mm x 9.5mm PCB Momentary Tactile Tact Push Button Switch 4 Pin DIP, purchased at amazon https://www.amazon.com/gp/product/B008420WOA/ref=ppx_yo_dt_b_asin_title_o08_s00?ie=UTF8&psc=1
28 Gauge Wire - Ribbon Cable - 10 Wire (15ft), purchased at amazon, https://www.amazon.com/gp/product/B007R9SQQM/ref=ppx_yo_dt_b_asin_title_o09_s00?ie=UTF8&psc=1 (I recommend going to a smaller (higher) gauge than 28. 30 or 32 would have made it a lot easer but 28 will do.
Indicator lights, Uxcell a11092800ux0119 Uxcell (Pack of 75), purchased at amazon, https://www.amazon.com/gp/product/B01F0TCXSW/ref=ppx_yo_dt_b_asin_title_o03_s00?ie=UTF8&psc=1 (these are totally optional)
Resistors and capicitors (audio), purchased from https://www.taydaelectronics.com Note: heres the guide I used for the audio too! https://sudomod.com/forum/viewtopic.php?t=480
Old Gameboy game cartridge. For aesthetics.
Headphone jack, ebay, https://www.ebay.com/itm/3-5mm-Stereo-Female-Socket-Audio-Jack-5Pin-PCB-Panel-Mount-Connector-PJ325-/400959590673
Volume wheel, ebay, https://www.ebay.com/itm/20pcs-B103-16x2mm-10K-Ohm-Double-Dial-Taper-Volume-Wheel-Duplex-PotentiometerBS/293146992835?epid=11009192051&_trkparms=ispr%3D1&hash=item4440ec20c3:g:NZkAAOSw3h1ZUavq&enc=AQAEAAAB0BPxNw%2BVj6nta7CKEs3N0qUCHDbWKwW7sKftQNu9OoIx7SAZoMMNoO7ZC%2BQU2m6tHizIeixg2Hdk8yQin%2B7yNcIdtTzT%2FneqdaLt1WntvDDMDNnZ9%2BCyBsPWRiKLCNPKdeaaZNnBjMoVA%2F0tK%2BtG7DVLtcUKV1a4ZUD8%2F3Lgu9eesPLoBiXZs77Vo7R%2FDaZVMV%2FquPTyLO%2FBFipuEkim1t7BIMiLOi2P3Z31r4yxIdLUw6SCVesvVeqBQuoKov776Dxzk8pUY7PZvu4Q3ULnqBWmlWXsKXc8iAp9juNxUBFHnDgW6A7iElTGYe0sQRXfFHW73jI62f5aO%2FnqGANNK%2F7KJlu474aR3Gae9%2FJCT%2FwoLqmBb4FfizrUJ6qKEuVeLAi31kJSoJXIv4msi3r0bMNSm2D7FL5DUBr0Bc4xsSPi7KFWI9AhmQjUn%2FsLVysgEKd8QEildi1DULaVOX11bv95PGoXvfAusYXSi5NQZk4oZJHr6QIjXu5w4e9Nd2lFtmG4ZB%2BkqROOwwliad72iafj6cbSLphBAjtWGZQVNbmcdKXG6S8h7cTVqt0aD4oej7%2BlDVihmo%2BV0Rc2MhA9FgkM%2BcyzPd0qc9vHvdxjpQUq&checksum=2931469928353c744c25da8843a496116014d4766745
Micro SD card (16 GB minimum)
Female Micro usb Port, (I know I did buy these but I can’t find the link. I bought female micro usb ports to make charging easier.)
I want to say this is the battery that I used, specifically because after taking the shell off it was the perfect fit inside of a gutted Gameboy Game cartridge-https://www.bestbuy.com/site/mycharge-razorplus-4000mah-portable-charger-for-most-usb-enabled-devices-silver/6292246.p?skuId=6292246
3d printed button wells-http://market.sudomod.com/3d-printed-gbz-button-wells/
Extra buttons-https://www.retromodding.com/collections/gameboy
Screw bracket-http://market.sudomod.com/3d-printed-gbz-screw-bracket/
I got A LOT of buttons, glass screen shields, the other three builds button PCBs, some stickers, seriously a lot of stuff from https://store.kitsch-bent.com/ his store is unfortunately closed as he has had life catch up to him and has some shit to attend to. If he comes back online show him some love.
Stuff I got from kitsch
PCB board with LR input points
Buttons for X/Y (you can opt to just get replacement snes or an extra set of Gameboy buttons.
Glass screen that fit the GB shell after removing extra plastic
And obviously you should have a pi zero/w as well a shit ton of patience.
I picked up 2 of these:
https://www.amazon.com/gp/product/B01EO5QPN2/ref=oh_aui_detailpage_o04_s00?ie=UTF8&psc=1
I was looking exclusively for bluetooth controllers because I didn't want to mess with cables at all. These were on sale for $9.99 when I purchased them, but they're obviously worth more. They feel sturdy & well built. Their battery life is pretty good too.
These controllers have different "modes", depending on whether you're connecting it to an Apple or Android device. Holding the "B" button while powering on will allow the Pi to see it.
I'm duplicating my setup for my younger brothers and a few friends, I'll be purchasing 2 of these controllers for each of those builds for sure.
Just checked and that $79.99 kit comes w/ a 32 GB Micro SD. This would be a complete package for you system-wise. Like someone else said, you need a controller. You can take advantage of the on-board bluetooth capability get a wireles controller set up with something like the SN30 Pro by 8bitdo.
After getting the ROM situation sorted (the Pi 3B+ also has wi-fi, so you could easily set up SMB shares via menus and transfer your ROMs that way) you could look into replacing the case you got with something a bit more period appropriate like a Super Tinytendo Case for a few bucks.
I think the whole mini SNES motif would be cool for your son to enjoy and really get a feel for the period at the time! Plenty of other options out there in terms of customization and controllers also, so you can do as you like.
Parts List:
Power Adapter
Raspberry Pi
USB Super Nintendo Controller (This is the best one I have found so far)
HDMI Cable
WiFi Dongle
Other Items you will need:
USB Keyboard
Monitor or TV with HDMI Support
Now you dont have to use these parts exactly, there are plenty of other parts you can use. I am pretty sure that you can play Roms up to Playstation 1.
There is also a new Raspberry Pi 3 that is compatible with the RetroPie software which has WiFi and Bluetooth integrated into the board.
Helpful Video's to tackle technical issues with your RetroPie:
https://www.youtube.com/playlist?list=PLtht1mv6ty8xMBwgHX9RCkplqeSRxyHiC
Here is the Case I found on Etsy. There are plenty of other sellers but this guy was great!
The raspberry pi will underclock if your board gets to hot. You'll see a little rainbow square near the edge of your image.
The only time my pi3 ever gets hot enough for this square is when I'm playing 1080p videos via Kodi. So you won't need a fan for games.
However, here is the case I'm currently using. It comes with a 40x40x10mm fan.
https://www.amazon.com/gp/product/B01FIUJDZE
It's pretty quiet unless you're in a super quiet room or up close to the pi. I've tried a lot of cases, and this is my favorite of the cases with fans. (My favorite non-fan case is the aluminum flirc one)
After an initial struggle getting it set up and working properly, I gotta say I'm really happy with the Matricom XYBA. Can be had from Amazon for $22. Given the price, I'm pleasantly surprised by the build quality. It's solid, got some weight to it, and while I've only had mine for a few weeks weeks so far the buttons and analog sticks feel just like they did when it was brand new.
The initial struggle setting it up with RetroPie came down to finding this review on Amazon: https://www.amazon.com/gp/aw/review/B01EO5QPN2/R2B6DAP4EI7TQG/ref=cm_cr_dp_mb_rvw_1
After following those steps and customizing gamepad.cfg accordingly, everything has been working great. Once paired, it will reconnect in a few seconds from powering up. And this is all with the on-board Bluetooth on the RPi 3 by the way. At under $25 per controller, you can afford to get a decent four-player setup.
Sure thing, glad to help.
Did a little more searching. So far, this is the screen I would use if I was trying to do what you were doing.
I was actually looking for 'portable battery-powered mini tv' and that came up. All the other things I found had a battery included, which was great, but then they didn't have an hdmi connection, so that didn't work. If you can find a mini tv type of thing with a built in battery, and hdmi connection, that would really be your best bet.
Thanks, I got everything you said except for the case. I got this case because the purple went a little better with the purple SNES controller buttons: https://www.amazon.com/Zebra-Case-Raspberry-Grapeshot-Heatsinks/dp/B011JA4D2U/ref=sr_1_1?ie=UTF8&qid=1495332522&sr=8-1&keywords=raspberry+pi+purple+case
But thanks, I'm very happy with this!
2 questions about this after looking at the listing on amazon:
https://www.amazon.com/dp/B07G34TTKL
​
Gotta keep the pi cool, how's the airflow in this thing?
​
Is anyone else taken back by this? I mean, that's a feature / function / selling point for Emulation Station, not the case! What if I were to use the pi in this case as a Pi Hole, and not video gaming? Would I wind up with emulationstation metadata all over my Pi Hole logs if I did? (Of course I wouldn't, just being a smartass and making a point)
​
​
I would suggest not doing what you are asking.
Keep the SD card you have. Get a USB drive. They're half as much, and you can add on to the space you already have.
Here is one that is ~$28. Compared to ~$55 micro SD Card..
If you keep your current card and get a USB, you would have about 160 GB of space combined. It will also save you $20.
In my personal experience, I went from a 32 GB card that was supported and worked great, to one step up to a 64 GB (same model, just a larger size). For whatever reason the card can't read continuously, which causes pausing while browsing and stuttering during PS1 movie intros. I ordered two of them, and both have the same issues. I did lots of testing, Pi 2 and Pi 3, 2 different 32 GB cards and 2 different 64 GB cards. The 64 GB cards just had issues with reading and occasionally writing. There were never errors, or bad writes, just delays which can cause pausing. Putting the PS1 games on a USB drive solved that.
Edit: If you're using all the ports on the Pi, then upgrading the card might be less of a headache.
I'm using this now and it works very well: https://www.amazon.com/dp/B011TY0P9Q/ref=cm_sw_r_cp_apa_MHUUzbKF4RDYD
I've also used this: https://www.amazon.com/dp/B0722L338Q/ref=cm_sw_r_cp_apa_0IUUzbANYYJWV
My initial setup was a canakit with the included heat sinks, the heat sinks turned out to be a bit too high for the aluminium case and interfered with the fan installed in the inside. I switched to the acrylic case and the canakit heatsink didn't interfere with that fan.
If you don't have the canakit heat sinks, you're probably better with the aluminium case as it included a bigger fan than the acrylic case did.
Thanks. I just went with an Elduino Metal Case with Cooling Fan.
https://www.amazon.com/gp/product/B012GPCLR6/ref=oh_aui_detailpage_o00_s00?ie=UTF8&psc=1
I didn't check on the volume of the fan. Hopefully it isn't too loud.
I've got the same one. It's the third case I've tried, I didn't like the other two very much.
First one was the same brand but no fan. Overclocked and it overheated.
Second one was a layer case with a fan. I didn't like the look of it and the fan started dying within a couple days.
Now, finally, i'm good.
Awesome and thanks! i can link you the specific reader if you need it
https://www.amazon.com/KKmoon-Contactless-14443A-Interface-13-56MHZ/dp/B011XI2DE8/ref=mp_s_a_1_1?ie=UTF8&qid=1541573634&sr=8-1-spons&pi=AC_SX236_SY340_QL65&keywords=kkmoon+rfid&psc=1
Very cool looks like this is the direct link for anyone interested.
http://arcadeskin.com/gallery.php?mode=gallery&id=63&page=1
Also did you use this case?
https://www.amazon.com/gp/aw/d/B01F1PSFY6/ref=ya_aw_od_pi?ie=UTF8&psc=1
I can't compare them as I haven't used the other brand. I got this 2P set based on the reviews. The buttons have screw rings on the back to tighten it. The easiest part about this set is the encoders. I was gonna a build one out if an Arduino but this is plug and play and saved me countless hours trying to make that work.
Yes that's right. Make sure your using the 2.5amp power supply that comes with it, or higher drawing that much power it could cause slowdown issues.
There is this for example on amazon https://www.amazon.com/AmazonBasics-4-Port-USB-2-0-Ultra-Mini/dp/B003M0NURK/ref=sr_1_1?ie=UTF8&qid=1492717886&sr=8-1&keywords=amazon+basics+usb+hub
that won't draw much, but depending on what your doing you might want to invest in a USB hub that has it's own power supply. Always a better choice
I got this one: https://smile.amazon.com/gp/product/B01EO5QPN2/ref=oh_aui_search_detailpage?ie=UTF8&psc=1 It was easy to connect and setup, and works perfectly with my rasp pi 3.
I think I have this sorted out. Let me explain what I was shooting for, in case anyone is thinking about a similar setup.
First, the goal was for a bartop setup with a pair of arcade-style sticks built in. I got these: https://www.amazon.com/gp/product/B00WAY9848/ref=oh_aui_detailpage_o02_s00?ie=UTF8&psc=1
The set came with a pair of 'zero delay' USB encoders, that when hooked to the Pi together, produce the wonky results I described earlier. I finally found the solution in a previous post: https://www.reddit.com/r/RetroPie/comments/4p3uzo/2_zero_delay_usb_encoders_not_working_together/
The solution is a simple addition to a text file, noting the USB ID class of your type of controller.
The second goal of my build however, was to have a pair of external USB ports to plug in wired controllers like this one: https://www.amazon.com/gp/product/B003VAHYQY/ref=oh_aui_detailpage_o03_s00?ie=UTF8&psc=1 to play more console-centric games. The problem I kept running into is that many of the console emulators will only recognize the first two input devices. The external controller ended up always being #3 and wouldn't work.
The solution here is to use the USB port ordering on the Pi itself to dynamically (at boot time) reorder the controllers so you can use the one(s) you want. I can't find the link to the video I found describing the order, but if you're looking at the USB ports head-on, they are upper-left, lower-left, upper-right, lower-right ordered as 0, 1, 2, 3, respectively. RetroPi will number the controllers in that order, so generally anything plugged in to 0 and 1 are the inputs recognized by the console emulators.
In my situation for example, I wanted the SNES emulator to use the game pad(s) if plugged in, otherwise use the sticks. Since the zero-delay encoders needed extra power for the LED-lit buttons, I used the flat panel monitor's built-in hub to daisy chain them. The monitor's host USB connection went to port 2 (upper right) on the RPi. The two console controllers then, when connected, get ports 0 and 1 - making them the first two inputs.
Good luck, that's the best way to do it, IMHO.
The SNES-style USB gamepads by Elecom are quite good and down to <12$ from some sellers.
There's also a Canakit Rpi bundle going up at 7:20 pm CST, but it includes a lot of overkill garbage you probably don't need and won't use.
Agreed. I've been using mine for the Switch and haven't tried the pi yet, but they're excellent quality. https://smile.amazon.com/dp/B0748S1VDC/ref=cm_sw_r_cp_apa_XlT6BbEGFQR7N
I haven't used it but this might help:
https://github.com/meleu/RetroPie-joystick-selection
EDIT
You might be able to hack together a hardware solution with something like this:
https://www.amazon.com/dp/B07J4H8ZCC OR
https://www.amazon.com/Sabrent-4-Port-Individual-Switches-HB-UM43/dp/B00JX1ZS5O
I use a cheap hub with buttons to turn on and off the ports. Then I can plug in and disable any others (arcade buttons) not needed.
If you get creative with the order of the controllers in the hub you can just change out player 1 or even player 2
This one is pretty hackable, and you can extent ports to your case if you have room inside
Sabrent 4-Port USB 3.0 Hub with Individual Power Switches and LEDs (HB-UM43) https://www.amazon.ca/dp/B00JX1ZS5O/ref=cm_sw_r_cp_api_i_2qlZCb0ZJ055P
that's why i refuse to pay that price when they were <$15 USD not that long ago. well i've heard they were discontinued, but there is this controller by elecom that i've heard is very similar:
Elecom game pad 8 button Super Nintendo style (Japan Import) JC-FR08TWH https://www.amazon.com/dp/B01HGGWOMC/ref=cm_sw_r_cp_api_DBldzbREM9GQZ
> Why not get a pi zero (cheap) in the meantime,
That's not a bad suggestion either. Pi Zero works well with most SNES, Genesis, and Arcade games, and it's relatively cheap. However, plan on spending some more money a Mini HDMI adapter and Micro USB adapter, plus a USB Hub if you want more than one player (the Pi0 is picky about which USB hub it uses, most people recommend the Amazon Basics USB hub). By the time you're done you're spending $15-20, which is not nearly as economical as it seems compared to a Pi3B+.
The NES Pi Cart was my first project too. I enjoyed the process immensely. Before I started I couldn't solder and had no clue what 'sudo' meant. Now I've built three retro systems, also since December, two with LED's, with zero prior Linux knowledge. I can suggest this guide which will give you a completed system in a few hours.
https://howchoo.com/g/mti0oge5nzk/pi-cart-a-raspberry-pi-retro-gaming-rig-in-an-nes-cartridge?utm_source=facebook&amp;utm_medium=cpc&amp;utm_campaign=picart
If you want plug n play then Buy a NES classic. If you wanna learn some new skills keep on the course man. Had to try some different wifi dongles myself. This one works out of the box with retro Pie and Pi Zero. sNES30 controllers never worked for me. Return and try wired maybe. PS4 controller works flawlessly for me.
https://www.amazon.com/dp/B003MTTJOY/ref=cm_sw_r_cp_apip_ECL4xI3dTpHx7
I ordered some from amazon that had 3M thermal tape on them. Some people recommend using something with more tac(thermal glue) but the plain janes work for me. I ordered the stock raspberry pi case. Both of mine are black. Nice and small and I leave both side panels out so there is more air movement.
LoveRPi Performance Heatsinks for Raspberry Pi 3 Model B (1 Set) https://www.amazon.com/dp/B018BGRDVS/ref=cm_sw_r_cp_apip_eSdSCcfJlqdfu
Official Raspberry Pi 3 Case - Black/Grey https://www.amazon.com/dp/B01F1PSFY6/ref=cm_sw_r_cp_apip_ahcikJCLScSM6
There are tons of these on amazon. Seems like they're just getting the same one from china and slapping their logo on it.
Here's one with a fan: https://www.amazon.com/Super-Tinytendo-Raspberry-Model-Cooling/dp/B074JJRWHH/ref=sr_1_3?s=electronics&amp;ie=UTF8&amp;qid=1511984145&amp;sr=1-3&amp;keywords=raspberry+pi+snes
go with the Official Raspberry Pi Case the cover snaps off for great ventilation also you can add this nes skin
I also have c4 labs case and it'd one of the best IMHO. Only issue is that you need a fan if you overclock. Also their cases are expendable like for the sense hat https://www.amazon.com/Zebra-Virtue-Wood-Raspberry-C4Labs/dp/B01FIUJDZE/
I just wished they had more option such as 2.8' led case Cover (they had a prototype but never released it)
I use this one, it is very well made and keeps very cool https://www.amazon.com/Eleduino-Raspberry-Aluminum-Enclosure-Heatsinks/dp/B0722L338Q/
That particular case is known for undervoltage issues.
Their newer cases don't have that issue since they have thicker power wires.
All of these also come with a really good wired controller, which you can also purchase on its own. You can also purchase the case on its own too, if you look on RetroFlag's official website, you'll find purchase links that redirect you to Amazon.
The monitor TOGUARD 7 Inch Small Portable Security Monitor HD 1024x600 TFT LCD Display Screen with AV VGA HDMI Input, Touch Keys,Built-in Speakers, Remote Control for Raspberry Pi PC Security Camera https://www.amazon.com/dp/B06W5WB26H/ref=cm_sw_r_cp_api_i_Q9yQCbQQ0CP45
I'll second this recommendation /u/EOMFD, buying a wifi adapter makes managing the Pi SOOOOO much easier. I bought this tiny one for $8 and it worked right from the first plug in.
If you have a Windows machine on the same network as the Pi, you can type
\RetroPie
in the File Explorer directory bar and get instant access to the roms, bios and config files on the Pi from the Win machine. You can just drag n drop roms in there. It's so useful.
So if I went with the standard RPi3, any recommended cases?
https://www.amazon.com/gp/product/B012GPCLR6/ref=pd_sim_147_3?ie=UTF8&amp;psc=1&amp;refRID=KWM34Q7V3F47V71JRPQ5
This case seems cool
Yah, here's a link to the one I got. Paid an extra dollar for the blue one. Comes with two heat sinks. I bought a stronger power supply so I don't really care about the USB, although it having a switch it cool.
https://www.amazon.com/gp/aw/d/B011TY0P9Q/ref=pd_aw_sim_sbs_147_1?ie=UTF8&amp;psc=1&amp;refRID=G2B21MDBK1PKQ4B3N3SD&amp;dpPl=1&amp;dpID=71SBXjNJrYL
Amazon has Gameboy shells and there's a few tutorials available just takes a bit of work to get everything set
Edit: do you know what Pi you have? If you go to the retropie setup in the menu you should hopefully connect to wifi
Go with a low profile stick so it doesn't stick out too far. I used this one and it works great: https://www.amazon.com/gp/product/B017DH3O5A/ref=oh_aui_detailpage_o03_s00?ie=UTF8&amp;psc=1
> What screen are you using?
Not OP but I'm using this fantastic 7 inch screen that accepts regular USB power for $60
Allows me to use a single power bank (with 2 USB ports) to power both the Pi and screen for hours.
get one of these as well to get rid of the cable clutter and you're sorted.
https://smile.amazon.co.uk/8Bitdo-SF30-PRO-Bluetooth-Gamepad/dp/B0748S1VDC/ref=sr_1_1?crid=4FRJTTI1D35U&keywords=retropie%2Bcontroller%2Bbluetooth&qid=1554913206&s=gateway&sprefix=retropie%2Bbluetooth%2Bc%2Caps%2C133&sr=8-1&th=1
This kit should do the trick as long as I'm using a powered USB hub. It seems like the LEDs do draw too much power to stay on 100% of the time.
https://www.amazon.com/gp/aw/d/B00WAY9848/ref=mp_s_a_1_15?ie=UTF8&amp;qid=1500236255&amp;sr=8-15-spons&amp;pi=AC_SX236_SY340_FMwebp_QL65&amp;keywords=retropie+kit&amp;psc=1
okay just ordered a case fan combo. https://www.amazon.com/gp/aw/d/B0722L338Q/ref=ya_st_dp_summary?ie=UTF8&amp;psc=1 If there's a problem with my order tell me now before it ships
Yes, I have Zero Delay USB encoders.
I actually purchased this
https://www.amazon.com/gp/product/B00WAY9848
You don't have to claim DOA, just say you're not satisfied or its no longer needed. Amazon's return policy is quite lenient. Just, try to make sure the seller is Amazon, LLC and not a third party.
to OP... this flash drive isn't that big and allows you to save on some headaches.
I went with this kit:
https://www.amazon.com/gp/product/B00WAY9848/ref=oh_aui_detailpage_o07_s01?ie=UTF8&amp;psc=1
It has everything you need, and works out of the box with RetroPie. The joystick is SUPER clicky. It's heavenly. The buttons require almost no force to push and can take a beating. They also pull apart so you can add labels inside. I've had no issues with any of the components so far.
If you have a little more cash to splash I would add some sort of USB storage into your build. Even if you don't have a ton of roms (PS1 or Dosbox or DC), adding roms back onto your SD card if something goes wrong is a time consuming and obnoxious thing. Plus you won't lose your saves if using a USB.
In summation, I like having the game files/metadata and the RetroPie data separate.
Edit: I don't have it, but I've seen this USB recommended often.
This was what I got, it had 2 full sets of buttons, joystick, and two usb encoders.
Easyget LED Arcade DIY Parts 2X Zero Delay USB Encoder + 2X 8 Way Joystick + 20x LED Illuminated Push Buttons for Mame Jamma Arcade Project Red + Blue Kits https://www.amazon.com/dp/B00WAY9848/ref=cm_sw_r_cp_api_i_WrQiDbXE476WE
Did you mean this?
https://www.amazon.com/dp/B06W5WB26H
I used these buttons
https://www.amazon.com/gp/aw/d/B00WAY9848/ref=mp_s_a_1_3?ie=UTF8&amp;qid=1521840802&amp;sr=8-3&amp;pi=AC_SX236_SY340_QL65&amp;keywords=arcade+button+kit&amp;dpPl=1&amp;dpID=61grTwr-n1L&amp;ref=plSrch
The Buffalo got discontinued. But the SNES USB controller from Elecom feels identical and is half the price. https://www.amazon.com/gp/product/B01HGGWOMC
There's a variety of ways to do this this:
Or ...
Get a Raspberry Pi 0W with on-board wifi and bluetooth.
I use these for all my builds that I've made people.
http://www.amazon.com/Eleduino-Raspberry-Metal-Cooling-Black/dp/B012GPCLR6/ref=sr_1_2?ie=UTF8&amp;qid=1463522653&amp;sr=8-2&amp;keywords=raspberry+pi+fan+case
This is the one that the reviews have said work with the pi zero: AmazonBasics 4-Port USB 2.0 Ultra-Mini Hub https://www.amazon.ca/dp/B003M0NURK/ref=cm_sw_r_cp_apa_i6ztybX6G3N7E
The one I'm using came from a local store in Canada so I don't think you'll be able to get one.