Reddit mentions: The best canning kits
We found 42 Reddit comments discussing the best canning kits. We ran sentiment analysis on each of these comments to determine how redditors feel about different products. We found 17 products and ranked them based on the amount of positive reactions they received. Here are the top 20.
1. Norpro Canning Essentials Boxed Set, 6 Piece Set
- A must have for the canning enthusiast and begginer alike!
- Six essential tools for canning and dehydrating.
- Conveniently all in one box!
- Capture summer fruit and vegetables at their prime for enjoyment throughout the year by canning at home.
- Includes: * Long tongs with green vinyl coated handles * Vinyl coated jar lifter * Magnetic lid lifter * Extra wide mouth funnel * Vinyl coated jar wrench * Bubble popper/measurer (*see product description below for more information on each piece included).
Features:

Specs:
| Color | As Shown |
| Height | 10.25 Inches |
| Length | 3 Inches |
| Number of items | 1 |
| Size | One Size |
| Weight | 0.07 Pounds |
| Width | 1.25 Inches |
2. Granite Ware Enamel-on-Steel Canning Kit, 9-Piece
- 9-piece canning kit includes 21-quart canner, canner lid, 7-jar rack, 9-inch colander, lid wrench, funnel, tongs, jar lifter, and magnetic lid lifter
- Durable enamel-on-steel construction heats quickly and efficiently
- Side loop handles help ensure safe, secure transport; coated stay-cool tool handles
- Domed lid with loop handle helps trap in heat for faster boiling
- Safe to use on both gas and electric stovetops; hand wash
- Note: Do not use on glass cooktops (does not have a flat bottom)
Features:

Specs:
| Color | Black |
| Height | 10.5 Inches |
| Length | 15.5 Inches |
| Number of items | 1 |
| Size | 9 pc Set |
| Weight | 0.000625 Pounds |
| Width | 15.5 Inches |
3. Ball Home Canning Discovery Kit (by Jarden Home Brands)
Ball Home Canning Discovery Kit. Hardware MiscellaneousManufacturer: JARDEN HOME BRANDSManufacturer part number: 1440010790Introductory home canning kit eases a novice canner into it with a trail set that makes use of existing kitchenwareIncludes an illustrated, simplified instruction book with reci...

Specs:
| Height | 4 Inches |
| Length | 8.8 Inches |
| Number of items | 1 |
| Size | 1 EA |
| Weight | 2.5 Pounds |
| Width | 11.5 Inches |
4. Presto 09995 7 Function Canning Kit
- Funnel for filling regular and wide mouth canning jars
- Bubble remover for releasing trapped air bubbles
- Magnetic lid lifter removes canning lids from hot water
- Kitchen tongs for easy handling of hot foods for canning
- Jar lifter easily removes hot jars from canner Jar wrench helps to remove sticky screw bands
Features:

Specs:
| Color | Green |
| Height | 5.75 Inches |
| Length | 10.91 Inches |
| Number of items | 1 |
| Size | 6 - Pack |
| Weight | 0.5 Pounds |
| Width | 3.43 Inches |
5. Roots & Branches VKP1054 FruitSaver Aluminum Steam Canner with Temperature Indicator, 7 Quart Jar capacity, Silver
- NO GUESSWORK TIMING: The lid’s unique built-in Temperature Indicator eliminates guesswork – just start timing when the needle hits your elevation’s green zone
- TIME SAVER: Aluminum construction ensures quick heat-up and cool-down times. Smaller water requirements also ensure quicker processing. It cuts preheating time by 50% compared to water bath canning.
- RIGHT CAPACITY: Can process up to 7 quart or 8 pint jars of high-acid foods at one time. Note: will NOT accommodate half gallon jars.
- EASY AND SAFE: Lightweight design, lower water capacity requirement, and cool-touch handles. Uses 80% less water than traditional water bath canning.
- 5 YEAR WARRANTY
Features:

Specs:
| Color | Silver |
| Height | 11 Inches |
| Length | 13 Inches |
| Number of items | 1 |
| Release date | July 2011 |
| Size | 7 Quart Jar capacity |
| Weight | 3.1 Pounds |
| Width | 16.5 Inches |

7. Back to Basics Steam Canner - 400A (Discontinued by Manufacturer)
- This product is highly durable
- The product is manufactured in China
- The product is easy to use
Features:

Specs:
| Color | Silver |
| Height | 9.5 Inches |
| Length | 13 Inches |
| Number of items | 1 |
| Release date | July 2006 |
| Size | 7 quart |
| Weight | 4.2 pounds |
| Width | 13.25 Inches |
8. Ball Home Canning Basics Kit 11102
Includes: ceramic on steel canning jar rack, 6 pint jars 6 collection elite lid Ball" blue book canning guide jar lifter lid wand, canning funnel bubble "freer"Everything Needed To Begin Canning

Specs:
| Weight | 11.2 Pounds |
9. Farm to Table Jelly Strainer, 15" H, Silver
Use to strain jelly, jam, fruits or soupsSturdy metal stand with reusable nylon bagTwo piece strainer set including stand and filter bagFilter out unwanted food particles, such as seeds6.5 x 6.5 x 11.75 inchSturdy frame design.Ideal for soups, sauces, jams, and jelly making.Disassembles for storage.

Specs:
| Color | Silver |
| Height | 8.5 Inches |
| Length | 12.87 Inches |
| Number of items | 1 |
| Size | 15" H |
| Weight | 0.05 Pounds |
| Width | 7.25 Inches |
10. Ball Jar Collection Elite Stainless-Steel 21-Quart Waterbath Canner with Rack and Glass Lid (by Jarden Home Brands)
- 21-quart stainless-steel canner with chrome-plated rack fits up to 7 quart-size jars at a time
- Double-riveted, loop side handles encased in silicone for a safe, comfortable grip
- Tempered-glass lid with steam vents allows for viewing contents at a glance
- Safe for use on all stove tops (unlike waffle-bottom canners); cleans up easily by hand
- Measures approximately 17-2/5 by 13 by 9-2/3 inches
Features:

Specs:
| Color | Stainless Steel |
| Height | 9.7 Inches |
| Length | 17.4 Inches |
| Number of items | 1 |
| Size | 21-Quart |
| Weight | 0.4 Pounds |
| Width | 13.1 Inches |
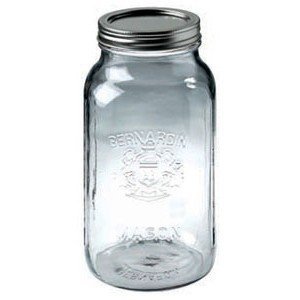
11. Bernardin Mason Jars - 1.9 L
These multi-use home canning mason jars have a traditional, rounded squarish shape for efficien...Pack of 6 mason jars and 6 2-piece lids (SNAP lids and screw bands)Capacity: 1.9 litre/64.2 ouncesColour/Pattern: Silver-tone lid and screw band
Specs:
| Color | Silver-tone lid and screw band |
| Size | 1.9 L, wide mouth (86 mm) |
12. Jaybird 1.5" Tri Clover CANNING JAR YEAST HARVESTER for Conical Fermenter
- Harvest yeast directly to a wide mouth canning jar - directly from your fermenter!
- 304 Stainless Steel, 1.5" Tri Clover connection
- (canning jar, tri clover clamp, tri clover gasket, tri clover cap not included in this version)
- See our Amazon store for complete yeast harvesting kits which include jar and tri clover attachment components
- Made in USA by NorCal Brewing Solutions
Features:

Specs:
| Color | Stainless Steel |
| Height | 1.5 Inches |
| Length | 4 Inches |
| Weight | 0.25 Pounds |
| Width | 4 Inches |
13. 10 Maple Syrup Tree Tapping Kit - 10 Taps + 2-Foot Drop Lines + Includes Sap Filter + Instructions
10 NEW 5/16'' diameter, 24'' long food grade drop linesMaple Tree Tapping instruction guide included [Copyright Kaito Ridge]10 NEW 5/16'' sustainable tree taps, produce less harm to trees than traditional metal spoutsCleanable and reusable, easy to use, made from durable food grade materialsInclude...

Specs:
| Size | 5/16'' diameter line x 24'' long |
14. Roots & Branches VKP1130 Harvest Stainless Steel Multi-Use Canner with Temperature Indicator, Holds 7 Quart Jars, 20 Quart Liquid Capacity
- USE ON ANY RANGE: Flat clad bottom for even heating on any cooktop, including induction ranges
- STEAM OR WATER BATH: Double-sided Stainless Steel Canning Rack lets you process by steam or water bath method
- NO GUESSWORK: Built-in Temperature Indicator in Tempered Glass Lid with 3 elevation zones makes timing easy
- GENEROUS CAPACITY: Handles 8 pint or 7 quart jars, or 20 quarts of liquid
- INCLUDES: Stainless steel canning rack
Features:

Specs:
| Color | Silver |
| Height | 11.5 Inches |
| Length | 13.1 Inches |
| Number of items | 1 |
| Size | Holds 7 Quart Jars, 20 Quart Liquid Capacity |
| Weight | 9 Pounds |
| Width | 17.5 Inches |
15. Le Parfait 3.75" Rubber Canning Rings / Gaskets, Set of 4
3.75" rubber canning rings
 ▼ Read Reddit mentions
16. Fagor Duo 10 Piece Stainless Steel Pressure Canning Set
Extremely versatile, pressure canning is the only safe method of preserving low-acid foodsCan and store your favorite preservative-free recipes at onceSave time in the kitchen while preparing healthful recipes with all-natural ingredients.Reduces cooking time by up to 70 percent. Fast cooking transl...

Specs:
| Color | Grey |
| Height | 9 Inches |
| Length | 10 Inches |
| Number of items | 1 |
| Size | 10 qt |
| Weight | 13.2 Pounds |
| Width | 10 Inches |
17. Mirro 9636000A Cushion-Coated Plated Steel Canning Jar Opener Cookware, Green
- Earth grown, canning jar opener
- Adds Extra shine to your product
- Manufactured in China
- Easily opens jars.
- Holds securely.
Features:

Specs:
| Color | Green |
| Height | 5 Inches |
| Length | 14.25 Inches |
| Number of items | 1 |
| Size | 4-1/4" L x 5" W x 14-1/4" H |
| Weight | 0.2 Pounds |
| Width | 4.25 Inches |
🎓 Reddit experts on canning kits
The comments and opinions expressed on this page are written exclusively by redditors. To provide you with the most relevant data, we sourced opinions from the most knowledgeable Reddit users based the total number of upvotes and downvotes received across comments on subreddits where canning kits are discussed. For your reference and for the sake of transparency, here are the specialists whose opinions mattered the most in our ranking.
Interested in what Redditors like? Check out our Shuffle feature
Shuffle: random products popular on RedditTop Reddit comments about Canning Kits:
Summary
1. Norpro Canning Essentials Boxed Set, 6 Piece Set
- A must have for the canning enthusiast and begginer alike!
- Six essential tools for canning and dehydrating.
- Conveniently all in one box!
- Capture summer fruit and vegetables at their prime for enjoyment throughout the year by canning at home.
- Includes: * Long tongs with green vinyl coated handles * Vinyl coated jar lifter * Magnetic lid lifter * Extra wide mouth funnel * Vinyl coated jar wrench * Bubble popper/measurer (*see product description below for more information on each piece included).
Features:
Specs:
| Color | As Shown |
| Height | 10.25 Inches |
| Length | 3 Inches |
| Number of items | 1 |
| Size | One Size |
| Weight | 0.07 Pounds |
| Width | 1.25 Inches |
2. Granite Ware Enamel-on-Steel Canning Kit, 9-Piece
- 9-piece canning kit includes 21-quart canner, canner lid, 7-jar rack, 9-inch colander, lid wrench, funnel, tongs, jar lifter, and magnetic lid lifter
- Durable enamel-on-steel construction heats quickly and efficiently
- Side loop handles help ensure safe, secure transport; coated stay-cool tool handles
- Domed lid with loop handle helps trap in heat for faster boiling
- Safe to use on both gas and electric stovetops; hand wash
- Note: Do not use on glass cooktops (does not have a flat bottom)
Features:
Specs:
| Color | Black |
| Height | 10.5 Inches |
| Length | 15.5 Inches |
| Number of items | 1 |
| Size | 9 pc Set |
| Weight | 0.000625 Pounds |
| Width | 15.5 Inches |
3. Ball Home Canning Discovery Kit (by Jarden Home Brands)
Ball Home Canning Discovery Kit. Hardware MiscellaneousManufacturer: JARDEN HOME BRANDSManufacturer part number: 1440010790Introductory home canning kit eases a novice canner into it with a trail set that makes use of existing kitchenwareIncludes an illustrated, simplified instruction book with reci...
Specs:
| Height | 4 Inches |
| Length | 8.8 Inches |
| Number of items | 1 |
| Size | 1 EA |
| Weight | 2.5 Pounds |
| Width | 11.5 Inches |
4. Presto 09995 7 Function Canning Kit
- Funnel for filling regular and wide mouth canning jars
- Bubble remover for releasing trapped air bubbles
- Magnetic lid lifter removes canning lids from hot water
- Kitchen tongs for easy handling of hot foods for canning
- Jar lifter easily removes hot jars from canner Jar wrench helps to remove sticky screw bands
Features:
Specs:
| Color | Green |
| Height | 5.75 Inches |
| Length | 10.91 Inches |
| Number of items | 1 |
| Size | 6 - Pack |
| Weight | 0.5 Pounds |
| Width | 3.43 Inches |
5. Roots & Branches VKP1054 FruitSaver Aluminum Steam Canner with Temperature Indicator, 7 Quart Jar capacity, Silver
- NO GUESSWORK TIMING: The lid’s unique built-in Temperature Indicator eliminates guesswork – just start timing when the needle hits your elevation’s green zone
- TIME SAVER: Aluminum construction ensures quick heat-up and cool-down times. Smaller water requirements also ensure quicker processing. It cuts preheating time by 50% compared to water bath canning.
- RIGHT CAPACITY: Can process up to 7 quart or 8 pint jars of high-acid foods at one time. Note: will NOT accommodate half gallon jars.
- EASY AND SAFE: Lightweight design, lower water capacity requirement, and cool-touch handles. Uses 80% less water than traditional water bath canning.
- 5 YEAR WARRANTY
Features:
Specs:
| Color | Silver |
| Height | 11 Inches |
| Length | 13 Inches |
| Number of items | 1 |
| Release date | July 2011 |
| Size | 7 Quart Jar capacity |
| Weight | 3.1 Pounds |
| Width | 16.5 Inches |
7. Back to Basics Steam Canner - 400A (Discontinued by Manufacturer)
- This product is highly durable
- The product is manufactured in China
- The product is easy to use
Features:
Specs:
| Color | Silver |
| Height | 9.5 Inches |
| Length | 13 Inches |
| Number of items | 1 |
| Release date | July 2006 |
| Size | 7 quart |
| Weight | 4.2 pounds |
| Width | 13.25 Inches |
8. Ball Home Canning Basics Kit 11102
Includes: ceramic on steel canning jar rack, 6 pint jars 6 collection elite lid Ball" blue book canning guide jar lifter lid wand, canning funnel bubble "freer"Everything Needed To Begin Canning
Specs:
| Weight | 11.2 Pounds |
9. Farm to Table Jelly Strainer, 15" H, Silver
Use to strain jelly, jam, fruits or soupsSturdy metal stand with reusable nylon bagTwo piece strainer set including stand and filter bagFilter out unwanted food particles, such as seeds6.5 x 6.5 x 11.75 inchSturdy frame design.Ideal for soups, sauces, jams, and jelly making.Disassembles for storage.
Specs:
| Color | Silver |
| Height | 8.5 Inches |
| Length | 12.87 Inches |
| Number of items | 1 |
| Size | 15" H |
| Weight | 0.05 Pounds |
| Width | 7.25 Inches |
10. Ball Jar Collection Elite Stainless-Steel 21-Quart Waterbath Canner with Rack and Glass Lid (by Jarden Home Brands)
- 21-quart stainless-steel canner with chrome-plated rack fits up to 7 quart-size jars at a time
- Double-riveted, loop side handles encased in silicone for a safe, comfortable grip
- Tempered-glass lid with steam vents allows for viewing contents at a glance
- Safe for use on all stove tops (unlike waffle-bottom canners); cleans up easily by hand
- Measures approximately 17-2/5 by 13 by 9-2/3 inches
Features:
Specs:
| Color | Stainless Steel |
| Height | 9.7 Inches |
| Length | 17.4 Inches |
| Number of items | 1 |
| Size | 21-Quart |
| Weight | 0.4 Pounds |
| Width | 13.1 Inches |
11. Bernardin Mason Jars - 1.9 L
These multi-use home canning mason jars have a traditional, rounded squarish shape for efficien...Pack of 6 mason jars and 6 2-piece lids (SNAP lids and screw bands)Capacity: 1.9 litre/64.2 ouncesColour/Pattern: Silver-tone lid and screw band
Specs:
| Color | Silver-tone lid and screw band |
| Size | 1.9 L, wide mouth (86 mm) |
12. Jaybird 1.5" Tri Clover CANNING JAR YEAST HARVESTER for Conical Fermenter
- Harvest yeast directly to a wide mouth canning jar - directly from your fermenter!
- 304 Stainless Steel, 1.5" Tri Clover connection
- (canning jar, tri clover clamp, tri clover gasket, tri clover cap not included in this version)
- See our Amazon store for complete yeast harvesting kits which include jar and tri clover attachment components
- Made in USA by NorCal Brewing Solutions
Features:
Specs:
| Color | Stainless Steel |
| Height | 1.5 Inches |
| Length | 4 Inches |
| Weight | 0.25 Pounds |
| Width | 4 Inches |
13. 10 Maple Syrup Tree Tapping Kit - 10 Taps + 2-Foot Drop Lines + Includes Sap Filter + Instructions
10 NEW 5/16'' diameter, 24'' long food grade drop linesMaple Tree Tapping instruction guide included [Copyright Kaito Ridge]10 NEW 5/16'' sustainable tree taps, produce less harm to trees than traditional metal spoutsCleanable and reusable, easy to use, made from durable food grade materialsInclude...
Specs:
| Size | 5/16'' diameter line x 24'' long |
14. Roots & Branches VKP1130 Harvest Stainless Steel Multi-Use Canner with Temperature Indicator, Holds 7 Quart Jars, 20 Quart Liquid Capacity
- USE ON ANY RANGE: Flat clad bottom for even heating on any cooktop, including induction ranges
- STEAM OR WATER BATH: Double-sided Stainless Steel Canning Rack lets you process by steam or water bath method
- NO GUESSWORK: Built-in Temperature Indicator in Tempered Glass Lid with 3 elevation zones makes timing easy
- GENEROUS CAPACITY: Handles 8 pint or 7 quart jars, or 20 quarts of liquid
- INCLUDES: Stainless steel canning rack
Features:
Specs:
| Color | Silver |
| Height | 11.5 Inches |
| Length | 13.1 Inches |
| Number of items | 1 |
| Size | Holds 7 Quart Jars, 20 Quart Liquid Capacity |
| Weight | 9 Pounds |
| Width | 17.5 Inches |
15. Le Parfait 3.75" Rubber Canning Rings / Gaskets, Set of 4
3.75" rubber canning rings
▼ Read Reddit mentions16. Fagor Duo 10 Piece Stainless Steel Pressure Canning Set
Extremely versatile, pressure canning is the only safe method of preserving low-acid foodsCan and store your favorite preservative-free recipes at onceSave time in the kitchen while preparing healthful recipes with all-natural ingredients.Reduces cooking time by up to 70 percent. Fast cooking transl...
Specs:
| Color | Grey |
| Height | 9 Inches |
| Length | 10 Inches |
| Number of items | 1 |
| Size | 10 qt |
| Weight | 13.2 Pounds |
| Width | 10 Inches |
17. Mirro 9636000A Cushion-Coated Plated Steel Canning Jar Opener Cookware, Green
- Earth grown, canning jar opener
- Adds Extra shine to your product
- Manufactured in China
- Easily opens jars.
- Holds securely.
Features:
Specs:
| Color | Green |
| Height | 5 Inches |
| Length | 14.25 Inches |
| Number of items | 1 |
| Size | 4-1/4" L x 5" W x 14-1/4" H |
| Weight | 0.2 Pounds |
| Width | 4.25 Inches |
TL;DR: pear butter recipe and canning instructions, and equipment list.
Make pear sauce. Basically cut the pears up, have a pan going to heat them up until they're soft and use an immersion blender or blender or food processor to pulverize it. You can use most of the pear, cut out the rotten stuff, and anything else that's nasty.
Fill your crockpot up with water, measure how much it takes to fill it up. Now, take a 1 cup measuring cup and measure with a ruler what the water level is after removing each cup. That's the technical way to do it, it can take a while to do it. Why you're doing this is because you're cooking your butter down to half it's volume. So if you start out with 14 cups of pear sauce, you'll want to end up with 7 cups of pear butter. If you know what the different levels are, it makes it a lot easier. Crock-Pot walls aren't straight, that's why you use the water to measure it.
Stir 2 tsp cinnamon and 1/2 tsp ginger (I usually double or triple, or more, the cinnamon and ginger) into some sugar (like 1/4 or 1/3 cup), then mix it into the pearsauce. Using the sugar keeps the spices from sticking together in clumps when added to the fruit. Start with the crock on LOW if it will be going overnight, or on HIGH if you are starting in the morning and will be around to stir the sauce. Remember, you DON'T USE THE LID on the crock pot. Depending on your pears, you might need to add more sugar, but usually not. I think this normally is what I put in about 20ish cups of sauce.. I honestly can't remember. I just put "enough" in, and I've never had to much. It's a taste thing, I like stronger cinnamon and ginger flavor.
Pull out enough foil to go completely around the crockpot, plus enough to join the two ends together by folding them over together a few times. The bottom of this collar will be crimped around the rim of the crock so the rest of it sticks up about 10" above the crock, which should give enough protection from splatting that will happen later as the sauce thickens into butter. When the sauce is first cooking, I often put some creases in the collar to make the hole at the top somewhat smaller to keep more heat in, maybe a 5-6" opening. Just open it up when you need to stir & scrape edge, then close it up a bit. The longer the sauce cooks, the more often you will need to scrape the sides & stir. I usually just stir the thickened stuff from around the rim back into the rest, unless it goes too long & smells scorched. If you scorch it, just be careful not to scrape it off into the butter.
The total time will depend on 3 things: the juiciness of your pears, how long you cook on LOW vs HIGH, and how thick you like your pear butter. As a rule of thumb, plan on cooking the sauce down to about half of the starting amount, but check the consistency before that & stop when you like it. You can put a tablespoon full on a saucer and put it in the freezer for a few minutes to chill it, as it thickens up somewhat when cooled.
I usually plan on 12 to 18 hours total cooking time, with maybe 8 of that on LOW. If you are doing it only in the daytime & have it on HIGH the whole time, it could be faster. IF you get it cooked down to the right consistency but can't can it immediately, you can take the collar off, stir well, put the LID ON and set on LOW or KEEP WARM till you are ready.
Water bath canning is the way to go, processing for 10 minutes for either pints or half-pints. Headroom on the jars should be 1/2".
This is the same recipe I use for Apple butter, sometimes you need to add some more sugar. It depends on what kind of apples you use. Also, the pear butter will get very brown by the end, that's ok.
For the water bath canning. It's super easy. Get a water bath canner. It's basically a big pot with a rack in it. Walmart should have it, Amazon, garage sales, or little hardware stores (like ace, do it best, etc). It should be about $20 if you buy it new.
For fruit butters, pint jars are best, but it's a preference thing. If you want to give them away as gifts, maybe use the 6oz jelly jars. It's up to you. Ball is the gold standard. Again, Walmart, Amazon, the same hardware stores as the canner. They're usually significantly cheaper at garage sales. The jars and rings are reusable, lids are not.
Fill your water-bath with enough water to cover your jars by about an inch. Submerge the empty jars and heat up the water. I like to use hot water to fill the canner, cause it takes a little less time to get it to boil. Once it's boiling set a timer for 10 minutes and keep it boiling. Do the same for your lids, but in a small saucepan.
Once it's boiling, remove your jars and dump out the water that's in them. Put the jars on the counter, I put a towel down, and a wire cooling wrack on top of that. There's a few tools that you can get that help with this. )I'll post Amazon links at the bottom of this.) Fill the jars with the hot pear butter with 1/2" headspace (this means 1/2" from the rim). Minimize air bubbles, you can use a clean spoon to stir the air bubbles out out. Take a damp paper towel and wipe any butter off the rim Place a sterilized lid on each jar, put a ring on, hand tight. Place filled jars back into water bath.
Bring water back back up to boil and let boil for 10 minutes. Remove jars from canner and place back onto the cooling wrack. Once they're cool, check to make sure they're all sealed by seeing if the lids pop. This is the button, like on pickle jars, when they're unsealed it sounds like a clicker, when they're sealed, they're pulled down. They may seal right when you take them out of the canner, you'll hear them pop, some may take a few minutes though. If they're sealed, you can take the rings off, and they are shelf stable (we've had stuff still good over a year later). If any aren't sealed, just put them in the fridge once cooled off and eat it first.
It's not that hard to do, I'm just trying to be detailed.
Now for the promised links.
Ball Blue Book Guide To Preserving, 37Th Edition https://www.amazon.com/dp/B00OEJZSNW/ref=cm_sw_r_cp_apa_i_905HDbGDP5GWY
This is basically a canning Bible, it's a good resource if you're wanting to learn more about canning. Lots of recipes. It's important to get your recipes from official sources, usually you don't want to get recipes from random strangers off the internet until you know what is normal. You don't want to put yourself into a situation where you process something in an unsafe manner. I can tell you that the Apple/pear butter recipe I gave you is safe, and can be compared to other official ones if you want to independently verify it.
Tools:
Granite Ware Enamel-on-Steel Canning Kit, 9-Piece https://www.amazon.com/dp/B002KHN602/ref=cm_sw_r_cp_apa_i_945HDb278TD1T
Ball 40801 Golden Harvest Mason Regular Mouth 8oz Jelly Jar 12PK 'Vintage Fruit Design', RM 8 Oz, Clear https://www.amazon.com/dp/B00YCX4SJ0/ref=cm_sw_r_cp_apa_i_I55HDbM3YGXNN
Norpro Canning Essentials Boxed Set, 6 Piece Set https://www.amazon.com/dp/B0000DDVMH/ref=cm_sw_r_cp_apa_i_d65HDbNK2VGJX
Out of the "essentials kit" really the funnel and jar grabber tongs is the only thing that you'll need.
If you have any other questions, feel free to pm me or ask on this post. My wife and I have taught a lot of people how to can a lot of different things, it's a skill we really enjoy passing on.
Also, if you buy jars new, they usually come with rings and lids. If you do this again next year and are buying new lids, just make sure you are paying attention to whether or not your jars are "wide mouth" or "regular mouth" those are the two standard lid sizes.
I’d suggest investing in a nice sofa bed, so you can fold it up when you have guests or if you’re feeling a bit claustrophobic and want to have a bit more room. I have this muji one which is very comfy and bigger than my normal bed when unfolded: https://www.muji.eu/pages/online.asp?Sec=19&Sub=82&PID=5266&qclr=5055321399161
For the tv, could you mount it on the wall? Always good to save floor space wherever possible. Also get a chromecast if possible, honestly just cause it’s great haha; can use tv as a speaker if you have Spotify, can watch YouTube on it, watch films etc.
I’d also suggest investing in one good pan that works as a pot too, something wide with tall rims, perfect for basically everything, frying as well as pasta etc. I did so for several years when I only had a hotplate, something like this: https://www.amazon.co.uk/dp/B0026OSRSU. Will save a lot of space.
Also, in the kitchen, consider getting matching spice jars and putting them on the shelves; it’ll remove much of the busy look that regular spice packets have, like this: https://www.amazon.co.uk/dp/B07KM8971W. And also get a big chopping board to use on top of the sink, I’ve seen a bunch of youtubers who live in Japan doing that.
Of course, plants, hanging from the ceiling would be best to save on floor space. A window basket with some trailing plants (maybe English ivy if available?) would be nice on the balcony too.
I’d also get a foldable table and chairs for the balcony to make it like a cute lil outdoor living space when the weather is nice enough, but suitable for inside too, something like this: https://www.ikea.com/gb/en/p/saltholmen-table-2-folding-chairs-outdoor-beige-s29218107/.
Maybe a low small table would be good inside as well, to act as both a bedside table and coffeetable for the sofa bed. I’d also suggest getting a little cable tidy system, clear up the clutter as much as poss, like this: https://www.ikea.com/gb/en/p/romma-cable-management-box-with-lid-white-90289836/
Honestly think just a sofa bed and the foldable chairs & table will be pretty much all the furniture you need. If it’s not nice outside, you can bring the table & chairs inside, and if they’re weatherproof they can be stored outside to keep maximum floor space. And you can always eat dinner on your lap on a sofa bed! Though it does depend how many clothes you have, if they don’t all fit in the inbuilt cupboards then perhaps a clothes rail, which generally looks p nice and minimalist anywhere imo, perhaps could even fit in the hallway if preferred.
Wow that was an essay holy f.
I'd highly recommend a canning book from a reputable source, for instance the Ball Blue Book or Ball Complete Book of Home Preserving are some very, very good places to start. I'd also recommend starting with water bath canning, and after you're comfortable with the mechanics venturing into pressure canning if you feel like it. Until you are very confident, don't deviate from the recipes at all. No extra ingredients, no halving or doubling recipes (especially jam, pectin's a finicky thing), and no subbing different sized jars. Once you get the hang of it, you can start to fudge a little bit, but at first I'd definitely play it safe and stick straight to the recipe; this is more fussy than regular cooking. Water bath canning is only for high-acid foods, and even tomato sauce recipes for canning require extra lemon juice, so definitely follow your recipe.
As far as equipment, technically all you really need are a pot to hold the jars as they boil, something to pull the hot jars out of the water with, and some kind of rack to keep them off the bottom of the pot (extra canning rings placed along the bottom, a cake rack, whatever works). Nothing else is technically needed, though I tried this method with just the extra rings and with spring-loaded tongs and made quite a mess, then immediately sprung for some toys.
I'd recommend this kit, the polypropolene basket doesn't melt even during long canning sessions and it's small enough to use in an eight or ten quart pot, which a lot of people already have at home. To make sure your pot's big enough, put a jar in the pot and make sure it could be covered with at least an inch or two of water. Taller pots are obviously more helpful than lower, wider ones. The kit comes with three jars, which is okay, and the recipe book it comes with scales down a lot of their most popular recipes so you can just make a few jars to test them out.
I'd also recommend a canning funnel, and a jar lifter. Something to measure headspace is also handy, there's a little plastic doohickey for that (looks like this) but if you don't mind keeping a plastic ruler around, it's not required. A set like this would definitely cover all your bases.
Keep in mind that while the jars and rings are reusable, the lids with the sealing compounds are not. If you feel a canning binge come on, be sure to buy an extra little box of just the lids because you'll be upset if you run out!
Good luck!! I'm still a novice canner myself, and I've only ever done water bath canning, but I've already got taco sauce, jams, jellies, pickles and canned fruit (I love canning pears!) under my belt so I've got at least a little bit of a clue!
When you say "both methods," I'm going to assume you mean water bath canning and pressure canning. So step one is to make sure that you truly want to pressure can, since you need a dedicated pressure canner for that and they aren't super inexpensive. Pressure canning is necessary to preserve most vegetables that aren't pickled in vinegar, as well as meats. Anything with a lower pH, that isn't acidic enough to water bath can. This is because a pressure canner gets hotter than 212degF, so it cans things that are unsafe at that lower temperature.
If you want to start with shelf-stable pickled things, or jams, jellies, or other preparations of fruits, those only require a water bath canner.
My recommendation would be to get one of the water bath canning kits, and start there. One option here on Amazon if you're in the US. I don't know the quality of that kit, but truthfully it isn't a big deal. Other than the pot and rack, most of the items (jar lifter, funnel, magnetic lid lifter, etc.) are of the "this makes your life easier" variety. It is possible to use a folded up towel to pad the bottom of the pot instead of a rack. Any pot deep enough to cover the jars + 2" or so of water can be used. Jar lifter just keeps your hands away from hot water, and tongs or a silicon oven mitt might work too. Magnetic lid lifter gets lids out of simmering water and puts them on the jars. Tongs work too. However, the actual tools all work better, and can also be used in pressure canning.
My other suggestion is to start small. Do NOT try to make a giant batch of 7 or more pints of something, because the volume just makes things harder.
Decide what interests you most- the fun and ability to make really special recipes that you couldn't buy, or the ability to make and store things at lower cost than you can purchase. (For most of us it's a little of both, but usually, you lean one way or the other.) I personally live in a small apartment and enjoy cooking, so I don't have the space to store huge amounts of food, and taste is more important to me than price (within reason of course.) So the sources that you're going to pull recipes depend largely on what you are interested in.
Do you have a favorite food? Something you've been dying to can? Maybe we can point you to a good beginner recipe for that item. :)
Depends on the food item and your infrastructure.
Drying is good for a lot of fruits and for herbs and such.
Cold storage. We have multiple freezers. A stand up 23 cu ft, a 19 cu ft chest plus the regular fridge freezer and the freezer on the back/beer fridge in basement. We have been buying half pigs and half or 1/4 cows for the freezers and we freeze a lot of vegetables. Sweet corn does really well frozen, so do a lot of the squashes and green beans.
Canning. Canning does quite a lot of foods. There are two types, pressure canning and water bath canning. The water bath canning is for high acid, high sugar, low risk foods like jellies and most tomato sauces if prepared correctly. Pickling is also usually water bath. All the low acid, higher risk stuff goes in a pressure canning systems.
Root cellar storage. Cool/cold room storage. If you have access to the right conditions, this is a great way to store lots of stuff like potatoes, carrots, beets, etc.
Some sources to get you started:
The starter book that is indispensable for canners: Ball blue book
The more advanced Ball full book
You can find either one at a book store, online, or at most used book stores.
USDA site has a lot of info. You want tried and tested recipes and methods. Botulism sucks. https://nchfp.uga.edu/publications/publications_usda.html
Purdue University has a really good set of links and add ons to the USDA guides as well. https://www.extension.purdue.edu/usdacanning/
You can also search the (food item, canning, extension) and there is probably a state agricultural extension that has some guide for it.
NDSU has a good guide for freezing stuff. It will get you started. Each food item will have specifics to getting a good freeze. Some things need blanched and some don't. Some need to be pre-frozen spread out on cookie sheets then dumped in a bag and some don't, etc.
Interesting root cellar idea that can be done fairly cheap. https://www.motherearthnews.com/real-food/root-cellaring/a-precast-septic-tank-root-cellar-zbcz1503
Root cellar list of what to store and what conditions. https://extension2.missouri.edu/mp562
Best way to get started: get a big ass boiler and a couple of dozens of pint mason jars and a couple of dozens of 1/2 pint mason jars. Start with a couple of batches of different pickles/pickled vegetables. Make a batch or two of jams and jellies. If you get a couple dozen wide mouth jars you can practice a little freezing as well. The idea is to build up your equipment.
For a full canning rig you need all kinds of stuff and if you really get into it usually large stuff. Like the ginormous pressure cooker that holds a goodly number of quarts or two full courses of pint jars in it. something like this guy. But you can start with whatever you have available. If you do the water bath stuff and start to get into it and want to get into pressure canning you should get a larger pressure canner that will do at least 6 quarts at a time. We have a medium one that we can do a limited batch of stuff in, or one round of jars and then a huge one like I linked to. Just slowly build up your equipment as you can and get the best quality you can when you buy stuff. If you try and do the I will buy the cheap one, and see if I like it, it costs you more. Usually the cheap one is crappy and wont do a good job. And you will either decide it is not worth the trouble or will eventually realize the quality one is worth the money and buy it anyway.
Get a good set of tools. You can can without them, but shouldn't. Decent set with the basic pieces.
I also find that a pair of the latex coated gloves are helpful. We have one person pull jars form the hiow water bath (keeping them sterile) and the second person will put the funnel in and spoon the food into the jar. You have to wipe the top of the jar and place a heated lid on it and screw the top onto the jar. The jar will be close to 200F. I will be the jar person and wear the heavy latex coated glove on my left hand to hold the jar stable and to screw the lid on so I don't get burned. Never have seen anyone give the tip before, but it works really well and I have less burnt fingers and fewer spills or dropped jars that way. Something like this.
Hi! The easiest way to get started canning is to read over the National Center for Home Food Preservation's site (they even offer a self-study program you can do at home!) or the Ball Complete Book of Home Preserving . It's VERY important to know what you are doing when you are canning, as while canning is easy, you can also improperly can items, which can lead to botulism, which can make you very sick and can kill you.
Water bath canning is a great for getting your feet wet in the canning world (ha ha! Feet wet. Water bath. I slay me). Water baths are for items like fruit and tomato products. All you need for this is a pot tall enough to cover the canning jars that sit on a towel or some kind of rack with 2 inches of water and a lid for the pot. I use a stock pot, and when I went to buy it I took along a jar and measured it in the pot to make sure I was getting the right size. Then you need jars, lids, and rings. If you get the jars new in a box, they come with the lids and rings.
If your budget can swing it, or if someone else would like to go in on it with you, a canning kit is really nice to have. It makes canning a lot easier and less frustrating.
When your sister has gotten the swing of water bath canning, and if she wants to try canning meat or vegetables, your family might be interested in getting her a pressure canner for the holidays. The nice thing about a pressure canner is that it can also be used as a water bath canner.
If you get her the Presto canner linked above, get the three piece weight to replace the mushroom looking weight. This way she won't have to relay on the dial gauge (which can be unreliable), all she has to do is listen for the steam escaping and the rocking.
I got this canning gear kit off Amazon. I think it has the measure thing. I'm thinking that because I used fresh tomatoes that I didn't steam and peel, the filled the can artificially high.
Still learning but I've been getting amazing advice from everyone great, you all are great!! ❤️
Nope, it's actually very easy once you are familiar with the process. You just have to make sure that you stick to all of the appropriate safety procedures. Also, you do need some special equipment. If you have a nice big pot, all you will need is a set like this, and a pack of mason jars.
Canning can be really fun, and people always seem impressed when you give them preserves that you made at home.
I don't know if this counts as a homesteading book, but I don't own any specific books for that topic. I find this book to be quite useful after a crop yield.
http://www.amazon.com/You-Can-Step---Step-Preserving/dp/0470607564/ref=sr_1_10?s=books&ie=UTF8&qid=1318988013&sr=1-10
and I use it with this steam canner:
http://www.amazon.com/Back-Basics-400A-7-Quart-Aluminum/dp/B0000DDUCJ/ref=sr_1_1?ie=UTF8&qid=1318988173&sr=8-1
I keep seeing some lovely looking books advertised in Urban Farm and Hobby Farm Magazines, but I don't have the extra money or time yet.
I currently have four chickens, compost, a 9X27 veggie patch, and am making plans for rabbits and aquaponics. Most of my information comes from family and the internet.
Good luck.
Thanks for the contest :D
I use a steam canner and love it! It's way faster than when I tried waterbath canning and I haven't had any problems. It's also super fast for doing multiple batches in a row.
That said, they are not expensive, so if you're interested, just buy one. Mine has a gauge on top that tells me when it's safe to start timing, so I wouldn't' want to diy it. This is mine: https://www.amazon.com/Aluminum-Temperature-Indicator-VICTORIO-VKP1054/dp/B0058SSUV0/ref=pd_sbs_79_1?_encoding=UTF8&pd_rd_i=B0058SSUV0&pd_rd_r=59225c0d-af18-11e8-ad5d-f9d1f1abea37&pd_rd_w=dBe9U&pd_rd_wg=nia5l&pf_rd_i=desktop-dp-sims&pf_rd_m=ATVPDKIKX0DER&pf_rd_p=0bb14103-7f67-4c21-9b0b-31f42dc047e7&pf_rd_r=FK1SR8MDDNGXJDJM7P4J&pf_rd_s=desktop-dp-sims&pf_rd_t=40701&psc=1&refRID=FK1SR8MDDNGXJDJM7P4J
Here are all the things you need to know to start canning foods at home.
Canning Basics
Only Pressure Canning is recommended by the USDA for home canning of Meats or Vegetables. I recommend this large capacity pressure canner
Fruits, Jams and Jellies, Tomatoes and Salsas can be Water Bath Canned in most cases. This is a nice kit to get started with from Jarden
Ignore the steam canner, microwave canner, open water bath kettle, and any "reusable" canning lids---these are all a quick way to discover food poisoning.
Buy standard canning jars at garage sales and thrift stores---I like the wide mouth jars best. I also run an ad on craigslist offering to buy jars when I need them. I pay $2.50 per dozen for the pint size and $4.00 a dozen for the quart size. Carefully check each jar's rim to make sure there are no flaws or chips. (Always store empty jars with rings on them to avoid getting chips.) New jars with lids and rings are available in most grocery stores for $9-$14 per dozen. Buy brand name jars only---this is not a time to use cheap knock offs. Each jar should be clearly imprinted Ball, Mason or Kerr. There are many brands of vintage jars and all of those should be fine as long as the rim is sound. Save the boxes and dividers that come with new jars and use them to store the finished products.
Always use new canning lids Never reuse this part!
Remember, you don't have to grow a garden to benefit from home canning--now is a great time to buy produce while it's cheap!
Today's Buy of the Day: 12 ounce bags organic green beans-already trimmed and washed at 2/$1.00 = 24 quarts of green beans with bacon and shitaki mushrooms(33 cents a pack!) now in the pantry for about 50 cents per quart!
To get her started, I would get her a book like this one, and depending on her stove top a water bath canner for gas/electric or flat top, also this set, and don't forget the jars. There are probably other stores than Amazon to buy these things, I usually get great deals at Ace hardware. There are some other great books out there, and depending on what she is interested in, a pressure canner is a big one too.
Kind of expensive, but I got a steam canner last year, and it has revolutionized my canning process. So much faster, easier to use and operate. Uses less water. Integrated thermometer.
https://www.amazon.com/dp/B0058SSUV0/
Edit: Wow. I paid almost $60 for it, and now it's under $40.
The cash layout for equipment to get started is pretty small if you're not getting a pressure canner (I've been canning for years and I'm just now thinking about getting a pressure canner). If you get one of these, you don't even need to buy a canner as long as you have a deep stock pot. It's also really common to find canning equipment at Goodwill or garage sales.
I'm a big fan of jalapeno jelly and tomato raisin chutney. Both are really tasty and versatile, so we eat them a lot, and also really impressive for taking to parties as an appetizer with some cream cheese and crackers.
Edit: Kind of a long shot, but are you comfortable saying what area you live in? I'm planning to replace my canner with a larger one this month. If you're in the Portland, OR area you can have the old one. I think shipping it would probably cost more than buying a new one locally if you're not close.
I've actually made several improvements to my technique, I almost need to make a new tutorial. Now I use a jelly strainer and then let it sit for like 30 mins and drip, while pressing down with a spoon every so often. Then place the whole thing into the ricer.
IME no ricer is strong enough to withstand the amount of squeezing necessary to get all/most of the oil separated. I've actually gone through 3 potato ricers haha they just get all bent and mangled so be gentle haha. That's why I let the oil mostly drip out first, to minimize the amount of squeezing necessary.
Bummer about the salsa. If you grow/make that kind of stuff regularly, canning is great next step. You can water bath can in any lidded pot deep enough to cover the jars with an inch of boiling water when they are sitting on a wire rack/trivet, but the dedicated pot and equipment are worthwhile.
For the marmalade, I think you need to heat it all through adding a bit of extra water, laddle it into sterilized canning jars, then process according to the Table 1 here (depending on your altitude).
You can get a cheap canning kit: https://www.amazon.com/Presto-09995-Function-Canning-Kit/dp/B001V9K8A6
It will save fingers and faces :)
Then a cheap stainless funnel set up: https://www.amazon.com/Norpro-Stainless-Steel-Funnels-Set/dp/B000FKERMW which I boil while managing the bottles.
So like a total of $22 bucks.
We use a Ball 21 quart on our glass top and it is fantastic. Fits about 7 quart jars (depending on wide-mouth / narrow-mouth). We love it. It was a bit pricey, but totally worth it to speed things up when canning big batches.
We also sprung for the stainless steel jar rack, since the standard ones always tend to rust at the welds after a couple of months of use.
I’m pretty sure I know this one! If I’m right, this is a tap to a maple tree or just to its sap. Many people would make a small hole into the tree to extract it, but not at the bottom, it always had to be a bit near the middle where there would be a higher concentration of sap. In more efficient ways, people would install a line from the tree to a collection device, my guess is that someone had a line set up before, but discarded it, or that the line is still in use, but is connected somewhere else.
https://www.amazon.com/Maple-Syrup-Tree-Tapping-Kit/dp/B00B5579E4.
Here is a kit on a more recent tap for a maple tree, but people also collect sap from trees as well.
http://www.amazon.com/gp/product/B002KHN602/ref=oh_aui_detailpage_o01_s00?ie=UTF8&psc=1 Cheapest set that I could find. I have it and have used it once. Seems pretty good for the price.
She's describing a water bath canner — a lot of things can be canned this way (it's the only kind of canning I've ever done).
Some things (low acid, like meats/stews) require a pressure canner to be canned safely.
For water bath canning, Ball makes a starter kit that has a lot of the tools/gadgets (funnel, tongs, a cheesy plastic rack), and it comes with some jars and a recipe book. I've seen it at Wal Mart. I started with this, and soon realized I wanted to can more than 3 jars at once, so bought a big stockpot and a round cake rack, like she describes.
Hey, thanks again! Found six packs of 1.9L (2qt) jars at Co-Op for $18.50. Standard wide mouth mason lid size, which is exactly what I was looking for.
(Mushroom enthusiasts be advised, there is a taper on jars this size in order for standard lids to fit.)
It is a lot of money for a water bath canner with limited capacity. Ball sells a small batch kit with a little basket and canning tools for under twenty bucks. It fits in a regular stockpot and comes with a few jars and tools. If the automatic one also did pressure canning recipes I could possibly see it being an ok purchase, but all the stuff I've read makes it out to be a glorified water bath canner.
http://www.amazon.com/gp/aw/d/B003ENB1KI?pc_redir=1408853157&robot_redir=1
In general, stainless sinks temperature much faster than plastic. I had a problem with my stainless cone getting too cold in the garage during the winter, where as my plastic cone was able to do a better job at holding temperature during primary.
The bottom dump is useful for:
One of the nice things about stainless cones is that you can re-set them up in a bunch of different ways. I converted my SS 1/2BBL to do spunding and also cold crash under pressure.
Right. The steam condenses on the jars, and the please change dumps a lot of heat into them. I have a steam canner (a stainless Victorio) and I'm in love with it. Any pot should work, but having a thermometer removes any guesswork.
The beginning of my canning kit. I know its not everything I need, but its a start...and I want to make strawberry jam while they're in season!! BINGO!
get some canning rings http://www.amazon.com/Parfait-Rubber-Canning-Rings-Gaskets/dp/B002GK1SDK
cut them in small pieces and put a hole in it. like this
http://www.abload.de/image.php?img=dscf0734v8rh.jpg
Et voila, silence. I use red switches thou.
Is this what you'd recommend?
> I wouldn't have a clue where to get the equipment
All you need is a really large pot, either with a removable tray or large tongs, and a bunch of jars. Walmart and Target both sell mason jars and canning pots, even in major cities. And of course there's always amazon.
I had the same problem with a filter a few years ago. Did you try using something like this?