Reddit mentions: The best threading taps
We found 43 Reddit comments discussing the best threading taps. We ran sentiment analysis on each of these comments to determine how redditors feel about different products. We found 35 products and ranked them based on the amount of positive reactions they received. Here are the top 20.
1. M7 x 0.5 Metric HSS Right Hand Tap with 6.5mm Drill Bit
- M7 x 0.5 HSS right hand thread tap with 6.5mm HSS drill bit
Features:

Specs:
| Weight | 0.0220462262 Pounds |
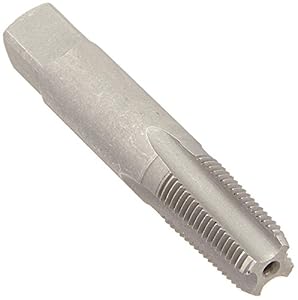
2. Vermont American 20371 1/8-27 NPT High Carbon Steel Pipe Tap
- Manufacturer: Vermont American
- Country of manufacture: China
- Power Cutting & Sawing
Features:
Specs:
| Color | Silver |
| Height | 0 Inches |
| Length | 0 Inches |
| Weight | 0.03 Pounds |
| Width | 0 Inches |
| Number of items | 1 |
3. Century Drill & Tool 95002 High Carbon Steel Fractional Plug Tap, 4-40 NC
- High carbon steel machine screw tap
- Precision cut threads for accurate threading.
- 1" hex across flats.
Features:
Specs:
| Color | steel |
| Height | 0.089 Inches |
| Length | 1.875 Inches |
| Weight | 0.01 Pounds |
| Width | 0.089 Inches |
| Size | 4-40 NC |
| Number of items | 1 |
4. LALANG 1/4'' Hex HSS High Speed Steel Thread Spiral Screw M3 M4 M5 M6 M8 M10 Metric Composite Tap Drill Bit Tap 6pcs/Set
Materials: High-speed steel (HSS)These high speed steel (HSS) bits are threaded for metric thread tapping of soft metal, wood, plastic, aluminum, and iron. They are multi-coated to remain bright and sharp.Spiral length: 20 mm; drill diameter: 8.5 mmSave LaborPlease Stay AWay from Children
 ▼ Read Reddit mentions
5. Hurricane Turning Tools, Woodturning Bowl Gouge, High Speed Steel, 1/4 Inches Flute (3/8 Inches Bar Stock)
- Bar Diameter: 3/8" | Flute Width: 1/4"
- Flute Length: 4" | Handle Length: 15" | Overall Length: 24"
- Made from High Speed Steel with solid beech handle
- Used to turn the outside and inside of bowls and vessels
- Available separately or in sets
Features:

Specs:
| Height | 2 Inches |
| Length | 21 Inches |
| Width | 2 Inches |
| Number of items | 1 |
6. Vermont American 20072 3/8-Inch 16 High Carbon Steel Machine Screw Plug Tap
- Manufacturer: Vermont American
- Country of manufacture: China
- Power Cutting & Sawing
- Ideal for cutting right-hand internal threads
- Four-flute design on all plug taps ensures fast and easy chip clearance
- Plug taps have 3 to 5 threads chamfered for general purpose applications when tapping to the bottom of a hole is not critical
Features:

Specs:
| Height | 0.4 Inches |
| Length | 5.7 Inches |
| Weight | 0.01 Pounds |
| Width | 1.6 Inches |
| Number of items | 1 |
7. HHIP 3900-0250 Precision Hand Tapper
- Precision ground work table and spindle to high accuracy.
- Assures straight perpendicular tapped holes. Rigid structure made of high grade tool steel.
- Precision ground work table and spindle to high accuracy.
- 9 tap adapters included: #6, #8, #10, 1/4, 5/16, 3/8, 7/16, 1/2 & 5/8" .
- Equipped with tap guide.
Features:

Specs:
| Height | 10 Inches |
| Length | 10 Inches |
| Width | 14 Inches |
| Size | #6-5/8" Capacity |
| Number of items | 1 |
8. 7pcs Metric Thread Steel Tap Tapping Thread Cutting Tool Suitable for M3, M4, M5, M6, M8, M10, M12
These taps are made from high quality bearing steel for high hardness, durable and long service lifeThere are total 7 pieces of taps in different sizes from M3 to M12 that you can use for tapping various threadsThey are used to cut new threads or repair damaged threads, you will have a smooth tappin...

Specs:
| Color | ColorMap |
| Height | 0 Inches |
| Length | 0 Inches |
| Weight | 1 Kilograms |
| Width | 0 Inches |
| Number of items | 1 |
9. Irwin 8338 10mm x 1.0 Metric Tap
- Made of shock-resistant and heat treated S2 steel for maximum strength and hardness
- Ideal for maintenance and repair work
- Item Package Dimension: 1.0" L x 4.5" W x 15.0" H
- Model Number: 8338
Features:

Specs:
| Color | Multi |
| Height | 0.5 Inches |
| Length | 5.8 Inches |
| Weight | 0.03 Pounds |
| Width | 1.7 Inches |
| Size | Size: 10MM-1.0mm. |
| Number of items | 1 |
10. uxcell 23mm Dia Wheel Furniture Stainless Steel Sliding Door Roller 4 Sets
- Product Name: Sliding Door Roller; Material: Stainless Steel, Plastic
- Weight: 266g; Package Content: 4 Sets x Sliding Door Roller
- Main Color: White, Silver Tone; Dimension: 58 x 32 x 15mm/2.3" x 1.2" x 0.6"(L*W*T)
- Hole Diameter: 5mm/0.2"; Hole Distance: 47 x 17mm/ 1.9" x 0.7"(L*W)
- Roller Diameter: 23mm/0.9"; Bolt Diameter: 7mm/0.3"
Features:

Specs:
| Height | 0.79 Inches |
| Length | 5.91 Inches |
| Width | 3.94 Inches |
| Size | 23mm Wheel Dia, Black,4 Pack |
11. Vermont American 20084 3/4-Inch 10 High Carbon Steel Machine Screw Plug Tap
- Ideal for cutting right-hand internal threads
- Four-flute design on all plug taps ensures fast and easy chip clearance
- Plug taps have 3 to 5 threads chamfered for general purpose applications when tapping to the bottom of a hole is not critical
Features:

Specs:
| Height | 7.5 Inches |
| Length | 1.2 Inches |
| Weight | 0.2 Pounds |
| Width | 2 Inches |
| Size | 0.75" |
| Number of items | 1 |
12. 1 1/4"-12 HSS Right Hand Thread Tap
- 1 1/4"-12 HSS right hand thread tap
Features:
 ▼ Read Reddit mentions
13. IRWIN Bottoming Tap, #6-48NS (1221)
Made of shock-resistant and heat treated S2 steel for maximum strength and hardnessIdeal for maintenance and repair workModel Number: 1221Country Of Origin: United States
Specs:
| Color | Silver |
| Height | 0.03 Inches |
| Length | 0.03 Inches |
| Weight | 0.02 Pounds |
| Width | 0.03 Inches |
| Release date | March 2017 |
| Size | Small |
| Number of items | 1 |
14. Titan 51950 EXO BURR External Deburrer and Chamfering Tool
- Leading Manufacturer Of High-Quality Products
- International Renown For Our Diverse Range Of Award-Winning Products
- Fully Equipped With State-Of-The-Art Technology
- All Products Have Been Designed With The Professional In Mind
- Constantly Modernizing Our Powerful Devices To Meet The Demands Of The Modern User
Features:

Specs:
| Color | Factory |
| Height | 7.1 Inches |
| Length | 3 Inches |
| Width | 4 Inches |
| Size | One Size |
| Number of items | 1 |
15. Irwin Tools Hanson 1750 Plug Tap
- Made of shock-resistant and heat treated S2 steel for maximum strength and hardness
- Ideal for maintenance and repair work
- Country Of Origin: China
- Item Package Weight: 1.6 oz
Features:

Specs:
| Color | Multi |
| Height | 0.6 Inches |
| Length | 4 Inches |
| Weight | 0.1 Pounds |
| Width | 3 Inches |
| Size | 14Mm - 1.50 |
| Number of items | 1 |
16. Drill America POU2-56 #2-56 Tap and #51 Drill Bit Kit, POU Series
Set contains high speed steel plug hand tap and matching high speed steel drill bitHigh speed steel plug hand threading tap is popular for use in general machine tapping or cnc tappingBlack oxide drill bit is ideal for production, maintenance or portable drilling jobs2-56 hss plug tap and matching #...

Specs:
| Height | 2 Inches |
| Length | 6 Inches |
| Width | 4 Inches |
| Release date | April 2017 |
| Size | #2-56 |
| Number of items | 1 |
17. 10X1.00 D5, 4 FLUTE HIGH SPEED STEEL METRIC HAND PLUG TAP
Premium Import!Quality and Performance to satisfy you!Tolerance: D5Overall Length: 2-15/16"Thread Length: 1-1/4"
 ▼ Read Reddit mentions
18. Irwin Tools 2518-3 Piece Set - 6-32 NC, High Carbon Steel Machine Screw Tap
- Ideal for auto repair and machinery
- Convenient plastic pouch puts all the necessary taps at your finger tips
- Each set includes 1 taper, bottoming and plug tap in the specified size
- High Carbon Steel Construction for Durability
Features:

Specs:
| Color | Multi |
| Height | 0.75 Inches |
| Length | 4.25 Inches |
| Weight | 0.04 Pounds |
| Width | 2 Inches |
| Size | One Size |
| Number of items | 1 |
19. M5 x 0.8 Metric Taper and Plug Taps
- M5 x 0.8 Metric taper and plug right hand taps (set of 2)
- Nominal diameter: 5mm
- Thread pitch: 0.8mm
Features:
 ▼ Read Reddit mentions
20. HHIP 3900-0215 Spring-Loaded Tap Guide
For drill presses and mills1/2" diameter hardened shank, knurled for easy handlingAdjustable Tension Spring3/16" Hardened tension pinReversible tension pin for male and female hole centering or tapping

Specs:
| Height | 1.49999999847 Inches |
| Length | 3.99999999592 Inches |
| Weight | 0.0992080179 Pounds |
| Width | 1.49999999847 Inches |
| Size | HHIP |
| Number of items | 1 |
🎓 Reddit experts on threading taps
The comments and opinions expressed on this page are written exclusively by redditors. To provide you with the most relevant data, we sourced opinions from the most knowledgeable Reddit users based the total number of upvotes and downvotes received across comments on subreddits where threading taps are discussed. For your reference and for the sake of transparency, here are the specialists whose opinions mattered the most in our ranking.
Subcategories:
Interested in what Redditors like? Check out our Shuffle feature
Shuffle: random products popular on RedditTop Reddit comments about Threading Taps:
Summary
1. M7 x 0.5 Metric HSS Right Hand Tap with 6.5mm Drill Bit
- M7 x 0.5 HSS right hand thread tap with 6.5mm HSS drill bit
Features:
Specs:
| Weight | 0.0220462262 Pounds |
2. Vermont American 20371 1/8-27 NPT High Carbon Steel Pipe Tap
- Manufacturer: Vermont American
- Country of manufacture: China
- Power Cutting & Sawing
Features:
Specs:
| Color | Silver |
| Height | 0 Inches |
| Length | 0 Inches |
| Weight | 0.03 Pounds |
| Width | 0 Inches |
| Number of items | 1 |
3. Century Drill & Tool 95002 High Carbon Steel Fractional Plug Tap, 4-40 NC
- High carbon steel machine screw tap
- Precision cut threads for accurate threading.
- 1" hex across flats.
Features:
Specs:
| Color | steel |
| Height | 0.089 Inches |
| Length | 1.875 Inches |
| Weight | 0.01 Pounds |
| Width | 0.089 Inches |
| Size | 4-40 NC |
| Number of items | 1 |
4. LALANG 1/4'' Hex HSS High Speed Steel Thread Spiral Screw M3 M4 M5 M6 M8 M10 Metric Composite Tap Drill Bit Tap 6pcs/Set
Materials: High-speed steel (HSS)These high speed steel (HSS) bits are threaded for metric thread tapping of soft metal, wood, plastic, aluminum, and iron. They are multi-coated to remain bright and sharp.Spiral length: 20 mm; drill diameter: 8.5 mmSave LaborPlease Stay AWay from Children
▼ Read Reddit mentions5. Hurricane Turning Tools, Woodturning Bowl Gouge, High Speed Steel, 1/4 Inches Flute (3/8 Inches Bar Stock)
- Bar Diameter: 3/8" | Flute Width: 1/4"
- Flute Length: 4" | Handle Length: 15" | Overall Length: 24"
- Made from High Speed Steel with solid beech handle
- Used to turn the outside and inside of bowls and vessels
- Available separately or in sets
Features:
Specs:
| Height | 2 Inches |
| Length | 21 Inches |
| Width | 2 Inches |
| Number of items | 1 |
6. Vermont American 20072 3/8-Inch 16 High Carbon Steel Machine Screw Plug Tap
- Manufacturer: Vermont American
- Country of manufacture: China
- Power Cutting & Sawing
- Ideal for cutting right-hand internal threads
- Four-flute design on all plug taps ensures fast and easy chip clearance
- Plug taps have 3 to 5 threads chamfered for general purpose applications when tapping to the bottom of a hole is not critical
Features:
Specs:
| Height | 0.4 Inches |
| Length | 5.7 Inches |
| Weight | 0.01 Pounds |
| Width | 1.6 Inches |
| Number of items | 1 |
7. HHIP 3900-0250 Precision Hand Tapper
- Precision ground work table and spindle to high accuracy.
- Assures straight perpendicular tapped holes. Rigid structure made of high grade tool steel.
- Precision ground work table and spindle to high accuracy.
- 9 tap adapters included: #6, #8, #10, 1/4, 5/16, 3/8, 7/16, 1/2 & 5/8" .
- Equipped with tap guide.
Features:
Specs:
| Height | 10 Inches |
| Length | 10 Inches |
| Width | 14 Inches |
| Size | #6-5/8" Capacity |
| Number of items | 1 |
8. 7pcs Metric Thread Steel Tap Tapping Thread Cutting Tool Suitable for M3, M4, M5, M6, M8, M10, M12
These taps are made from high quality bearing steel for high hardness, durable and long service lifeThere are total 7 pieces of taps in different sizes from M3 to M12 that you can use for tapping various threadsThey are used to cut new threads or repair damaged threads, you will have a smooth tappin...
Specs:
| Color | ColorMap |
| Height | 0 Inches |
| Length | 0 Inches |
| Weight | 1 Kilograms |
| Width | 0 Inches |
| Number of items | 1 |
9. Irwin 8338 10mm x 1.0 Metric Tap
- Made of shock-resistant and heat treated S2 steel for maximum strength and hardness
- Ideal for maintenance and repair work
- Item Package Dimension: 1.0" L x 4.5" W x 15.0" H
- Model Number: 8338
Features:
Specs:
| Color | Multi |
| Height | 0.5 Inches |
| Length | 5.8 Inches |
| Weight | 0.03 Pounds |
| Width | 1.7 Inches |
| Size | Size: 10MM-1.0mm. |
| Number of items | 1 |
10. uxcell 23mm Dia Wheel Furniture Stainless Steel Sliding Door Roller 4 Sets
- Product Name: Sliding Door Roller; Material: Stainless Steel, Plastic
- Weight: 266g; Package Content: 4 Sets x Sliding Door Roller
- Main Color: White, Silver Tone; Dimension: 58 x 32 x 15mm/2.3" x 1.2" x 0.6"(L*W*T)
- Hole Diameter: 5mm/0.2"; Hole Distance: 47 x 17mm/ 1.9" x 0.7"(L*W)
- Roller Diameter: 23mm/0.9"; Bolt Diameter: 7mm/0.3"
Features:
Specs:
| Height | 0.79 Inches |
| Length | 5.91 Inches |
| Width | 3.94 Inches |
| Size | 23mm Wheel Dia, Black,4 Pack |
11. Vermont American 20084 3/4-Inch 10 High Carbon Steel Machine Screw Plug Tap
- Ideal for cutting right-hand internal threads
- Four-flute design on all plug taps ensures fast and easy chip clearance
- Plug taps have 3 to 5 threads chamfered for general purpose applications when tapping to the bottom of a hole is not critical
Features:
Specs:
| Height | 7.5 Inches |
| Length | 1.2 Inches |
| Weight | 0.2 Pounds |
| Width | 2 Inches |
| Size | 0.75" |
| Number of items | 1 |
12. 1 1/4"-12 HSS Right Hand Thread Tap
- 1 1/4"-12 HSS right hand thread tap
Features:
▼ Read Reddit mentions13. IRWIN Bottoming Tap, #6-48NS (1221)
Made of shock-resistant and heat treated S2 steel for maximum strength and hardnessIdeal for maintenance and repair workModel Number: 1221Country Of Origin: United States
Specs:
| Color | Silver |
| Height | 0.03 Inches |
| Length | 0.03 Inches |
| Weight | 0.02 Pounds |
| Width | 0.03 Inches |
| Release date | March 2017 |
| Size | Small |
| Number of items | 1 |
14. Titan 51950 EXO BURR External Deburrer and Chamfering Tool
- Leading Manufacturer Of High-Quality Products
- International Renown For Our Diverse Range Of Award-Winning Products
- Fully Equipped With State-Of-The-Art Technology
- All Products Have Been Designed With The Professional In Mind
- Constantly Modernizing Our Powerful Devices To Meet The Demands Of The Modern User
Features:
Specs:
| Color | Factory |
| Height | 7.1 Inches |
| Length | 3 Inches |
| Width | 4 Inches |
| Size | One Size |
| Number of items | 1 |
15. Irwin Tools Hanson 1750 Plug Tap
- Made of shock-resistant and heat treated S2 steel for maximum strength and hardness
- Ideal for maintenance and repair work
- Country Of Origin: China
- Item Package Weight: 1.6 oz
Features:
Specs:
| Color | Multi |
| Height | 0.6 Inches |
| Length | 4 Inches |
| Weight | 0.1 Pounds |
| Width | 3 Inches |
| Size | 14Mm - 1.50 |
| Number of items | 1 |
16. Drill America POU2-56 #2-56 Tap and #51 Drill Bit Kit, POU Series
Set contains high speed steel plug hand tap and matching high speed steel drill bitHigh speed steel plug hand threading tap is popular for use in general machine tapping or cnc tappingBlack oxide drill bit is ideal for production, maintenance or portable drilling jobs2-56 hss plug tap and matching #...
Specs:
| Height | 2 Inches |
| Length | 6 Inches |
| Width | 4 Inches |
| Release date | April 2017 |
| Size | #2-56 |
| Number of items | 1 |
17. 10X1.00 D5, 4 FLUTE HIGH SPEED STEEL METRIC HAND PLUG TAP
Premium Import!Quality and Performance to satisfy you!Tolerance: D5Overall Length: 2-15/16"Thread Length: 1-1/4"
▼ Read Reddit mentions18. Irwin Tools 2518-3 Piece Set - 6-32 NC, High Carbon Steel Machine Screw Tap
- Ideal for auto repair and machinery
- Convenient plastic pouch puts all the necessary taps at your finger tips
- Each set includes 1 taper, bottoming and plug tap in the specified size
- High Carbon Steel Construction for Durability
Features:
Specs:
| Color | Multi |
| Height | 0.75 Inches |
| Length | 4.25 Inches |
| Weight | 0.04 Pounds |
| Width | 2 Inches |
| Size | One Size |
| Number of items | 1 |
19. M5 x 0.8 Metric Taper and Plug Taps
- M5 x 0.8 Metric taper and plug right hand taps (set of 2)
- Nominal diameter: 5mm
- Thread pitch: 0.8mm
Features:
▼ Read Reddit mentions20. HHIP 3900-0215 Spring-Loaded Tap Guide
For drill presses and mills1/2" diameter hardened shank, knurled for easy handlingAdjustable Tension Spring3/16" Hardened tension pinReversible tension pin for male and female hole centering or tapping
Specs:
| Height | 1.49999999847 Inches |
| Length | 3.99999999592 Inches |
| Weight | 0.0992080179 Pounds |
| Width | 1.49999999847 Inches |
| Size | HHIP |
| Number of items | 1 |
First, most guns operate around 90 psi. 10-20 psi is ridiculously small.
There is a trade off that you have to confront.
CO2 holds WAAAAY more energy than compressed air ever will. If size is your main concern, CO2 would be the way to go. The reason, as you know, is because CO2 goes through a phase change and there's a lot of energy in that step.
Yes, there are 2 or 3 oz co2 bottles. You're going to want to ask on mcarterbrown.com where ot get them. They are specialty made in limited runs for people who play pump paintball. I think they go for 40 bux. The same customers also buy very small compressed air tanks.
Now then, CO2 has a lot more energy stored, but god damn is it dirty. First, you need to make sure it expands. That expansion uses up a lot of heat. If you are continuously running the bottle, it is entirely possible that everything will freeze up. BUT, if it's only 10-20 psi, that may just be a small enough flow to where ambient temperature will work. However, with a constant flow I would bet that your device would freeze up on CO2 Either way, you will probably want to buy an old school "expansion chamber."
https://www.amazon.com/Kingman-Paintball-Expansion-Bottomline-conversion/dp/B00APL4KPK/ref=zg_bs_3488731_1
That's a really crappy one. Try to buy a used one (pbnation.com or mcarterbrown.com) that has multiple chambers and FINS. The one with the fins is really great. (20 bux).
Compressed air in a small tank may struggle to provide you with enough energy to run for 1 hour. A larger tank, like a 45 cubic inch/4500 psi (called a 45/45) would definitely last you.
Either way, you will need at least two regulators. All tanks, whether CO2 or HPA, expel air out of them at 800 psi (standard) or 400 psi (low pressure HPA tanks only). So you will need to regulate the pressure down from 800 down to 100 using a high pressure regulator. If you are using CO2, (Or even if not) one of the best most consistent regulators is a Palmer's male stabilizer.
https://palmers-pursuit-shop.myshopify.com/collections/stabilizers
90 dollars.
You want to put this 100 psi air into some sort of dump chamber, roughly the size of your thumb or larger. I highly recommend using macroline and macroline fittings in order to make these connections.
http://www.oringmonkey.com/macroline-fittings-c-210.html
The straight one here is 8 dollars. It's a premium, higher costed macroline fitting. Most go for 4-5. But o ring monkey is good people and I always order from there. Pick up some 010 o rings to fix any leaks you may get in your macroline fitting later (which will definitely occur with CO2). The macroline connectors fit into 1/8 NPT threads, which is easy enough to drill and tap.
https://www.amazon.com/Vermont-American-20371-Carbon-Steel/dp/B000K1LZ76
Then feed that into a low pressure regulator. Now these are getting rarer as most guns have ditched them. Anyways, once again Palmers is going to be your best bet for CO2, and they're one of the best regs there is, hands down. I cannot say for certain that such a regulator will get down to 10 psi and work properly. This is outside the range of almost every paintball gun there is. You definitely are going to have to "Ask the Experts" over at mcarterbrown.com
Most Low Pressure Regulators (LPR) output the air through microline which is different from macroline. You want SOFT microline for the fittings. The only source of soft microline that I have ever been able to locate is from a guy on mcarterbrown.com . His handle is "maggot" and you are looking for his "autococker hose kit." 12 bux
http://www.mcarterbrown.com/forums/dealers-forum/255801-slps-kit-cocker-parts-macroline-halfblock-delrin-grips-benchmark-sliders.html#post2949265
As far as refilling, CO2 is very easy to refill from a larger bottle wit a CO2 fill station
https://www.amazon.com/Ninja-Paintball-Mini-Fill-Station/dp/B0023U7RH4
As far as refilling HPA, it is really easy to do so from a scuba fill station.
https://www.amazon.com/Ninja-Paintball-SCUBA-Fill-Station/dp/B001T6I1K0
Of course, be warned. DO NOT EVER PUT OIL INTO A HPA TANK AS IT CAN AND WILL EXPLODE That's really the only thing you'd have to worry about with filling.
Ooznest is great, they actually used to sell an i3 kit that was quite good, and my goto for Great Britain recommendations insofar as cheap-ish kits were concerned. Last I checked they're a genuine reseller, so what you got should be the correct component. Anyway, if you want to upload a picture, the easiest way is to upload it to an external image host, like imgur, for instance, then link it in your comment.
So, by broken in half, do you mean it looks like this? If so, it is possible to overtorque the two halves against each other inside an M6 nut. It'll be pretty wobbly, and it definitely won't last for more than a couple of prints, but it should work enough to get it through a single print. Actually, since you ordered from Ooznest, you're probably in the UK, or nearby in Europe, right? That means hardware stores should just carry most kinds of metric fasteners, and you can get ahold of an M6 coupler nut, which would definitely join the two halves together long enough for you to get a print off of it. In addition, you could get an M7 tap of some sort, and drill out the Anet's original heatsink. The E3Dv6's heatbreak is an M7 on the top, M6 on the bottom, so that could work. You'd have issues with heat creep long-term, since the E3D uses a metal interior instead of PTFE like the Anet does, but you'd probably be able to get the mounting adapter for an E3D off of it before it gunked up too much.
I dunno. Aero doesn't really offer anything that you can't DIY pretty easily other than finish and I do like to rattlecan guns. As soon as we replace the oven in the kitchen, that might be migrating out to the garage to see if I want to get into Cerakote.
> The intergrated trigger guard is really nice
I like the ability to pick and choose, but I usually default to MagPul plastics.
> threaded bolt catch is a god send of making the hardest part of the lower build the easiest
Knipex flat jaw pliers for all the roll pins makes it super simple.
> I like the set screw in the back
4-40 tap and tap wrench along with a phat sack of these. If you chop a couple coils off the safety detent you can tap and thread that for the same screws as well.
I think you'd be happier with a bowl gouge. $100 gets you a top of the line one, but you can get a good one for $60:
https://www.woodturnerscatalog.com/p/129/948/Artisan-Superflute-Bowl-Gouge
and a decent one for $30:
https://www.amazon.com/Hurricane-Turning-Tools-Woodturning-Inches/dp/B008AVM77A
Using a scraper is fine, but a bowl gouge is faster and leaves a better surface. If I were using a scraper to hollow though, I'd want something a lot beefier than the little ones that come in that HF set.
Sure!
Dein Username prüft übrigens aus.
The Light Units
The Chips x4: 98.6$
The Driver x1: 74.9$
CPU Cooler
x4: 55.96$
Thermal Adhesive Paste x1: 7.9$
4way pin for the coolers x1: 9$
Lights Total: 246.36$
Framing and stuff
Most guys build their framing out of aluminium profiles. I bought mine here from the %%% section: https://www.alu-verkauf.de/ALUMINIUM-ALUMINIUMPROFILE
Every country has its own manufacturers for these. Mine cost about 30$.
You also need cables. The veros are pretty flimsy. so take pretinned gauge x1: 9,95$
In order to screw the frame you might wanna cut holes swith a thread. This will do x1: 8.43$
Be careful these drills suck and break easily.
Screws x1: 12.98$
Wago Connectors
x1: 6.35;$
Were at about 315$.
Lets see what we can do with it.
my frame is build with 6 L-Profiles in which the COBs just lay around and one center piece: Link to Pic
You might additional hangers, cold device cables and another power source for the cooling fans. If you decide to buy the MeanWell HLG-320H-2100B you will need to connect a 10kOhm potentiometer to the Driver. This is to dim the light and safe money in vegphase. The HLG-320H-2100A has a build in dimmer which you can access via a screwdriver. I would recommend A, since its easier to operate. You can also regulate the fans of the cooler via a 150Ohm poti. If you dont like the sound, you can run them at 1/3 to 1/2 speed.
have fun!
Maybe find a garage, automobile shop or supply that works on English or American cars.
Does not Amazon sell these in Europe?
1/4 20 is common for camera / tripod screw.
edit
Looks like Amazon Ship to Norway
3/8 tap tap
There are others - also need correct drill. That would be 5/16.
If you need 1/4" you can search - chart here
If you need more help - yell :)
Also a Manfrotto user in the US.
Bother/Sister, do yourself a favor and have your boss get one of these if they aren’t willing to spend on anything higher grade. By the time that you consider the cost of a tap, the cost of a damaged/ruined part, and lost labor tiles, it pays for itself in just a couple oopsies. HHIP 3900-0250 Precision Hand Tapper https://www.amazon.com/dp/B00QVYQR9W/ref=cm_sw_r_cp_api_bFNOBbCEN3AJ6
There are better and more expensive solutions out there, but if nothing else, this will do a good job as a reasonable cost.
It was this set from Amazon.ca. Seems really cheap, and I've only used it on plastic threaded parts on my builds. I might still trust it on thinner aluminum and brass, but definitely not steel, and definitely not on something important like my car.
Assuming there's enough material on the underside of your bed, drilling and tapping the bed's holes out to M10 would be the easiest.
To do that you need a 9.1mm drill bit (or something close), and an M10 tap drill (https://www.amazon.com/Irwin-8338-10mm-1-0-Metric/dp/B0002JT0XW). If the mounting part is metal, this might not be that easy. If it's wood, it becomes far easier.
You'll need to know whether the thread on the legs is M10x1 (fine thread) or M10x1.25 (course thread). The second number indicates the space between each thread height. Metal on your bed and it's probably M10x1. Wood and it's probably M10X1.25. The tap is different depending on what the thread pitch is.
I have done the same - a concave piece friction fit between the live center and the ball.
Or, if you have a live center like the Oneway or Nova, and a 3/4” - 10 tap, you can make whatever shaped live center you wish. Just put the live center in the headstock with a wire or a cotter key, or a nail holding it, screw on a tapped piece of hardwood, and turn a cup, or cone, or whatever you need. Or just set a 3/4” - 10 nut in a wooden blank with epoxy and avoid the the tap.
(For the live center see https://oneway.ca/products-category/holding/Spurs,%20Drivers,%20Centers/Live%20Center)
(For the tap see https://www.amazon.com/Vermont-American-20084-4-Inch-Machine/dp/B000FMO8CO/ref=sr_1_3?ie=UTF8&qid=1543209754&sr=8-3&keywords=3%2F4+-+10+tap)
Here’s a link.
uxcell 23mm Dia Wheel Furniture Stainless Steel Sliding Door Roller 4 Sets https://www.amazon.com/dp/B019ZDJJ18/ref=cm_sw_r_cp_api_xulDAb4V5TFHW
It worked out well and they’re fairly adjustable but in hindsight I wish I would’ve gone with something of higher quality.
At the top of this thread someone said these measurements and this is what I found 7mm X .5 Metric HSS Right Hand Thread Tap M7 X 0.5mm Pitch
http://www.amazon.com/dp/B00C88E0IA/ref=cm_sw_r_an_am_ap_am_us?ie=UTF8
wut
I mean sure, that's no-name Amazon but for occasional use (eg you don't use the thing but once in a blue moon) it's probably ok.
If not, you've got this one from Fastnel; Grainger has a decent selection for similar prices.
Even McMaster has them starting at around $100 ($60 if you only need to 'repair' a thread).
most home improvement stores do not carry any tools you'd use to work on firearms short of things like the drills themselves or sanders or whatever.
things like taps, dies, screwdrivers, these all need to be gotten elsewhere unless you can find specific stuff. hollow ground screwdrivers for instance. this tap. (alt link at midway) just about any tap handle will work for the most part, so long as it goes down to a small size to grab the tap itself. tapping lube can be found at most hardware stores. #31 drill bits (@midway) are also usually not found in regular stores. if you have a local machine supply shop they might have such, and even the tap and what not, but they're probably not going to be cheap.
This one is from Titan. It works great now, not sure how long it will stay sharp
https://www.amazon.com/Titan-Tools-51950-Deburring-External/dp/B07V9PGRSB
All of those bolts are M14x1.5. None of them would cause damage to your oil pan. As long as the threads aren't too badly damaged, you can repair them using a M14x1.5 tap or a thread chaser. You can probably find one at a local autoparts store or online: http://www.amazon.com/Hanson-1750-HANSON-Plug-Tap/dp/B000UE8Z9E/ref=sr_1_1?ie=UTF8&qid=1452650684&sr=8-1&keywords=m14x1.5+tap.
If the tap or chaser works, you won't need a heli-coil. Just make sure you put it in perfectly straight, or else you're going to make things worse.
Drill out original rivets, which I assume you did in order to take it apart. Drill pilot holes for tap, be careful not to go too far. Use tap tool to cut threads, make sure to use lube (wd40 works). If you’re unfamiliar with tapping maybe look up a vid on you tube.
Button head screws -
Tap and drill bit
I just looked and couldn't find it again. It's buried in a comments thread somewhere and I didn't think to save it. I do remember that the key to the build is removing as much of your battery sled as possible, milling out the bottom right corner of the box, and putting the 510 connector on the left. Width wise it's tight but very possible. By tapping I mean using a tool to add threads to the hole for the 510. I don't do this to my boxes but if I remember correctly the FDV is a 10x1.00 thread, which could be attained with this.
http://www.amazon.com/10X1-00-FLUTE-SPEED-STEEL-METRIC/dp/B002G9IV0O
Definitely check me on this, it's off the top of my head not a data sheet.
It's been said that if you order parts from McMaster-Carr, they fly out your computer's CD drive.
I'd also look at your local Fastenal branch. And bring sponsorship material--some branches have given FIRST teams at least a price break if not freebies.
Or, if nothing else, this might be a good time to learn tapping your own parts to accept the 6-32 screws. (It's not like you'll never need a 6-32 thread in some obscure place ever again after this!)
M5-0.8 hand tap, and corresponding set screw
https://www.amazon.com/Hillman-Group-1607-M5-0-80-10-Pack/dp/B00HYKCJFS/ref=sr_1_3?qid=1568507934&refinements=p_n_feature_fourteen_browse-bin%3A11434060011&s=industrial&sr=1-3
https://www.amazon.com/0-8-Metric-Taper-Plug-Taps/dp/B00870161M
I think he's referring more to something like this for $10: https://www.amazon.com/HHIP-3900-0215-Spring-Loaded-Tap-Guide/dp/B00R13VQCA
> M7x0.5 tap or thread follower
Like this? http://www.amazon.com/Metric-Right-Thread-0-5mm-Pitch/dp/B00C88E0IA
Amazon has them
I used these two when I installed a FDV 510 for a DNA build.
http://www.amazon.com/gp/product/B0002JT0XW/ref=oh_aui_detailpage_o05_s00?ie=UTF8&psc=1
http://www.amazon.com/gp/product/B00004YOB1/ref=oh_aui_detailpage_o06_s00?ie=UTF8&psc=1