(Part 2) Reddit mentions: The best houshehold finishes, sealers & stains
We found 387 Reddit comments discussing the best houshehold finishes, sealers & stains. We ran sentiment analysis on each of these comments to determine how redditors feel about different products. We found 173 products and ranked them based on the amount of positive reactions they received. Here are the products ranked 21-40. You can also go back to the previous section.
21. Minwax 657000000 Water-Based Sanding Sealer, Quart,Clear
- Seals wood grain
- Easy to sand
- Dries in one hour
- Use on unstained, bare wood floors, furniture, doors, and cabinets
- It seals wood grain and easy to sand
- Designed for use on unstained, bare wood floors, furniture, doors and cabinets
- Dries quickly, in one hour, for easy project completion
- It seals wood grain and easy to sand
- Designed for use on unstained, bare wood floors, furniture, doors and cabinets
- Dries quickly, in one hour, for easy project completion
Features:

Specs:
| Color | Quart |
| Height | 5 Inches |
| Length | 4.4 Inches |
| Number of items | 1 |
| Size | 1 Quart |
| Weight | 2.1164377152 Pounds |
| Width | 4.4 Inches |
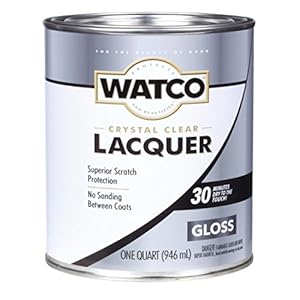
22. Watco 63041 Lacquer Clear Wood Finish, Quart, Clear Gloss
- Ideal for use on furniture, doors, cabinets and paneling; not recommended for floors or exterior surfaces
- Formulated for a higher clarity finish than polyurethane
- Dries to the touch in 1 hour and covers up to 290 sq ft
- Eliminates the need for wood filler and protects against scratches; no need to sand between coats
- Dries to a crystal-clear gloss with a lasting durable finish
- Apply to furniture, doors, cabinets and paneling
- Dries in 30 minutes and does not require sanding between coats
- Dries crystal-clear
- Durable wood finish and seal
- Fast-drying
Features:
Specs:
| Color | Clear Gloss |
| Height | 4.9 Inches |
| Length | 4.15 Inches |
| Number of items | 1 |
| Size | Quart |
| Weight | 2.19 Pounds |
| Width | 4.15 Inches |
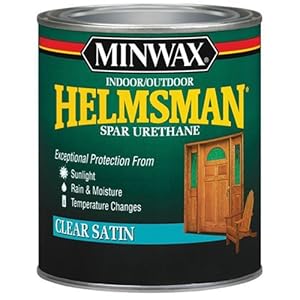
23. Minwax 63205444 Helmsman Spar Urethane, quart, Satin
Contains UV blockers to reduce the sun's graying and fading effects.Forms a protective barrier against rain and moisture.Special oils allow the finish to expand and contract with the wood as seasons and temperatures change.Ideal for use on doors, windows, trim, bathroom cabinets, bar tops, kitchen c...
Specs:
| Color | Quart |
| Height | 4.89 Inches |
| Length | 4.25 Inches |
| Number of items | 1 |
| Size | 1 Quart |
| Weight | 2.20462262 Pounds |
| Width | 4.25 Inches |
24. Minwax 63200444 Helmsman Spar Urethane, quart, Gloss
Recommended Uses: furniture, woodwork, molding, cabinets, doors, paneling, accessoriesApplication Tool: natural bristle brushDry Time: 24 hours before normal useCleanup: mineral spirits or paint thinner following manufacturer's safety instructionsContains UV blockers to reduce the sun's graying and ...

Specs:
| Color | Quart |
| Height | 4.89 Inches |
| Length | 4.25 Inches |
| Number of items | 1 |
| Size | 1 Quart |
| Weight | 2 Pounds |
| Width | 4.25 Inches |
25. J.E. Moser's 844995, Finishes, Wood Stains & Dyes, Water Soluble Ebony Black Aniline Dye
Brings out the beauty of the wood grain.Specifications: Coverage=75-100 sq ft, Diameter=1-3/4 in, Height=2-3/4 in
 ▼ Read Reddit mentions
26. Tried and True Danish Oil, Pint
- Safe for Food & Skin Contact
- Free from Solvents, Dyes, Petrochemicals & VOCs
- Old-School Rustic Sheen
- Pure heat-treated linseed oil
- 100% Renewable Ingredients
Features:

Specs:
| Size | Pint |
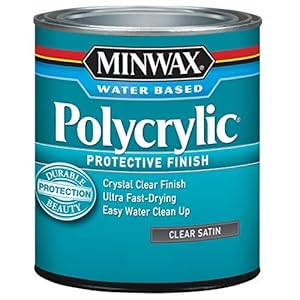
27. Minwax 64444444 Polycrylic Protective Finish Water Based, quart, Semi-Gloss
- PROTECT WOOD SURFACES – Minwax Polycrylic Protective Finish protects and adds beauty to your interior wood projects, including woodwork, furniture, doors and cabinets. The clear top coat protects against scratches, spills, dirt and more.
- CRYSTAL CLEAR FINISH THAT LASTS – The crystal clear finished offered in this protective coating is ideal for use over all Minwax Oil-Based and Water-Based Stains and colors, as well as all wood species including light woods like maple, ash and birch.
- SEMI-GLOSS SHEEN – Give your wood projects a sleek finish with this semi-gloss clear varnish. It protects the natural beauty of the wood and offers a semi-shiny, sleek sheen for a bright, modern look. It’s non-yellowing, non-ambering and low odor.
- ULTRA FAST DRYING – Get more done with this protective poly coating. It’s a fast-drying clear coat, which allows for quick recoats after 2 hours, letting you get projects done faster. Be sure to apply with a high-quality synthetic bristle brush.
- EASY CLEAN UP – This water-based wood finish allows for easy soap and water clean-up, so you don’t have to stress about spills and big messes.
- Water clean-up
- Low odor, non-yellowing
- Fast drying
- Semi Gloss
- 1 quart
Features:

Specs:
| Color | Quart |
| Height | 4.9 Inches |
| Length | 4.3 Inches |
| Number of items | 1 |
| Size | 1 Quarts (Pack of 1) |
| Weight | 2.25 Pounds |
| Width | 4.9 Inches |
28. The Army Painter Anti Shine Matt Varnish for Miniature Painting - After Quickshade Matte Top Coat Acrylic Varnish for Miniatures - Matte Finish for Acrylic Model Paint, 18ml, Dropper Bottle
- 18 ml.
Features:
Specs:
| Height | 0.98425 Inches |
| Length | 3.1496 Inches |
| Number of items | 1 |
| Size | 0.6 Fl Oz (Pack of 1) |
| Weight | 0.02 Pounds |
| Width | 0.98425 Inches |
29. Minwax 63487000 Wood Finish Stain Marker, Dark Walnut
This product adds a great valueIdeal for use on furniture, molding, cabinets and moreDark WalnutEasy touch-up for common nicks and scratchesIdeal for use on furniture, molding, cabinets and more.Dark WalnutFast dryingEasy and quickEasy touch-up for common nicks and scratchesIdeal for use on furnitur...

Specs:
| Color | Dark Walnut |
| Height | 2.25 inches |
| Length | 8.3 inches |
| Number of items | 1 |
| Size | Dark Walnut |
| Weight | 0.02 Pounds |
| Width | 1.3 inches |
30. Tried & True Danish Oil Finish, Quart
This product cannot ship to a PO box. Delivery requires street address.Danish Oil is a good choice for any wood work where you want a satin finishUse on kitchenware, cutting boards, and children's furniture, since it is food safe and non-toxicThe coverage is 600 sq. ft./gallon, very economicalTwo or...
 ▼ Read Reddit mentions
31. Environmental Technology 32-Ounce Kit Lite Pour-On, High Gloss Finish
- High Gloss 2 component polymer coating
- 1 coat equals up to 50 coats of varnish
- Require shipping of gallon envirotex in full case original cartons
- Preserves and beautifies
- Solvent free formula
- Waterproof
- Heat and alcohol resistant
- 32-Ounce kit covers approximately 8 square feet
Features:

Specs:
| Color | Original Version |
| Height | 8 Inches |
| Length | 2.5 Inches |
| Number of items | 1 |
| Size | 2 Piece Set |
| Weight | 3 Pounds |
| Width | 5 Inches |

33. Original Wood Finish, Pint
- Safe for Food & Skin Contact
- Free from Solvents, Dyes, Petrochemicals & VOCs
- Superior Moisture Resistance
- 100% Renewable Ingredients
- Matte sheen
Features:

Specs:
| Height | 4 Inches |
| Length | 3.3 Inches |
| Size | Pint |
| Width | 3.25 Inches |
34. Deco Art Soft Touch Varnish, 8-Ounce, Clear
Deco Art-Soft Touch Varnish: ClearUse with Americana Decor Chalky Finish Paint (sold separately) to deliver a luxurious soft to the touch durable and polyurethane finishMay also be used as a topcoat over any acrylic paint

Specs:
| Color | White |
| Height | 3 inches |
| Length | 2.8 inches |
| Number of items | 1 |
| Size | 8 Fl Oz (Pack of 1) |
| Weight | 0.58 Pounds |
| Width | 2.8 inches |
35. Minwax 63484000 Wood Finish Stain Marker, Red Mahogany
This product adds a great valueIdeal for use on furniture, molding, cabinets and moreMahoganyEasy touch-up for common nicks and scratchesIdeal for use on furniture, molding, cabinets and more.MahoganyFast dryingEasy and quick
Specs:
| Color | Red Mahogany |
| Height | 1.3 Inches |
| Length | 8.3 Inches |
| Number of items | 1 |
| Size | Red Mahogany |
| Weight | 0.1 Pounds |
| Width | 2.25 Inches |
36. Minwax 622224444 Polycrylic Protective Finish, 1 quart, Matte
- PROTECT WOOD SURFACES – Minwax Polycrylic Protective Finish protects and adds beauty to your interior wood projects, including woodwork, furniture, doors and cabinets. The clear top coat protects against scratches, spills, dirt and more.
- CRYSTAL CLEAR FINISH THAT LASTS – The crystal clear finished offered in this protective coating is ideal for use over all Minwax Oil-Based and Water-Based Stains and colors, as well as all wood species including light woods like maple, ash and birch.
- MATTE SHEEN – Give your wood projects a sleek finish with this matte clear varnish. It not only protects the natural beauty of the wood, but offers a soft, unique sheen for a modern, cozy and on-trend look. It’s non-yellowing, non-ambering and low odor.
- ULTRA FAST DRYING – Get more done with this protective poly coating. It’s a fast-drying clear coat, which allows for quick recoats after 2 hours, letting you get projects done faster. Be sure to apply with a high-quality synthetic bristle brush.
- EASY CLEAN UP – This water-based wood finish allows for easy soap and water clean-up, so you don’t have to stress about spills and big messes.
Features:

Specs:
| Color | Quart |
| Height | 0.7 Inches |
| Length | 9.5 Inches |
| Number of items | 1 |
| Size | 1 Quarts (Pack of 1) |
| Weight | 2.2 Pounds |
| Width | 4.37 Inches |
37. Watco Rust-Oleum A65741 Danish Oil Wood Finish, Quart, Natural
Ideal for use on a variety of indoor wood surfaces including bare, stripped or sanded; not recommended for floorsOil-based formula of blended oil & varnish penetrates deeply into wood pores for ultimate protectionDries to the touch in 6 hours and covers up to 170 sq ftEasy application and protects a...

Specs:
| Color | Natural |
| Height | 7.5 Inches |
| Length | 4.63 Inches |
| Number of items | 1 |
| Size | Quart |
| Weight | 1.8 Pounds |
| Width | 2.5 Inches |
38. Minwax 233334444 Minwaxc Polycrylic Water Based Protective Finishes, 1/2 Pint, Satin
Protects and adds beauty to interior wood surfaces including woodwork, furniture, doors and cabinetsCrystal clear finish is ideal for use over light woods like maple, ash and birch as well as over Minwax Water-Based Wood StainsUltra fast-drying formula allows for quick recoats in 2 hoursWater-based ...
Specs:
| Color | 1/2 Pint |
| Height | 2.87 Inches |
| Length | 2.87 Inches |
| Number of items | 1 |
| Size | 8 Fl Oz (Pack of 1) |
| Weight | 0.67749999943185 Pounds |
| Width | 3 Inches |
39. Krylon K03400000 Clear Non-Skid Coating - 11 oz. Aerosol
- Krylon Non-Skid Coatings Aerosol Clear
Features:

Specs:
| Color | Clear |
| Height | 1 Inches |
| Length | 1 Inches |
| Number of items | 1 |
| Release date | January 2013 |
| Size | 11 Ounce Aerosol |
| Weight | 0.85 Pounds |
| Width | 1 Inches |
40. TotalBoat Clear Penetrating Epoxy Wood Sealer Stabilizer for Rot Repair and Restoration (Quart, Traditional), Model Number: 403795
WOOD HARDENER FOR ROTTED WOOD: two-part epoxy system seals, hardens, preserves, and protects all types of wood by stopping rot. Makes finishes like paint and varnish stick better and last longer. Easy to use treatment has no VOCs or harsh fumesPENETRATING WOOD SEALER: An ideal dry rot treatment; thi...

Specs:
| Number of items | 1 |
| Size | Quart |
🎓 Reddit experts on houshehold finishes, sealers & stains
The comments and opinions expressed on this page are written exclusively by redditors. To provide you with the most relevant data, we sourced opinions from the most knowledgeable Reddit users based the total number of upvotes and downvotes received across comments on subreddits where houshehold finishes, sealers & stains are discussed. For your reference and for the sake of transparency, here are the specialists whose opinions mattered the most in our ranking.
Interested in what Redditors like? Check out our Shuffle feature
Shuffle: random products popular on RedditTop Reddit comments about Household Finishes, Sealers & Stains:
Summary
21. Minwax 657000000 Water-Based Sanding Sealer, Quart,Clear
- Seals wood grain
- Easy to sand
- Dries in one hour
- Use on unstained, bare wood floors, furniture, doors, and cabinets
- It seals wood grain and easy to sand
- Designed for use on unstained, bare wood floors, furniture, doors and cabinets
- Dries quickly, in one hour, for easy project completion
- It seals wood grain and easy to sand
- Designed for use on unstained, bare wood floors, furniture, doors and cabinets
- Dries quickly, in one hour, for easy project completion
Features:
Specs:
| Color | Quart |
| Height | 5 Inches |
| Length | 4.4 Inches |
| Number of items | 1 |
| Size | 1 Quart |
| Weight | 2.1164377152 Pounds |
| Width | 4.4 Inches |
22. Watco 63041 Lacquer Clear Wood Finish, Quart, Clear Gloss
- Ideal for use on furniture, doors, cabinets and paneling; not recommended for floors or exterior surfaces
- Formulated for a higher clarity finish than polyurethane
- Dries to the touch in 1 hour and covers up to 290 sq ft
- Eliminates the need for wood filler and protects against scratches; no need to sand between coats
- Dries to a crystal-clear gloss with a lasting durable finish
- Apply to furniture, doors, cabinets and paneling
- Dries in 30 minutes and does not require sanding between coats
- Dries crystal-clear
- Durable wood finish and seal
- Fast-drying
Features:
Specs:
| Color | Clear Gloss |
| Height | 4.9 Inches |
| Length | 4.15 Inches |
| Number of items | 1 |
| Size | Quart |
| Weight | 2.19 Pounds |
| Width | 4.15 Inches |
23. Minwax 63205444 Helmsman Spar Urethane, quart, Satin
Contains UV blockers to reduce the sun's graying and fading effects.Forms a protective barrier against rain and moisture.Special oils allow the finish to expand and contract with the wood as seasons and temperatures change.Ideal for use on doors, windows, trim, bathroom cabinets, bar tops, kitchen c...
Specs:
| Color | Quart |
| Height | 4.89 Inches |
| Length | 4.25 Inches |
| Number of items | 1 |
| Size | 1 Quart |
| Weight | 2.20462262 Pounds |
| Width | 4.25 Inches |
24. Minwax 63200444 Helmsman Spar Urethane, quart, Gloss
Recommended Uses: furniture, woodwork, molding, cabinets, doors, paneling, accessoriesApplication Tool: natural bristle brushDry Time: 24 hours before normal useCleanup: mineral spirits or paint thinner following manufacturer's safety instructionsContains UV blockers to reduce the sun's graying and ...
Specs:
| Color | Quart |
| Height | 4.89 Inches |
| Length | 4.25 Inches |
| Number of items | 1 |
| Size | 1 Quart |
| Weight | 2 Pounds |
| Width | 4.25 Inches |
25. J.E. Moser's 844995, Finishes, Wood Stains & Dyes, Water Soluble Ebony Black Aniline Dye
Brings out the beauty of the wood grain.Specifications: Coverage=75-100 sq ft, Diameter=1-3/4 in, Height=2-3/4 in
▼ Read Reddit mentions26. Tried and True Danish Oil, Pint
- Safe for Food & Skin Contact
- Free from Solvents, Dyes, Petrochemicals & VOCs
- Old-School Rustic Sheen
- Pure heat-treated linseed oil
- 100% Renewable Ingredients
Features:
Specs:
| Size | Pint |
27. Minwax 64444444 Polycrylic Protective Finish Water Based, quart, Semi-Gloss
- PROTECT WOOD SURFACES – Minwax Polycrylic Protective Finish protects and adds beauty to your interior wood projects, including woodwork, furniture, doors and cabinets. The clear top coat protects against scratches, spills, dirt and more.
- CRYSTAL CLEAR FINISH THAT LASTS – The crystal clear finished offered in this protective coating is ideal for use over all Minwax Oil-Based and Water-Based Stains and colors, as well as all wood species including light woods like maple, ash and birch.
- SEMI-GLOSS SHEEN – Give your wood projects a sleek finish with this semi-gloss clear varnish. It protects the natural beauty of the wood and offers a semi-shiny, sleek sheen for a bright, modern look. It’s non-yellowing, non-ambering and low odor.
- ULTRA FAST DRYING – Get more done with this protective poly coating. It’s a fast-drying clear coat, which allows for quick recoats after 2 hours, letting you get projects done faster. Be sure to apply with a high-quality synthetic bristle brush.
- EASY CLEAN UP – This water-based wood finish allows for easy soap and water clean-up, so you don’t have to stress about spills and big messes.
- Water clean-up
- Low odor, non-yellowing
- Fast drying
- Semi Gloss
- 1 quart
Features:
Specs:
| Color | Quart |
| Height | 4.9 Inches |
| Length | 4.3 Inches |
| Number of items | 1 |
| Size | 1 Quarts (Pack of 1) |
| Weight | 2.25 Pounds |
| Width | 4.9 Inches |
28. The Army Painter Anti Shine Matt Varnish for Miniature Painting - After Quickshade Matte Top Coat Acrylic Varnish for Miniatures - Matte Finish for Acrylic Model Paint, 18ml, Dropper Bottle
- 18 ml.
Features:
Specs:
| Height | 0.98425 Inches |
| Length | 3.1496 Inches |
| Number of items | 1 |
| Size | 0.6 Fl Oz (Pack of 1) |
| Weight | 0.02 Pounds |
| Width | 0.98425 Inches |
29. Minwax 63487000 Wood Finish Stain Marker, Dark Walnut
This product adds a great valueIdeal for use on furniture, molding, cabinets and moreDark WalnutEasy touch-up for common nicks and scratchesIdeal for use on furniture, molding, cabinets and more.Dark WalnutFast dryingEasy and quickEasy touch-up for common nicks and scratchesIdeal for use on furnitur...
Specs:
| Color | Dark Walnut |
| Height | 2.25 inches |
| Length | 8.3 inches |
| Number of items | 1 |
| Size | Dark Walnut |
| Weight | 0.02 Pounds |
| Width | 1.3 inches |
30. Tried & True Danish Oil Finish, Quart
This product cannot ship to a PO box. Delivery requires street address.Danish Oil is a good choice for any wood work where you want a satin finishUse on kitchenware, cutting boards, and children's furniture, since it is food safe and non-toxicThe coverage is 600 sq. ft./gallon, very economicalTwo or...
▼ Read Reddit mentions31. Environmental Technology 32-Ounce Kit Lite Pour-On, High Gloss Finish
- High Gloss 2 component polymer coating
- 1 coat equals up to 50 coats of varnish
- Require shipping of gallon envirotex in full case original cartons
- Preserves and beautifies
- Solvent free formula
- Waterproof
- Heat and alcohol resistant
- 32-Ounce kit covers approximately 8 square feet
Features:
Specs:
| Color | Original Version |
| Height | 8 Inches |
| Length | 2.5 Inches |
| Number of items | 1 |
| Size | 2 Piece Set |
| Weight | 3 Pounds |
| Width | 5 Inches |
33. Original Wood Finish, Pint
- Safe for Food & Skin Contact
- Free from Solvents, Dyes, Petrochemicals & VOCs
- Superior Moisture Resistance
- 100% Renewable Ingredients
- Matte sheen
Features:
Specs:
| Height | 4 Inches |
| Length | 3.3 Inches |
| Size | Pint |
| Width | 3.25 Inches |
34. Deco Art Soft Touch Varnish, 8-Ounce, Clear
Deco Art-Soft Touch Varnish: ClearUse with Americana Decor Chalky Finish Paint (sold separately) to deliver a luxurious soft to the touch durable and polyurethane finishMay also be used as a topcoat over any acrylic paint
Specs:
| Color | White |
| Height | 3 inches |
| Length | 2.8 inches |
| Number of items | 1 |
| Size | 8 Fl Oz (Pack of 1) |
| Weight | 0.58 Pounds |
| Width | 2.8 inches |
35. Minwax 63484000 Wood Finish Stain Marker, Red Mahogany
This product adds a great valueIdeal for use on furniture, molding, cabinets and moreMahoganyEasy touch-up for common nicks and scratchesIdeal for use on furniture, molding, cabinets and more.MahoganyFast dryingEasy and quick
Specs:
| Color | Red Mahogany |
| Height | 1.3 Inches |
| Length | 8.3 Inches |
| Number of items | 1 |
| Size | Red Mahogany |
| Weight | 0.1 Pounds |
| Width | 2.25 Inches |
36. Minwax 622224444 Polycrylic Protective Finish, 1 quart, Matte
- PROTECT WOOD SURFACES – Minwax Polycrylic Protective Finish protects and adds beauty to your interior wood projects, including woodwork, furniture, doors and cabinets. The clear top coat protects against scratches, spills, dirt and more.
- CRYSTAL CLEAR FINISH THAT LASTS – The crystal clear finished offered in this protective coating is ideal for use over all Minwax Oil-Based and Water-Based Stains and colors, as well as all wood species including light woods like maple, ash and birch.
- MATTE SHEEN – Give your wood projects a sleek finish with this matte clear varnish. It not only protects the natural beauty of the wood, but offers a soft, unique sheen for a modern, cozy and on-trend look. It’s non-yellowing, non-ambering and low odor.
- ULTRA FAST DRYING – Get more done with this protective poly coating. It’s a fast-drying clear coat, which allows for quick recoats after 2 hours, letting you get projects done faster. Be sure to apply with a high-quality synthetic bristle brush.
- EASY CLEAN UP – This water-based wood finish allows for easy soap and water clean-up, so you don’t have to stress about spills and big messes.
Features:
Specs:
| Color | Quart |
| Height | 0.7 Inches |
| Length | 9.5 Inches |
| Number of items | 1 |
| Size | 1 Quarts (Pack of 1) |
| Weight | 2.2 Pounds |
| Width | 4.37 Inches |
37. Watco Rust-Oleum A65741 Danish Oil Wood Finish, Quart, Natural
Ideal for use on a variety of indoor wood surfaces including bare, stripped or sanded; not recommended for floorsOil-based formula of blended oil & varnish penetrates deeply into wood pores for ultimate protectionDries to the touch in 6 hours and covers up to 170 sq ftEasy application and protects a...
Specs:
| Color | Natural |
| Height | 7.5 Inches |
| Length | 4.63 Inches |
| Number of items | 1 |
| Size | Quart |
| Weight | 1.8 Pounds |
| Width | 2.5 Inches |
38. Minwax 233334444 Minwaxc Polycrylic Water Based Protective Finishes, 1/2 Pint, Satin
Protects and adds beauty to interior wood surfaces including woodwork, furniture, doors and cabinetsCrystal clear finish is ideal for use over light woods like maple, ash and birch as well as over Minwax Water-Based Wood StainsUltra fast-drying formula allows for quick recoats in 2 hoursWater-based ...
Specs:
| Color | 1/2 Pint |
| Height | 2.87 Inches |
| Length | 2.87 Inches |
| Number of items | 1 |
| Size | 8 Fl Oz (Pack of 1) |
| Weight | 0.67749999943185 Pounds |
| Width | 3 Inches |
39. Krylon K03400000 Clear Non-Skid Coating - 11 oz. Aerosol
- Krylon Non-Skid Coatings Aerosol Clear
Features:
Specs:
| Color | Clear |
| Height | 1 Inches |
| Length | 1 Inches |
| Number of items | 1 |
| Release date | January 2013 |
| Size | 11 Ounce Aerosol |
| Weight | 0.85 Pounds |
| Width | 1 Inches |
40. TotalBoat Clear Penetrating Epoxy Wood Sealer Stabilizer for Rot Repair and Restoration (Quart, Traditional), Model Number: 403795
WOOD HARDENER FOR ROTTED WOOD: two-part epoxy system seals, hardens, preserves, and protects all types of wood by stopping rot. Makes finishes like paint and varnish stick better and last longer. Easy to use treatment has no VOCs or harsh fumesPENETRATING WOOD SEALER: An ideal dry rot treatment; thi...
Specs:
| Number of items | 1 |
| Size | Quart |
After I posted my new split-top Roubo a few months ago, a lot of you said, “great, now go build something with it.” So, ya know, I did.
About halfway through the bench build, a co-worker approached me and told me about a bunch (about 105 b.f.) of 8/4 local Florida Cypress that he had purchased on Craigslist and wanted to be made into an outdoor table. We both started to get excited about the ideas we were tossing out and he eventually agreed to commission me to build it. So the fun challenge was figuring out how much table and one bench he could get out of the amount of wood on hand (he wanted to put two chairs on the other side) instead of the usual design, calculate, buy. We did some back and forth on the design while I finished my bench but he largely left it all up to me. I heavily based the design on Marc Spagnoulo’s rustic outdoor table because I really want to build one for myself. I added a few refining details that I’ve wanted to try in a project and eliminated one stretcher because of the amount of wood available. Some of the details worked, others I would change on subsequent versions.
Once the workbench was done, I got to dig in on the table. The first difficulty was the wood itself. Either my co-worker or the person from whom he bought it from had left the wood out for quite a while so that it was pretty discolored with mildew, was a bit punky in spots, and had been snacked on by bugs. My cutlist kept getting thrown out whenever I’d cut into a piece and find a worm or termite track. I kept a close eye on the wood and didn’t see any further signs of living critters but it did get annoying at times. I got around most of them but there are a few small tracks visible, not more than 1/32” wide or ½” long but I eliminated all big tracks. (1/4” wide) I’ve never worked with Cypress before and it was definitely a learning experience. New growth Cypress is so soft. If you imagine wood grain as a lot of straws bundled together, this stuff is like a bunch of pool noodles, yet it still proved quite prone to tear out. I’d sharpen my hand tools 2-3 times a day to keep getting clean, slicing cuts. No matter how sharp my plane blades/ tight my mouth/ close my chipbreaker was though, I’d still get areas of tear out in difficult areas. After some reading around and some great advice from r/woodworking, it seemed a lower angle iron might be the solution. Weeellll, I just happen to have some money set aside and now an excuse so, go ahead, twist my arm, I’ll get a new toy. Lie-Nielsen’s low angle jack proved to be absolutely perfect and gave me the best surface I’ve encountered right off the plane.
A few of the changes I decided to make to The Wood Whisperer’s table was to taper the legs, bevel the underside of the table top, and use drawbored dowels for the joinery. They worked well enough, especially since the customer loved the end product, but I’ll change things further on subsequent versions.
First would be the taper of the legs. It’s meant to be a bit rustic but I tapered the legs because I didn’t want an overly blocky look to it. When designing and then building it, something didn’t sit quite right but it didn’t condense into an idea why. After it was too late, I saw Marc building his gaming table and it clicked. Those legs were tapered from the inside, mine were tapered from the outside. I don’t have the design education to describe it using the right jargon but the lines of my table remind me of a shy person standing with their feet together, trying not to be noticed. The lines drag your eye down to the ground. Whereas Marc’s reminds me of the superman pose; someone standing with their legs slightly apart confidently. Your eyes are drawn up to the main part of the table. I’m still happy with my table but it’s something to improve on the next version, though I don’t know yet how that will jive with the side rails.
The next item I’d change is the drawbore pins. I’ve seen plenty of shaker pieces with squared off dowels set in a diamond pattern and cut from a contrasting wood color. They look very elegant and I wanted to try it here. First, I went with too many. I didn’t need two in each joint. It was having two dowels and the dowel’s shape that caused the first joint I put together to blow apart. I made most of the dowel round using Veritas’ dowel cutter, leaving the end tapered to a square. From an article on square shaker pegs in Fine Woodworking, I expected the softer Cypress to just deform to the harder Mahogany dowel. The problem was that the taper from round to square was too long, (about ¾”) meaning it was spreading apart the wood deeper down. It could only handle so much deformation before it split. The solution was to take a chisel to the rest of the dowels and limit the taper to about 1/8” and only drive it in to the point where it just transitioned to fully square. Chiseling the receiving hole just shy of square also meant the Cypress had to deform less so no splitting and a crisper diamond pattern. If I do it again, one dowel will be enough but I don’t even think I’ll do a contrasting color again. This wood is filled with knots and, instead of the dowels being a pleasant interruption of monotonous grain, it just joins the knots to make it look busy and chaotic. It just doesn’t stand out in a pleasant way.
The arched stretcher ended up being 4” tall instead of 3 ½” because, after making and putting in the side rails, loe and behold, I F’ed up. They were further apart than planned and I had to make the stretcher taller to accommodate.
The other two changes were the beveled undersides of the table and bench tops and all the other bevels added to the bench top. Those I would leave as I think they look really nice, giving each a visually lighter look than their 1 ½” thickness. The beveled top of the bench seat makes for a more comfortable spot to rest your posterior for a long while.
The other great thing to come from this project was that I got to use my hand tools more on this project than any previous build, especially hand planes. Obviously it was just too big for any of my hobby level power tools but I geeked out on every bit of it and it got me really comfortable with several tools.
Finally, I finished it fully expecting to be an outdoor table. I used Watco teak oil that could easily be reapplied in later years and won’t blister like a film finish. I applied clear penetrating epoxy sealer to the feet to stop absorption be the end grain at the bottom of the legs and keep them from rotting from the ground up. Lastly, I put a few coats of Minwax Finishing Paste Wax on the tops of the table and bench as a barrier against mustard, ketchup, beer, etc. It’s shinier than I intended but will knock down pretty quickly. However, as it turned out, he loved it so much it will now be the main dining table inside his house and some CL table will be found for outdoors. I’m perfectly ok with that.
Thanks for looking, reading, and any constructive criticism you can throw my way. Thanks for all the advice leading up to this and my workbench. You, my fellow wood nerds, are awesome.
For me, that would be dependent on several factors - I would block sand the headstock with about 220 grit, with the grain, until it's as smooth and blemish free as possible...
Then I would double check to make sure that the tuning keys have enough threads to tighten down properly without the thickness of the missing veneer. If they do, you're good to proceed, otherwise, you probably want to find a veneer, shape and glue it up and proceed with finishing. (you also would have the option of reaming out the holes and using a bushing, but that would weaken the headstock just a bit).
If you want a fairly exact match on the color, Stew-Mac has ColorTone Liquid Stains that can be mixed with lacquer (or polyurethane, if that's your choice, I'd personally go with lacquer as it's easiest to work with and polishes out better) - you can tint the clear finish (don't tint the whole can, you'll also want some clear to apply on top), and just brush on subsequent coats until the color is deep enough to match. a few (few in my world means about 10, but I'm extremely particular) coats of clear on top, block sand with 2000 grit paper, and hand polish and you're good to go.
Another option would be to stain the wood directly, but you may have a harder time getting the color to match. If you test on a scrap of similar wood, though, you can get it pretty honking close and the use the tinted clear to tweak it. That might be faster (stain first, then clear).
Whatever finish you decide to go with, be sure to pay careful attention to the wait time between coats and the recoat window. Layers have to thoroughly outgas between coats so that you don't trap solvents between layers - that's how you get bubbles of cloudy (blushed) clearcoats.
Refrain from casing it up as long as you can - let the finish air dry as long as you can stand it. OH, and you probably also want to wait at least a week after your last coat of clear before you crank down on the tuning key nuts to make sure that the finish has fully hardened - otherwise you'll get squishy little craters in the finish because it's still a little soft. Those things don't have to be torqued down like a car engine mounting bolt either, just hand snug is fine. It's your guitar, you can always revisit that in a couple of months anyway.
Best of luck with your project - we want pics when it's done!
I would suggest:
Basic process (You have the video to fallow, but these steps are general steps for almost all woodworking finish)
Other Options, instead of Laquer:
I pretty much use boiled linseed oil to finish everything I make. You can just wipe on with a brush or rag and it's basically impossible to mess up. It brings out the natural color and grain nice without looking overdone. Personally, I don't like clear coat unless it is satin or flat. I think shiny furniture takes away from the natural beauty and loses some of the grain in the glare. This satin clear coat works pretty good I've found and is water based and easy to clean up: https://www.amazon.com/Minwax-64444444-Polycrylic-Protective-Semi-Gloss/dp/B000PRNXNY I've used it on 5-6 tables now and I'm always happy with the look and durability. You can do 2-3 coats and sand with 220 briefly in between coats to get the finish super smooth.
Anyways, you have a really cool slab and it's going to make a beautiful table no matter how you decide to finish. :)
Dowels and chopsticks with sandpaper wrapped around them, and a Dremel with a variety of stones. It's gonna be a labor of love.
Proluxe is good, but it's really just a deck stain. And the semitransparent is a water based acrylic... you're not gonna like the finish it gives you on that beautiful old hardwood. It'll look like plastic. I'd personally go with an Old Masters penetrating stain (you can go with a wiping stain if you wanna tone down the grain a little... wiping stain will give you a little more of the semitransparent look) followed by a spar finish (3 coats, applied with sponge brushes, light sand with 220 between coats - juuuuust kiss it with the sandpaper). It'll give the door a richer and longer lasting finish than a simple coat of deck stain, and the spar is UV protectant.
I'd use Evaporust or Metal Rescue on any of the ironwork that can be removed and allowed to soak (with both products, you strain the soak and pour it back into the jug - it's reusable several times). After the rust removal soak, clean with acetone and use a self-etching primer. For anything you can't remove and soak, use Rust Reformer after wire brushing instead of a simple primer for tough surfaces - it converts surface rust to magnetite to stabilize it. Then proceed with your black color coat. After the black, spray with a couple coats of satin clear. All the paints I linked are available at any auto parts store and Walmart, and I believe Home Depot carries Metal Rescue.
That's a gorgeous door. Take pictures and post a project gallery!
Edit: added that Proluxe semitransparent is water based.
Thanks! You have to dissembled the joy cons which is pretty simple after my first one. 5-10 minutes each joy con.
From another reply I posted.
"You want to start off using an air brush kit. You can get some pretty cheap ones for about 80 bucks that will do the job. Something like this https://www.amazon.com/Master-Airbrush-Multi-purpose-Dual-action-Compressor/dp/B001TO578Q.
I have a better air brush that's about 150 bucks alone but it's because we use it for other stuff that requires more precision. You won't need something that much to do the job.
Start off taking out your joycons and cleaning it. Use grey or black primer and let it cure for 12+ hours. https://www.amazon.com/Vallejo-Black-Primer-Acrylic-Polyurethane/dp/B004BN5RUU/ref=sr_1_2?s=toys-and-games&ie=UTF8&qid=1494183787&sr=1-2&keywords=airbrush+black+prime
As for the paint itself, you can use any of these and it depends on what you like. https://www.amazon.com/Color-Changing-Holographic-Paint-2oz/dp/B0015H4G2K. I used the gold/green/orange/purple so it changes to any of these colors based on the angle.
For the finish, I used https://www.amazon.com/Deco-Touch-Varnish-8-Ounce-Clear/dp/B00HQME2R2/ref=sr_1_1?s=hi&ie=UTF8&qid=1494183686&sr=1-1&keywords=soft+touch+varnish. It gives it a really nice soft touch feel but it's very thick. You'll want to thin it out a bit and let it cure for 24+ hours. Multiple coats the better for that extra protection and long lasting feel. Although I used these here, I am finding that they will wear out eventually. I am redoing the finish with this now. https://www.amazon.com/Vallejo-Matt-Model-Color-Varnish/dp/B000PH9JPA/ref=sr_1_1?ie=UTF8&qid=1494191915&sr=8-1&keywords=vallejo+matte+varnish. You can also go with a glossy finish if you want as well.
I just started air brushing a few months ago so just practice on some test objects."
Well, regarding the sanding, my rule of thumb is to sand moving up through the grits until the sanding marks disappear. How high I go with the grits depends a lot on the tool I'm using (hand sanding versus orbital sander versus random orbital sander),species of wood, and what finish I plan to put on it. Hand sanding following the grain is pretty forgiving, because the scratch pattern blends in with the grain. Orbital sanders tend to leave a scratch pattern across the grain which stands out. Random orbitals are better, but still leave some swirls across the grain. If I'm going to stain it, sanding marks will show up much more strongly than if I was just going to clear coat it. Every project is different, but typically I'll sand to at least 180 if I'm staining, and at least to 120 if I'm just oiling and clear coating. In truth I usually go higher than those numbers, but if I'm in a rush I can get away with those as minimums. I've used it on a couple of projects and have been quite pleased with it.
Now, all that said, the amount of sanding you do doesn't really change the porosity of the wood. Rough sanding will leave a more toothy surface, but that doesn't make much difference to an oil or other penetrating finish, because it will soak in as deep as the cell structure of the wood allows regardless of how smooth it is. Paints don't penetrate, they just cling to the surface, so leaving a more toothy surface does benefit them. I looked at the primer you linked, and I'm still not quite sure what to make of it, but it seems to me to be something along the lines of what I've seen called grain conditioner, which is basically a thin oil that penetrates and soaks into the wood to sort of level out how the wood absorbs subsequent layers of stain or dye or whatever. It basically helps prevent blotchiness. Since it is a penetrating substance, it shouldn't really matter how much you sand it.
Since you seem to be having dificulty finding a final finish, I might suggest OSMO Top Oil. It's a hard wax oil that both penetrates and leaves a wax film on the surface. It's meant specifically for kitchen countertops, so it should be able to handle hard use and abuse, and it's easy to apply more as it wears over time.
Sure! I've been planning to do this since we bought this house.
This is the kit I'm using, obviously mine is in black. It comes with a sanding pad to do the sides of your cabinets, I guess they are made differently than the doors, but I went over all my cabinets with the pad and some 150 grit sandpaper, just so I could be sure it would adhere to the cabinets.
So far I've just been painting them, and being sure to use painters tape so I don't ruin anything. I am using a small artists brush to paint around the inner hardware so I don't have to take the doors off.
According to the reviews, and tutorials online they recommended to use This Satin Polycrylic Protective Finish just for added protection. I bought the one I linked, and plan to use it. It's a kitchen so I'm sure dings are going to happen. So for me the protection is a necessity.
Lining my cabinets with this chevron contact paper
And I'm thinking that hardware will really modernize my kitchen, which is what I'm going for.
Worth Knowing I used a different "no sand" type paint in my bathroom, and I love this so much more. This brand has a Facebook page, and seriously, their product really is awesome. I should have taken more before photos.
Also the kit only comes with 2 quarts(?) and it goes so far. My kitchen is huge! And we have done it all and 59% of it already has a second coating! and we have barley used 1/3 of the paint.
I bought a "damaged" box off Amazon, check there. This kit is at my Lowe's for $149, and $69 off the manufactures website. I paid $30. My contact paper was $10 and my Protective coating was $10. Might buy hardware but that's optional. So new fucking cabinets for $50, $40 if you skip the paper? Cannot be beat.
I'd encourage you to look in to Tried & True Danish oil. It's a pure linseed oil, so same idea as tung oil, but it's the oil that in my experience has changed the color of maple the least. Two or three coats of it applied according to the directions on the container will give you a nice subtle satin sheen.
As for blotchy issues, I typically only see that as an issue when someone tries to color maple with a big box store type wood stain or something like that. If you want to color the maple, I'd recommend Transtint dyes, but since you said you want to keep in natural on show off the grain, immaculate surface prep + Tried and True should get you where you need to go.
https://www.amazon.com/Tried-True-Danish-Oil-Pint/dp/B0155AUTG4
Thanks for the info, really appreciate it. I just want to make something that looks nice without creating a bunch of trash or hazardous waste. Also, it saves me time and energy if there's an easy cleanup.
Ever tried the Original Wood Finish by Tried and True? https://www.amazon.com/gp/product/B003DKYZQ4/ref=crt_ewc_img_dp_1?ie=UTF8&psc=1&smid=ATZ61JQHZC6XB
Ive never used Rit but had good results with aniline dye. It doesnt require any bleaching and is easy to adjust the darkness.
Fading is only an issue in direct sunlight, and over a long time, but a clear UV inhibiting top coat can help with that.
I recently started used Tried and True finish, it's food safe, and I have been very happy with the results. I've been putting 2 coats on, and it gets a nice semi gloss finish.
Thank you very much! I did the fast-drying - I almost exclusively use that product for poly.
The wax was a paste wax to buff the final finish and clean up any imperfections the poly might have left. It's similar to a wet sanding, without getting too technical. I used 0000 steel wool and put the steel wool in the wax, buffed it onto the box, then let it sit for a minute or two, and then removed the wax and buffed it with a shop(lint free) towel.
http://www.amazon.com/Johnson-Fine-Wood-Paste-00203/dp/B0000DIWIM
The humidor I made out of Tiger Maple with a Spanish Cedar lining. It's approximately 6' tall, 2.5' wide, and 1.5' deep. I'll link some pictures for you!
Edit1 Response: I used the MinWax sanding Sealer, that comes in the white can: http://www.amazon.com/Minwax-65700-Water-Based-Sanding-Sealer/dp/B004Y6TTKI
Edit2 Response: So I sanded the box with 150, 220, 400, and 800 with my orbital until it was as smooth as I could get it. With Zebrawood it seems like the grain stands up, and I could be using the wrong term, but part of the wood will pop up with almost small slivers, that will need to be buffed out. Essentially the grain was raised up and it really only does it on the first coat that gets applied. If you ever work with Zebrawood you'll know exactly what I'm saying - one of those things that's hard to explain without a sample in front of me.
FYI - I'm more than happy to answer any of your questions!
I personally love lacquer for finish watco brushing lacquer is my go to. It lays down nice with a good brush and it dries fast way faster than poly and hold up almost as well. It doesn’t have the water resiliency as poly. One tip I after final coat rub the surface with a brown paper bag take out the dust nibs without dulling the finish.
Wow, nailed it - it is indeed plywood birch. I used this Dark Walnut stain marker, which was super easy.
Vallejo Matt Model Color Varnish, 17ml https://www.amazon.com/dp/B000PH9JPA/ref=cm_sw_r_cp_apa_i_4ZWqDbN193MQG is a good one.
I use The Army Painter Anti Shine Matte Varnish https://www.amazon.com/dp/B007QW3M0U/ref=cm_sw_r_cp_apa_i_z1WqDb9D0KQZX. Because they had it at my local shop, it dries fast and I like brushing it on to control the thickness and honestly it doesn't take long.
Before you use a matte varnish use a gloss one it's a better protector. I do 2 thin coats of gloss then 2 thin coats of matte.
Gloss varnish- Vallejo Acrylic Paint, Gloss Varnish https://www.amazon.com/dp/B001JJZDSK/ref=cm_sw_r_cp_apa_i_82WqDb58V9HGK
"Old Fashioned Milk Paint" is zero VOC and awesome looking. Sand lightly between coats. Use gloves with this as the lye is caustic before the reaction with the milk protein.. after it dries, it's fine.
Topcoat with a couple of wipe on/wipe off coats of https://www.amazon.com/Tried-True-Wood-Finish-Danish/dp/B003DL6VQA/ USE VERY VERY LITTLE OF THIS PRODUCT, and rub it to get off what you can after letting it sit an hour... during the wipe-off phase, the rag should come clean.
check out the MDS/MSDS of all the stuff you want to use and judge for yourself.
Helmsman Spar. It's a wood varnish designed for outdoor/marine use, works great for bar tops and tables because it holds up well against moisture. 3-4 coats is usually enough. I recently built a bar and used this and it looks amazing. No worries if I forget to use a coaster under a sweating glass, it never rings.
I use https://www.amazon.com/Minwax-63200-Helmsman-Urethane-Finish/dp/B000Y4II3I/ref=sr_1_6?ie=UTF8&qid=1473080884&sr=8-6&keywords=spar+varnish whenever I'm concerned about yellowing, say from the sunlight from a window. It's formulated to block UV which is what causes fading and yellowing.
It will not give you the finest furniture lacquer quality finish, but a very nice finish is doable if you take care with multiple coats, sand between coats, use a proper tack rag, maybe thin a tiny bit with mineral spirits to get thinner coats. Finish is tough and you don't have to worry about damage from the misc stuff that gets thrown on tables.
The only drawback is that it is oil based, so you need good ventilation when working with it and it takes a few days to lose the smell completely.
Please post a photo of the finished project in reply to this comment.
Yeah varnish can be weird, every brand is different I use to love this reaper brand but can’t find it anymore but the army painter stuff I’m using is a close second.
Hobby Anti-shine Paint Pot https://www.amazon.com/dp/B007QW3M0U/ref=cm_sw_r_cp_api_i_UcRPCb3HW1Z6P
Then you have peeps who use unconventional types of varnish like pine-sol or something like that through an air brush. Although I can’t remember if it was pine-sol that I read that they used. I think it’s weird but if works for them to each their own.
I spent a few minutes on the interwebs looking at finished maple. honestly this looked the best to me http://www.amazon.com/Watco-Danish-Oil-Finish-Natural/dp/B00176TCU0
do a Google image search for danish oil on maple and you will see what I mean.
Thanks! ..and nope, no pre-sealer nor conditioner - I just dampened with water to raise grain, sand to 220, wipe clean and go. Here is the dye I used with denatured alcohol.
Hmm it's a huge table top (5ft) so I don't think I can get a nice brush all the way across. Do you think I can use this? Minwax 622224444 Polycrylic Protective Finish, 1 quart, Matte https://www.amazon.com/dp/B017NNJQIS/ref=cm_sw_r_cp_apa_i_7F7HDbSNGSCE8
Get one of [these pens] (http://www.amazon.com/Minwax-63484-Finish-Interior-Mahogany/dp/B000BQN8FM/ref=pd_sim_hi_2) but be sure to get the right color. It is hard to tell if it is badly chipped or just dinged a bit. For the bulk of it: Restore-a-finish in the appropriate color applied with some 0000 steel wool.
Wood will almost always look better than paint. To get a really good job with the paint you'll put about the same amount of work.
There is a brand of Danish Oil (Tried & True) that claims to be made without any toxic chemicals: https://smile.amazon.com/gp/product/B003DL6VQA/
I've used it a bunch of times and it works well. It's actually certified food grade - personally I would not trust it that much but I'm sure a surfboard will be fine!
Check this stuff out: https://amzn.com/B000BZYYQ0
Or, you could put a piece of glass on top of the door.
I would make sure that this is going to be an aesthetic that you'll like though...
I would suggest practicing on a piece of scrap wood if you do want to add color. I think it look lovely as is though!
As for the finish, I use this:
Minwax 64444444 Polycrylic Protective Finish Water Based, quart, Semi-Gloss https://www.amazon.com/dp/B000PRNXNY/ref=cm_sw_r_cp_apa_i_sYPDDbDE4ZEJT
With this brush:
Minwax 427320008 Manway Polycyclic 2" Trim-Polyester/Nylon Blend Brush/Roller/Applicator, 2 inch, White https://www.amazon.com/dp/B01LBFR8T8/ref=cm_sw_r_cp_apa_i_9ZPDDbCF4N6BQ
The full guide:
http://www.autogeekonline.net/forum/show-n-shine/19021-headlight-restoration-new-uv-sealant-idea.html
Hey, I had the same problem (but with people). What I did was buy a can of clear non-skid coating, and it works like a charm. It wears off over time however, depending on how much foot traffic it gets. I usually reapply once a year.
I am looking for a natural oil finish and I want to avoid toxic substances and fumes. I tried food grade white mineral oil but the surface is still greasy a week later (its possible i did not put it on correctly). I saw some forum posts that people claimed its because mineral oil is a non-drying oil and it will always feel that way. So far this is what I have come up with Tried & True Oil and Walrus Oil has anyone used either of these or have other suggestions?
Ah, ok. The problem with those is usually the cheap fit between the wood base and the horn.
A lot of people use Envirotex to seal their horns, that would certainly work in your case: https://www.amazon.com/Environmental-Technology-32-Ounce-Pour--Finish/dp/B000BZYYQ0/ref=sr_1_1?ie=UTF8&qid=1432588567
Thank you! So if I use one of those stain pens marketed towards "red mahogany" it should work just fine, correct? The reason I ask is because the picture on the package looks darker than my stain.
Here's the exact production in question- Minwax 63484000 Wood Finish Stain Marker, Red Mahogany https://www.amazon.com/dp/B000BQN8FM/ref=cm_sw_r_cp_apa_i_a-YVDb0N2SEYH
Thanks!
This sort of thing?
https://www.amazon.com/dp/B017NNJQIS
Yeah, Osmo Top Oil is a blend of plant-based oils and a wax that have been heated to polymerize. It is supposed to be amazing.
The epoxy I used is only in New Zealand I think (Norski Timber Sealer), but this seems to be the same thing :
TotalBoat Penetrating Epoxy
I've not used that one, but it seems to be the same thing, to give you an idea of what you're looking for. I'm sure there are lots of different brands.
I used the following: https://www.amazon.com/gp/product/B007RHA5KE/ref=oh_aui_detailpage_o00_s00?ie=UTF8&psc=1
Just a word of advice, spray this outside or in a well ventilated area or else be prepared to be smelling the noxious fumes for a couple hours later.
Thanks, I'm going to go ahead and try thin layers of Envirotex pour on gloss. Has 1 bottle of resin and 1 bottle of hardener that you mix.
https://www.amazon.com/gp/product/B000BZYYQ0/ref=ppx_od_dt_b_asin_title_s00?ie=UTF8&psc=1
I would fill, then use these https://www.amazon.com/Minwax-63487000-Finish-Marker-Walnut/dp/B0000DI7ZK/ref=sr_1_3?ie=UTF8&qid=1519250430&sr=8-3&keywords=wood+stain+pens You can use several colors to mimic the grain in the wood making it pretty hard to notice if you don't know where it was.
Try Watco clear.
https://www.amazon.com/Watco-A65741-Danish-Oil-Finish/dp/B00176TCU0
Something like this or this?
[this](http://www.Minwax.com/ 63200444 Helmsman Spar Urethane, quart, Gloss https://www.amazon.com/dp/B000Y4II3I/ref=cm_sw_r_cp_apa_i_bi11BbAWDC6M3) is the one I got. Make sure it's not the water based one. And then mix it with mineral spirits. Most diys call for a 50/50 mix of both
https://www.hidplanet.com/forums/forum/general-discussion/shrouds-ccfl%C2%92s-angel-eyes-painting/41723-headlamp-uv-protector-urethane?p=675308#post675308
Use a grease pen! Seriously though, I don't know how you would need to do it on walnut.
I did one in birch and burned in the scale and numbering, then overcoated with satin/flat version of this. Then I coated that in Minwax paste wax. The idea was/is for the marks for height or whatever are to be scratched in using a knife or scratch awl. Then that scratch would be gone over with a stain marker and wiped off. The wax would help the stain to only stick in the scratch.
Since you have a dark background, that won't work for you. I guess you could just use a regular light colored paint pen though. You would still have to scratch the wood to get it to stick. Wax, and to some extent polyurethane, won't let the paint stick permanently to it.
(I'm not sure what exact epoxy you are using, but...)
If you use a penetrating epoxy, you will get a significantly more durable finish. Be warned it does end up more "plastic" feeling than if you just use the spar alone.
Also, you have to keep up on it (recoat as necessary) because if you do let the finish fail, it is difficult to repair (vs. if you just used spar, you could just strip off the varnish).
I have had great luck using Total Boat epoxy, thinned 25%, 3 coats, covered with Epifanes marine UV varnish (first two coats thinned, last coat less thinned).
As an example, this bench has been out for three seasons, and the finish still looks just like it did the day I applied it.
I did some Googling and a few folks recommended this stuff. http://www.amazon.com/Minwax-23333-Polycrylic-Protective-Finishes/dp/B000C02AO2
Clean it well. Seal the inside with a food safe sealant. Bee's wax is the most common, but you can get other hardier things like this bar top sealer. bee's wax shouldn't be washed with hot water, or used with hot beverages it'll damage the seal.
No stain, because Jupiter is a variation of browns.
helmsman is what I like to use.
Just grab a decent brush when you buy it and brush with the grain
Literally 30 seconds of googling
http://www.personal.utulsa.edu/~marc-carlson/horn/dhorn.html
https://www.amazon.com/Environmental-Technology-32-Ounce-Pour--Finish/dp/B000BZYYQ0/ref=sr_1_1?ie=UTF8&qid=1432588567&sr=8-1&keywords=bar+top+epoxy
From the translation, its just a solvent based urethane finish. This would be similar, https://www.amazon.com/dp/B000Y4II3I. There are lots of manufacturers of solvent based urethane finishes though.
I've done a similar thing:
https://imgur.com/a/lm5Yx
I mixed the glow powder with this resin and dripped it into all the bug-eaten spots in the wood.
https://www.amazon.com/Environmental-Technology-32-Ounce-Pour-Finish/dp/B000BZYYQ0
Someone has been using this stuff out at renfests for years - Link.
This one?
https://www.amazon.com/Krylon-3400-Clear-Non-Skid-Coating/dp/B007RHA5KE
I used this stuff. I think it cured for almost 14 days before I rubbed it.
Environmental Technology 32-Ounce Kit Lite Pour-On, High Gloss Finish https://www.amazon.com/dp/B000BZYYQ0/ref=cm_sw_r_cp_api_i_udmuDb775X4MY
You pour it on
A stain marker would do the trick, just gotta eyeball a similar shade. Example: https://www.amazon.com/Minwax-63487-Finish-Marker-Interior/dp/B0000DI7ZK
You could try this stuff. It should fill the pores and hold up to normal cutting board activities.
http://www.amazon.com/gp/product/B000BZYYQ0/ref=pd_lpo_sbs_dp_ss_1?pf_rd_p=1944687702&pf_rd_s=lpo-top-stripe-1&pf_rd_t=201&pf_rd_i=B000PEGLBS&pf_rd_m=ATVPDKIKX0DER&pf_rd_r=02DD0C7Y29K9P9X27FZW
This is actually before they are coated and I'm not sure I chose the right option here, but I'm currently coating them with a 2 part epoxy resin which I will then sand with some 600 grit to take away the gloss and give it a satin finish.
However, the kind I used is really meant for a horizontal surface, so I'm having trouble getting it to apply to all of the sides in an even fashion.