Reddit mentions: The best hobby tool magnifiers
We found 211 Reddit comments discussing the best hobby tool magnifiers. We ran sentiment analysis on each of these comments to determine how redditors feel about different products. We found 77 products and ranked them based on the amount of positive reactions they received. Here are the top 20.
1. Neiko 01902 Adjustable Helping Hand With Magnifying Glass | Dual Alligator Clips
- HELPING HAND SOLDERING STATION: This helpful tool frees your hands for safe soldering, gluing, positioning, fastening, and assembly of objects small to large in size for tasks requiring a high level of precision, such as avionics.
- MAGNIFYING GLASS WITH STAND: This soldering helping hand is equipped with a 2x magnifying glass on an adjustable arm to perform precision work on even the smallest of objects or workpieces. With this tool, you can achieve near-perfect results.
- DUAL-CLIP STAND: Dual alligator spring clamps are attached to wire holders on adjustable arms that securely hold components, work pieces, small electronics, and appliances steady for soldering tasks that require accuracy and efficiency.
- ADJUSTABLE HELPING HAND: The mirror and clamps are mounted on adjustable ball joints to position and view work at any angle and to serve as extra hands to view objects at the most difficult angles with ease.
- SOLDER STATION WITH HEAVY-DUTY BASE: The heavy-duty cast-iron base keeps the unit upright and stable and provides a secure hold that keeps objects steady while working on or soldering components. Perform even the finest work with this helpful tool.
Features:

Specs:
| Height | 2.68 Inches |
| Length | 5 Inches |
| Width | 3 Inches |
| Size | 1-Pack |
| Number of items | 1 |
2. YOCTOSUN Head Mount Magnifier with 2 Led Professional Jeweler's Loupe Light Bracket and Headband are Interchangeable
- 5 interchangeable lenses with 1.0X, 1.5X, 2.0X, 2.5X, 3.5X magnification, scratch-resistant acrylic reduces weight.
- Comfortable eyeglass frame with rubber nose-pads or switch to headband for more-secure fit.
- Headlight with 2 super-bright LED -powered by 3 AAA batteries (included), last for long hours.
- See your work pieces or text magnified up to 350% original size with high clarity.
- Perfect for jewelry work, watch repair, arts & crafts or as general reading aid.
Features:

Specs:
| Color | White |
| Height | 2.6 Inches |
| Length | 8.5 Inches |
| Width | 6.1 Inches |
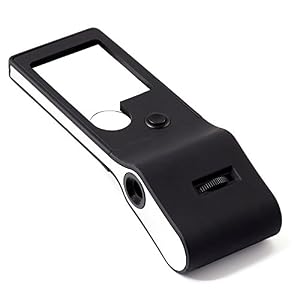
3. KINGMAS Mini 60x Microscope Magnifying with LED Light Pocket Jewelry Magnifier Jeweler Loupe with 10X Folding Pocket Magnifier
- Application Range: Industrial Purpose, Circuit Board And Printing , Industry, Gardening, Coin, Stamp, Jewelry, Appraisal, Education, Geography, Home And Office
- Package Content: 1 x Black faux leather puch;1 x 60X Microscope LED Currency Detecting Magnifier; 3 x LR1130 batteries;
- The pocket size is convenience to carry, you can use it in everywhere and every time
- Illuminated by LED . Bright LED light of the Magnifying Glass provides enough light at any dim conditions;
Features:

Specs:
| Height | 2.4 Inches |
| Length | 3 Inches |
| Weight | 0.02 Pounds |
| Width | 1.5 Inches |
| Size | 60x |
4. Brightech LightView Pro Flex Magnifying Lamp - 2 in 1 Clamp Table & Desk Lamp Energy Saving LED Ultra Bright Daylight Light, Great for Reading, Hobbies, Crafts, Workbench- Black
- Magnifying Glasses With Light For Close Work: This magnifying glass with light is designed for people who need continuous close focus work or anyone who needs visual aids to reduce eye fatigue. With a 3" lens made of genuine diopter glass, you won’t feel dizzy when you use it for reading, cross-stitching, sewing, painting, needlework, and other small projects. Things are in focus 13" away.
- Adjustable Magnifying Desk Lamp With Gooseneck: The glass lens has a 13.5" adjustable, flexible gooseneck, can be adjusted up and down, you can keep the magnifying glasses with light for close work at any angle, freeing both hands. Suitable for repairing electronics, soldering, crocheting, painting, jewelry, facial, manicure, puzzles, etc.
- 20 Year Life LED Lights For Max Durability - The genuine diopter magnifying glass doesn't warp with time or heat, and is also scratch-resistant. So it lasts longer than cheap acrylic/plastic mag lenses that warp in heat and scratch easily, causing replacement hassles in little time. The 6W & 570 lumen LED lights are built-in and last 20,000 hours - about 20 years of use for 3 hours/day!
- 1.75X Magnification Table Lamp: The heavy base or strong clamp ensure the light doesn't tip so you can enjoy comfort with close work. A perfect work light for doing facials & eyelash extensions. Brightech’s magnifying glass with light always stays cool, even after hours of use.
- 3 Year Product Warranty: We proudly stand behind all of our products 100% and offer a full 3 year warranty. This will cover you if the magnifying glass with light stops working within 3 years or if there are any defects within those 3 years.
Features:

Specs:
| Color | Black / White |
| Height | 11 Inches |
| Length | 9 Inches |
| Weight | 3.5 Pounds |
| Width | 6.3 Inches |
| Size | 3 Diopter (1.75x) |
5. LED Light Weight Magnifier with 5 Lenses 1x, 1.5x, 2x, 2.5x, 3.5x
- 5 interchangeable lenses in powers 1.0, 1.5, 2.0, 2.5 3.5X scratch-resistant acrylic reduces weight
- Comfortable eyeglass frame with rubber nose-pads or switch to headband for more-secure fit
- Perfect for jewelry work, watch repair, arts & crafts or as general reading aid
- Headlight with 2 super-bright LED - powered for 30 hours by 3 button-cell batteries (included)
- See your workpieces or text magnified up to 350% original size with brilliant clarity.FREE tweezer for you as a gift!
Features:

Specs:
| Color | Style 1 |
| Height | 2.05 Inches |
| Length | 8.98 Inches |
| Weight | 0.15 Pounds |
| Width | 7.17 Inches |
6. Elenco Helping Hands with 2 .5" Magnifying Glass | Work Bench Must Have | Case-Iron Base | Chrome Plated for Long Life | Glass Lens
What DIY workbench is complete without Helping Hands?Great for fine soldering work or re-workExcellent for miniature painting and other detailed workEverything is adjustable to position your work perfectly - Magnifier has a 25 inch diameterCast-iron base for stability - All clamps and rotation point...

Specs:
| Height | 1 Inches |
| Length | 7.5 Inches |
| Weight | 0.9 Pounds |
| Width | 5 Inches |
7. SE Clip-On 7/8" Double 3.3X 6.6X Loupe Set
- Lenses have 5 x and 10 x power magnification-you can use one or the other or combine
- Rubber tipped clip attaches easily to your eyeglass frames on either side
- You can combine the strength of the two lenses over either eye for 15x power
- Ideal for close study and intricate work such as electronics soldering and repair
- Easy hands-free magnification-lightweight unit weighs only 0.5 oz
Features:

Specs:
| Height | 1.1 Inches |
| Length | 2.8 Inches |
| Weight | 0.02 Pounds |
| Width | 1.6 Inches |
8. Headband Magnifier Visor Double Lens, YTOM Head Mounted Magnifier Jewelers Jewelry Visor Opitcal Glass Binocular Magnifier with Lens - 1.5X 2X 2.5X 3.5X Magnification
4 Replaceable/interconvertible magnification lens plates to meet different magnifying needs. 1.5x at 20" Focal Length/2.0x at 10" Focal Length/2.5x at 8" Focal Length/3.5x at 4" Focal Length.The shell frame is made of lightweight, durable and impact resistant materials..Premium-grade professional qu...

Specs:
| Color | Gray |
| Height | 7.874 inches |
| Length | 9.76376 inches |
| Weight | 0.30423792156 Pounds |
| Width | 1.9685 inches |
| Size | 248*200*50mm |
9. Headband Magnifier Glasses With LED Light, Head Mount Magnifier Handsfree Reading Magnifying Glasses with Light for Close Work Jeweler Loupe Craft Watch Repair Hobby 5 Lenses 1.0X 1.5X 2.0X 2.5X 3.5X
Best Reading Glasses for All Age - An adjustable headset magnifier magnifying glass with clear lenses for seniors, hobbyists and professionals, great for jewlers loupe work, watch repair, arts and crafts or as general reading aid.Magnifying Glass with 5 Sets of Lens for Close Work - The 1X to 2.5X m...

Specs:
| Color | White |
| Height | 2.72 Inches |
| Length | 8.5 Inches |
| Weight | 0.66 Pounds |
| Width | 6.18 Inches |
| Size | size 2 |
10. SE Illuminated LED Microscope - MW10085
60-100x magnificationIlluminated by LEDAdjustable focusSlide-on standGreat for antique, coin, and stamp collector, everyday user, jeweler, and student

Specs:
| Color | Black |
| Height | 2 Inches |
| Length | 8.25 Inches |
| Weight | 0.25 Pounds |
| Width | 3 Inches |
| Number of items | 1 |
11. Fancii Headband LED Illuminated Head Magnifier Visor - 1X to 3.5X Zoom with 5 Detachable Lenses - Hands Free Head Worn Lighted Magnifying Glasses for Reading, Jewelry Loupe, Watch & Electronic Repair
- INTERCHANGEABLE LENS DESIGN: Switch between 5 optical lenses using a simple click and release system. Magnification power: 1X, 1.5X, 2X, 2.5X, 3.5X
- COMFORTABLE AND STYLISH: Lightweight ergonomic frame with soft padding suitable for all head sizes. Fits over your reading glasses
- VERSATILE: Best for examining intricate details in engraving, electronic parts, watches, jewelry, coins, stamps, dental work, hobbies and crafts
- HEADBAND MODE: Alternate between wearing it as glasses or headband. The included head strap can be attached with ease to ensure a more secure fit
- BRIGHT HEADLIGHTS: Two energy-efficient LEDs with rotatable angle; turn on or off with a simple switch on the top of the headset (Batteries NOT included)
Features:

Specs:
| Color | White |
| Weight | 0.3125 Pounds |
12. UltraOptix Powerful 7x ASPHERIC 1.5" Round LED Pocket Lighted Magnifier
- Pocket and Purse Sized
- LED Illuminated
- Super powerful Magnification
- Affordable
- Easy to use
Features:
 ▼ Read Reddit mentions
13. Rolson Tools 60335 Heavy Duty Helping Hand With 60mm Magnifying Glass
- Two motors and low gearing make for rugged off-road action
- Articulated front and rear suspension
- 6AA for the vehicle (Not included) and 2 AAA (Not included) for the controller
- Tri-Channel Transmitter
- Go off-road today
Features:

Specs:
| Height | 0 Inches |
| Length | 0 Inches |
| Width | 0 Inches |
14. Large 3.9” Magnifying Glass Dome - Genuine Crystal Glass Magnifier - Easy to Glide Paperweight - Professional Grade Reading Aid for Blueprints, Maps, Newspapers - in A Nice Gift Box (Large 3.9" Dia)
- ✅ EXTREMELY CLEAR MAGNIFICATION - Say goodbye to squinting while trying to read the small print on maps, newspapers, and other printed materials. This optical glass dome is free of any marks or engravings providing you with clear and obstruction free magnification. You will see the magnified text clearly and without distortion.
- ✅ GENUINE CRYSTAL GLASS - Do not compromise with anything less than perfection when it comes to reading magnifiers and your precious eyes. Unlike less expensive acrylic magnifiers, image is sharp and resolution clean. Magnificent magnifiers are used by surveying and construction companies because they are designed from high quality real K9 crystal glass and will provide you with an effortless magnification experience.
- ✅ BETTER THAN HANDHELD MAGNIFIERS - You don't have to hold it in your hand! Just place the magnifying crystal dome on top of your book, newspaper, magazine, map or catalog and effortlessly slide along the surface for reading. Leave it in place, and then come back to it later, because this paperweight will remain right where you left it. It displays nicely on your desk as an attractive paper weight and you will always have it available at your reach.
- ✅ MULTIPURPOSE TABLE MOUNTED MAGNIFYING GLASS - Upon designing this optical dome, we tried to make it as multipurpose and convenient to use as possible. Besides reading your favorite newspaper or literature book, you can place it on maps, desks, catalogues, magazines and more. It is ideal as a paperweight as well or simply as a sophisticated home décor that fits perfectly everywhere!
- ✅ ELEGANTLY DESIGNED MAGNIFIER IN A CASE WITH MONEY BACK GUARANTEE - Invest on this strong magnifier dome that comes in a marvelous gift box and help your eyes read without squinting. Ideal for people of all ages and especially those who have poor eyesight. Since your satisfaction is our top priority, this product is backed both with a 12-month manufacturer's warranty and Amazon's money back guarantee policy!
Features:

Specs:
| Color | Li62 |
| Height | 2 Inches |
| Length | 3.9 Inches |
| Weight | 1.21875 Pounds |
| Width | 3.9 Inches |
| Size | LARGE 3.9" diameter in Gift Box |
15. Best Pocket Magnifying Glass by iLumen8-3X Small Magnifier with Lights. Great for Seniors, Kids, Travel. Fits into Purse or Pocket Read Maps, Menu, Jewelry, Coins Hobby Stamps. Lighted Low Vision Aid
SAVE YOUR EYESIGHT -- No more headaches from eye strain when trying to read restaurant menus, grocery store labels, Prescription pill bottles, crossword puzzles, bedside night time reading or any fine print…anywhere! When reading glasses aren’t handy or convenient, iLumen8’s discreet pocket ma...

Specs:
| Color | Black |
| Height | 1 Inches |
| Length | 5.7 Inches |
| Weight | 0.125 Pounds |
| Width | 2.8 Inches |
| Size | 1 Magnifier |
16. Headband Magnifier Headset - Magnifying Visor with 4 Real Glass Optical Lens Plates (1.5X, 2X, 2.5X, 3.5X)
- Real glass lenses: Visor glasses are shaped, ground, and polished to precision optical standards. Mounted to a durable frame and interchangeable
- Adjustable head mount: Comfortable and form fitting to all head sizes. This hands free headband is adjustable and wearable for extended periods of time
- 4 lens sizes Included with your magnifying goggles are 4 glass lenses 1.5X, 2.0X, 2.5X, and 3.5X
- Leather band : Real leather and an orthopedic felt material across the headband strap improves comfort when wearing
- Adjustable visor: Visor can be tilted up and down as needed, and moved out of the way when no longer required. Can be worn over prescription glasses or safety goggles
Features:

Specs:
| Color | Black |
| Height | 2 Inches |
| Length | 12 Inches |
| Width | 8 Inches |
17. BelOMO 7x Triplet Loupe Folding Magnifier, Optical Glass with Anti-Reflection Coating
7x Magnification PowerLarge 22mm(0.866'') Achromatic Triplet Lens Gathers Light for a Bright, Clear and Color Correct ViewOptical Quality Glass Lenses, each BelOMO loupe is certified just like a camera lens.Great for rocks, minerals, jewelery, coins, stamps, part inspection and snow flakesEach screw...

Specs:
| Weight | 0.125 Pounds |
18. Premium 2-Pcs Full Page Magnifier Set – Fresnel Lens Plastic 7.5” x 10” Magnifying Sheet – Bonus 2 Compact Portable Credit Card Magnifiers & 2 Ruler Magnifiers Included - For Reading & Low Vision Aids
- A classic electronics trainer with 130 experiments
- Learn basic principles of electronics and electricity, physics and magnetism
- Projects include: AM broadcast station, Electronic Organ, LED strobe light, Timer, Logic Circuits and much, much more
- Includes easy-to-read, lab style, illustrated manual
- Brought to you by Elenco Electronics, the same company the brings you Snap Circuits
Features:

Specs:
| Height | 0.1 Inches |
| Length | 10 Inches |
| Weight | 0.2 Pounds |
| Width | 7.5 Inches |
19. Fancii LED Lighted 3X 10X Small Magnifying Glass with 15X Magnifier Loupe - Portable Illuminated Handheld Lens with UV Light for Reading, Coins, Stamps, Jewelry Appraisal
- MULTIFUNCTIONAL: 3X magnifying lens for reading, 10X auxiliary lens for finer details, and 15X jewelry loupe with adjustable focus for examination of objects close-up.
- COMPACT AND STYLISH: Ergonomic design suitable for seniors, hobbyists, and professionals including jewelers, geologists, coin and stamp collectors, etc.
- HIGH CLARITY: Best for examining fine details in documents, jewelry, coins, stamps, electronic parts, currency, film negatives, and more.
- LIGHTWEIGHT AND PORTABLE: Durable, pocket size, and easy to carry. Comes with a black PU leather sleeve for added protection.
- MULTI-PURPOSE LIGHTS: 3 LED small flashlight, 2 LED Light for magnification, 1 UV black light for counterfeit detection, and 1 LED light dedicated to the loupe.
Features:
Specs:
| Color | Black |
| Height | 1.3 Inches |
| Length | 4.5 Inches |
| Weight | 0.0875 Pounds |
| Width | 1.6 Inches |
20. Hands-Free Magnifying Glass 1.8X Magnification Focus Eyeglasses - Best Reading Magnifier Clear Viewing Portable for Elder Kids
- ★1.8X Magnification - The portable magnifying glasses is up to 1.8x magnification (approximately equal 300°), ensuring your clarity and detail, perfect for reading books/ documents/ newspapers /instructions.
- ★Provide Multiple Ways To Read - Our magnifying glass can be Directly on the eyes like ordinary glasses to use. If you don't want to do this, you can also wear your glasses at the same time with our magnifying glass to provide higher definition.
- ★Free your Hands - Hands-free magnification glasses helps to increase productivity and aids in visual precision during everyday close work tasks. You can wear as ordinary glasses and your hands can do anything.
- ★Suitable for Indoor & Outdoor - With its ability to filter 99% of harmful UV, the clear lens is a general purpose lens designed for impact protection and is suitable for indoor and outdoor use.
- ★Comfort & Protection - Our magnifying glasses by focusing through bifocals to relieve eye strain and fatigue, with a range of 1.8x magnification strength, increases visual precision during close work tasks. The soft and flexible nose bridge minimize slippage providing all day comfort.
Features:

Specs:
| Color | Black |
| Size | One Size |
🎓 Reddit experts on hobby tool magnifiers
The comments and opinions expressed on this page are written exclusively by redditors. To provide you with the most relevant data, we sourced opinions from the most knowledgeable Reddit users based the total number of upvotes and downvotes received across comments on subreddits where hobby tool magnifiers are discussed. For your reference and for the sake of transparency, here are the specialists whose opinions mattered the most in our ranking.
Interested in what Redditors like? Check out our Shuffle feature
Shuffle: random products popular on RedditTop Reddit comments about Hobby Tool Magnifiers:
Summary
1. Neiko 01902 Adjustable Helping Hand With Magnifying Glass | Dual Alligator Clips
- HELPING HAND SOLDERING STATION: This helpful tool frees your hands for safe soldering, gluing, positioning, fastening, and assembly of objects small to large in size for tasks requiring a high level of precision, such as avionics.
- MAGNIFYING GLASS WITH STAND: This soldering helping hand is equipped with a 2x magnifying glass on an adjustable arm to perform precision work on even the smallest of objects or workpieces. With this tool, you can achieve near-perfect results.
- DUAL-CLIP STAND: Dual alligator spring clamps are attached to wire holders on adjustable arms that securely hold components, work pieces, small electronics, and appliances steady for soldering tasks that require accuracy and efficiency.
- ADJUSTABLE HELPING HAND: The mirror and clamps are mounted on adjustable ball joints to position and view work at any angle and to serve as extra hands to view objects at the most difficult angles with ease.
- SOLDER STATION WITH HEAVY-DUTY BASE: The heavy-duty cast-iron base keeps the unit upright and stable and provides a secure hold that keeps objects steady while working on or soldering components. Perform even the finest work with this helpful tool.
Features:
Specs:
| Height | 2.68 Inches |
| Length | 5 Inches |
| Width | 3 Inches |
| Size | 1-Pack |
| Number of items | 1 |
2. YOCTOSUN Head Mount Magnifier with 2 Led Professional Jeweler's Loupe Light Bracket and Headband are Interchangeable
- 5 interchangeable lenses with 1.0X, 1.5X, 2.0X, 2.5X, 3.5X magnification, scratch-resistant acrylic reduces weight.
- Comfortable eyeglass frame with rubber nose-pads or switch to headband for more-secure fit.
- Headlight with 2 super-bright LED -powered by 3 AAA batteries (included), last for long hours.
- See your work pieces or text magnified up to 350% original size with high clarity.
- Perfect for jewelry work, watch repair, arts & crafts or as general reading aid.
Features:
Specs:
| Color | White |
| Height | 2.6 Inches |
| Length | 8.5 Inches |
| Width | 6.1 Inches |
3. KINGMAS Mini 60x Microscope Magnifying with LED Light Pocket Jewelry Magnifier Jeweler Loupe with 10X Folding Pocket Magnifier
- Application Range: Industrial Purpose, Circuit Board And Printing , Industry, Gardening, Coin, Stamp, Jewelry, Appraisal, Education, Geography, Home And Office
- Package Content: 1 x Black faux leather puch;1 x 60X Microscope LED Currency Detecting Magnifier; 3 x LR1130 batteries;
- The pocket size is convenience to carry, you can use it in everywhere and every time
- Illuminated by LED . Bright LED light of the Magnifying Glass provides enough light at any dim conditions;
Features:
Specs:
| Height | 2.4 Inches |
| Length | 3 Inches |
| Weight | 0.02 Pounds |
| Width | 1.5 Inches |
| Size | 60x |
4. Brightech LightView Pro Flex Magnifying Lamp - 2 in 1 Clamp Table & Desk Lamp Energy Saving LED Ultra Bright Daylight Light, Great for Reading, Hobbies, Crafts, Workbench- Black
- Magnifying Glasses With Light For Close Work: This magnifying glass with light is designed for people who need continuous close focus work or anyone who needs visual aids to reduce eye fatigue. With a 3" lens made of genuine diopter glass, you won’t feel dizzy when you use it for reading, cross-stitching, sewing, painting, needlework, and other small projects. Things are in focus 13" away.
- Adjustable Magnifying Desk Lamp With Gooseneck: The glass lens has a 13.5" adjustable, flexible gooseneck, can be adjusted up and down, you can keep the magnifying glasses with light for close work at any angle, freeing both hands. Suitable for repairing electronics, soldering, crocheting, painting, jewelry, facial, manicure, puzzles, etc.
- 20 Year Life LED Lights For Max Durability - The genuine diopter magnifying glass doesn't warp with time or heat, and is also scratch-resistant. So it lasts longer than cheap acrylic/plastic mag lenses that warp in heat and scratch easily, causing replacement hassles in little time. The 6W & 570 lumen LED lights are built-in and last 20,000 hours - about 20 years of use for 3 hours/day!
- 1.75X Magnification Table Lamp: The heavy base or strong clamp ensure the light doesn't tip so you can enjoy comfort with close work. A perfect work light for doing facials & eyelash extensions. Brightech’s magnifying glass with light always stays cool, even after hours of use.
- 3 Year Product Warranty: We proudly stand behind all of our products 100% and offer a full 3 year warranty. This will cover you if the magnifying glass with light stops working within 3 years or if there are any defects within those 3 years.
Features:
Specs:
| Color | Black / White |
| Height | 11 Inches |
| Length | 9 Inches |
| Weight | 3.5 Pounds |
| Width | 6.3 Inches |
| Size | 3 Diopter (1.75x) |
5. LED Light Weight Magnifier with 5 Lenses 1x, 1.5x, 2x, 2.5x, 3.5x
- 5 interchangeable lenses in powers 1.0, 1.5, 2.0, 2.5 3.5X scratch-resistant acrylic reduces weight
- Comfortable eyeglass frame with rubber nose-pads or switch to headband for more-secure fit
- Perfect for jewelry work, watch repair, arts & crafts or as general reading aid
- Headlight with 2 super-bright LED - powered for 30 hours by 3 button-cell batteries (included)
- See your workpieces or text magnified up to 350% original size with brilliant clarity.FREE tweezer for you as a gift!
Features:
Specs:
| Color | Style 1 |
| Height | 2.05 Inches |
| Length | 8.98 Inches |
| Weight | 0.15 Pounds |
| Width | 7.17 Inches |
6. Elenco Helping Hands with 2 .5" Magnifying Glass | Work Bench Must Have | Case-Iron Base | Chrome Plated for Long Life | Glass Lens
What DIY workbench is complete without Helping Hands?Great for fine soldering work or re-workExcellent for miniature painting and other detailed workEverything is adjustable to position your work perfectly - Magnifier has a 25 inch diameterCast-iron base for stability - All clamps and rotation point...
Specs:
| Height | 1 Inches |
| Length | 7.5 Inches |
| Weight | 0.9 Pounds |
| Width | 5 Inches |
7. SE Clip-On 7/8" Double 3.3X 6.6X Loupe Set
- Lenses have 5 x and 10 x power magnification-you can use one or the other or combine
- Rubber tipped clip attaches easily to your eyeglass frames on either side
- You can combine the strength of the two lenses over either eye for 15x power
- Ideal for close study and intricate work such as electronics soldering and repair
- Easy hands-free magnification-lightweight unit weighs only 0.5 oz
Features:
Specs:
| Height | 1.1 Inches |
| Length | 2.8 Inches |
| Weight | 0.02 Pounds |
| Width | 1.6 Inches |
8. Headband Magnifier Visor Double Lens, YTOM Head Mounted Magnifier Jewelers Jewelry Visor Opitcal Glass Binocular Magnifier with Lens - 1.5X 2X 2.5X 3.5X Magnification
4 Replaceable/interconvertible magnification lens plates to meet different magnifying needs. 1.5x at 20" Focal Length/2.0x at 10" Focal Length/2.5x at 8" Focal Length/3.5x at 4" Focal Length.The shell frame is made of lightweight, durable and impact resistant materials..Premium-grade professional qu...
Specs:
| Color | Gray |
| Height | 7.874 inches |
| Length | 9.76376 inches |
| Weight | 0.30423792156 Pounds |
| Width | 1.9685 inches |
| Size | 248*200*50mm |
9. Headband Magnifier Glasses With LED Light, Head Mount Magnifier Handsfree Reading Magnifying Glasses with Light for Close Work Jeweler Loupe Craft Watch Repair Hobby 5 Lenses 1.0X 1.5X 2.0X 2.5X 3.5X
Best Reading Glasses for All Age - An adjustable headset magnifier magnifying glass with clear lenses for seniors, hobbyists and professionals, great for jewlers loupe work, watch repair, arts and crafts or as general reading aid.Magnifying Glass with 5 Sets of Lens for Close Work - The 1X to 2.5X m...
Specs:
| Color | White |
| Height | 2.72 Inches |
| Length | 8.5 Inches |
| Weight | 0.66 Pounds |
| Width | 6.18 Inches |
| Size | size 2 |
10. SE Illuminated LED Microscope - MW10085
60-100x magnificationIlluminated by LEDAdjustable focusSlide-on standGreat for antique, coin, and stamp collector, everyday user, jeweler, and student
Specs:
| Color | Black |
| Height | 2 Inches |
| Length | 8.25 Inches |
| Weight | 0.25 Pounds |
| Width | 3 Inches |
| Number of items | 1 |
11. Fancii Headband LED Illuminated Head Magnifier Visor - 1X to 3.5X Zoom with 5 Detachable Lenses - Hands Free Head Worn Lighted Magnifying Glasses for Reading, Jewelry Loupe, Watch & Electronic Repair
- INTERCHANGEABLE LENS DESIGN: Switch between 5 optical lenses using a simple click and release system. Magnification power: 1X, 1.5X, 2X, 2.5X, 3.5X
- COMFORTABLE AND STYLISH: Lightweight ergonomic frame with soft padding suitable for all head sizes. Fits over your reading glasses
- VERSATILE: Best for examining intricate details in engraving, electronic parts, watches, jewelry, coins, stamps, dental work, hobbies and crafts
- HEADBAND MODE: Alternate between wearing it as glasses or headband. The included head strap can be attached with ease to ensure a more secure fit
- BRIGHT HEADLIGHTS: Two energy-efficient LEDs with rotatable angle; turn on or off with a simple switch on the top of the headset (Batteries NOT included)
Features:
Specs:
| Color | White |
| Weight | 0.3125 Pounds |
12. UltraOptix Powerful 7x ASPHERIC 1.5" Round LED Pocket Lighted Magnifier
- Pocket and Purse Sized
- LED Illuminated
- Super powerful Magnification
- Affordable
- Easy to use
Features:
▼ Read Reddit mentions13. Rolson Tools 60335 Heavy Duty Helping Hand With 60mm Magnifying Glass
- Two motors and low gearing make for rugged off-road action
- Articulated front and rear suspension
- 6AA for the vehicle (Not included) and 2 AAA (Not included) for the controller
- Tri-Channel Transmitter
- Go off-road today
Features:
Specs:
| Height | 0 Inches |
| Length | 0 Inches |
| Width | 0 Inches |
14. Large 3.9” Magnifying Glass Dome - Genuine Crystal Glass Magnifier - Easy to Glide Paperweight - Professional Grade Reading Aid for Blueprints, Maps, Newspapers - in A Nice Gift Box (Large 3.9" Dia)
- ✅ EXTREMELY CLEAR MAGNIFICATION - Say goodbye to squinting while trying to read the small print on maps, newspapers, and other printed materials. This optical glass dome is free of any marks or engravings providing you with clear and obstruction free magnification. You will see the magnified text clearly and without distortion.
- ✅ GENUINE CRYSTAL GLASS - Do not compromise with anything less than perfection when it comes to reading magnifiers and your precious eyes. Unlike less expensive acrylic magnifiers, image is sharp and resolution clean. Magnificent magnifiers are used by surveying and construction companies because they are designed from high quality real K9 crystal glass and will provide you with an effortless magnification experience.
- ✅ BETTER THAN HANDHELD MAGNIFIERS - You don't have to hold it in your hand! Just place the magnifying crystal dome on top of your book, newspaper, magazine, map or catalog and effortlessly slide along the surface for reading. Leave it in place, and then come back to it later, because this paperweight will remain right where you left it. It displays nicely on your desk as an attractive paper weight and you will always have it available at your reach.
- ✅ MULTIPURPOSE TABLE MOUNTED MAGNIFYING GLASS - Upon designing this optical dome, we tried to make it as multipurpose and convenient to use as possible. Besides reading your favorite newspaper or literature book, you can place it on maps, desks, catalogues, magazines and more. It is ideal as a paperweight as well or simply as a sophisticated home décor that fits perfectly everywhere!
- ✅ ELEGANTLY DESIGNED MAGNIFIER IN A CASE WITH MONEY BACK GUARANTEE - Invest on this strong magnifier dome that comes in a marvelous gift box and help your eyes read without squinting. Ideal for people of all ages and especially those who have poor eyesight. Since your satisfaction is our top priority, this product is backed both with a 12-month manufacturer's warranty and Amazon's money back guarantee policy!
Features:
Specs:
| Color | Li62 |
| Height | 2 Inches |
| Length | 3.9 Inches |
| Weight | 1.21875 Pounds |
| Width | 3.9 Inches |
| Size | LARGE 3.9" diameter in Gift Box |
15. Best Pocket Magnifying Glass by iLumen8-3X Small Magnifier with Lights. Great for Seniors, Kids, Travel. Fits into Purse or Pocket Read Maps, Menu, Jewelry, Coins Hobby Stamps. Lighted Low Vision Aid
SAVE YOUR EYESIGHT -- No more headaches from eye strain when trying to read restaurant menus, grocery store labels, Prescription pill bottles, crossword puzzles, bedside night time reading or any fine print…anywhere! When reading glasses aren’t handy or convenient, iLumen8’s discreet pocket ma...
Specs:
| Color | Black |
| Height | 1 Inches |
| Length | 5.7 Inches |
| Weight | 0.125 Pounds |
| Width | 2.8 Inches |
| Size | 1 Magnifier |
16. Headband Magnifier Headset - Magnifying Visor with 4 Real Glass Optical Lens Plates (1.5X, 2X, 2.5X, 3.5X)
- Real glass lenses: Visor glasses are shaped, ground, and polished to precision optical standards. Mounted to a durable frame and interchangeable
- Adjustable head mount: Comfortable and form fitting to all head sizes. This hands free headband is adjustable and wearable for extended periods of time
- 4 lens sizes Included with your magnifying goggles are 4 glass lenses 1.5X, 2.0X, 2.5X, and 3.5X
- Leather band : Real leather and an orthopedic felt material across the headband strap improves comfort when wearing
- Adjustable visor: Visor can be tilted up and down as needed, and moved out of the way when no longer required. Can be worn over prescription glasses or safety goggles
Features:
Specs:
| Color | Black |
| Height | 2 Inches |
| Length | 12 Inches |
| Width | 8 Inches |
17. BelOMO 7x Triplet Loupe Folding Magnifier, Optical Glass with Anti-Reflection Coating
7x Magnification PowerLarge 22mm(0.866'') Achromatic Triplet Lens Gathers Light for a Bright, Clear and Color Correct ViewOptical Quality Glass Lenses, each BelOMO loupe is certified just like a camera lens.Great for rocks, minerals, jewelery, coins, stamps, part inspection and snow flakesEach screw...
Specs:
| Weight | 0.125 Pounds |
18. Premium 2-Pcs Full Page Magnifier Set – Fresnel Lens Plastic 7.5” x 10” Magnifying Sheet – Bonus 2 Compact Portable Credit Card Magnifiers & 2 Ruler Magnifiers Included - For Reading & Low Vision Aids
- A classic electronics trainer with 130 experiments
- Learn basic principles of electronics and electricity, physics and magnetism
- Projects include: AM broadcast station, Electronic Organ, LED strobe light, Timer, Logic Circuits and much, much more
- Includes easy-to-read, lab style, illustrated manual
- Brought to you by Elenco Electronics, the same company the brings you Snap Circuits
Features:
Specs:
| Height | 0.1 Inches |
| Length | 10 Inches |
| Weight | 0.2 Pounds |
| Width | 7.5 Inches |
19. Fancii LED Lighted 3X 10X Small Magnifying Glass with 15X Magnifier Loupe - Portable Illuminated Handheld Lens with UV Light for Reading, Coins, Stamps, Jewelry Appraisal
- MULTIFUNCTIONAL: 3X magnifying lens for reading, 10X auxiliary lens for finer details, and 15X jewelry loupe with adjustable focus for examination of objects close-up.
- COMPACT AND STYLISH: Ergonomic design suitable for seniors, hobbyists, and professionals including jewelers, geologists, coin and stamp collectors, etc.
- HIGH CLARITY: Best for examining fine details in documents, jewelry, coins, stamps, electronic parts, currency, film negatives, and more.
- LIGHTWEIGHT AND PORTABLE: Durable, pocket size, and easy to carry. Comes with a black PU leather sleeve for added protection.
- MULTI-PURPOSE LIGHTS: 3 LED small flashlight, 2 LED Light for magnification, 1 UV black light for counterfeit detection, and 1 LED light dedicated to the loupe.
Features:
Specs:
| Color | Black |
| Height | 1.3 Inches |
| Length | 4.5 Inches |
| Weight | 0.0875 Pounds |
| Width | 1.6 Inches |
20. Hands-Free Magnifying Glass 1.8X Magnification Focus Eyeglasses - Best Reading Magnifier Clear Viewing Portable for Elder Kids
- ★1.8X Magnification - The portable magnifying glasses is up to 1.8x magnification (approximately equal 300°), ensuring your clarity and detail, perfect for reading books/ documents/ newspapers /instructions.
- ★Provide Multiple Ways To Read - Our magnifying glass can be Directly on the eyes like ordinary glasses to use. If you don't want to do this, you can also wear your glasses at the same time with our magnifying glass to provide higher definition.
- ★Free your Hands - Hands-free magnification glasses helps to increase productivity and aids in visual precision during everyday close work tasks. You can wear as ordinary glasses and your hands can do anything.
- ★Suitable for Indoor & Outdoor - With its ability to filter 99% of harmful UV, the clear lens is a general purpose lens designed for impact protection and is suitable for indoor and outdoor use.
- ★Comfort & Protection - Our magnifying glasses by focusing through bifocals to relieve eye strain and fatigue, with a range of 1.8x magnification strength, increases visual precision during close work tasks. The soft and flexible nose bridge minimize slippage providing all day comfort.
Features:
Specs:
| Color | Black |
| Size | One Size |
The most important things are a tank and the ability to fill the tank to a PSI above a minimum of 80 or so. A tank makes it so the compressor doesn't have to run constantly, and creates a buffer so the air pulses of the compressor aren't transmitted to the brush where they can cause dotted rather than smooth lines. You want the compressor to be able to put out a higher PSI because you want the tank to hold enough so you can spray for longer at pressures of 60 PSI or below for longer intervals before the compressor has to refill the tank.
For model painting, most of your spraying will be best done at 20-30 PSI. Higher PSIs like 60 tend to be either for cleaning, or stuff like textile paints (i.e. T-shirt artists). The little "fishtank" compressors like the Ninja Jet can only deliver a max PSI of around 15 or so, which is on the very bottom edge of what most brushes can work with. PSIs of 15 and below are mainly used for tiny close-in detail work with highly thinned paint, and going that low works better with brushes that are designed specifically for detail, rather than "jack of all trades" workhorses.
Different brushes require different CFM (cubic feet per minute- a measurement of air volume rather than pressure), and little "fishtank" compressors are bare minimum here as well, so there will be many brushes where they'll make the brush spray poorly because they physically can't provide enough air to keep up at any pressure. A good target CFM rating for a tankless compressor is 1.5.
A tanked compressor can technically get away with less CFM, since it's not supplying the brush directly, but unless you want to have to stop painting whenever the compressor has to top up the tank, you want the compressor to have enough CFM to supply the brush WHILE also filling the tank, which means check your brush manual/documentation for its CFM, and look for a compressor that is specced over that by at least 1/2. The higher the CFM, the faster the tank will fill. Unfortunately I could not find specs for the Patriot that list CFM, but 1.5 is probably still a good start for a tanked compressor.
"Master" and other such Chinese import brand compressors are popular because people think they're cheap, but for very little extra a brand like California Air Tools will get you better QC, support, reliability, and specs. Chinese airbrushes are comparatively cheap, but the compressors aren't really, so there's not much reason to get the Chinese ones IMO.
Avoid regular hardware-style compressors unless you're painting in a very noise-tolerant environment, as even the "quiet" ones are LOUD AF. Seriously: when the descriptions/reviews say "super quiet" they mean by construction site standards, not household appliance standards.
As to fittings: if you live in a particularly dry climate (like Arizona, say), you can get away with not using a moisture trap, but even there it's good practice to have one just in case. If your climate is any more variable or humid than that, you will want a moisture trap. You can just get one from the local hardware store though: it doesn't have to be a special type. Always place the trap last in the air supply/fitting chain before the airbrush hose, so: compressor-> tank-> regulator-> moisture trap-> airbrush hose-> airbrush. Or if using a bench block as described below: compressor-> tank-> regulator-> connecting hose-> bench block regulator-> moisture trap-> airbrush hose-> airbrush.
In the US, compressors usually have 1/4 NPT fittings. In Metric countries, 1/4 BSP. These fittings are cross-compatible enough that you can use them together with teflon tape.
For hobby and fine art airbrushing, I HIGHLY recommend a lightweight hose like this over braided hoses. Braided hoses are for industrial-type settings like auto painting shops, where hoses need to be extra hard wearing.
BTW, when painting, loop the hose once around your forearm so if you accidentally drop the brush, the hose acts as a lanyard preventing the brush from hitting the floor. I feel like I'm constantly hearing horror stories about people damaging their brush by dropping it when preventing this is so easy.
A tanked compressor with come with a regulator. These are perfectly usable, but imprecise. It's not strictly necessary, but I do highly recommend using the built-in regulator as a step-down regulator, and getting a 0-30 or 0-60 PSI regulator to chain after it. I use one of these on my setup, and it makes adjusting airflow much better.
If you plan on locating your compressor directly on or under your "workbench" surface, that's all you need. If the compressor is going to be outside immediate/easy reach, it can be good to mount your regulator and moisture trap on a separate "bench block" so you can put it on/under your bench within easy reach. This is what I had to do with my setup (I mounted the regulator and moisture trap on a scavenged heavy steel bookend). In that case, you'll want/need a hose like this to go between the compressor and the regulator/filter block.
There are "extras" you can get like a quick-connectors and MAC valves, but I don't personally recommend them. If you're only using the compressor for your airbrush, you don't need quick connectors on the compressor side of the hose, and IMO quick connectors on the brush side don't actually save you time/energy as it only takes 2 seconds to unscrew a brush from the hose. If your regulator is in easy reach, a MAC valve similarly does not save you any time/effort. Both of these also add lots of bulk to the brush stem, which is undesirable if your instinct is to hold/use the brush like a pen instead of a gun. There are mini-filters that go between the hose and the brush, but I generally don't recommend them for the same reason: too much added bulk on the brush stem: it's better to to add to your main filters if you need better filter performance.
I don't have a Badger Patriot, but my understanding is that it's a good brush. I have two Badger SOTAR models, and if they're any indicator, I'd expect spray performance to be comparable to IWATA, but fit & finish to be more raw and "industrial" outside of the nozzle and needle, so a little fussier to keep clean. It should be much better and more reliable than a 20$ "Master" or "Point Zero" or whatnot.
The threads in the head assembly can be a little "gritty" on Badger brushes OOB. If that's the case, I recommend lapping them with something like Flitz to ensure a good seal. Basically just put a tiny dab of compound on the male threads, then screw them in and out about 20 times to polish off the burrs that are causing the gritty/sticky feeling. Make sure to clean the residue off thoroughly before spraying again.
For maintenance, get a roll of lint-free shop paper towels, a couple packs of interdental brushes from the local dollar store, a box of q-tips, and a box of round wood toothpicks. Use paper towels and q-tips wetted with solvent/thinner to clean the cup and needle, the interdental brushes to clean the passageways/tubes in the body, and use a wood toothpick whittled to a needle taper and soaked in thinner to clean the inside of the nozzle (don't use metal tools to clean the nozzle, as they might scratch it or flare the tip). Occasionally you'll need to inspect the needle tip or nozzle for gunk or damage, so you'll want a high-X pocket magnifier similar to this. Also a stick of wax-based lip balm to help the threads in the head assembly maintain a good air seal (apply a tiny amount to the male threads before reassembly after cleaning).
Get or make a spray-out pot. They're easy to DIY out of a margarine tub or soda/juice bottle, so although nice, it's not strictly necessary to buy one.
Get or make an airbrush stand/holder. This is not for storing the brush, but rather for having a way to set the brush down while in-in use without spilling the paint cup. Again: these are easy to DIY, so you don't have to splash cash on one unless you really feel like it.
Hope that helps!
My SO's birthday is coming up, and he likes to casually paint Warhammer-models. He has requested something to help hold the pieces while he paints, but hasn't specified a preference for a particular type of tool.
I was looking at something like this: http://www.amazon.co.uk/dp/B001BMSBD4 and I'm wondering if I'm waaaay off target or not. If anyone has any recommendations or helpful tips I would be super grateful!
I'd also like to get him some additional stuff if the price of this ends up being very low, so if anyone can recommend some additional basic useful tools or accessories that they feel helped them out while painting you'll help me make my SO very happy! :)
Thanks!
"The 1966 JB Readers Edition was instrumental in my reading the complete bible because of the language." Same here! I have two copies: a compact reader's edition, and then the full edition. The complete edition is what I'm asking about in this thread, and my copy actually is nice, though thrashed, but it's like +90% of Bibles, and just has pages that are too thin and all the rest. And of course they had to do that so that the book wasn't too massive. But that's essentially what I'm looking for: a massive one with good quality paper.
I like your name by the way, hobbitsden.... And I really hope this doesn't violate the "selling of goods policy", but as I understand the rule personally, I don't think it should. Or I hope it doesn't at any rate. But I encourage you to check this out hobbitsden:
https://www.amazon.com/dp/B01F0HU68S
It feels quite good and burly in the hand, like you're hefting a baseball-sized chunk of raw jade or granite or some other particularly heavy variety of rock. I've given away a few of them, and Bible-readers seem to especially like them. And in particular, Douay–Rheims-preferring friends have a lot of nice things to say about 'em; I'm guessing possibly 'cos of the double columns.
Apologies, just realized I did not reply to your RCA cable comment.
When I did the tonearm rewire, I also swapped out the RCA cables which were connected to the board. I did both at once so I can't tell how much of this was the cable replacement vs the tonearm rewire - but I noticed a good drop in the overall noise floor and better clarity. In my head, I credit the noise floor drop to the RCA replacement and the clarity to the tonearm review - but again, don't take my assumptions as gospel. It did seem like a worthwhile change.
Take a look at KAB, that's where I picked up the tonearm rewire stuff and it was cheap and defiantly worth the effort. I have very limited soldering experience and it still only took me about 1.5 hours to get everything pulled apart and reassembled with the RCA cable soldering and tonearm rewire soldering. Just need to be delicate. If I were to do it again, I'd def pickup an inexpensive set of helping hands, something like this to make the job easier as it is delicate work.
Currently with the SME 309, I'm using the Sumiko Premier PIB-1 Interface Box so I get to pick the cables running out from there to my phono stage. Currently using bluejeans RCA interconnects and have no complaints. Super 'high-end' cables an area I haven't been convinced enough that it makes that huge of a difference, so I'm going to stick with what I have as I have no issues.
The run in a little longer than I like and it crosses paths with some of the power cables behind my components - so a good cleanup and cable management project is needed. I picked up the supplies a few weeks back to take care of cable management but don't want to commit to it until after the external power supply change as I know that'll need to be considered when I end up taking care of all the wire management work.
All the best brother (or sister)!
Amazon.
I have:
Generic Hobby Knife - Generic hobby knife kit. Blades were shit so I buy Xacto brand but the knives and case are good.
Needle Files - Extremely useful for polishing off mold lines or smoothing cuts.
Adjustable Jeweler's Saw - Handles a ton of different size blades for cutting metal, plastic, or wood.
Swivel Handle Pin Vice - Probably the best tool you can buy. Great for customizing what your troops are carrying.
Third Hand - Stupidly useful. Mostly for gluing.
Jeweler's Saw Blades - Bought these for my saw. Useful. Others might be better.
Micro Drill Bits - Bought for my pin vice. Useful. Others might be better.
Mini Drill Bits - Bought for my pin vice. Useful. Others might be better.
I havent built that model but to answer your second question...Be cautious of build guides (or lack thereof). The one you linked has a really good guide. Step by step, clear pictures, and in color. So far, I've found Befaco, AI Synthesis, and Trogotronic to have really good guides.
Also, take your time. Its better to go slow and be sure of your work than rush. Tape! Tape helps me a lot by holding small pieces in place. If you can, get this circuit board holder. I got this magnifying headband for free (that style, not that specific one) and its been really helpful as well.
Here are my go to recommendations for beginners.
Trogotronic VCA
Trogotronic Power System
AI Synthesis
It's a normal pocket magnifier. I like to play boardgames and generally don't want to deal with my phone whenever I'm doing that (since the point is to escape the electronics). I like this one pretty well (here's the Amazon link, btw). It has a reasonably large viewing area without a lot of distortion and the light's pretty bright. I've dropped it a few times and it hasn't died yet, though I did have to put it back together once.
I used to use a flashlight all the time if I was out at night until I started using the cane more regularly (which has only been in the past few months). Now that I'm used to using the cane, I find it easier/quicker. I still use it quite a bit if I need to look at an object in low light.
Since you used to work in public safety, just throwing it out there, I know a couple of blind people who got into Police/Fire/EMS dispatching (I did it myself for a couple years as a volunteer), so that might also be something you could consider.
As for learning to program, it really depend. There are so many online resources, depending on what type of programming you want to do. I have generally not been disappointed by highly ranked, popular courses on Udemy that I've taken to improve my skills (you can usually find them on sale), but I haven't started from scratch with anything in a while. I'm sure there are a lot of CS fundamental type courses, though.
I assume you're able to still see the monitor? I use large fonts and the OS's built-in magnifier as-needed, and code in VS Code and find that the Monokai Pro theme (I think there's also a free one, but the "pro" is cheap) to be a good balance of "easy on the eyes" and "enough contrast."
It looks like a nice gift. The issue is that you can get not-quite-as-nice-but-good-enough solutions for much cheaper:
(Depth of field is extremely narrow, though.)
So, for around $60, I have a decent setup (but I still use a DSLR for wider macro shots). While it's not as nice as a loupe system, it's also hundreds of dollars less.
On the other hand, if he appreciates nice things, and you don't mind spending the money, the loupe system does look nice.
I’m a tricomb guy, grab a cheep scope off of amazon, https://www.amazon.ca/KINGMAS-Microscope-Jewelry-Magnifier-Jeweler/dp/B00AQAANDS/ref=mp_s_a_1_5?keywords=mini+microscope&qid=1567317008&s=gateway&sprefix=mini+micr&sr=8-5 Or search mini microscope and pick one
This one is 12$ Canadian and works perfect for this, the tricombs will start clear and then start to get cloudy and then start to turn Amber. I usually check the middle of the main cola on the plant and chop when it’s approx 60/40 Amber to cloudy. it’s a personal preference thing as the high changes depending on ratio. You should be able to find some you tube videos fairly easily that’ll help. The scope is also a must for identifying some pests as well.
Great looking plant, good luck!
I seem to have linked the wrong scope, you should get at least a x45 sorry about that
A great place to start is the mini painting starter sets by Reaper:
https://www.amazon.com/Reaper-Miniatures-08906-Learn-Paint/dp/B00NTMC49G
https://www.amazon.com/dp/B01N458GBK/
They're not too expensive, and they are a great intro to mini painting. They also come with pieces to practice techniques on, and a lot of paints to work with as well. I'd get those, and maybe some brushes.
I also would recommend a wet palette to keep paints wet between painting sessions, magnifying glasses to help see, and a mini holder.
I also got these brushes, which seem to be working well for me, and have a mix of useful ones.
I was pretty worried about the eyes. They took some patience, but it wasn't too hard. The paint consistency is important. It needs to flow, but not go all over the place.
After glazing with gloss varnish a barely visible sienna oil wash was put in the bottom part of the eye to bring out the line. Then the mini was sprayed with dullcote.
I used this guy's eyes for inspiration.
I wore 1.5x magnifying glasses so I can see what I'm doing.
I recommend these:
http://www.amazon.com/UltraOptix-Powerful-ASPHERIC-Lighted-Magnifier/dp/B0054H1XYQ/ref=sr_1_5?ie=UTF8&qid=1397526300&sr=8-5&keywords=aspheric+lens+7x
They are for sale at Fry's Electronics if you have one nearby, and the lenses are great quality. I built a Durovis Dive and used these lenses. I eventually ordered a retail Durovis Dive and found that the lenses linked above were much better than the ones it came with, so I made a new bracket for them, and the improvement was amazing.
Incidentally, they are the same lenses recommended for the FOV2GO, which was made by some college folk.
More info on lens suggestions from them here:
http://projects.ict.usc.edu/mxr/diy/lens-sources-for-fov2go/
Glad to hear it!
For soldering, I'd recommend doing what I did and just go to Home Depot or Lowes or a hardware store and get a few feet of wire, maybe a few different gauges of it, take it home and practice. Cut it, strip it, solder it together, and use electrical tape or heat-shrink wrap to cover all exposed metal. Rinse wash repeat. Did that 3 or 4 times and got more comfortable with it.
Grab one of these helping hands along with a basic soldering kit off amazon and you're good to go.
https://www.amazon.com/Neiko-01902-Adjustable-Magnifying-Alligator/dp/B000P42O3C/ref=sr_1_4?keywords=helping+hands&qid=1569619359&sr=8-4
Have fun!
I bought this LED lamp with a magnifying glass back in January and, up until last week, it’s been my only source of light besides whatever is overhead in the room.
Brightech LightView Pro Flex... https://www.amazon.com/dp/B01K10XA1O?ref=yo_pop_ma_swf
This lamp is great. However, I found that because it was so bright, it was basically the only source of light my res could see on the model and it cast pretty harsh shadows, making it difficult to really paint well and straining my eyes.
So I purchased this lamp last week as a “fill” light:
RMJ Dimmable LED Desk Lamp... https://www.amazon.com/dp/B0714KST8G?ref=yo_pop_ma_swf
And it’s been such a wonderful addition. The “study” setting is perfect daylight hue and it fills my workspace with enough light so that I’m not straining my eyes and have relatively even lighting over my models while I paint.
Hope that helps.
Yeah sorta get it, they make flip down magnifying goggles but they'resuper uncomfortable to me some people like them though.
You might try something like this, a bit more comfortable then goggles and you still have a free hand to mess about with.
I use the Lightview Flex.
It's not the cheapest in the world but it is very bright and you have the magnifier if you need it. The flexibility of the gooseneck is great and the desk clamp is quite strong. The weighted base has good heft and doesn't move on the desk.
The downside is that the gooseneck isn't extremely long, so that could be an issue for you. I have no problems due to how I brace my elbows on my desk.
+1 for the Hakko FX888D-23BY
Some solder wick and a desolder pump is something else I would add. Also a cheap tip thinner for a noob (like me). Helping hands are cheap and can be useful. Also a cheap variety pack of tips. Nothing expensive till you are comfortable with keeping them clean and tinned.
These are all things I bought when I purchased my Hakko FX888. All have been useful.
Desolder Pumps and Wick
[Tip tinner] (https://www.amazon.com/dp/B00NS4J6BY/ref=cm_sw_r_cp_apa_i_k1kZDbJ5TS5Q6)
Helping hands w/magnifying glass
Various Tips
Hakko FX888D-23BY
All of this cost me $146 shipped. Right now, it'll all total to $139.83 shipped if in the US
Well, if you're thinking about doing it get some mylar paper from goulet and go slow and use super cheap nibs. You will break your first 4-16 nibs.
I personally like to do it on my dremel at low speeds using a finer grit spinny thing :) The way you do it is keep a vision of what the nib should look like at a very detailed level and just go slow and light with the grinding and check it with a loupe often. I use a 60x loupe (this one, it's amazing) and check the shape of the nib OFTEN. After every few seconds of work I'll check it till it's in the shape I want, then I'll take some fine files and smooth it out a bit with different sticks between 3200 and 12000 grit. I'll usually move up from 3200 and just keep going until I'm on the 12000 grit stick. I usually have the nib I'm working on in the pen by the stick tuning part but I do take out the nib when I'm using the dremel.
Now that I've gotten pretty proficient at it, it usually only takes about 5 minutes to do a nib unless it's below a F, in which case it'll take up to 10 since you really have to go slow with those because you want to keep as much material on the nib as possible, but just shape it into a finer point where the paper touches it.
Thank you. I will say that it definitely helps to practice a lot and have good materials. Learning how to highlight a face is a must and there are a ton of videos and tutorials about that. I recommend a good set of brushes (about 2-3 different sizes), I use thePsycho by Army painter and I have used it for the last 2 years for those fine details. I am also beginning to use a wet palette which helps create layers, I usually do about 3-4 different shades. Finally, using a set of magnifying lenses helps a lot. I can give more details, but those are the biggest tips I can give.
Paintbrushes, always nice to have extras, even if low quality
Airbrush supplies if you have an airbrush, Thinner, Cleaner etc
Kneadite or milliput superfine
Extra glue, whichever you use to assemble
Exacto blades
Blue-tac
Tacky glue, aka pva glue
Certain tools you don't have, or would like. Good example would be this, good to have for precise operations.
First let me say that disposable contacts are one of the best investments I ever made, for this reason among others.
Otherwise, things like Wizard (traditional or modern) or Mad Scientist work very well with glasses, especially if you have something like this to clip on.
You can find sunglasses to go over your frames at places like Walgreen's or CVS. I've worn out a few pairs, myself. Then you can do any costume that calls for sunglasses: Terminator, Zombie Kim Jong Il, or whatever. :)
For stripping the inner usb cables, I recommend this tool.
Also highly recommend a helping hand tool; you can use that to hold the usb terminals or GX16-4 which makes soldering way easier.
I use this, the base could use a little more weight, but all in all it is great.
Brightech LightView Pro Flex 2 in 1: Magnifying Glass LED Lamp - Lighted Magnifier with Stand & Clamp - for Desk, Sewing, Table - Bright Light for Rea https://www.amazon.com/dp/B01K10XA1O/ref=cm_sw_r_cp_apap_hJbqsNahY9meL
I’m also over 40 here and my eyesight just tanked as well. I recommend this instead of a mounted magnifying lens.
YOCTOSUN Head Mount Magnifier... https://www.amazon.com/dp/B01H8808H6?ref=ppx_pop_mob_ap_share
Comes with several lenses of increasing magnifying strength and doesn’t get in the way of handling things. They look goofy but I’m well behind caring at this point.
I bought the surgical tubing to pull in the pots. I have not soldered in years but I researched before I started and based on good tips I bought a hotter soldering iron (40 watts +) and 'helping hands'. Both were huge and I could not have done it without the helping hands. The magnifying glass was just in the way. The alligator clips were strong so to keep them from cutting through the wires when holding them I put rubber tubing over the clips.
The soldering went so much better than I expected.
In my experience those two finger turning adjustable types are garbage. They never last for very long and are dificult to manage.
I purchased these two years ago and it's all I've eve used.
[1] (https://www.amazon.com/KINGMAS-Pocket-Microscope-Jeweler-Magnifier/dp/B00AQAANDS/ref=pd_sim_200_2?_encoding=UTF8&psc=1&refRID=KEDEDRG711YM9A2DM25Y) 60x LED and adjustable. Is great for looking at trichomes.
2 40x fixed. Is great for everything else when you don't need to get as up close and personal.
A good magnifying glass is just as important as a good iron, especially once you realize you're not 25 anymore.
Any chance it's still salvageable or did you burn a hole through one of the chip? ;)
I would honestly buy them separately. A helping hands like this one, and a lamp like this.
I have this one and it is pretty neat.
This one is a little better though and still cheap.
opticians glasses bro.
here's the link for a $30 pair that'll change your life - https://www.amazon.com/gp/product/B016L343SE/ref=s9_acsd_al_bw_c_x_5_w
model looks great!
cheers!
This is slightly different from what you have above, but if you're using a cell phone and you want to get macro shots, give one of these a try. You can just hold it up to the back of your cell phone camera lens, and then directly over the coin. It's great for getting macro shots of specific parts of a coin.
If you need to solder on a pcb you'll want a temperature controlled soldering station, other essentials are rosin core solder, some flux to apply before soldering, and a helping hand to hold the pcb/component and wire in place when soldering. I leave my soldering station at a little less than 350 when I'm tinning wires and soldering on a pcb. Wipe excess solder off the iron, heat up the spot you want to solder to with the wire in place, then apply solder to the wire when the flux has smoked off, it should flow into the joint. You don't want to keep heat on a pcb for too long as it can damage components on the board. Make sure you tin the tip/s of the soldering iron with solder before and often during use, or the tips will oxidize and refuse to tin until you scrape the oxides off with a razor knife. Typically a problem at high temps, around 300C solder will melt and oxides form very slowly and the tip will stay hot without needing a retin for a 5-10 minutes. I usually set my temp on max when I first turn it on and hold a bit of solder to the tip and then turn it down when the solder melts. Saves a few minutes of warm up between use.
If you need to heat up a larger surface area (like a battery terminal) for tinning or soldering it helps to bump up the heat - sanding a large surface also will help. Steel and other metals may require use of a corrosive flux made specially for that.
That's about all I know XD
Meat rub and spices gift set
BBQ Tools gift set
[Race car wine bottle holder](https://www.amazon.com/Premium-Metal-Race-Bottle-
Holder/dp/B01GIG86H8/ref=sr_1_2?ie=UTF8&qid=1482234804&sr=8-2&keywords=nascar+gift)
Coin magnifier
My favorite magnifiers as someone who does bench work, beading, wire wrap, stonework:
http://www.amazon.com/SE-1013FL-Helping-Magnifier-Light/dp/B000Z7GGJC/ref=sr_1_6?ie=UTF8&qid=1405451223&sr=8-6&keywords=helping+hands
http://www.amazon.com/Microscope-Jeweler-Currency-Magnifier-Adjustable/dp/B00AQAANDS/ref=sr_1_9?ie=UTF8&qid=1405451254&sr=8-9&keywords=jewelers+loupe
(this thing is so much fun, and I keep one on me when running around goodwills)
http://www.amazon.com/Housweety-Professional-Jewelers-Lighted-Magnifier/dp/B005VIG6TA/ref=sr_1_1?ie=UTF8&qid=1405451281&sr=8-1&keywords=jewelers+magnifier
None of these are expensive and all are very useful.
Got it on Amazon https://www.amazon.com/dp/B018MRI1F8/ref=cm_sw_r_cp_api_i_0mIYCb2A9PYTP
Got the lighted magnifier there too. It can be free standing or clamp on. The ones locally available look like junk. https://www.amazon.com/dp/B01K10XA1O/ref=cm_sw_r_cp_api_i_TpIYCbFB0MCVR
Yeah, I wasted so much paint on my partchment paper pallet prior to buying the wet pallet. I dunno what I was doing... I was planning on making one out of tupperware, but couldnt find a sponge at Michaels, so just bought it instead.
I actually purchased a jewelers headset that I love, https://www.amazon.com/gp/product/B01H8808H6/ref=oh_aui_search_detailpage?ie=UTF8&psc=1
It has a light and interchangeable lenses from 1x to 3.5x
It's a helping hands. For soldering typically but for any time you need a device to hold something in place to free your hands to work on it somehow.
https://www.amazon.com/Neiko-01902-Adjustable-Magnifying-Alligator/dp/B000P42O3C
I use these. I frickin' live in them when doing electronics. They fit over my glasses, and work really well straight out of the box.
This helps me so much when soldering. I'm not sure how much it would help your specific weld you have to do but it will help in the future
http://www.amazon.com/TEKTON-Helping-Hand-with-Magnifier/dp/B000P42O3C/ref=sr_1_1?ie=UTF8&qid=1421774456&sr=8-1&keywords=helping+hand+soldering
I was looking more at something like this to not take up table space. But they both seem good!
I actuall did away with fresnel and put in some +3.0 plastic lenses.I have just ordered this lens and will see how it looks.https://www.amazon.ca/Professional-Jewelers-Lighted-Magnifier-Visor/dp/B005VIG6TA/ref=cm_cr_arp_d_product_top?ie=UTF8
Mod pics http://imgur.com/a/aU3kT Night and day compared to the fresnel lense.It looks better in person as i can actually read the text on the coffee cup quite clearly.
I’m pretty sure it’s one of these taped inside of a box, or at least the kind that have LED lights in them taped inside of a box!
I’ve been using this for detail work and it’s been great! Depth perception alteration takes some getting used to but I found the switch to this to be fairly painless.
i want to start painting the pilot figures. i'm thinking of buying a magnifying glass desk lamp. do you guys use such things? is it worth it? if so, any recommendations?
from my cursory research, seem this one may be decent value for relatively cheap price point.
https://www.amazon.com/gp/product/B01K10XA1O?pf_rd_p=183f5289-9dc0-416f-942e-e8f213ef368b&pf_rd_r=4WEDB459278EGVMBZEX9
A small vise or helping hand can be invaluable, if using a helping hand I recommend wrapping the alligator clip hands in a couple layers of electrical tape as they can be quite sharp and scratch up connectors and such. Since there's virtually no risk in damaging components, most soldering irons between 60-120W should work well. Any 60/40 rosin core solder will work, if you're unable to get leaded solder due to local regulations, I've heard the 99% tin stuff is decent, again just make sure it has rosin core. A smaller tip might be beneficial if using smaller connectors such as 2.5mm. A solder sucker and wick is useful if any mistakes are made. Lastly, a DMM is helpful to make sure there are no shorts and that all connections have continuity and low resistance.
something like this makes for a good nug scope.
A set of helping hands with alligator clips can hold the pieces still, so you only have to use one hand to paint.
Did you know Amazon will donate a portion of every purchase if you shop by going to smile.amazon.com instead? Over $50,000,000 has been raised for charity - all you need to do is change the URL!
Here are your smile-ified links:
these
---
^^i'm ^^a ^^friendly bot
I have this headlamp and I love it.
https://smile.amazon.com/gp/product/B01H8808H6/ref=oh_aui_search_detailpage?ie=UTF8&psc=1
I got these at my local Fry's and they work great: http://www.amazon.com/gp/aw/d/B0054H1XYQ?pc_redir=1404448648&robot_redir=1
This one works great for me. https://www.amazon.com/dp/B016L343SE?ref=myi_title_dp
No problem :-)
I also got one of these to help hold the cables still while soldering. You could do it with pliers and elastic bands though. http://www.amazon.co.uk/gp/aw/d/B001BMSBD4/ref=mp_s_a_1_5?qid=1420010781&sr=8-5&pi=AC_SX110_SY165
Happy soldering!
After the thread here: https://www.reddit.com/r/MTGLegacy/comments/6k77zx/buying_duals_is_terrifying/ I figured I'd try to disprove the rumor that the text is the biggest give-away (hint: it's not), and bring some degree of confidence to those who do want to buy duals (hint: just buy a $5 loupe!)
 
Here's the loupe I use: https://www.amazon.com/KINGMAS-Pocket-Microscope-Jeweler-Magnifier/dp/B00AQAANDS/ref=sr_1_11?ie=UTF8&qid=1498759657&sr=8-11&keywords=jewelers+loupe
I got this and it’s perfect. https://www.amazon.com/dp/B01K10XA1O/ref=cm_sw_r_cp_api_pazQBbKS6AWWN
Reaper makes Learn to Paint kits. I've used them to reinforce some of what I've learned at local painting meetups and I've liked them. I ended up grabbing a large Army Painter paint set and then had a wet palette and a Winsor & Newton brush recommended to me from a Zombicide painting group. They also pointed me to a head-mounted light/magnifying glass and some brush soap.
Buy a set of Helping Hands. Yes, you can solder without one, but it makes it so much easier that for a couple bucks it's absolutely worth it.
Get a pair of watch repair specs with different lense strengths. Can pick up a pair for a few bucks from amazon.
https://www.amazon.com/dp/B0716ZCYXZ/ref=cm_sw_r_cp_awdb_t1_72AtDbM4K8G62
honestly I just ordered them, they were cheap and I didn't want to mess with building my own.
http://www.amazon.com/SE-Clip--Double-Loupe-Set/dp/B000YMZJX2/ref=sr_1_14?ie=UTF8&qid=1318217887&sr=8-14
Only thing I had to do was make a little room on the hole clamp so it would sit right as I adjusted it.
I did this for my phone off of this tut:
http://www.roadtovr.com/category/diy-vr/
I was in the process of inventing a foldable version when Google Cardboard came out :/
Here are two good sources for cheap lenses if you are interested:
Singles (glass)
|
Bulk (plastic)
After I did a decent bit of research a few months back I ended up getting this one and enjoy it quite a bit.
It would. Are you using a "helping hand" to hold up the board vertically?
https://www.amazon.ca/gp/product/B0188JAPGI/ref=oh_aui_detailpage_o06_s00?ie=UTF8&psc=1
I got one of those. Its nice, got a regular magnifier and then the loup style on the side is 15x i think. And plenty of light. The 3 batteries that came with it i couldnt find replacements for, but it took 2 357s just fine.
This is the one I use:
https://www.amazon.com/dp/B073RFZS94/ref=sspa_dk_detail_6?psc=1&pd_rd_i=B073RFZS94&pd_rd_wg=Et8uj&pd_rd_r=8T1KYZ3DTY48KAPJTZBS&pd_rd_w=XJNh6
I like that it's a band (rather than having spectacle-like arms) so it won't fall off when you lean forward and that the tension of the band is easy to adjust using a knob on the back of the band.
I have these. They're pretty nice but way too heavy for the small little nose piece. I have to take breaks from them. I think I'm just going to a regular old magnifying glass and light on a stand for my desk.
This is another popular option: https://www.amazon.com/KINGMAS-Pocket-Microscope-Jeweler-Magnifier/dp/B00AQAANDS/ref=pd_sim_201_4?_encoding=UTF8&pd_rd_i=B00AQAANDS&pd_rd_r=T85T5H6TCG8FQT8Q80XR&pd_rd_w=mh4B9&pd_rd_wg=9WA7H&psc=1&refRID=T85T5H6TCG8FQT8Q80XR
Multiple vendors sell that same one for multiple price points.
A handheld for checking trichomes, I like these little cheapies: https://smile.amazon.com/gp/product/B00AQAANDS/ref=ppx_yo_dt_b_search_asin_title?ie=UTF8&psc=1
But checking for broad and russet mites, the USB plug-in is the way to go.
It was another amazon find for me: https://www.amazon.com/dp/B01K10XA1O/ref=cm_sw_r_cp_apap_Fh9FMsyEilKRq Its not too bad. I dont really use the magnifying glass though
Ooh! I got these recently and they've helped SO MUCH! The light goes right where you need it, and you can direct it slightly up or down, too. I also never realized how helpful magnification is until getting these. My stitches are so much more even!
I bought a cheap loupe to inspect the tip... https://www.amazon.ca/KINGMAS-Microscope-Jewelry-Magnifier-Jeweler/dp/B00AQAANDS
So far, I'm on the original 0.4mm nozzle, and I only change them to switch sizes... 0.8 for big "structural" work, and 0.2 for 1:100 scale minis.
I've run roughly 10kg through the 0.4 nozzle, including several spools of "silk" and thermo-chromatic.
> most of the text on the Kickstarter page is probably stupid, it's like it was written for someone who doesn't know how it works ... and it was because that is the target: someone who doesn't know anything about VR / who doesn't really need a VR headset.
You can be didactic and still right, here you're blatantly wrong on several aspects, and you do nothing to correct your errors.
> Secondly, it helps keeping the overall cost low. I believe that anyone who looked into DIY their own Oculus probably found that buying the right lenses is quite expensive.
You must be kidding, acrylic aspheric lenses cost next to nothing.
Here for the first tutorial for a DIY HMD :
$12.95
And here for the first mobile-based HMD (FOV2GO) : $10.99
> The Altergaze is not a poorly made VR headset, looking to make a quick buck... I am basically giving it for free!
And you made a patent application for that ? Free indeed...
> "This way, the distortion of the image is achieved through optics rather than using up the processing power of the smartphone."
You didn't answer this one. Here someone timed the pixel shader and it took 69 microseconds at native res (yes, micro, not milli) : http://rifty-business.blogspot.fr/2014/02/distortion-methods-in-rift-and-their.html
Processing power is wasted you said ?
> I am really surprised of how many people, especially Oculus fans, hate the Altergaze, and I can’t really understand why.
It's quite easy to understand why, try a bit harder...
I'd opt for a freestanding magnifying glass or combo helping hand over one of those
Helping hands
https://www.amazon.com/Neiko-01902-Adjustable-Magnifying-Alligator/dp/B000P42O3C/
Can use for fly tying or holding circuit boards while soldering, etc.
Maybe one could be made by using these from Amazon? https://www.amazon.com/Full-Page-Magnifier-Magnifying-conveniently/dp/B01HP48ZAK/ref=sr_1_1?ie=UTF8&qid=1486919326&sr=8-1&keywords=Full+page+magnifier
https://smile.amazon.com/gp/product/B01H8808H6/ref=oh_aui_search_detailpage?ie=UTF8&psc=1
they're ok, but they don't offer much magnification and the led is finicky. there's a makerspace by me with a microscope and it makes me really want my own for small smds, but i think you can get down to 0805s at least without needing that, and i dont need to go smaller than that yet
I bought one from amazon that was prettys wide and it still didnt work.
Give this a try! It works for me:)
https://www.amazon.com/dp/B01H8808H6/ref=cm_sw_r_other_apa_Guuvzb7QXP4D4
Also near-sighted and astigmatic, I used to get this until I spent the money on getting a decent headset magnifier, and it seemed to go away.
It was an old-school magnifier, like this one but even less modern without the swappable lenses.
I use this.
Works well, but feels a little cheap.
I use https://www.amazon.com/gp/product/B01H8808H6/ref=oh_aui_detailpage_o07_s00?ie=UTF8&psc=1
I believe this is the one:
https://www.amazon.com/Yoctosun-Magnifier-Professional-Jewelers-Interchangeable/dp/B01H8808H6/ref=pd_lpo_vtph_328_bs_t_1?_encoding=UTF8&psc=1&refRID=TCHXY0SG58VH85TADDJT
Try r/minipainting
I’ve used YOCTOSUN Head Mount Magnifier... https://www.amazon.com/dp/B01H8808H6?ref=ppx_pop_mob_ap_share for awhile
I use this thing
http://www.amazon.com/dp/B00AQAANDS
I'll chime in for a recommendation for this lamp I purchased recently.
Also/additionally, try picking up a cheap pair of low-strength readers. At least in the US, they're available at most drugstores. Even a 1.00 or a 1.25 can make a big difference in discerning tiny dates on coins.
https://www.tindie.com/products/Abacomtech/ezpick-manual-pick-and-place-machine/
https://www.amazon.com/dp/B01H8808H6/ref=cm_sw_r_cp_apa_i_FNJvCb5F2HY8J (there are many other relabeled and variations of this particular one).
Op posted link as new comment instead of replying, here's what they said;
"https://www.tindie.com/products/Abacomtech/ezpick-manual-pick-and-place-machine/
https://www.amazon.com/dp/B01H8808H6/ref=cm_sw_r_cp_apa_i_FNJvCb5F2HY8J (there are many other relabeled and variations of this particular one)."
A pocket microscope. Might get it tomorrow when I get paid and take pictures on my phone using it. :o
I was using an empty small pill bottle, using some old poster tack to affix the miniature to the cap. Then I got a little "helping hands" on Amazon, though gripping old miniature bases with the alligator clips can be a little wonky sometimes, but it at least allows me to manipulate the miniature and then let go and have it just sitting on its own.
Those eyes are really cool. I've got a bunch of mini's showing up soon from the Bones 3 kickstarter and will have to try that out on some of the bigger pieces before working it down to the smaller ones. Unfortunately most of the large models I have now are Big stompy robots (privateer press Cryx) and they don't really have eyes on them.
I have not tried a magnifier head set. I tried using the magnifier on a pair of helping hands but I had no sense depth perception so it didn't really work out for me. I've heard that the headsets work fairly well and you can maintain your sense of depth. Let's just say they're on the old wishlist so I can try them out.
Hehe I’m still relatively new too. And I too make polymer clay things, the tiny stuff really does hurt your eyes. I bought one of these things as it helps for the tiny stuffs: head mount magnifier
No. It's just a magnifying glass that has a 15X loupe built in.
https://www.amazon.com/gp/aw/d/B0188JAPGI?psc=1&ref=ppx_pop_mob_b_asin_title
One of these and a cheap laser pointer.
Total outlay <£5, and more accurate and it won't fall off or leave marks on the screen or have that annoying cable dangling down.
I'm using Amazon links as requested, but if you have a local big box tool stop you can get the store brand of most all these items for the same price or less. I know from personal experience, that from the tools I've listed all but two of the items are cheaper in store than on Amazon.
Everyone needs a knife! (~$7 home depot)
Razor blade
Where are you going to keep everything? (~$10 home depot)
Utility Sack
You'll need a good all around screw driver. (~$8 home depot)
6-in-1 Reversible Screwdriver
Need some basic general maintenance pliers? (~$20 home depot)
Pliers Set
Ratcheting screwdriver for those repetitive screw jobs. (~$20 sears)
Ratcheting Screwdriver
Where the hell did I put that T6?
Magnetic Precision Screwdriver Set
Where did that damn screw go?
Flashlight
Extra stuff!
I recommend the ball end ones specifically if you don't have a good angle on what your trying to get at (cough towel bar cough cough).
Long Arm Ball End Hex Key Wrench Set
For those damn pesky wires and that damn lack of a third hand.
Helping hands
When duck tape and gum wont cut it.
Beginners soldering iron kit
I have used all of these specific items extensively besides the ball end hex keys, and that specific helping hands.