Reddit mentions: The best electrical cable ties
We found 1,185 Reddit comments discussing the best electrical cable ties. We ran sentiment analysis on each of these comments to determine how redditors feel about different products. We found 208 products and ranked them based on the amount of positive reactions they received. Here are the top 20.
1. VELCRO Brand ONE-WRAP Cable Ties | 100Pk | 8 x 1/2" Black Cord Organization Straps | Thin Pre-Cut Design | Wire Management for Organizing Home, Office and Data Centers
- WIRE ORGANIZING SELF BUNDLING TIES - Get organized fast with these simple to use, self-fastening thin ties that will contain and store cords and wires quickly and safely; Secure large cords and bulky cables with ease for a neat finish
- WIRE AND CORD MANAGEMENT - These bundling ties are ideal fasteners for cord organization, wire management, and securing loose or extra-long cords out of the way to eliminate tripping hazards
- STRONG AND REUSABLE - Strong, trusted, and used by data and network centers across the globe; These fasteners can be easily reused and repositioned; Allows convenient access when arranging computer, appliances and electronic wires
- PRE-CUT AND EASY TO USE - These pre-cut ties stay firmly in place with an easy to use slotted head; simply insert the rounded end through the hole and pull the strap tight; it firmly wraps onto itself for a secure hold
- INDOOR OR OURDOOR USE - With multi-use options for the home, shed, garage or office, these thin ties can safely be used indoors or outdoors for your organizing and storage needs
Features:

Specs:
| Color | Black |
| Height | 7.25 Inches |
| Length | 3 Inches |
| Number of items | 1 |
| Release date | August 2019 |
| Size | 8In x 1/2In |
| Weight | 0.22 Pounds |
| Width | 1.125 Inches |
2. Attmu 50 PCS Reusable Fastening Cable Ties, Microfiber Cloth 6-Inch Hook and Loop Cord Ties, Black
DEFINITELY SUPER VALUABLE - Made from fabric material with hook & loop attachments, these cable straps are both reusable and durable. Each pack includes 50 pieces cable ties.FLEXIBILITY & VERSATILITY - Each wire ties is 6 in length and 0.7 inches in width. Include an eye hole in the tail allowing th...

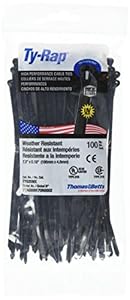
Specs:
| Color | Black |
| Height | 0.5 Inches |
| Length | 6.3 Inches |
| Number of items | 1 |
| Release date | September 2019 |
| Size | 50 Count |
| Weight | 0.00625 Pounds |
| Width | 5.5 Inches |
3. StarTech.com Self-adhesive Nylon Cable Tie Mounts - Pkg of 100 - Cable organizer - HC102
Easy to use and quick to installpeel and stick, no screws requiredEliminate cable tangles and clutter

Specs:
| Height | 9.29 Inches |
| Length | 7.4 Inches |
| Number of items | 1 |
| Size | 100 Pack |
| Weight | 0.4 Pounds |
| Width | 1.1 Inches |
4. PASOW 50pcs Cable Ties Reusable Fastening Wire Organizer Cord Rope Holder 7 Inch (Black)
- 50 PCS cable ties in package
- Great for computer, appliance, and electronics wire management and is reusable,Great for cable or wire organized and tying use, and easy to make markes.
- Ideal for keeping all kinds of cords cables well organized and tidy in place
- Reusable, durable, flexible fabric material ,Detachable design is convenient to use.
- Multi-purpose and reusable cable ties
Features:

Specs:
| Color | Black |
| Height | 0.05 Inches |
| Length | 7.1 Inches |
| Size | 7 inch |
| Weight | 0.110231131 Pounds |
| Width | 0.8 Inches |
5. LASUS Zip Tie Mount, 1/2 X 1/2, 25 Pack
Very affordable.Will keep you more organized.This will keep your cords out of your way.Comes in packs of 10.Made by Ziotek.

Specs:
| Weight | 0.05 Pounds |
6. C2G 43036 4 Inch Cable Tie Multipack (100 Pack) TAA Compliant, Black
Bundle cables then just zip and snip for a neat, organized installationDesigned to bundle and secure cables18 pounds of tensile strength4 inch lengthLifetime Warranty

Specs:
| Color | Black |
| Height | 0.95 Inches |
| Length | 4 Inches |
| Number of items | 1 |
| Release date | September 2019 |
| Size | Pack of 100 |
| Weight | 0.03 pounds |
| Width | 0.48 Inches |
7. 50 Pieces Adhesive Cable Management Ties Cord Management Clips Cable Organizer Cable Ties with Optional Screw Mount Cord Fasteners
- Pack of 50 Units Quality Adhesive Nylon Cable Zip Ties
- Strong and Durable: made of sturdy nylon, strong bearing capacity.
- Easy to Use: adhesive for clean and smooth flat surfaces; firmly attached, detachable without leaving residues.
- Adjustable and Reusable, can be easily unlocked to add or remove cables; optional screw mount for walls and wet environments.
- Multipurpose: used for organizing cables, cords and wires at home, office, garage or workshop.
Features:

Specs:
| Color | Black |
| Size | 50 Pieces |
8. Monoprice Cable tie mounts 25x25(mm), 100pcs/Pack - white
- These high quality adhesive backed cable tie mounts are perfect for any application where a wire needs to be securely mounted without damaging the mounting surface
- Just peel the covering off of the adhesive backing stick the mount to the mounting surface thread your cable tie through zip it shut around the cable and your cable is firmly mounted
- country of origin :China
- Package Dimensions: 3.048 L x 16.256 H x 12.954 W (cm)
Features:

Specs:
| Color | White |
| Height | 2.7 Inches |
| Length | 4.1 Inches |
| Weight | 0.27 Pounds |
| Width | 4 Inches |
9. SunplusTrade 100pcs 11.8 Inches Stainless Steel Exhaust Wrap Multi-Purpose Locking Cable Metal Zip Ties
- 304 Stainless Steel Self Locking Zip Tie For Automotive Application Such As Exhaust Heat Wrap
- Can Support Temperature Up To 932 F. Don't Need To Worry About Heat And Corrosion. Perfect For Outdoor Applications
- Max Supporting Weight is 90kg (198lb)
- Perfect Universal Application For Automotive Parts, Home Repair, Computer Repair, Etc
- No Special Tools Required. Only Need A Set Of Needle Nose Plier To Tighten And A Diagonal Plier Or Tin Snips To Cut The Zip Tie
Features:

Specs:
| Weight | 0.74 Pounds |
10. TR Industrial Multi-Purpose UV Resistant Black Cable Ties, 8 inches, 100 Pack
- Made with UV resistant industrial strength 6/6 Nylon
- 100 8 inch pieces
- 50 lbs tensile strength
- Working temperature: -40-85 degrees C or -40-185 degrees F
- Strong cable ties usable in many applications
Features:

Specs:
| Color | Black |
| Height | 0.25 Inches |
| Length | 8 Inches |
| Number of items | 100 |
| Size | 8" |
| Weight | 0.220462262 Pounds |
| Width | 4 Inches |
11. Monoprice Hook and Loop Fastening Cable Ties 6 in 50 pcs/pack Black
- Includes eyelet so tie can be attached to a cable
- Multiple ties can be attached together to form one longer tie
- Each order includes 50 ties
- These ties measure 6-inch length and include an eye hole in the tail
Features:

Specs:
| Color | Black |
| Height | 1.4 Inches |
| Length | 7 Inches |
| Number of items | 1 |
| Size | 6in |
| Weight | 0.01 Pounds |
| Width | 6.6 Inches |
12. VELCRO Brand ONE-WRAP Cable Ties | 25Pk | 8 x 1/2" Black Cord Organization Straps | Thin Pre-Cut Design | Wire Management for Organizing Home, Office and Data Centers
WIRE ORGANIZING SELF BUNDLING TIES: Secure large cords and bulky cables with ease; get organized fast with these simple to use, self-fastening thin ties that will contain and store cords and wires quickly and safelyWIRE AND CORD MANAGEMENT: These bundling ties are ideal fasteners for cord organizati...

Specs:
| Color | Black |
| Height | 7.25 Inches |
| Length | 3 Inches |
| Number of items | 1 |
| Size | 8 x 1/2In - 25 Ties |
| Weight | 0.04 pounds |
| Width | 1.125 Inches |
13. 8" Plastic Cable Zip Ties 100-Pack (Black)
- Wire ties Self-locking: Self-locking Fastener Design, Strong durable powerful lock, easy handling and prevent snagging in tight. zip Ties Heavy Duty field tested to support up to 40 pounds of weight with a strong Ratchet-Lock design and dense teeth are more durable for use.
- Black Zip ties Assortment: Pack of 700 small zip ties 4/6/8/10/12 inch premium cable ties assorted (4inch 200pcs, 6inch 200pcs, 8inch 100pcs,10inch 100pcs,12inch 100pcs). 700-PACK of strong plastic cable ties usable in many applications.
- High-Quality Plastic Zip Ties: Made of industrial strength nylon 6/6 fire resistant material, the cable straps are flexible to be used in temperatures ranges from -31℉ to +185℉ (-35℃ to +85℃), uv resistant for outdoor.
- Pc Cable Management Ties: These bundling ties are ideal fasteners for wires/ cords organizer and storages, secure loose cables to eliminate tripping hazards.
- Plastic zip ties Indoor or Outdoor Use: With multi-use cable zip ties indoor/outdoor, these assorted ties wraps can safely be used for home, office, shed, garage, plants, patio/fencing mesh shade net cover with your organizing and storage needs.
Features:

Specs:
| Color | Black |
| Height | 1.18 Inches |
| Length | 11.41 Inches |
| Number of items | 700 |
| Size | 700 Pack |
| Weight | 0.12 Pounds |
| Width | 5.11 Inches |
14. Rustark 50Pcs 2 Sizes Adjustable Self-Adhesive Nylon Cable Straps Cable Ties Cord Clamp for Wire Management, Large and Small
✔ ADJUSTABLE & RECYCLABLE: Zipper design, so you can opens and closes easily and quickly to add or remove cables according to your wire size. Black cable ties with adjustable design, can meet your different needs. Make the wires tie up stably. Although the adhesion of self-adhesive pad is very str...

Specs:
| Weight | 0.26 Pounds |
15. Cable Matters Combo Pack Assorted 200 Self-Locking 6+8+12-Inch Nylon Cable Ties (Tie Wraps, Zip Ties) in Black and White
LIGHT & MEDIUM DUTY CABLE TIES in black and white for home, office, garage, workshop and moreINDOOR USE WIRE TIES are designed with rounded edges to provide easy handling and prevent snagging in tight spacesDURABLE SINGLE-USE TIES are rated with a 17 lb or 48 lb tensile strength; Increase the tensil...

Specs:
| Color | Black and white |
| Size | 6+8+12 Inch Combo |
16. TEKTON 6235 Assorted Cable Ties, 200-Piece
- Made of strong nylon material
- Self-locking buckle will not loosen
- Use assorted colors (orange, green, yellow, black, and white) to organize groups of wires, cables or hoses
- Includes: 125-pc. 4 inch cable ties, 50-pc. 8 inch cable ties, 25-pc. 12 inch cable ties
Features:

Specs:
| Height | 8.5 Inches |
| Length | 3 Inches |
| Number of items | 1 |
| Weight | 0.35 Pounds |
| Width | 3 Inches |
17. KEDSUM 200pcs Adhesive Cable Clips, Wire Clips, Car Cable Organizer, Cable Wire Management, Drop Cable Clamp Wire Cord Tie Holder for Car, Office and Home
▶Double-sided foam tape makes super sticky. Strong adhesive make it grip firmly, and lock a wire in place once closed.▶Easy to use.No need to punch a hole or attach any screws.Come with 200 pieces in total,creative approaches is available as you like to utilize them.▶Attach to a smooth, clean ...

Specs:
| Size | 200 Piece |
18. VELCRO Brand ONE-WRAP Ties | Cable Management, Wires & Cords | Self Gripping Cable Ties, Reusable | 5 Ct - 8" x 1/2" | Multi-color
- WIRE AND CORD MANAGEMENT - These bundling straps are ideal fasteners for cord organisation, wire management, and securing loose or extra-long cords out of the way
- STRONG AND REUSABLE - Strong, trusted, and used by data and network centers across the globe; these fasteners can be reused and re positioned when arranging computer, appliance and electronic wires
- PRE-CUT LENGTH - Adjustable to suit different circumferences; simply insert the rounded end through the hole and pull the strap tight; ties firmly wrap onto itself for a secure hold
- KEEP DRAWERS AND SUPPLIES ORGANISED - Ideal for indoor or outdoor use in the home, shed, garage, dorm or office, these ties are ideal to organise drawers in tool chests, desks, or cabinets; keeps pens, pencils, brushes, and markers neat and tidy
- WIRE ORGANISING SELF BUNDLING STRAPS - Secure large cords and bulky cables with ease; get organised fast with these simple to use, self-fastening ties that will contain and store cords and wires quickly and safely
Features:

Specs:
| Color | Multi Color |
| Height | 7.25 inches |
| Length | 3 inches |
| Number of items | 1 |
| Release date | January 2020 |
| Size | 5 Ties |
| Weight | 0.03 Pounds |
| Width | 1 inches |
19. Install Bay CTM34 Adhesive Backed Cable Tie Mount 3/4 Inch x 3/4 Inch 100 Pack
- Quality assured products
- Secure fit
- Designed with the installer user in mind
- Proven and Tested for durability and function in real world conditions
Features:

Specs:
| Height | 1.5 Inches |
| Length | 5 Inches |
| Number of items | 1 |
| Width | 9 Inches |
20. Thomas and Betts TR TY525MX Cable TIE 50LB 7" UV BLK (Pack of 100)
- 7.31" Tie Length
- Ultraviolet Resistant Black Nylon
- 50 LB Tensile Strength
Features:
Specs:
| Color | Black |
| Height | 1.5 Inches |
| Length | 10.5 Inches |
| Number of items | 100 |
| Width | 5 Inches |
🎓 Reddit experts on electrical cable ties
The comments and opinions expressed on this page are written exclusively by redditors. To provide you with the most relevant data, we sourced opinions from the most knowledgeable Reddit users based the total number of upvotes and downvotes received across comments on subreddits where electrical cable ties are discussed. For your reference and for the sake of transparency, here are the specialists whose opinions mattered the most in our ranking.
Interested in what Redditors like? Check out our Shuffle feature
Shuffle: random products popular on RedditTop Reddit comments about Electrical Cable Ties:
Summary
1. VELCRO Brand ONE-WRAP Cable Ties | 100Pk | 8 x 1/2" Black Cord Organization Straps | Thin Pre-Cut Design | Wire Management for Organizing Home, Office and Data Centers
- WIRE ORGANIZING SELF BUNDLING TIES - Get organized fast with these simple to use, self-fastening thin ties that will contain and store cords and wires quickly and safely; Secure large cords and bulky cables with ease for a neat finish
- WIRE AND CORD MANAGEMENT - These bundling ties are ideal fasteners for cord organization, wire management, and securing loose or extra-long cords out of the way to eliminate tripping hazards
- STRONG AND REUSABLE - Strong, trusted, and used by data and network centers across the globe; These fasteners can be easily reused and repositioned; Allows convenient access when arranging computer, appliances and electronic wires
- PRE-CUT AND EASY TO USE - These pre-cut ties stay firmly in place with an easy to use slotted head; simply insert the rounded end through the hole and pull the strap tight; it firmly wraps onto itself for a secure hold
- INDOOR OR OURDOOR USE - With multi-use options for the home, shed, garage or office, these thin ties can safely be used indoors or outdoors for your organizing and storage needs
Features:
Specs:
| Color | Black |
| Height | 7.25 Inches |
| Length | 3 Inches |
| Number of items | 1 |
| Release date | August 2019 |
| Size | 8In x 1/2In |
| Weight | 0.22 Pounds |
| Width | 1.125 Inches |
2. Attmu 50 PCS Reusable Fastening Cable Ties, Microfiber Cloth 6-Inch Hook and Loop Cord Ties, Black
DEFINITELY SUPER VALUABLE - Made from fabric material with hook & loop attachments, these cable straps are both reusable and durable. Each pack includes 50 pieces cable ties.FLEXIBILITY & VERSATILITY - Each wire ties is 6 in length and 0.7 inches in width. Include an eye hole in the tail allowing th...
Specs:
| Color | Black |
| Height | 0.5 Inches |
| Length | 6.3 Inches |
| Number of items | 1 |
| Release date | September 2019 |
| Size | 50 Count |
| Weight | 0.00625 Pounds |
| Width | 5.5 Inches |
3. StarTech.com Self-adhesive Nylon Cable Tie Mounts - Pkg of 100 - Cable organizer - HC102
Easy to use and quick to installpeel and stick, no screws requiredEliminate cable tangles and clutter
Specs:
| Height | 9.29 Inches |
| Length | 7.4 Inches |
| Number of items | 1 |
| Size | 100 Pack |
| Weight | 0.4 Pounds |
| Width | 1.1 Inches |
4. PASOW 50pcs Cable Ties Reusable Fastening Wire Organizer Cord Rope Holder 7 Inch (Black)
- 50 PCS cable ties in package
- Great for computer, appliance, and electronics wire management and is reusable,Great for cable or wire organized and tying use, and easy to make markes.
- Ideal for keeping all kinds of cords cables well organized and tidy in place
- Reusable, durable, flexible fabric material ,Detachable design is convenient to use.
- Multi-purpose and reusable cable ties
Features:
Specs:
| Color | Black |
| Height | 0.05 Inches |
| Length | 7.1 Inches |
| Size | 7 inch |
| Weight | 0.110231131 Pounds |
| Width | 0.8 Inches |
5. LASUS Zip Tie Mount, 1/2 X 1/2, 25 Pack
Very affordable.Will keep you more organized.This will keep your cords out of your way.Comes in packs of 10.Made by Ziotek.
Specs:
| Weight | 0.05 Pounds |
6. C2G 43036 4 Inch Cable Tie Multipack (100 Pack) TAA Compliant, Black
Bundle cables then just zip and snip for a neat, organized installationDesigned to bundle and secure cables18 pounds of tensile strength4 inch lengthLifetime Warranty
Specs:
| Color | Black |
| Height | 0.95 Inches |
| Length | 4 Inches |
| Number of items | 1 |
| Release date | September 2019 |
| Size | Pack of 100 |
| Weight | 0.03 pounds |
| Width | 0.48 Inches |
7. 50 Pieces Adhesive Cable Management Ties Cord Management Clips Cable Organizer Cable Ties with Optional Screw Mount Cord Fasteners
- Pack of 50 Units Quality Adhesive Nylon Cable Zip Ties
- Strong and Durable: made of sturdy nylon, strong bearing capacity.
- Easy to Use: adhesive for clean and smooth flat surfaces; firmly attached, detachable without leaving residues.
- Adjustable and Reusable, can be easily unlocked to add or remove cables; optional screw mount for walls and wet environments.
- Multipurpose: used for organizing cables, cords and wires at home, office, garage or workshop.
Features:
Specs:
| Color | Black |
| Size | 50 Pieces |
8. Monoprice Cable tie mounts 25x25(mm), 100pcs/Pack - white
- These high quality adhesive backed cable tie mounts are perfect for any application where a wire needs to be securely mounted without damaging the mounting surface
- Just peel the covering off of the adhesive backing stick the mount to the mounting surface thread your cable tie through zip it shut around the cable and your cable is firmly mounted
- country of origin :China
- Package Dimensions: 3.048 L x 16.256 H x 12.954 W (cm)
Features:
Specs:
| Color | White |
| Height | 2.7 Inches |
| Length | 4.1 Inches |
| Weight | 0.27 Pounds |
| Width | 4 Inches |
9. SunplusTrade 100pcs 11.8 Inches Stainless Steel Exhaust Wrap Multi-Purpose Locking Cable Metal Zip Ties
- 304 Stainless Steel Self Locking Zip Tie For Automotive Application Such As Exhaust Heat Wrap
- Can Support Temperature Up To 932 F. Don't Need To Worry About Heat And Corrosion. Perfect For Outdoor Applications
- Max Supporting Weight is 90kg (198lb)
- Perfect Universal Application For Automotive Parts, Home Repair, Computer Repair, Etc
- No Special Tools Required. Only Need A Set Of Needle Nose Plier To Tighten And A Diagonal Plier Or Tin Snips To Cut The Zip Tie
Features:
Specs:
| Weight | 0.74 Pounds |
10. TR Industrial Multi-Purpose UV Resistant Black Cable Ties, 8 inches, 100 Pack
- Made with UV resistant industrial strength 6/6 Nylon
- 100 8 inch pieces
- 50 lbs tensile strength
- Working temperature: -40-85 degrees C or -40-185 degrees F
- Strong cable ties usable in many applications
Features:
Specs:
| Color | Black |
| Height | 0.25 Inches |
| Length | 8 Inches |
| Number of items | 100 |
| Size | 8" |
| Weight | 0.220462262 Pounds |
| Width | 4 Inches |
11. Monoprice Hook and Loop Fastening Cable Ties 6 in 50 pcs/pack Black
- Includes eyelet so tie can be attached to a cable
- Multiple ties can be attached together to form one longer tie
- Each order includes 50 ties
- These ties measure 6-inch length and include an eye hole in the tail
Features:
Specs:
| Color | Black |
| Height | 1.4 Inches |
| Length | 7 Inches |
| Number of items | 1 |
| Size | 6in |
| Weight | 0.01 Pounds |
| Width | 6.6 Inches |
12. VELCRO Brand ONE-WRAP Cable Ties | 25Pk | 8 x 1/2" Black Cord Organization Straps | Thin Pre-Cut Design | Wire Management for Organizing Home, Office and Data Centers
WIRE ORGANIZING SELF BUNDLING TIES: Secure large cords and bulky cables with ease; get organized fast with these simple to use, self-fastening thin ties that will contain and store cords and wires quickly and safelyWIRE AND CORD MANAGEMENT: These bundling ties are ideal fasteners for cord organizati...
Specs:
| Color | Black |
| Height | 7.25 Inches |
| Length | 3 Inches |
| Number of items | 1 |
| Size | 8 x 1/2In - 25 Ties |
| Weight | 0.04 pounds |
| Width | 1.125 Inches |
13. 8" Plastic Cable Zip Ties 100-Pack (Black)
- Wire ties Self-locking: Self-locking Fastener Design, Strong durable powerful lock, easy handling and prevent snagging in tight. zip Ties Heavy Duty field tested to support up to 40 pounds of weight with a strong Ratchet-Lock design and dense teeth are more durable for use.
- Black Zip ties Assortment: Pack of 700 small zip ties 4/6/8/10/12 inch premium cable ties assorted (4inch 200pcs, 6inch 200pcs, 8inch 100pcs,10inch 100pcs,12inch 100pcs). 700-PACK of strong plastic cable ties usable in many applications.
- High-Quality Plastic Zip Ties: Made of industrial strength nylon 6/6 fire resistant material, the cable straps are flexible to be used in temperatures ranges from -31℉ to +185℉ (-35℃ to +85℃), uv resistant for outdoor.
- Pc Cable Management Ties: These bundling ties are ideal fasteners for wires/ cords organizer and storages, secure loose cables to eliminate tripping hazards.
- Plastic zip ties Indoor or Outdoor Use: With multi-use cable zip ties indoor/outdoor, these assorted ties wraps can safely be used for home, office, shed, garage, plants, patio/fencing mesh shade net cover with your organizing and storage needs.
Features:
Specs:
| Color | Black |
| Height | 1.18 Inches |
| Length | 11.41 Inches |
| Number of items | 700 |
| Size | 700 Pack |
| Weight | 0.12 Pounds |
| Width | 5.11 Inches |
14. Rustark 50Pcs 2 Sizes Adjustable Self-Adhesive Nylon Cable Straps Cable Ties Cord Clamp for Wire Management, Large and Small
✔ ADJUSTABLE & RECYCLABLE: Zipper design, so you can opens and closes easily and quickly to add or remove cables according to your wire size. Black cable ties with adjustable design, can meet your different needs. Make the wires tie up stably. Although the adhesion of self-adhesive pad is very str...
Specs:
| Weight | 0.26 Pounds |
15. Cable Matters Combo Pack Assorted 200 Self-Locking 6+8+12-Inch Nylon Cable Ties (Tie Wraps, Zip Ties) in Black and White
LIGHT & MEDIUM DUTY CABLE TIES in black and white for home, office, garage, workshop and moreINDOOR USE WIRE TIES are designed with rounded edges to provide easy handling and prevent snagging in tight spacesDURABLE SINGLE-USE TIES are rated with a 17 lb or 48 lb tensile strength; Increase the tensil...
Specs:
| Color | Black and white |
| Size | 6+8+12 Inch Combo |
16. TEKTON 6235 Assorted Cable Ties, 200-Piece
- Made of strong nylon material
- Self-locking buckle will not loosen
- Use assorted colors (orange, green, yellow, black, and white) to organize groups of wires, cables or hoses
- Includes: 125-pc. 4 inch cable ties, 50-pc. 8 inch cable ties, 25-pc. 12 inch cable ties
Features:
Specs:
| Height | 8.5 Inches |
| Length | 3 Inches |
| Number of items | 1 |
| Weight | 0.35 Pounds |
| Width | 3 Inches |
17. KEDSUM 200pcs Adhesive Cable Clips, Wire Clips, Car Cable Organizer, Cable Wire Management, Drop Cable Clamp Wire Cord Tie Holder for Car, Office and Home
▶Double-sided foam tape makes super sticky. Strong adhesive make it grip firmly, and lock a wire in place once closed.▶Easy to use.No need to punch a hole or attach any screws.Come with 200 pieces in total,creative approaches is available as you like to utilize them.▶Attach to a smooth, clean ...
Specs:
| Size | 200 Piece |
18. VELCRO Brand ONE-WRAP Ties | Cable Management, Wires & Cords | Self Gripping Cable Ties, Reusable | 5 Ct - 8" x 1/2" | Multi-color
- WIRE AND CORD MANAGEMENT - These bundling straps are ideal fasteners for cord organisation, wire management, and securing loose or extra-long cords out of the way
- STRONG AND REUSABLE - Strong, trusted, and used by data and network centers across the globe; these fasteners can be reused and re positioned when arranging computer, appliance and electronic wires
- PRE-CUT LENGTH - Adjustable to suit different circumferences; simply insert the rounded end through the hole and pull the strap tight; ties firmly wrap onto itself for a secure hold
- KEEP DRAWERS AND SUPPLIES ORGANISED - Ideal for indoor or outdoor use in the home, shed, garage, dorm or office, these ties are ideal to organise drawers in tool chests, desks, or cabinets; keeps pens, pencils, brushes, and markers neat and tidy
- WIRE ORGANISING SELF BUNDLING STRAPS - Secure large cords and bulky cables with ease; get organised fast with these simple to use, self-fastening ties that will contain and store cords and wires quickly and safely
Features:
Specs:
| Color | Multi Color |
| Height | 7.25 inches |
| Length | 3 inches |
| Number of items | 1 |
| Release date | January 2020 |
| Size | 5 Ties |
| Weight | 0.03 Pounds |
| Width | 1 inches |
19. Install Bay CTM34 Adhesive Backed Cable Tie Mount 3/4 Inch x 3/4 Inch 100 Pack
- Quality assured products
- Secure fit
- Designed with the installer user in mind
- Proven and Tested for durability and function in real world conditions
Features:
Specs:
| Height | 1.5 Inches |
| Length | 5 Inches |
| Number of items | 1 |
| Width | 9 Inches |
20. Thomas and Betts TR TY525MX Cable TIE 50LB 7" UV BLK (Pack of 100)
- 7.31" Tie Length
- Ultraviolet Resistant Black Nylon
- 50 LB Tensile Strength
Features:
Specs:
| Color | Black |
| Height | 1.5 Inches |
| Length | 10.5 Inches |
| Number of items | 100 |
| Width | 5 Inches |
Ow that's awesome!
Happy birthday already!
Great to hear that the RAM will be used! That really makes me happy.
I've seen your updated OP and my god, I get way too jealous, haha! This is going to be an amazing PC.
---
Watercooling
---
I have been looking at it in depth. You don't want to go with the 480mm in the top & 240mm in the bottom setup?
Here is a double 480mm build. Which does look pretty awesome as well.
Here is an other double 480mm build. This one is a bit messy, but just to show you how it will "look".
I would advise to buy the pretty expensive but probably very good & awesome looking window from MNPC tech.
I've send them a mail to question if a 480mm radiator will still fit in the bottom. I am very sure, but not entirely.Just got a reply from MNPC tech and the 480mm radiator will fit no problem.
---
As for the tubing, you mentioned that you want hard tubes. Would you perhaps like the extra step to go with glass?
The benefit of glass is that it's very scratch resistant & it stays very clear. It's also not that hard to "cut" but you need to take your time for it. It will take a full weekend for sure to completely watercool it. Or I would say, 2 days at least.
Here is a video that explains on how to cut glass tubes. But it also shows you and explains why you would perhaps want glass tubes.
As you can see at 3:23 the soft tubing got pretty damn clouded. I don't know how long this took, but I guess about a year+ for sure. Probably 2 years, not entirely sure.
When you do go for glass, it's recommended to actually set up the whole loop in plastic first. To get the exact lengths, since you can cut plastic a lot easier than glass. Then you can use the plastic parts as templates for the glass. This will cost you an other $50 extra, but it's mostly going to cost you time.
I will put the plastic in the list.
It's actually great that you'll get the case soon, because then you can measure up a lot of things that I need to know. So I can suggest the right parts! So be ready with a measuring tape.
---
GTX1080s, cables & monitors
---
GTX1080s:
Yes, getting 2 GTX1080s is going to be "rough". They sell out in a snap, so I highly recommend to make an account at this website:
https://www.nowinstock.net/computers/videocards/nvidia/gtx1080
Then you can get an email / SMS text notification for when parts come back in stock, so that you can order it very quickly. It sells out in less than 2 hours the last time a card came into the store on Amazon.
You can buy any "founders edition" card from any brand really. But EVGA & Asus are 2 that keep the warranty even when you put waterblocks on them. So I prefer those 2 brands, maybe MSI, Gigabyte, Zotac & other brands started to also keep the warranty if you put their cards under water. But I am not sure about that.
I highly recommend to be very careful about all the screws when you put on the waterblock. Just in case you have to send the card back for RMA. You need to have all the screws & the cooler.
Cables:
You have to tell me which color combination you would prefer. They have a lot of options from CableMods.
Then I have a better idea on how to pick out the colors for the rest of the components.
Monitors:
Ow yes, the monitors! I assume that you probably would prefer to have the same monitors all around? That would of course shoot your budget into the roof. If you do go for the Acer 1440p, 165Hz gaming monitor of $759. The LG 4K monitor that I recommended got a very sleek design as well, but it of course is a bit different compared to the Acer 1440p monitor.
Other parts:
I hope that you didn't buy that CPU for $549.99? But anyway, you want to buy a cheap after-market air cooler as well. Since the i7-6700K does not come with a cooler on it's own.
You need this to test the system, before you put it under water, you have to make sure it works on air. Including a stress test for about 2-12 hours. Whatever you prefer. I generally let it stress test for 1 night. Which is about 8-10 hours.
I will post my list with all the parts later tonight. I hope, but I have to tell you, that you should not order it right away. We have to do some measurements first!
Measurements:
I will make a paint drawing to show you exactly what I need to know in terms of all the measurements.
Tools:
Magnetic screwdriver set | $20
Set of files | $15
Handsaw | $13
Electronic drill | $50
1/8" to 5/8" adapter chunk | $20
Velcro straps | $8
Anti static wrist strap | $5
Working on the whole list now (again).
---
#####Again, if you have any questions. Feel free to ask!
Things I feel are a must:
Useful extras:
--EDIT--
My order of assembly:
I apologize. Let me do my best to break it down clearly for you here. Because it's a lot of stuff I was confused too, so I made a document that I hope clearly details my build and the associated costs. For the sake of this, I'm excluding peripherals, because I can't buy them from Memory Express anyways. If you're interested in what I've chosen I can link those too.
So, to begin, ME is holding on to their last 1060 for me, if I do my full system build with them (due to miners, they won't sell it to me alone). As a result, I can price match any of my items with them -- including the video card (of course, I'll be hard-pressed to find the GPU for less than they're listing it for). That's why I listed PCPP -- according to the associate I spoke with, they're willing to price match with any of the sites on there, so long as they have the GPU in stock. This is the most up-to-date build I have -- I've for now excluded the peripherals and the RAM.
****
The CPU is the same as before:
Intel Core i3 8100 3.6Ghz, 6mb
Price Match w/ Vuugo @ $147.25
https://www.memoryexpress.com/Products/MX68268
**
The motherboard I think I managed to get the same one from a different ME, and it's being transferred to my local one.
MSI Z370-A Pro
Price Match w/ Newegg @ $149.99
https://www.memoryexpress.com/Products/MX68590
****
The RAM I'm still iffy about. The one I have on the build right now is a Kingston 2x4 GB for $125. I wasn't given a product number and forgot to ask, but through some digging on their website, I found this and I think it's that one because the price is the same (it's the only one at exactly that price). If not, they have it in stock and I can switch it out for this one.
As far as I can tell, it's identical to the one you linked. What do you mean by expandability? As far as I can tell, my motherboard has 4 memory slots. Can I not just add more RAM? Unless I need to use those to connect stuff like my HDD and SSD, but I thought those used PCI-e slots.
If 8 gb will do me fine then I'm happy, I just don't want to have to upgrade any time soon. The 16gb version of the same one is less than $100 more so it's something I'll have to consider. If it was you, what would you do? The choices:
Kingston HyperX Fury 2x4 GB
Price Match w/ PC-Canada @ $117.99
https://www.memoryexpress.com/Products/MX64812
OR
Kingston HyperX Fury 2x8GB
Price Match w/ Vuugo @ $218.50
https://www.memoryexpress.com/Products/MX66968
**
From what I could tell, ME had the best price on my SSD.
Samsung 850 Evo SSD 500GB
Memory Express @ $179
https://www.memoryexpress.com/Products/MX55510
I think I've decided on 500GB. More storage is always better, and again, I don't want to have to switch, transfer, or upgrade later. I aim to put only my OS and most of my games on there, so it will be dedicated to that.
*****
The HDD I went for 2TB. It's a $20 difference from 1TB so I figured the same as above.
Seagate 2TB BarraCuda HD Sata III w/ 64 M Cache
Price Match w/ ShopRBC @ $72.25
https://www.memoryexpress.com/Products/MX63178
*
The GPU I had to change from EVGA, because ME doesn't have that one in stock anywhere. This one, according to the salesperson and the Internet, has two fans and a higher speed. I figured that would end up being better anyways, but again, let me know if I'm causing a problem for myself here.
Asus GTX 1060 3GB
Price Match w/ PC-Canada @ $364.99
https://www.memoryexpress.com/Products/MX63930
The case I had to switch a bit to get one they had in stock. It's effectively the same as far as I can tell.
IN WIN G7 ATX Mid Tower Case, Black
Memory Express @ $59.99
https://www.memoryexpress.com/Products/MX52221
Same with the PSU. Think I used the filter to grab this one, sorted by Memory Express.
Corsair TXM Gold 550W 80+ Gold Certified Semi-Modular ATX Power Supply
Price Match w/ PC-Canada @ $94.99
https://www.memoryexpress.com/Products/MX65812
The monitor they have in stock. I was looking to get a cheaper one at about 120Hz but apparently nobody has those.
ACER GN246HL 24in Full HD 144Hz LCD LED
Price Match w/ Amazon.ca @ $249.99
https://www.memoryexpress.com/Products/MX64422
So the total price of all of the above comes to:
$1446,44 if I choose to go with 8 GB of RAM, OR
$1546,95 if I choose to go with 16 GB of RAM.
Prices may fluctuate a bit depending on the prices I'm matching with (I'll review as I get closer to picking up the parts) and tax etc.
I hope that was enough. Please let me know if there's any more info you need. Sorry for the late response by the way, trying to get some homework done at the same time, haha.
Once more, thank you for your help. You've gone above and beyond what anyone would have asked of you, and I appreciate your help very very much. This kind of thing is why I love Reddit.
***
I've added the details on my peripherals below, just for fun. You can totally ignore this if you want, but if you're interested, here's the extra stuff I'm looking to get.
Fasteners
$13.97
https://www.amazon.ca/Monoprice-106457-Fastening-Cable-Black/dp/B004AFUJZC/ref=pd_bxgy_147_2?_encoding=UTF8&psc=1&refRID=6JVF3PB6QH9VKNGJ9Z50
CM Masterkey Pro S RGB Cherry MX Brown
$139.99
https://www.amazon.ca/dp/B01D3BDN60/_encoding=UTF8?coliid=I2Q9BUBJBGLQRF&colid=27HBAHJXQ3YZ9&th=1
TP-Link TL-PA4010KIT AV500 Nano Powerline Adapter Starter Kit, Up to 500Mbps, Plug and Play
$49.99
https://www.amazon.ca/dp/B00AWRUICG/_encoding=UTF8?coliid=I3UXQO0VKJJAHK&colid=27HBAHJXQ3YZ9&psc=1
Mionix Ambidextrous Mouse (AVIOR 8200)**
$79.99
https://www.amazon.ca/dp/B00D3F7D86/?tag=pcp0f-20
Your room is really functional, and you're trading off style for function. Honestly, if you really want to make your room look nicer, take the Computer and Musical instruments out, replace the space with some seating, and a small table (maybe with a TV), leave some open space in your room.
As far as what you can do with what you have... Most students are in the same position you are, not a lot of space for our stuff and everything we have is there because it functions well. For instance, that chair that you have is an eyesore, but I'm sure it's comfy and you spend a lot of time in it (I have pretty much the same thing in my room, crappy looking chair, but I love to sit on it; in fact I actually have the same Chassis and speakers as you as well...).
Here's what you can do... Pick a Color Scheme, lose the blinds, and move your desk in front of the window if you're going to keep it. It would be best if you could kind of center it at the window, but I don't see anywhere else you can put your bed.
Your computer is the only thing which can't change color, so go with sometimes like White/Orange, stay away from dull colors and grays, take a chance, paint the walls with orange and white stripes or something(I like orange and white if you didn't notice).
Next, make sure everything is organized. Your room isn't dirty or really messy, but it's cluttered, it looks like everything was just thrown in there. Grab a couple of storage cabinets, shove them in your closet, and throw everything in there that you can bare to not have at arms reach (take some chances, you can always keep something out if you find that you need it too often). Do your best to clear up as much desk space as possible. A desk is not a storage space, it's a workspace, it looks best when it's cleared off.
Thus musical stuff will always look poorly in your room; it has too many wires. If you can find a place to put it elsewhere in the house, that would be best, otherwise, grab these and use them on every cord. Take a second to wind everything up when you're done using it and keep all of the cords out of sight when you're not using them.
Putting some stuff on your walls would be cool too, I like that everything you have up is framed. In my opinion, A few framed items or a lot of unframed items look great on a wall, but I think having a couple of loose posters looks tacky. A few more framed items would be cool (band posters/artwork/movie posters, whatever you're into).
Finally, never understood the rug on carpet thing, especially if it's just another solid color, and especially if that other solid color is black. I would ditch it, if you want a rug, get something colorful and contemporary (this is really the key word for you). The rug is an opportunity to have a centerpiece/focal point/glue that holds the room together, so keep that in mind if you go shopping for another one.
And of course, pick up the chair, clean your closet, put away your vacuum, fix your light bulbs, and pick all that shit up off the floor you lazy son of a bitch...
It's not pretty lol. We tried to zip tie everything together to make it at least understandable haha
EDIT: Hijacking this post since there are a LOT of common questions. Oh and /u/smilenataliew is the wife :)
FAQ:
>How did you connect everything to the TV/What adapters did you use?
NES through Gamecube (bottom 4): We have a 4-input composite switcher (those Yellow/Red/White cables) between the N64 and Gamecube, connected to our TV's 3.5mm composite port (which looks like a headphone jack), which we convert with cables like these. We do not recommend a composite to HDMI converter, as the output (might) look garbled from older systems (it did for us).
Wii: Component cables to HDMI converter, then into a remote controlled HDMI switcher (switcher and controller can both be seen to the left of Kirby Amiibo/the Wii)
WiiU & Switch: HDMI to the same HDMI switcher
>Don't the controllers just fall out when you open the case? How are they secured?
The NES controller is resting on a WiiU controller stand, oddly enough!
The SNES controller is the most finnicky. It's slightly leaning back on its own cords, but it's hard to get it to stay put.
The N64 controller is leaned against a stack of N64 games--it's definitely the system my wife and I have the most games for already!
The Gamecube controller is leaning against two other stacked gamecube controllers.
The Wii controller is just just leaning up against a thick piece of cardboard (more cardboard is also holding up the NES and SNES systems since the bottom of their doors would block view of the systems otherwise. My wife intends to wrap all cardboard with contact paper to make it all more decorative, she's very crafty!)
The WiiU has the same controllers as the Wii, except for the screen one, which is on a stand that actually charges the unit while it sits on top of the WiiU system!
The Switch controller actually stands on its own with the joy cons connected to them, but I've decided to actually show the charging station we bought with the joy cons connected to it so that they'll always be charged and ready to go!
>Where are the games?
Behind the controllers! In fact the N64 controller is leaning on a stack of them.
>Cable management? Do you have controller extenders?
Lots of zip ties in the back, and as for controller cables, we bought ~100 of those velcro straps for cords so we can wrap them up for neat display storage without wrapping the cords around the controllers. We also have extension cords for all corded controllers since the consoles don't exactly come out of the unit!
>Where can I get the display case?
It's a piece of furniture so it's a bit expensive, but it's definitely what we wanted after searching for a couple weeks! It's on Amazon
>You could have just emulated it all!
I love having and playing on the original consoles, but emulation is also awesome!
>Where's the Virtual Boy?
It doesn't connect to the TV so I didn't feel the need to get it for this project, but I DO want it for my collection! (Also kids should wait a bit before they play with a 3D device, even the 3DS)
>Where's Nintendo's even older console, the Color TV-Game?/Where's the 64DD?
Those were released Japan only, but I might still want to get them! I believe the controller and the console for Color TV-Game are both one unit, and space is limited, so it might be tough to integrate it if I want to get it!
>Where's the TV? CRT??
Mounted on the wall above the mantle. Sorry, no CRT...yet.
>PHOTOSHOPPED!/I swear I saw this before!
lol why would anyone photoshop this? Definitely real. I'll provide a few more images if I can. And definitely my setup! Though I'm sure I'm not the first to do something similar.
>lol fake niece
The niece and story are real, but if I'm being perfectly honest this is more for me than her haha
HERE YOU GO! :D
( Example ) Does what it says on the tin. Is adhesive on one side, has a passthrough for a zip tie on the other. Useful for guiding cables along flat surfaces.
( Example ) They tie things. You have to cut them to remove them, but they're stupid cheap. Great anywhere that space is a concern, or anywhere next to a flat surface with mounts.
( Example ) These are best for cables you might change frequently and places where a little bulk is OK. I use them anywhere the cables are hidden, but are coming apart but not away from the hiding surface.
( Example ) These are great in place of zip ties + adhesive tie mounts, because they're easy to open and can hold larger bundles, but not easily bundles as small. So, big sibling metaphor. Oh, and you don't have to cut them to change something.
( Example ) These are basically the same thing, but the "staples" come with the nail in them, but stirrups can use screws. Great for routing single cables, like say, ethernet if it's not in the walls, up to the ceiling, and in the corners all the way to the router. Just don't damage your cable accidentally.
( Example ) These are great for bundles of wire that have to pass a good distance (1ft+) through someplace visible. Spiral of sleeve really depends on context, spirals are fine for all-dark cables, but mixed colors means get a sleeve instead.
( example ): These often come with adhesive backs and you can get corners and intersections and basically hide cables inside a "tunnel" shaped like wall or desk. Oh, there are floor versions too. J-ways are usually just straight strips, but almost perfect for any desk with a vertical back panel.
( Example ) These are good for areas where lots of cables meet. Your surge protector, for example, should go in one of these (preferably the box kind, not the example), and they should be mounted to the wall. Otherwise they're most used for massive networking installations, IIRC. Cable trays are like this, but more open. Use them somewhere hidden, can take the place of loop sticks with longer or thicker cables.
( Example ) These are for basically, getting rid of slack. Or putting your earbuds in your pocket, but slack works great, especially tucked just out of sight with the rod zip tied to an adhesive tie mount.
( Example ) Now this is serious cable management, if you have a drill. Run your cables under the desk, until a central (or several small!) grommets to minimize their visual presence.
Great job on taking the first steps!
---
Regarding FreeNAS (my preference). There are a ton of guides out there about how to set things up and what to do. My personal setup and favorite guide is 6 raw disks in mirrored zdevs. After running raidz3 for a year, then backing up, then trying out a raidz2, then reading to NEVER do raidz1, I decided to do a final backup, and rebuild into mirrored zdevs, and I've settled in and been running it now for about 4 years with 0 issues. I cant espouse all the benefits of this setup because the article I'm linking below will do a MUCH better job than I can in this post.
Read more about mirrored vdevs and why to use them here.
TLDR: instead of raidz1, raidz2, or some other structure, use mirrored vdevs to create your storage pool.
DISK0 & DISK1 = VDEV_A
DISK2 & DISK3 = VDEV_B
DISK4 & DISK5 = VDEV_C
...
DISKn & DISKn+1 = VDEV_n
last step:
storage_pool = VDEV_A & VDEV_B & VDEV_C & VDEV_n
---
Now if you are still reading, then great! Let me share a few things about operational uses for your home server.
I missed a few things I'm sure, but this is probably too large of a post to keep going. Happy building!
You can have a killer setup for under $500.
Mic: Audio Technica AT2005 - A great mic that a lot of let's players use (draax, zueljin, kingdaddydmac, etc.). It also accepts xlr or usb inputs (more on that at the end). I use the atr2100, which is the same mic, just different color and warranty. The at2005 is cheaper by about $25 right now, so buying today, that's the one I'd get. It's a dynamic mic, so it blocks out sound that's not in front of it. Much better for noisy environments. Condenser mics like the blue yeti will pick up a lot more background noise. Other mics I've used are the V-Moda Boompro, which works with most headphones that have detachable cables (in my case the M100s) and sounds good, but changing the cable for when I didn't want to use the mic became old pretty fast. You can leave it attached, but then the boom mic is there all the time. I've also used the antlion modmic 4.0 and can't recommend it. It has white noise unless you use a usb soundcard, the cable is stiff and it's kind of expensive compared to full fledged mics. $56
Stand: Pyle PMKSH01 Suspension Boom Scissor Microphone Stand - A decent cheap stand. Nothing special, but it comes with an integrated xlr cable. I use this one, but may upgrade to the Rode PSA1 ($100) later on. The shock mount will not fit the at2005 however. $21
Shock Mount: On-Stage MY420 - A great shock mount that fits the at2005/atr2100. Shock mounts reduce noises from bumping your desk or tapping on your keyboard; things that may reverberate to your mic. It might not even be necessary if you're not a heavy handed gamer or if your desk is made of a thick, dense material. $25
Wind Filter: On-Stage Foam Ball Windscreen - Reduces wind/breathing noises as well as minimizing plosives. Not a complete necessity, but extremely cheap and it does help, so why not? $3
Cable management: Velcro One-Wrap Cable Wraps - I use these for keeping the usb cable for the mic attached to the stand. Extremely useful and cheap. $6
Headphones: Very subjective to user preference. I prefer closed vs open for noise isolation. Here's what I've used:
Audio Technica ATH M50: Good (not great) headphones for ~$100. Considered the standard by many, but to me they're just good. $155
V-Moda M100: Excellent sound with very potent bass. They make the M50s sound muddy in comparison. HOWEVER, the M100s have a design flaw where the "wings" (the parts above where you adjust the headphones) will crack over time. It happened to two pairs of my M100s. Unacceptable for the price of these headphones, regardless of how good they sound. $222
Beyerdynamic DT770 Pro 80 Ohm: Amazing. Potent bass like the M100s, but even a bit clearer. Very wide soundstage for closed headphones. I paid $219 for mine and don't regret it a single bit. I might grab another pair at the price they're currently at. $150
All that adds up to around $261 + tax choosing the DT770s, and will be a killer setup for gaming. Far better than any "gaming" headset, and it even opens the option of streaming or let's play videos (the reason I got my setup). There is one more thing I'd add though, given the budget if you're serious about mic quality, and that's the $99 Focusrite Scarlett Solo 2nd Gen. It's a usb audio interface that accepts xlr mics. It gives you a bit more control over the audio coming out of your mic and cleans up the signal so you get less "noise" from the usb interface. Quality is good without it, but with it, it's noticeably better.
Hope this helps some! I spent quite a while researching things when I put my own setup together. :)
Hey, heads up on modern bulbs.
I started doing this about five years ago when not as many LEDs were used, my first with a Space Bucket is here from about four years ago, and some are now using a lot more LEDs in the bulbs. I did remount some of the LED modules for side lighting. I'm going to modify the article with a disclaimer.
The problem with more LEDs is that they are each ran in series, each LED needs 3-3.3 volts, so in some instances you are going to be exposing voltages that are going beyond safe levels by removing the cover. This should be isolated DC voltage, not AC line voltage, but keep in mind that with more than 15-20 LEDs that you can have a shock hazard.
Big Clive on YouTube has shown that they might not always be isolated from ground.
https://www.youtube.com/watch?v=rNf6VSj6M-E
Shock hazards are most serious when it's a hand to hand shock since the current path can go through the heart and 50mA is when things can start becoming lethal.
Also I found that if the LEDs become disconnected from the power supply that the power supply voltage floated up to about 170 volts which in 120 volt AC nations is the peak voltage that you would get with a rectified capacitor. You have to be aware of this particularly when doing major modifications to the bulb.
It can be done safely but insulation is the key.
Also, don't use hot glue with power electronics. You can use 5 minute epoxy instead and give it 5 hours to cure.
edit spelling
/u/MrSparkleBud is using modules with 10 LEDs and his setup looks pretty safe. The hot glue is being used in areas where there would not be an expected heat build up. Adhesive cable tie mounts with tiny cable ties would still be a much better option as they provide really good strain relief (as an electrician I used a lot of these). Those now exposed power supplies still have line voltage on them, though, but it's obvious he has experience doing stuff like this from the very neat layout.
Make sure the line voltage splicing is soldered/taped and not just twisted with line voltage. Be sure to use Scotch Super 33+ tape if you can get it and not cheap, generic tape. Home Depot etc will have it for about $3 as well as the cable mount stuff.
Wire nuts are preferred for line voltage splicing.
It's amazing how big a difference frames can make.
I assume that the reason you moved the tower to face that away is so that you can see the glass window? Totally get that. Moved my set up all around because I wanted to enjoy looking at it. But maybe you could move it to the same position you had in the first photos but maybe further to the left of your desk? Basically switching it with the PS4's location. I think that will help hide some of those cables and give the desk a cleaner look.
Or if you really have your heart set on that tower positioning, I think some velcro straps would be a great start and compressing the cables. Or something like these could help get cables off the floor and under the desk and help run them in a tidier fashion.
You've definitely been making some improvements! Keep up the great work!
Let me just start off by saying, even with just the few hours I've played with it, I LOVE this thing. Thank you valve for making such an awesome piece of hardware. And yes, my unit does have the joystick issue but it's just the feedback that's broken. My joysticks otherwise register without issue.
But anyways onto the good stuff.
What?
A 20m (65ft) cable run from my desk to right under the couch, so that the only hookup is the breakout / trident cable.
Why?
In my place, I ran into the predicament of the only space I had room to do VR was the living room, but given that putting my entire desk in the living room would have been weird aesthetically, I opted for the cable run, to get VR from the PC in the room across the house to my living room.
What parts?
Pretty simple actually, but it did require 2, not exactly cheap cables, and one coupler (prices in US Dollar).
The DP - DP coupler is out of necessity, given that no link box exists with the Index. Yes, it's an expensive solution. In addition to the $999 headset, I've spent another ~$231 on cable runs. But for my situation, it works flawlessly.
If you are thinking you need a solution like that, and any of the cables are unavailable (the DP cable is out of stock as of writing on July 6th), make sure to get fiber if you can for the sake of not losing quality over a copper cable. As for the USB cable, you're looking for an active cable. These typically have external power bricks to supply additional 5V power that your tower cannot do over such a distance. Edit: _However_, I have found that plugging in the additional power causes the computer to have issues recognizing any USB device, so I guess don't do that if you buy the same cable. Other cables may vary.
How is it setup?
I have the cables running along the basebords of the house, from my computer all the way to the living room. They take a right angle, and are gaff-taped down to the floor before running under the couch where they can become a loose coil [pic].
Does it work?
In a word, yes! I will update this comment if I run into reliability issues down the line, but it seems that this system works well enough, and has the added bonus of not hearing the PC fans spinning given the off-ear design of the Index headphones. (Edit: The only pitfall is that sometimes you have to power cycle the headset once or twice to get SteamVR to see it, but that doesn't take long. After that it's smooth sailing!)
Hope this helps anyone that might be needing a similar setup!
(EDIT: Numerous edits for spelling / grammar)
If you know of a store with some kind of clearance junk isle (wal mart, target, k mart, etc), dig around in it. You may be surprised what you find. I found these for $2. Blinking they should get around 150 hours battery time, if I recall. I put the red one on the back of my helmet and put the white one away for when I find another place to put it. Then I bought two more lights in a pack, a head and a tail, for $12. None too powerful, but tail lights don't need to be, and in my neighborhood I'm never too far away from a street light unless I really try.
If you have the right kind of helmet, you may find a literal headlight pretty easy to macguyver out of an otherwise cheap light not made for mounting. I've done this. In september (?) I got this pack of 3 headlamps for only $8+tax at a store. They're more than bright enough, and the adjustability is fabulous. Using just two zip ties I managed to fasten one securely to my giro venti. I love using it, all the reflective stuff for 40 yards in front of my lights up clear as day. Stop signs, license plates, reflectors, lane paint, glass and sand on the ground. If I set it to blink it actually looks like the stop signs and license plates are self-lit and blinking. And at such a cheap price I'm not too worried if something happens and I break/lose it.
So there you have it. $22+tax and I got seven lights, 4 in service at any time.
pro-tip: since it's april, april shower time, you should think about water-proofing your lights using pieces of spare inner tube. It holds nice and tight on all my lights' seams, and is easily dealt with when time to change batteries.
So you have four corners on the recessed ceiling (higher up), and four corners on the lower ceiling. I would almost prefer to put the cameras in the corners of the lower ceiling, because it would give a more straight-on view of the player/controllers. Each camera has a narrower viewing cone at extreme close proximity. The further from the main playspace they are, the more that cone has a chance to "spread out" and cover the actual playspace. In this case, you would draw your playspace with at least (2 ft) or (0.6 m) distance from each of the four walls, so people don't bash their knuckles at the borders.
However, you might not want your cameras to be further than (12 ft) or (3.6 m) apart from each other (for best tracking quality). I don't have a big enough room to run into this limit, so you may be fine with further spaced out cameras. If the lower ceiling corners are further apart than (12 ft) or (3.6 m), then you may want to put them in the recessed ceiling anyways. You can always ignore the Oculus Rift setup's warnings about camera spacing, by the way. In fact, with larger playspaces, the Oculus setup wizard will always complain. Don't worry about it.
Also, you might want to consider using this USB card. It can handle the throughput of all four cameras in USB 3.0 mode, if desired. You can downgrade any camera to USB 2.0 by simply running a USB 2.0 cable to that camera instead of 3.0. A passive USB 2.0 cable is fine for short runs, but consider an active USB 2.0 cable (like the one that comes in the box of an extra Rift camera) for longer runs. You should put your Rift headset in one of the motherboard's USB 3.0 ports (USB 2.0 might actually be fine), and then put all four cameras (you might only need three cameras) in the USB extension card.
You can search this subreddit for discussions on whether you want/need to have the cameras/headset on 3.0 or 2.0. I prefer to run everything at USB 3.0, but it may not be necessary.
For USB 3.0 cable runs that are less than 10 feet (say, those corners nearest to your computer tower), use these passive USB 3.0 cables. You're also going to want a passive USB 3.0 extension for your Rift headset.
For USB 3.0 cable runs that are more than 10 feet away, you should use an active USB 3.0 cable. This is necessary for cameras that are further away from your tower. Note that the cable I linked has an optional barrel port for a 12V power supply. You only need to power these cables if you're daisy-chaining two or more of them in a row (for runs longer than (33 ft) or (10 m)).
These CAT6 round cable clips should work well for cable routing, especially for the slightly thicker active USB 3.0 cables. These general-purpose adhesive cable clips work fine for runs of the thinner, passive USB cables, but you may have issues with the adhesive depending on your wall.
You'll want this HDMI extension cable for your Rift headset, to make use of the extra space. I've had a good experience with bunching the HDMI and USB Rift headset extensions together by using these lightweight Velcro ties. I have about a (10 ft) or (3 m) square playspace, so you may encounter different problems than me if your playspace is larger. I only have three cameras, and it works fine. Good luck in your setup, I'm sure whatever you do will work great!
If you want the desks to be facing each other, this is how I would recommend setting the desks up:
http://imgur.com/a/PUdKO
Once you do that, you have some degree of play on how close the desks are and how much room you have between your backs' and the walls of the room. That's going to boil down to preference and feel, but depending on how much space you have between the desks and how much you need to access your cables, you could do some pretty creative things to disguise the cable clutter.
A cheap sheet of material and some basic tools, like Plywood and drills/saws or foam core and a sharp utility knife can partition off the cables so you aren't always looking at them when you're looking past the desk. There's also all sorts of wire management options like bluelounge's "nicer" options or just simple velcro wraps. If you want to add some light and customization to the room, LED strips are super popular with regards to the gaming aesthetic and they're fairly inexpensive and usually have easy instalation. (Adhesive, normally.)
As far as decor is concerned, you have lots of options, really. You could have separate rugs for you and your partner's sitting areas, or you could have a rug under both of the desks, or utilize the other half of the room for something else and visually separate it with a rug. Another thing you could use to visually separate the room is some kind of open, free-standing shelf. I'm separating my bedroom (bed from computer/desk area) with this kind of shelving which is pretty 'rugged', 'industrial', or I guess 'masculine', but I like how they look in my space. I had to do some digging but I was able to find some shelves that were 72" by 48" (14" deep) at Walmart for under $100, I got two of them.
It's hard for me to make any specific suggestions about anything else without actually seeing the room (or your desks/gaming setups, etc!) and having a feel for it.
I dont do too many field-fixes anymore... Im now in startup land where everything is shiny & new, and we get what we need.
 
My things that were stupid-useful that mostly haven't been listed so far:
Klein Tools electrician scissors - Most useful cutters ever. Take-a-finger-off sharp, cuts though thick cables, the top is great for straining phone / ethernet cable. A cable puller had a set, and he sold me on them in 30 seconds when he raked the wobbly cat5 strands across them, and they were perfectly straight. Would have been worth the $$ at twice the cost.
I replaced my mismatched tools in my bag w/ a iFixit toolkit when I needed to start buying new bits for iPads and the tri-lobes for macs. Ended up being about the same cost as those bits alone, and it had them, and a bunch of other stuff that was better then my cobbled together tools. The screwdriver is far-better made then the little plastic ones I had before. They have a new-toolkit, but I haven't used it.
A roll of Velcro ties Far more useful then zips. Use the scissors above to trim as needed.
Mars-eraser. Great for cleaning toner from printers, and cleaning up corroded connectors (first pass).
Melamine Sponge (aka Magic Eraser) - They clean up things nothing else does like the weird tint that macs wrist guards get from skin oil. Also great for getting toner off of the outside of printers. Also good for cleaning up cherry-coke from a $25k piece of sound gear.
Deoxit - You can use the cheap stuff that was like $5 a can at any automotive parts store, and that will work for most things. This is for more sensitive stuff. I used this repairing contacts in audio-control-surfaces, rebuilding DSLRs, etc. Its for when more then a mars-eraser is needed.
I'm sure most of you are familiar with VR cover mod and head strap.
But even after both modification, I noticed that the headset still feel "lose" at the button half, and I always get better image quality and clearity if I push the headset closer to my face/nose from the bottom.
The solution was pretty easy, I used this Velcro tape and this Velcro tie, both links are Amazon Canada, but if you search or "Velcro Brand" you should be able to find all their products, they are a pretty established velcro products company.
And now I can finally enjoy the best image quality and this actually relieved much more pressure on my forehead compares to just the VR cover foam + head strap. Definitely recommend to try it out as it doesn't cost much.
Hope Samsung can improve the comfort in their future VR headset, it's just pure laziness that they can't spend a bit more time to come up with a solution...
Let me know if you guys have any questions.
It's all about personal preference as to what you want to use, but I used Velcro cable ties, cable sleeves, and sticky cable clamps for both my battlestation and my TV/console station. I bought these in particular and they do just the trick for me at very low cost.
Ties: VELCRO Brand ONE WRAP Thin Ties | Strong & Reusable | Perfect for Fastening Wires & Organizing Cords | Black, 8 x 1/2-Inch | 100 Count https://www.amazon.com/dp/B001E1Y5O6/ref=cm_sw_r_cp_api_l3bJBbHE1JZZS
Sleeves: 20" Cable Management Sleeve with Free Zip Ties https://www.amazon.com/gp/product/B01MR6QQLR/ref=oh_aui_detailpage_o05_s00?ie=UTF8&psc=1
Clamps: eBoot Adjustable Cable Clips Adhesive Nylon Wire Clamps, Black, 50 Pack https://www.amazon.com/dp/B01LYO307S/ref=cm_sw_r_cp_api_J3bJBbRA9GWRQ
Stick some clamps behind your desk and down the edges of the desk legs to run the wires and cords along them. Just be warned that the residue may stick and might peel off paint or wood, so take caution if you want to tear them off. I'm sure you can find better ones that don't potentially damage your desk, but with proper removal care, you should be fine.
I like the velcro straps because they can easily be adjusted, removed, and reused. They're also versatile for any other random cables you want to store.
> Currently the main coax line goes through the basement direct to the 1st floor wall outlet, then coax to the modem.
I’ve made a drawing of how I understand the internet could go to the splitter, then run again to the 1st floor outlet, then to the modem.
Ideally, you'd have zero interruptions between the coax coming from the street, all the way to the plug on the modem. Since it sounds like the coax enters the walls to the first floor from the basement, just be sure you eliminate any coax splitters by using a barrel adapter
UNLESS you also want a coax drop for Cable TV elsewhere in the house.
Then it's just a matter of making sure you've simplified the circuit to the street using the fewest number of splitters as you can. Each two-way split introduces approximately 3.5dB of loss (a little more than 50%) of power lost. Splitters are also known to be super poorly made and absolutely go bad after a few years of use. You may consider replacing any that you're using. These are decent ones.
> I'm feeling bold
Two of those ethernet strips there in the basement look like basic patch panels. They're just for organizing the cables and don't do any switching, per se. I'd figure out what connections you actually need in the house, beyond maybe a ethernet connection to the modem, the TV and your desktop PC and then go through and eliminate everything else. If you want to double check where the lines are terminated to through the massive web of cables, you can pick up an Ethernet Probe and Test kit to make tracking everything down easier. I'd (ideally) only buy one that has a dedicated ethernet jack and is made by Extech, Fluke, or Klein. As a bonus, It's a handy tool for tracing out ANY sort of wiring, too.
Once you eliminate all the unnecessary stuff, you can start making it look nice. Use some velcro wire ties and bundle everything until it looks respectable. You MAY find that you have odd-length cables used as patch cables between the switch and the patch panel. Don't cut anything, and maybe lay out anything you eliminate by length so you can reuse them if your now-neat-looking bundle could benefit from different-length cables. Don't forget to label everything for clarity using your own philosophy.
> I’m not sure how to use this stuff, if it’s past it’s prime, or if I should even bother. But, If it could be useful I’d like to use it. I just don’t understand it despite reading the sticky’s, etc.
You'll feel a lot more comfortable once you understand what everything is and where it all goes.
All that cable is probably Cat5 or Cat5e at best. If you want to be ready for gigabit speeds in the coming years, you might consider running some new Cat6a or better. I don't know anything about the big switch in the photos, but it's probably doing the job fine for now - If you want faster than 100mbit/s network speeds though, you'll need to upgrade it along with the ethernet. As with the ethernet, it's not a priority, just a nice-to-have.
The big coax amplifier you've got there was probably built in 1974 (note: pre-internet) and is all kinds of lossy/noisy mess. I'd go ahead and get rid of that and anything coax-related that you don't think you'll end up using. There's better stuff available on the market now for stupidly cheap, if you decide that you still need an amplified coax signal.
I'd love to see more pictures once you get it all put together and looking nice. If you need any further hardware advice, let us know!
I don't know if it is worth it to you to buy a big keyboard case but this is what I do. I have a very large keyboard case that I have my gear set up in. All the connections are set up and the wires are held down with velcro. I only have to hook up one piece of gear and I have all the cables labeled very clearly so any gear savy person could set my gear up for me. Live setup requires zero thinking. I can have everything set up and ready in less than five min. All I need is power and two lines out to the house.
If you can't go the giant coffin setup route then go with OCD labeling of all the things. To be rock solid fail proof have 2 of every cable you need. Both ends of every cable should be labeled as to what they plug into with a matching label on the device that the cable gets plugged into. Just match up the labels. Also have your power supply sorted before hand. Get a really nice power strip and secure all of your wall warts to it with tape or velcro straps. Label and wrap each power cable coming off of it so you can quickly identify what everything plugs into. Color coded tape is great for this but that might be overkill. I just use a label printer.
Then practice setting up your gear a few times. Tear your setup down and put everything out in a hallway. Turn all the lights off in your room and set up all your gear with just a flashlight in your teeth. Anything that confuses you for even a second needs to be streamlined, labeled better or made easier in whatever way necessary. Basically you need to be able to set up your gear in the dark while you are drunk and high. It takes a little prep work but it makes things so easy once you get up on stage.
Edit: These velcro straps are the best thing ever.
Awesome build man! One thing you are lacking is cable management! But that isn't a big deal but if you want to take it to the next level of pretty come over to /r/CableManagement . Those guys there know there shit and are very helpful!
I personally would recommend some zip ties, twisty ties, and some velcro! Velcro is the shit.
For bigger wires these worked great for me. A bit pricey but they are wonderful.
http://www.amazon.com/ColorYourLife-Reusable-Fastening-Microfiber-Packaging/dp/B00CI5YW4U/ref=pd_ys_sf_s_rp_a1_2_p?ie=UTF8&refRID=0CKBF12EX0GRNFPZWYYH
Smaller things I usually go with this.
http://www.amazon.com/gp/product/B00GRTHEYI/ref=oh_aui_detailpage_o07_s00?ie=UTF8&psc=1
http://www.amazon.com/Velcro-Reusable-Self-Gripping-Inches-91140/dp/B001E1Y5O6/ref=sr_1_1?s=office-products&ie=UTF8&qid=1409399401&sr=1-1&keywords=zip+ties
Zip Ties
http://www.amazon.com/gp/product/B005OK7P3G/ref=oh_aui_detailpage_o01_s00?ie=UTF8&psc=1
http://www.amazon.com/TEKTON-6233-Cable-Ties-500-Piece/dp/B000NPZ4D0/ref=pd_rhf_gw_s_cp_31_AGK5?ie=UTF8&refRID=1KER4A54A5HGWD1C6GC6
Op, correct me if I am wrong, but they look like the super awesome ones from Amazon - I keep them on hand as they are super useful. https://www.amazon.com/gp/product/B001E1Y5O6/ref=oh_aui_search_asin_title?ie=UTF8&psc=1
Hey, thats my shop! Glad to see you put your shadow boxes to good use! Your setup looks great and is surprisingly similar to mine (I love that monitor, but I had to return mine a few times to get one without backlight bleed). Maybe I'll post my station later in the week.
About the cables, I don't know if your desk is too thick, but I bought some of those black binder clips from office supply stores and clamped them to the back of my desk, and then I ran wires through them and secured them with velcro straps. Even if that doesn't work, these velcro straps are awesome for bundling wires: https://www.amazon.com/gp/product/B001E1Y5O6
Thanks to everyone else for your interest in my shadow boxes, I'll be working hard to get your orders out and I'll have some new NES scenes up soon as well. Check back this week!
Here is a brief step by step on how to somewhat tame this birds nest of spaghetti.
Some other things I would say is, put your UPS outside of the entertainment center, those things take up a ton of space and are heavy. If you ever need to unplug something or change the battery it will be very inconvenient. I would place it right next to the entertainment center or behind it. Also consider using double sided 3M foam tape to mount your switch upside down underneath a shelf, that way it frees up some space. Aside from that, theres not much else that I can see being done. I hope this helps. You are contractually obligated by reddit to post the before and after if you decide to tackle this. (not really, but I would love to see the results!)
Cable management to start.
You need to set yourself ample time and be in a focused mood to do it.
Basically, you sit down one Saturday (or other day off), and unplug EVERYTHING.
Line up all of the equipment the way you want to so it looks nice and neat, and then run the wiring. (optional but helpful: label the wires)
I use these a lot at work: https://smile.amazon.com/VELCRO-Brand-Reusable-Fastening-Organizing/dp/B001E1Y5O6/ you can also buy one long roll of velcro so you can cut to size, I like that better at home.
To address the flipping over because of cables, you have to contort the cables. Bend them in the opposite direction they want to bend, not too hard but firm, and they'll end up wanting to stay straight.
Pro-tip: If you hang a group of cables over a hook and cable tie them together at the bottom, near the RJ-45 tips; leave them there for a week or so, you end up with really straight cables. (I got this trick from my former boss).
​
Edit: for me, if I had a wire rack I would make it look more pleasant by putting a wooden board, or even poster board on top of the metal wire so you couldn't see through it. That may just be a personal preference though.
Edit 2: Thank you kind internet stranger for the silver!
CPU | AMD - Ryzen 7 1700 3.0GHz 8-Core Processor | $378.99 @ Amazon Canada
Motherboard | MSI - B350 TOMAHAWK ARCTIC ATX AM4 Motherboard | $154.99 @ PC Canada
Memory | Corsair - Vengeance LPX 16GB (2 x 8GB) DDR4-3000 Memory | $183.99 @ Amazon Canada
Storage | SanDisk - SSD PLUS 240GB 2.5" Solid State Drive | $114.68 @ Amazon Canada
Storage | Western Digital - Caviar Blue 1TB 3.5" 7200RPM Internal Hard Drive | $61.95 @ Vuugo
Video Card | EVGA - GeForce GTX 1080 8GB Superclocked Gaming ACX 3.0 Video Card | $689.99 @ Newegg Canada
Case | Phanteks - ECLIPSE P400 TEMPERED GLASS ATX Mid Tower Case | $99.99 @ Newegg Canada
Power Supply | EVGA - SuperNOVA G2 650W 80+ Gold Certified Fully-Modular ATX Power Supply | $134.99 @ Amazon Canada
Wireless Network Adapter | TP-Link - Archer T2U USB 2.0 802.11a/b/g/n/ac Wi-Fi Adapter | $30.00 @ Vuugo
Monitor | AOC - G2460PQU 24.0" 1920x1080 144Hz Monitor | $259.99 @ Amazon Canada
Monitor | BenQ - XL2411 24.0" 1920x1080 144Hz Monitor | $299.99 @ Amazon Canada
| Prices include shipping, taxes, rebates, and discounts |
| Total | $2409.55
| Generated by PCPartPicker 2017-08-25 04:23 EDT-0400 |
Operating system
Amazon links to the download or the USB. If you pick the first option, you'll have to make a bootable USB drive.
Useful videos
Step by step PC building walkthrough.
What to do after you finish the build.
Updating the BIOS (necessary for getting the RAM to run at correct frequency).
Tools you'll need
Screwdriver. Magnetic tip is optional (but useful). Number 2 size Phillips head. Here's one if you don't have one.
Scissors/Wire cutter. You probably have one already.
Zip ties for cable management.
Optional Mini screwdriver for hard-to-reach places.
Optional Velcro straps to assist cable management further.
Other peripherals
Entry-level, non-mechanical keyboard from Logitech, or a mechanical like this Cougar MX Cherry Black switch keyboard.
Entry-level gaming mouse from Corsair.
QcK Gaming mousepad.
Feel free to ask anything.
Note: all Amazon links are to the US site, not the Canadian one. The PC build, however, has all Canadian links.*
EDIT: Formatting.
EDIT 2: If you pick one of the two monitors, pick the BenQ one. It's a nicer monitor.
So when I originally moved in to my house last year, I set things up in a very temporary setup that became more permanent than I was hoping. I also had to bring another box home from my office when we moved locations and we no longer had a dedicated internet connection so I couldn't expose anything directly to the internet.
I've been looking at setups from everyone for a while now, getting ideas of what I needed and I finally settled on the following:
I don't intend on purchasing full sized rack mount servers as I just use desktop class hardware for the most part but I took the two systems that I had in desktop cases and put them in the Rosewill cases that I've seen a lot of people use and a coworker recently suggested them as well as he recent did a rack setup. Since I don't need full size servers, I decided to go with a 4 post "network" rack as I don't really need the extra depth. I'm just using a 1U blank to help stabilize the servers in the rack so they're not just hanging from the front.
If anyone is looking to get some of the same components, I would say that the 1U shelves that I bought don't really work that well as I had to get creative with the brackets to make them work and they do extend out the back a bit but I knew they would do that when I purchased them, I just didn't realize I would have to flip around some brackets to make it work.
My network is really basic so I went with a 24 port unmanaged gigabit switch. I did have to get some POE injectors for my 3 WAPs as I did have a 8 port switch that had built in POE before but I knew that 8 ports wasn't going to cut it and I wanted to go with a rack mount switch.
Future plans are to replace the 3 regular PSUs with something rack mountable. Right now I have one PSU for each box and then the 3rd is for all of the network equipment. I'd also like to get a KVM but for right now I have HDMI cables ran to the side where I can easily switch them out and the keyboard I only plug into the front panels if I need it.
I just moved into a new place, so I've had the opportunity to upgrade a lot of my stuff.
Here's my list (sorted by value it provides to me)
Not sure about cable management in the case for but the desk...
I believe thats a malm desk so it has the rack in the back which means adding another won't be easy (really everything doesn't fit?). You could try using something like this or this with some 3m tape so you can mount the cables on the bottom of the desk so they aren't hanging. You could also wrap the cables to decrease the amount of slack using something like this. Any cables coming from the back of the monitors or the desk you can try using this. You could consider mounting your surge protector on the desk if it is not already so that no cables are dangling down to it and the only thing would be the surge protector wire.
Additional things you could look into would be a boom arm for the mic so its not sitting in the middle, might clean it up a bit. Also, if you are really dedicated to making it look nice and don't tend to rearrange that often, you could look into drilling holes for the wires for the keyboard/mouse (I'm personally not a fan of this method but people do it).
It might take a bit of cash to do ALL of that so maybe just prioritize what you think will give the best results.
If you're averse to drilling into your desk like I was, here's what I used for my cable management with less room to work with than you, OP.
The Basic Stuff
2 x 40" Cable management sleeves- $14
30 x adhesive cable management clips- $7
50 x reusable velcro ties- $8
2 x Cable management bins- $23
The strongest double-sided 3M tape you can find- $10 at your local hardware store
Optional, but highly recommended
AmazonBasics Premium Dual Monitor Stand- $190
AmazonBasics 7 Port USB 3.0 Hub with 12V/3A Power Adapter- $27
AmazonBasics 4 Port USB 3.0 Hub with 5V/2.5A power adapter- $17
This is a great little space! A couple small things could go a long way to liven it up a bit more. You've got a lot of neutrals in here (which I love, my room has a pretty similar vibe). You could easily add an accent color or two and it would really go well in here - green plants do a great job of this and work nicely with the neutral palette you've got now. As was mentioned already, a fiddle leaf fig would do great in this room. You could also go for a majesty palm if that's more your style. I'd go with something big and bold to fill up the space a little and bring some life into it. If I were you, I'd put it just to the left of the TV stand, and maybe get a good floor lamp to go in the corner on the other side of the TV stand. As it is right now, I don't see any lighting other than the window light and the overhead lights. A floor lamp in the corner and maybe another small lamp somewhere else would go a long way to make it feel more cozy and homey once the sun goes down. I agree with what was said about a bigger rug, too. You've got the space for it, go big!
Also, this is nit-picky, but some of these velcro cable ties could clean up the cords sticking out by the TV and make it look a little tidier. Cleaner = cozier in my opinion. I used to install & service custom home theaters for a living, and I used these bad boys every day for cable management. It's amazing what a difference it can make when you can't see any cables!
>I was wondering could I do the bigger battery but use velcro tape instead?
I don't know the 818 specifically, but as long as the wires and battery don't get in the way of the props, it should be fine. Be aware that bigger batteries weigh more, so you'll start to see diminishing returns as the extra capacity starts to overtake the power-to-weight ratio. (For the same reason, be careful not to overdo it with that velcro tape. If you don't have this stuff, get it. Best cable tie there is, you can cut it to length, it's light as a feather, and it's strong enough to hold a battery that weighs more than your quad does.)
I second what /u/shamus727 said, the more batteries you have, the better, but I know how to spell "batteries" so you can trust me. Also, spare props would not go amiss, they're generally pretty cheap, and even with those prop guards you'll probably lose a prop here and there.
To add onto this, if a case doesn't have enough tie down points, you can get these: https://www.amazon.com/dp/B06XNBS6TG/
They just use 3m adhesive and give you more loops to attach zip-ties/velcro straps. They're also typically available at pretty much any local hardware store.
My personal favorite velcro straps are these: https://www.amazon.com/dp/B001E1Y5O6/ They're pretty cheap, the have a decent strength hold, have a slot at one end for retention on a cable/mount if you want it, and are pretty thin, both in width and thickness. A lot of cheaper ones seem to be like 1" wide or more and super thick and bulky, making them hard to deal with.
I could see something like that being useful for one or two cords that you use really frequently, but they're too expensive for something like cleaning up your tangled pile of 20-30 random cables. For cable storage, something like this is ideal. 100 reusable Velcro cable ties for $6.50.
Also, before trying out those cable ties, I hadn't realized there was a difference between Velcro (the brand) and velcro (generic). I was quite pleasantly surprised.
I just adjusted the way I'm doing but and it's the best so far. Using a Velcro cable tie like this:
https://www.amazon.com/dp/B001E1Y5O6/ref=cm_sw_r_cp_apa_i_JXAhDb9P486Y9
Wrap it around the cable and loop the Velcro through the slot so you can have a set size that is a little larger than the cable. Now gently detach the foam on the back of the halo so you can get to the left of the knob (looking at it from the back. Wrap the Velcro around here in the flat spot between the plastic hooks that the foam uses. Make this a little snug, but don't crank it down. This is just to keep the cable floating there, but it can easily slide back and forth. Reattach the foam and it almost a factory look that works MUCH better.
Here is my build list formated for reddit
Group | Name | Price | Quantity | Total | Link
--- | --- | --- | --- | --- | ---
Pc | (Everything Inside the case) | | | |
$1,601.62 | Intel Core i7-6700K 4.0GHz Quad-Core Processor | $347.00 | 1 | $347.00 | https://www.amazon.com/gp/product/B012M8LXQW/ref=oh_aui_detailpage_o05_s00?ie=UTF8&psc=1
| Cooler Master Hyper D92 54.8 CFM Rifle Bearing CPU Cooler | $44.80 | 1 | $44.80 | https://www.amazon.com/gp/product/B00NXLYE4G/ref=oh_aui_detailpage_o04_s00?ie=UTF8&psc=1
| Gigabyte GA-Z170X-UD5 ATX LGA1151 Motherboard | $171.49 | 1 | $171.49 | https://www.amazon.com/gp/product/B012N6EW6G/ref=oh_aui_detailpage_o05_s01?ie=UTF8&psc=1
| Corsair Vengeance LPX 32GB (4 x 8GB) DDR4-2666 Memory | $129.99 | 1 | $129.99 | https://www.amazon.com/gp/product/B00OTJZTZE/ref=oh_aui_detailpage_o05_s01?ie=UTF8&psc=1
| Samsung 850 EVO-Series 250GB 2.5" Solid State Drive | $97.99 | 1 | $97.99 | https://www.amazon.com/gp/product/B00OAJ412U/ref=oh_aui_detailpage_o02_s00?ie=UTF8&psc=1
| Hitachi HDS723020BLA642 | $58.00 | 3 | $174.00 | EBay
| EVGA GeForce GTX 1070 8GB FTW Gaming ACX 3.0 Video Card | $459.99 | 1 | $459.99 | https://www.amazon.com/gp/product/B01I60OGUK/ref=oh_aui_detailpage_o04_s00?ie=UTF8&psc=1
| EVGA 850W 80+ Bronze Certified Semi-Modular ATX Power Supply | $90.39 | 1 | $90.39 | https://www.amazon.com/gp/product/B00KYK1CC6/ref=oh_aui_detailpage_o04_s00?ie=UTF8&psc=1
| XFX AMD Radeon HD 5450 1GB | $29.99 | 2 | $59.98 | https://www.amazon.com/gp/product/B005IUW7YE/ref=oh_aui_detailpage_o05_s00?ie=UTF8&psc=1
| PWM Female to 4 x PWM Male Computer Case Fan Splitter | $6.50 | 2 | $13.00 | https://www.amazon.com/gp/product/B00DYQRFY6/ref=oh_aui_detailpage_o07_s00?ie=UTF8&psc=1
| Sabrent 2.5" SSD & SATA Hard Drive to Desktop 3.5" | $12.99 | 1 | $12.99 | https://www.amazon.com/gp/product/B00UN550AC/ref=oh_aui_detailpage_o08_s00?ie=UTF8&psc=1
| 80MM 5000RPM Fan | $0.00 | 2 | $0.00 |
| 92MM 5000RPM Fan | $0.00 | 4 | $0.00 |
Monitors | | | | |
$744.66 | Seiki Pro SM28UTR 28-Inch 4K UHD 3840x2160 | $195.69 | 1 | $195.69 | https://www.amazon.com/gp/product/B013XWQF28/ref=oh_aui_search_detailpage?ie=UTF8&psc=1
| AOC e2460Sd 24-Inch Widescreen LED Monitor | $142.99 | 3 | $428.97 | https://www.amazon.com/gp/product/B00C99MUHQ/ref=oh_aui_detailpage_o00_s00?ie=UTF8&psc=1
| Dell 17" 5:4 | $30.00 | 4 | $120.00 | EBay
Cables | | | | |
$137.77 | Cable Matters Gold Plated DisplayPort to DisplayPort Cable 10 Feet | $11.99 | 1 | $11.99 | https://www.amazon.com/gp/product/B005H3Q5E0/ref=oh_aui_detailpage_o05_s00?ie=UTF8&psc=1
| Cable Matters Active DisplayPort to DVI Male to Female Adapter | $19.99 | 2 | $39.98 | https://www.amazon.com/gp/product/B00EDT01TO/ref=oh_aui_detailpage_o03_s00?ie=UTF8&psc=1
| DVI Male to Female 90 Degree Adapter Connector | $4.43 | 3 | $13.29 | https://www.amazon.com/gp/product/B008X0ZJZ0/ref=oh_aui_detailpage_o03_s00?ie=UTF8&psc=1
| 15ft 28AWG CL2 Dual Link DVI-D Cable - Black | $10.47 | 3 | $31.41 | https://www.monoprice.com/product?c_id=102&cp_id=10209&cs_id=1020902&p_id=2760&seq=1&format=2
| 15ft Super VGA M/M | $5.69 | 4 | $22.76 | https://www.monoprice.com/product?c_id=102&cp_id=10201&cs_id=1020101&p_id=3622&seq=1&format=2
| 15ft USB 2.0 A Male to A Female Extension | $1.87 | 5 | $9.35 | https://www.monoprice.com/product?c_id=103&cp_id=10303&cs_id=1030304&p_id=5435&seq=1&format=2
| 25ft hdmi cable | $8.99 | 1 | $8.99 | https://www.amazon.com/gp/product/B00SKVMHI4/ref=oh_aui_detailpage_o00_s00?ie=UTF8&psc=1
Desk Accesseries | | | | |
$263.49 | Perixx PX-5200 Cherry MX Blue | $72.91 | 1 | $72.91 | https://www.amazon.com/gp/product/B00NY45NCY/ref=oh_aui_detailpage_o01_s00?ie=UTF8&psc=1
| Logitech C310 Webcam | $31.93 | 1 | $31.93 | https://www.amazon.com/gp/product/B003LVZO8S/ref=oh_aui_detailpage_o07_s00?ie=UTF8&psc=1
| Lapel Mics | $6.50 | 1 | $6.50 | https://www.amazon.com/gp/product/B005DJOIHE/ref=oh_aui_detailpage_o08_s01?ie=UTF8&psc=1
| FingerPrint Reader | $12.58 | 1 | $12.58 | https://www.amazon.com/gp/product/B000HHHP7C/ref=oh_aui_detailpage_o04_s00?ie=UTF8&psc=1
| Mouse Pad | $8.99 | 1 | $8.99 | https://www.amazon.com/gp/product/B00GB0IF50/ref=oh_aui_detailpage_o07_s00?ie=UTF8&psc=1
| Headset Func HS260 | $79.99 | 1 | $79.99 | https://www.amazon.com/FUnc-FUNC-HS-260-1ST-fUnc-HS-260/dp/B00HH3H83U
| Altec ACS 54 - Speaker | $0.00 | 1 | $0.00 |
| Logitech G700S | $50.59 | 1 | $50.59 | https://www.amazon.com/gp/product/B00BFOEY3Y/ref=oh_aui_detailpage_o03_s00?ie=UTF8&psc=1
Audio Accesseries | | | | |
$58.33 | BEHRINGER MICROAMP HA400 | $24.99 | 1 | $24.99 | https://www.amazon.com/gp/product/B000KIPT30/ref=od_aui_detailpages00?ie=UTF8&psc=1
| 5-Pack 6.35mm Male to 3.5mm Female Adapter | $7.99 | 1 | $7.99 | https://www.amazon.com/gp/product/B00XAQD4YA/ref=od_aui_detailpages00?ie=UTF8&psc=1
| 3.5mm Male to 2 x 3.5mm Female Splitter Cable | $3.99 | 1 | $3.99 | https://www.amazon.com/gp/product/B0081ZBNI4/ref=od_aui_detailpages00?ie=UTF8&psc=1
| Coupler 3.5 mm Female - 3.5 mm Female Stereo or Mono | $3.93 | 1 | $3.93 | https://www.amazon.com/gp/product/B000068O4N/ref=od_aui_detailpages00?ie=UTF8&psc=1
| 3 feet Slim 3.5mm Stereo Audio Cable - M/M | $2.71 | 2 | $5.42 | https://www.amazon.com/gp/product/B004G3UK5C/ref=od_aui_detailpages00?ie=UTF8&psc=1
| 3-Feet 3.5mm Stereo Male to Female Extension Cable, 5-Pack | $12.01 | 1 | $12.01 | https://www.amazon.com/gp/product/B00SWOJLSS/ref=oh_aui_detailpage_o00_s00?ie=UTF8&psc=1
Lighting | | | | |
$86.88 | Studio Designs Swing Arm Lamp Black | $24.75 | 2 | $49.50 | https://www.amazon.com/gp/product/B00I2S7MHQ/ref=oh_aui_detailpage_o09_s00?ie=UTF8&psc=1
| Lutron TT-300NLH-BL Credenza Lamp Dimmer Black | $14.83 | 1 | $14.83 | https://www.amazon.com/gp/product/B00024BJZE/ref=oh_aui_detailpage_o01_s00?ie=UTF8&psc=1
| Triple Outlet Swivel Adapter, White | $3.27 | 1 | $3.27 | https://www.amazon.com/gp/product/B000HJBENG/ref=oh_aui_detailpage_o01_s02?ie=UTF8&psc=1
| Daylight LED Light Bulb 15W | $9.64 | 2 | $19.28 | https://www.walmart.com/ip/Great-Value-GVRLA1850ND-Great-Value-LED-15W-A19-Light-Bulb/38596922
Cable Managment | | | | |
$18.81 | 100 Velcro Ties | $5.00 | 2 | $10.00 | https://www.amazon.com/gp/product/B001E1Y5O6/ref=oh_aui_detailpage_o03_s00?ie=UTF8&psc=1
| 100 Releasable cable ties | $2.47 | 3 | $7.41 | https://www.monoprice.com/product?c_id=105&cp_id=10520&cs_id=1052012&p_id=5795&seq=1&format=2
| Cable Clip nais | $0.70 | 2 | $1.40 | https://www.monoprice.com/product?c_id=105&cp_id=10520&cs_id=1052006&p_id=5834&seq=1&format=2
Power | | | | |
$53.13 | Monster MP AV 750 Audio Video PowerCenter | $18.99 | 1 | $18.99 | https://www.amazon.com/gp/product/B004ETIKH8/ref=oh_aui_detailpage_o01_s00?ie=UTF8&psc=1
| AmazonBasics 6-Outlet Surge Protector Power Strip 2-Pack | $12.99 | 1 | $12.99 | https://www.amazon.com/gp/product/B00TP1BWMK/ref=oh_aui_detailpage_o05_s01?ie=UTF8&psc=1
| 3 Outlet Single-Tap Wall Tap | $4.00 | 2 | $8.00 | https://www.amazon.com/gp/product/B007XQORTO/ref=oh_aui_detailpage_o02_s00?ie=UTF8&psc=1
| 15ft 16AWG Power Cord Cable | $5.20 | 1 | $5.20 | https://www.monoprice.com/product?c_id=102&cp_id=10228&cs_id=1022801&p_id=5287&seq=1&format=2
| 10ft 18AWG Right Angle Power Cord Cabl | $2.65 | 3 | $7.95 | https://www.monoprice.com/product?c_id=102&cp_id=10228&cs_id=1022809&p_id=7677&seq=1&format=2
Network | | | | |
$33.98 | TP-LINK 8-Port Gigabit Desktop Switch | $22.99 | 1 | $22.99 | https://www.amazon.com/gp/product/B001EVGIYG/ref=oh_aui_detailpage_o03_s00?ie=UTF8&psc=1
| 5-Pack, Cat6 Ethernet Patch Cable in Blue 3 Feet | $10.99 | 1 | $10.99 | https://www.amazon.com/gp/product/B00C2B81K6/ref=oh_aui_detailpage_o02_s00?ie=UTF8&psc=1
Monitor Mount | | | | |
$215.27 | Arm wall mount | $17.54 | 3 | $52.62 | https://www.monoprice.com/product?c_id=109&cp_id=10828&cs_id=1082821&p_id=12232&seq=1&format=2
| Top wall mount bracket | $4.80 | 4 | $19.20 | https://www.monoprice.com/product?c_id=109&cp_id=10828&cs_id=1082821&p_id=3005&seq=1&format=2
| Center Monitor Mount | $7.99 | 1 | $7.99 | https://www.monoprice.com/product?c_id=109&cp_id=10828&cs_id=1082821&p_id=4564&seq=1&format=2
| 2x8 | $7.47 | 3 | $22.41 | https://www.lowes.com/pd/Top-Choice-Common-2-in-x-8-in-x-10-ft-Actual-1-5-in-x-7-25-in-x-10-ft-Lumber/4082916
| 2x4 | 2.55 | 1 | $2.55 | https://www.lowes.com/pd/Common-2-in-x-4-in-x-8-ft-Actual-1-5-in-x-3-5-in-x-8-ft-Stud/1000074211
| 3" clamp | $5.98 | 6 | $35.88 | https://www.lowes.com/pd/IRWIN-QUICK-GRIP-3-in-Clamp/50214643
| 4" Hinge | $2.81 | 2 | $5.62 | https://www.lowes.com/pd/Gatehouse-4-in-H-Oil-Rubbed-Bronze-Interior-Exterior-Mortise-Door-Hinge/4772785
| Wood Screws | $9.00 | 1 | $9.00 | Lowes
| Assorted brackets/hardware | $25.00 | 1 | $25.00 | Lowes
| Case Rack Mount | $35.00 | 1 | $35.00 | EBay
Misc | | | | |
$35.97 | Steam Link | $19.99 | 1 | $19.99 | https://www.amazon.com/gp/product/B016XBGWAQ/ref=oh_aui_detailpage_o06_s00?ie=UTF8&psc=1
| Bluetooth Adapter | $7.99 | 1 | $7.99 | GRANDCOW Bluetooth 4.0 USB Adapter Dongle for Windows 10/ 8.1 / 8/ 7 / Vista / XP
| 19 Key Numeric Keypad | $7.99 | 1 | $7.99 | https://www.amazon.com/gp/product/B005DJSAAU/ref=oh_aui_detailpage_o01_s00?ie=UTF8&psc=1
Thank you good Sir!
I used these cable clips below.
https://www.amazon.com/gp/product/B075Y9J42T/ref=ppx_yo_dt_b_asin_title_o04_s01?ie=UTF8&psc=1
I did a lot of research of several types of cable clips on Amazon and after using these ones i would definitely recommend. The adhesive is very strong compared to others. I just put these all over the back of the edge table and routed the cables through them. Worked like a charm! I also used three of them to clip the power strips to the bottom of the desk. I would cut the zip tie of one of them and run the other two zip ties through 1. I don't know if that makes sense. I can add pictures. Might be easier to understand.
NZ represent!
Besides what Serptintine said about the mobo and 4690K, I'd stick an SSD in there as a boot drive.
I've actually been in the process of building a PC for the last few months, here are some things I've found:
Base price is $12.50, +$5 for every 500g. So essentially, minimum is $17.50. Make sure to group Amazon parcels into as few deliverables as possible. Amazon global shippping is almost always cheaper so check before you send to your YouShop US address.
Feel free to ask me any questions.
I recently went on a cable management spree myself. I looked at baskets but ended up going with a cable box and Velcro ties.
http://www.amazon.com/gp/aw/d/B0019T0J9S/ref=mp_s_a_1_3?qid=1453832556&sr=8-3&pi=SY200_QL40&keywords=bluelounge+cable+box&dpPl=1&dpID=31X9MbzH8jL&ref=plSrch
http://www.amazon.com/gp/aw/d/B001E1Y5O6/ref=mp_s_a_1_1?qid=1453832946&sr=8-1&pi=SY200_QL40&keywords=velcro+cable+ties&dpPl=1&dpID=31SGEFLLv%2BL&ref=plSrch
These are aweomse and highly recommend them to anyone trying to tidy up their station.
Anyway, congrats on a clean station, op, it's looking really awesome.
LOL! The dirty secret?
I have two cats, brothers, Mario and Luigi. Luigi's mellow, never a problem. Mario likes to chew on things, the more expensive and less replaceable, the better. After the second mouse and a set of reference headphones lost, I'm now religious about neatly cabling everything lest he get the idea that my patch cables (or the USB ones for that matter) are there for his amusement.
Velcro ties are your friends, best thing ever. I learned to like them about 20 years ago on my first civilian job post military, wiring up computer labs in schools - they're absolutely fantastic and so cheap you'll be embarrassed you don't already have some. I get mine from Amazon 100 at a time for about $10.
​
https://www.amazon.com/gp/product/B001E1Y5O6/ref=ppx_yo_dt_b_search_asin_title?ie=UTF8&psc=1
Alex Tech 25ft - 1 inch Cord Protector Wire Loom Tubing Cable Sleeve Split Sleeving For USB Charger Cable Power Cord Audio Video Cable – Protect Cat From Chewing Cords - Black https://www.amazon.com/dp/B07FW3MKGH/ref=cm_sw_r_cp_api_i_IFo0CbT7FDW0S
Pasow 50pcs Cable Ties Reusable Fastening Wire Organizer Cord Rope Holder 7 Inch (Black) https://www.amazon.com/dp/B0154MS9Q0/ref=cm_sw_r_cp_api_i_tGo0CbCF1T2B0
eBoot 100 Pieces Adhesive Cable Clips Wire Clips Cable Wire Management Wire Cable Holder Clamps Cable Tie Holder for Car, Office and Home https://www.amazon.com/dp/B01HR9VS4I/ref=cm_sw_r_cp_api_i_0Go0Cb8EVVNYV
Plus some other materials i probably missed but a quick amazon search of “Cable Management” on amazon can start to trigger some awesome ideas.
You really gotta sit there and stare at it and think how you can hide everything, neatly and routed in a way thats easy to clean. Having my monitors wall mounted allowed me to use the brackets to hide the long monitor power cords and hdmi cables i was also able to mount a power strip behind there so it was easier to power things while hiding wires.
You might have tried this already, but how about instead of your back to the wall, the desk goes up against the same wall? This will help with the following:
I had ~10 racks with almost the exact same setup (same racks, same servers, very similar cable layout and switch position).
My advice to you is to tie the cables off in such a way that they are not touching the rack rails. Those hooks you see on the left side of the photo on the rack rails? They move with the server and love to catch the ethernet cables. Similar situation happens on the side with the power cables, although not as bad due to different cable management attachment point on the other side.
You will say to yourself, but sir, I will always be sure to power the server off and then disconnect all cables before removing it from the rack! - likely very true statement. However, no one else will give 2 shits about it and will do the old "I'll just pull this server out a half inch so I can go around back and tell which one it is" trick, which then pulls your ethernet cables into the pinch-n-cut hook, and the power cables pull out. Then your life gets worse :)
I suggest getting some of the really thin Velcro cable wraps like these - http://amzn.com/B001E1Y5O6?tag=amz-link-20 - then apply them liberally to keep stuff tied back and out of the way. They are really thin and don't get in the way like the thicker expensive ones do so they work great for actually tying the cables directly to the sliding section of the rack rails.
Any Velcro will do but this is the one I got. The length fits this lock diameter perfectly so it takes a second or two to strap each one down each time.
VELCRO Brand ONE WRAP Thin Ties | Strong & Reusable | Perfect for Fastening Wires & Organizing Cords | Black, 8 x 1/2-Inch | 100 Count https://www.amazon.com/dp/B001E1Y5O6/ref=cm_sw_r_cp_api_i_hypvDb7RAC3YA
I found them quite uncomfortable as it put a lot of pressure on the center of my head, but I did a cheap/simple mod - I bought a replacement Sennheiser headband for $7 and some thin Velcro straps. It spreads the weight out evenly and made it very comfortable! All for ~$10.
I love the sound of the NAD... I think you really hear guitar growl like it's coming from an amp.
Headband -
https://www.amazon.com/Replacement-Headband-Cushion-Sennheiser-Headphones/dp/B01H8Q05O4/ref=mp_s_a_1_7?keywords=sennheiser+headband&qid=1570099657&s=gateway&sr=8-7
Velcro straps thin enough to fit between the pads -
https://www.amazon.com/gp/aw/d/B0006BB9MG/ref=ya_aw_od_pi?ie=UTF8&psc=1
That's where the art of the zip tie come into play. Tying the cables together into the least amount of bundles will meet you a lot more of a cleaner look then you'd imagine.
If you're really feeling fancy, some of these can help for cleaner pathing, especially for those I/o cables.
Never neglect cable management, you get better airflow plus a beautiful rig you can take pride in!
I've never really seen the pegboard before honestly but it just came to me. I wouldn't recommend it though, it took a bunch of time and is only for someone who likes doing organization. As far as cable management tips:
These are the ones you want: https://www.amazon.ca/Thomas-Betts-TY525MX-CABLE-50LB/dp/B001DEHZ14
I usually buy them from Westburne, my local electrical wholesaler.
They're literally an order of magnitude stronger, more temperature stable, and more UV stable than the Home Depot cheapos. I've seen these things still rock solid, after supporting lengths of pipe, in direct sunlight after 20+ years (!).
And they save so much time and headache, rather than hog rings.
Make sure you have a good pair of flush cutters. If you cut their tails off with regular side cutters, the remaining stub is incredibly sharp.
It looks good for your first try but these links will help you do better:
https://www.amazon.com/Channel-Desk-Cable-Organizer-SimpleCord/dp/B06XZPYP7Y?ref_=Oct_RAsinC_Ajax_11042051_0&pf_rd_r=1N24GCVAEKH8VXVCV1MH&pf_rd_p=aa2c769d-eec9-5298-93e3-59e57ff9c396&pf_rd_s=merchandised-search-10&pf_rd_t=101&pf_rd_i=11042051&pf_rd_m=ATVPDKIKX0DER
https://www.amazon.com/Attmu-Reusable-Fastening-Microfiber-6-Inch/dp/B00O9VKVFK?ref_=Oct_RAsinC_Ajax_11042051_1&pf_rd_r=1N24GCVAEKH8VXVCV1MH&pf_rd_p=aa2c769d-eec9-5298-93e3-59e57ff9c396&pf_rd_s=merchandised-search-10&pf_rd_t=101&pf_rd_i=11042051&pf_rd_m=ATVPDKIKX0DER
Strive for excellence in all you do, always.
Nice deployment! If you aren't already, we strongly recommend using proper safety gear for operations like this. Standard issue safety harnesses can be acquired from numerous sources, I've had success with these: https://www.amazon.com/dp/B01018DC96/
Over!
Get the stainless steel, no doubt about it, and also definitely do forward sealing. You may want to consider flow control, but that is a bit more of a personal preference. I really like my intertaps, and really like the ball lock adapter, makes bottling from a keg really easy using a DIY picnic tap poor mans beer gun. This also works for growlers, just need a larger bung.
Some things I appreciate in my build:
I haven't found too many things I wish I did differently, but I'm still learning all the right procedures. I would recommend buying a both liquid and gas line in bulk, it's nice to be able to replace and not worry about if you have it.
Just undid five years worth of accumulated mess. Saw the beautiful workstations on this channel, and just couldn't take the cognitive dissonance anymore.
Installed a raceway and new power strips under the desk. The project took about four hours or so.
This channel had tons of great product and technique suggestions, and this YouTube video was also extremely helpful: https://youtu.be/Uc01oUqmxhE
Here's what I ended up using:
The next phase would probably be lighting, but I'm far less comfortable in that area. Thinking of a simple LED strip behind the desk using color that is keyed off the screen color. Any suggestions here?
Also, my mic arm clamp doesn't attach to the desk well because the desk has a lower drawer level that bumps into the base of the clamp. Looking for a mic arm clamp that is short--maybe 4-6 inches. I couldn't find easily on Amazon. Can anyone point me in the right direction?
All other suggestions welcome!
Get some velcro cable ties; tie everything headed to a common component together. ie. all the power cords conecting to a certain power bar, tie them together. All the HDMI cables connecting to the TV, etc.
All the cords going to the right-hand side of the entertainment unit, bundle them together and tie them to the unit's centre-right vertical support column/leg (preferably the one in the back). White velcro cables ties might blend in better here. Do the same for the centre-left column/leg and components on that side.
For the big rat's nest in the back, bundle the surplus power brick cord lengths together with cable ties and either hide the tied bundles behind the component it powers, or tuck it under the entertainment unit out of sight.
Snip the surplus ends of the wrapped cable ties so they are neat and not rolled up into little cinnamon rolls.
Because the entertainment unit is so open, you're not going to be able to completely hide everything. It doesn't all have to be hidden, it just has to look organised.
Honestly the best thing you could do for your setup right now is cable management. You can get reusable velcro zip ties from Amazon or Walmart or someplace like that. I’d also recommend getting little figures or plushies of your favorite characters to add some more of your personality to the area
Super rad looking lights. Hope to see this upclose on the playa!
I've used velcro zip ties with a lot of success. I felt it was my way of minimizing my moop levels while also harnessing the awesome power of velcro.
I've used velcro straps on mine to great success, and I'm in a similar boat with the Classic 2 and a Phoenix power supply. I connect two or three of those straps together and wrap them around the power supply and the top crossbar, one near each end of the power supply so as not to block the plugs. I also put a small piece of regular adhesive velcro on both the power supply and the underside of the board to keep the power supply from sliding.
It keeps the power supply securely mounted, costs very little, is easily removable and reusable if I need to move anything, and doesn't interfere with the velcro on top that the pedals need to stick to.
Thank you for the information! I'll definitely go with smaller props - although if the bigger ones do happen to fit, would I be fine using those?
I'd really like to go with a taranis, if a sale comes up in the future I'll probably snag one. For now, being a beginner, I'll have to learn to hate the 9x so I can love the taranis - haha.
I do have a bunch (100+) of velcro straps from amazon. Specifically these. They might work out? I might grab a rubberized strap just because they're so cheap anyways.
As for the buzzer - I've seen the HobbyKing™ Lipoly Low Voltage Alarm (2s~4s) posted around, might grab 3 or 4 as you suggested.
Thanks again for the advice - it's very helpful to a noob like myself.
Honestly looks great. I think the only thing that could be done better is cable management. Buy some of these and bundle the cables coming off the back of the tower. Small hole under your mouse pad to route the kb/m cables under the desk. Put a small hole behind the shelf to route those power cables from behind the desk. Honestly I feel like I'm just nitpicking because this looks great.
I've been using a sleeve for cables that does a great job preventing this. It won't stop it forever, but it takes way more to get it tight and tangled. I can usually go through a play session of several hours without it bunching up on itself, then I just untangle what little bit is there when I'm done. This is the sleeve, and I secure it to the cables with these. It works beautifully.
The "Type" of cable fastener absolutely does make all of the difference depending upon the application.
In many applications cable or "zip" ties are not allowed due to toxic fumes given off when they are heated. Many users tend to over tighten cable ties thus damaging the cable jacket or conductor vs velcro.
In the case of aircraft or high vibration scenarios the type of cable fastener used is highly regulated.
In the end remember there are Redditors from around the globe here that are not only home users but also many that work with cable fasteners day to day in the work that they do. I have been known to post a link to this set of velcro from Amazon to those that complain about price.
If this were my setup I would cringe at the crimped coax cable. It's totally worth redoing, using a compression fitting instead. Those tools can be found at your local hardware store, online or just befriend a cable guy and hand him a few bucks to remake the end. It will take him a minute or less.
Thx OP for the post, IMO anything better than a nest of cables is better in the end. I highly prefer velcro.
If you ever have to replace the cables, try these instead of zip ties. :)
Desk looks super awesome. I'm going to be setting up a new desk once we move, and now I'm inspired.
Cat5e should be sufficient for any house. Really. You can get gigabit speeds on that, which is good for 20 simultaneous 4K video streams, plus another dozen or so netflix HD streams. Really, GigE is fine.
Source: http://blogs.iis.net/alexzam/archive/2013/01/28/h-265-hevc-ratification-and-4k-video-streaming.aspx
The only time I'd recommend cat6a is if you, right now, have a home application which routinely requires greater than 500 Mbit/s. The extra cost for cat6a isn't worth it, and the cost of 10G components is still quite high (for the home)
Wire cat5e from each place you might want a phone, TV or media device. My living room has 4 cat5e drops (TV, blu-ray, xbox, Roku) back to your panel box area.
Secure them to the joists in the ceiling with J-hooks, not staples, please.
http://store.cablesplususa.com/jhook225pk.html?utm_source=googlepepla&utm_medium=adwords&id=20005783933&utm_content=pla&gclid=CMvZ5vG4nLoCFQSf4AodMRsAiA
If you're feeling cheap, get some anchors and small zip ties. Screw the anchors to the joists, peel and stuck will come loose.
http://www.amazon.com/Startech-HC102-Adhesive-Cable-Mounts/dp/B00008VFBE/ref=pd_sim_e_4
At the walls, use keystone jacks and wall plates
http://www.monoprice.com/Product?c_id=105&cp_id=10517&cs_id=1051703&p_id=6734&seq=1&format=2
Don't forget the low voltage box
http://www.monoprice.com/Product?seq=1&format=2&p_id=7016&CAWELAID=1329454251&catargetid=320013720000010679&cadevice=c&cagpspn=pla&gclid=CLuwocO8nLoCFYWe4AodtF4AmQ
and use a proper patch panel in the basement
http://www.monoprice.com/Product?c_id=105&cp_id=10514&cs_id=1051402&p_id=7255&seq=1&format=2
Don't save the labeling for last, you won't remember. Label things as you go.
I have a brother labeler, which works really well.
http://www.brother-usa.com/Labeling_Solutions/ModelDetail/7/PT18R/Overview#.Ul8cOFBwqsM
I stress the cat5e thing as being good enough because people very often think that they need cat6a or somehow their 15Mb/s turbo internet package will be bottlenecked. The only project I've ever worked on where cat6a made sense was for a public works project in NYC, where the labor rate was $105/hour. For them, it made sense to buy the best cable money could buy.
Other than those minor nitpicks, it looks plenty comfortable. Do you use the crossbar as a foot rest?
I ordered these reusable Velcro ties on Amazon.
They are great because you get 100 of them for cheap and they allow you to easily correct mistakes or add new cables. Also, they don't strangle and damage your wires like zip ties do, and removing them does not require cutters... Ya know, since they're Velcro. You can even string them together to make large loops that can hold your cables against your desk's legs.
Here is a pic of them in action.
I hope that helps!
Case|IN WIN 101 Mid Tower High Air Flow Gaming Case w/ Tempered Glass Full Size Window (White)
CPU|Intel® Core™ Processor i7-7700K 4.20GHZ 8MB Intel Smart Cache LGA1151 (Kaby Lake)
Case Fan|3x 120mm AZZA Hurricane RGB Fans
CPU Cooler|Thermaltake Floe Riing RGB 240mm Premium Edition Liquid CPU Cooling System w/ Copper Cold Plate (2 x Standard 120MM Fans)
SSD|240GB WD Green Series SATA-III 6 SSD
HDD|Seagate 3TB 64MB Cache 7200RPM SATA III 6.0Gb/s
RAM|XPG Z1 Gaming Series 16GB DDR4-3000 Dual Channel DDR4 Kit, CL16 (2x 8GB), White
Motherboard|ASUS ROG Strix Z270E Gaming ATX w/ RGB, USB 3.1, 3 PCIe x16, 4 PCIe x1, 6 SATA3, 2 M.2 SATA/PCIe
OS|Windows 10 Home (64-bit Edition)
Power Supply|600 Watts - Standard 80 Plus Certified Power Supply - SLI/CrossFireX Ready
Video Card|GeForce® GTX 1060 3GB GDDR5
Monitor|Dell S2415h 24-Inch x 3
Monitor Stand|VIVO Single Stand & VIVO Dual Stand
Headset|Steelseries Arctis 7
Headset Stand|Avantree Universal Aluminum Desk Headphone Stand Hanger with Cable Holder
Keyboard|Logitech K780 Multi-Device Wireless Keyboard
Mouse|Logitech MX Master 2S Wireless Mouse (White)
Webcam|Logitech HD Pro Webcam C920
Plants|Artificial Plants, Amyhomie Set of 4 Mini Fake Succulent Plants
Desk|98x1 1/8" EKBACKEN Kitchen Counter Top resting on two White ALEX Drawers. There's also two OLOV White Adjustable Legs underneath for support.
Laptop|Apple 13" MacBook Air 256GB SSD 2015 Model
Laptop Stand|Vertical Laptop Stand Holder by MOTONG
Laptop Skin|Solid State White Skin by DecalGirl
Mini Fridge|Danby DAR017A3WDB Contemporary Classic Compact All Refrigerator, White
Lamp|Studio Designs 12024 Swing Arm Lamp, 13-watt, White
Lamp Bulb|TP-Link Multicolour Smart LED Bulb
Wallpaper|Nathan Nyx on ArtStation
Wall Scrolls|Tokyo Ghoul, No Game No Life, Attack On Titan, Seven Deadly Sins
Console|Nintendo Switch - Gray Joy-Con
Console Skin|Solid State White by DecalGirl
Controller|Nintendo Switch Pro Controller
Cable Management|Reusable Velcro Cable Ties, 2 x White Cable Raceway Channels, and 2 x White Cable Box
USB Charger|RAVPower 60W 12 A 6-Port USB Charger
Router|Linksys Velop Tri-band Whole Home WiFi Mesh System 2-Pack
Trash Bin|FILUR (White)
Here are the parts I used:
The cable raceway and the cable clips made the biggest difference. In the past I would just use the velcro strips, which would help with making the cables look more clean, but not with hiding them altogether.
The process I used was:
VELCRO Brand - ONE WRAP Thin Ties, 8 x 1/2-Inch, 100 Count, Black https://www.amazon.com/dp/B001E1Y5O6/ref=cm_sw_r_cp_apa_i_SphaBbVD4R8ZR
WireTamer Cable Management Tray (2 Pack, Black) https://www.amazon.com/dp/B01BVYW7UY/ref=cm_sw_r_cp_apa_i_-rhaBbAYX7GVF
I used these two of Amazon to make all my cables disappear and for pretty cheap 30$. Both products are amazing I've for no issues with either one. Good luck hope this helped.
Basically what /u/cstoner said. If you absolutely can't take downtime then setting up redundant paths are the only way.
Our blade chassis have ethernet fiber, storage fiber, a few copper connections, and power. They're all redundant. Being able to fix that mess while being careful isn't too hard as long as you only ever have one thing unplugged at a time. Messy power cables? Unplug one, reroute it, plug it back in, wait a few seconds, move to the next one.
For actual cable management tips, I would strongly recommend something like THIS. They're velcro cable ties that function pretty much like reusable zip ties. You can pull them pretty tight.
I would also recommend /r/cableporn .
My apartment has pretty terrible lighting and with fall/winter coming on strong in the Boston area, I decided to put together a little home gardening station to help with lighting and movement of the plants for watering. I went into this with the goal of having my setup accommodate most of my small collection of plants and to allow for easy movement without having to mess with the grow lights. In the end, I decided on a cart-based design composed of the following items:
Bror Utility Cart 33 ½” X 21 ⅝” X 34 ⅝” ($99)
https://www.ikea.com/us/en/p/bror-utility-cart-black-pine-plywood-60333850/
Bror Add-on Shelf 21 ⅝” X 6 ¼” X 5 ½” ($10)
https://www.ikea.com/us/en/p/bror-add-on-shelf-black-20402001/
Koppla 3 Outlet Power Strip 19 ¾” ($4.99 for two pack)
https://www.ikea.com/us/en/p/koppla-3-outlet-power-strip-grounded-white-00086428/
2x Hemma Cord Set, Black 15’ 5” ($7.00 each)
https://www.ikea.com/us/en/p/hemma-cord-set-white-10175810/
(IKEA site only has white showing up now, black was available in-store)
2x Luftmassa Lamp Shade 10” ($17.99 each)
https://www.ikea.com/us/en/p/luftmassa-lamp-shade-rounded-70462648/
Kasa Smart WiFi Plug Mini HS105 ($21.75)
https://www.amazon.com/gp/product/B01K1JVZOE/
Relassy 20 Watt Dual Head, Gooseneck, Full Spectrum Grow Lamp ($27.39)
https://www.amazon.com/gp/product/B07C68N7PC/
2x GE 9 Watt BR30 Balanced Full Spectrum Bulbs ($9.98 each)
https://www.amazon.com/dp/B07NN6SVG6/
4x 3M Command Utility Hooks 3 lbs ($8.99 for nine)
https://www.amazon.com/gp/product/B0751RPD3V/
2x Velcro Thin Ties 8” X ½” ($9.70 for 100)
https://www.amazon.com/gp/product/B001E1Y5O6/
Total Cost (pre-tax): $234.76
Underneath my desk i have 2 ikea signums holding all my cables, and if i need to route the cables somewhere specific like behind my monitor I use some sort of zip tie mounting plate together with zip tie's of course! Just take your time and route the cables however you like them.
zip tie mounting plate: http://www.amazon.com/Monoprice-Cable-mounts-25x25-100pcs/dp/B003L16ZYU/ref=sr_1_1?ie=UTF8&qid=1457803967&sr=8-1&keywords=zip+tie+mount
ikea signum: http://www.ikea.com/nl/nl/catalog/products/30200253/
hope it helps :)
Hey man. It really doesn't take much. :)
Just order a pack of 8" zip ties from Amazon (about $3) and some Velcro strips for $5. Just bundling your cables together goes a LONG way.
But don't worry. If you still want to be on /r/shittybattlestations even after your cables look all nice, you can just mount your hard drives by duct taping the shit out of them to your case. A shittybattlestations masterpiece!
VELCRO Brand One Wrap Thin Ties, Black & Gray, 8 x 1/2-Inch, 50 Count (90924) https://www.amazon.com/dp/B000F5K82A/ref=cm_sw_r_cp_apa_k0LZzbYE7WKZG
C2G/Cables to Go 43036 4-Inch Cable Ties - 100 Pack (Black) https://www.amazon.com/dp/B0002GX1XA/ref=cm_sw_r_cp_apa_L1LZzbMJSWCN0
OP, this is your answer. Dead simple to set up, but super powerful and not expensive either. There's a reason many IT people (including myself) prefer the $150/unit Ubiquiti WiFi over the $400/unit Cisco WiFi.
Also, cable management is your friend. Get yourself some velcro straps and tie those cable bundles together.
I take it you’re looking for a long term storage solution but with dayvto day accessibility? As in easy in, easy out, and it’ll be out of sight as well.
After you find an appropriately sized case, you’ll want to set up some pick and pluck foam inserts so everything has a spot. No more digging through bins for what you need. Prioritize the stuff you already use constantly, then put the rest into your big Rubbermaid container in the closet. (And mark it “summer clothes” so your wife doesn’t complain about your hoarding)
Then you’ll want a few hundred of these to keep your wires neat and undamaged. Beats rolling them around the wall wart or using rubber bands.
It’s a little less accessible than the cable hangers but it clears the clutter.
Ended up researching into a bag and eventually found one I think will work well.
I will link to everything I've found on amazon. I have found others on our distributors website. Hopefully this will help others put together something as well!
Bag
SATA Adapter
Toolkit
Toner/Fox and Hound
Small LED Flashlight
Velcro Wire Ties - Zip ties are awful
Network Kit
External HDD
Analog Phone - For testing Fax Lines mainly
There's more, such as cables and things, but everyone should be OK with figuring that out for yourselves. Total the kit (with cables and stuff included) is only about $370.91 per technician.
Hope this helps someone!
I use these for cable management and they work great!
Love the way they work because if I need to add, move, or change cables, I can do so easily thanks to the adjustable clip.
Also if you need to remove them, they come off fairly easy and don't leave marks on the desk.
https://www.amazon.com/50pcs-Adhesive-Adjustable-Optional-Management/dp/B075Y9J42T/ref=mp_s_a_1_5?crid=AW7A51XXD34Y&keywords=adhesive+cable+clips&qid=1554302862&s=gateway&sprefix=adhesive+ca&sr=8-5
This guy is in all of my bags. I also carry a North Face Surge 2, it's pretty solid, has a lot of pockets, the laptop pouch is lined so my device never gets scratched up. I have some velcro cable ties that have been very useful at times, but I also go into a lot of rack rooms still.
I agree with the comfy shoes, and I also carry some hand sani and wipes.
Last piece of advice.... Let your EdgeRouter breathe... don't stack stuff on top of the poor thing. :)
What /u/Cloo159 said...
>Put this under your desk, best $10 you can spend on cable management.
or these with zip ties
http://www.amazon.com/Ziotek-Zip-Tie-Mount-Pack/dp/B000BSJHLE.
I like the flexibility of the zip tie mounts. You can get very creative
I'm constantly buying packs of these cheap straps: http://www.amazon.com/gp/product/B001E1Y5O6/ref=oh_aui_detailpage_o08_s00?ie=UTF8&psc=1
Not just for case cable management, but pretty much any cable for anything. I love these things.
http://www.amazon.com/gp/product/B001E1Y5O6/ref=oh_details_o03_s00_i00?ie=UTF8&psc=1
Order these, never again will you need zip ties. Worked wonderfully in my build, honestly the best purchase I made as far as "extras" goes.
Here are some tips that might help.
Looks good!
Try these ties. They should help:
VELCRO Brand One Wrap Thin Ties, Black, 8 x 1/2-Inch, 100 Count (91140) https://www.amazon.com/dp/B001E1Y5O6/ref=cm_sw_r_cp_api_NqZ2AbET1MZRN
Sleeves like this as well:
Cable Management Sleeve, JOTO Cord Management System for TV / Computer / Home Entertainment, 19 - 20 inch Flexible Cable Sleeve Wrap Cover Organizer, 4 Piece - Black https://www.amazon.com/dp/B015HWXG4M/ref=cm_sw_r_cp_api_hrZ2Ab5S7FG4V
The stock heatsink should be more than enough for what this. You only need a custom CPU Cooler if you are planning to overclock, which this processor can't because it's a locked CPU. Because there won't be any real heavy CPU/GPU usage, you should't need custom case fans.
If you want case fans, for the 200mm front I suggest this Phanteks one or this Cooler Master one. For the 2x 80mm fans, you can go with 2 of these Noctua. Or you can find other fans you might like.
You shouldn't need any extra cables or anything. If anything... these Velcro ties are AMAZING for cable management, and use around the house :)
I forgot to mention. This case does not have a optical drive, most newer cases these days do not have an external bay for them, because most people use USB now. If you need to use a CD/DVD/Blu-Ray, I suggest an external one. And remember to get the driver for your MOBO's ethernet from the manufacture's website and put it on your phone or USB stick to put on your PC. After that W10 should update all your drivers for you via internet.
Don't believe the price on their website, by the way. It's like $25 bucks on Amazon.
Grab that box, and get yourself some:
...and you're golden. My entertainment center is super tidy.
I would run all cabled directly off to either the left or right side, bundle them and then run them over the top and down the other side.
Consider getting an arm or something else to avoid messing the whole thing up when you pull out the server on the rails. You can kind of wing it without one though.
Velcro strips comes in real handy for cable management. Having 100 of those hanging off the sides makes it really easy to gather up the cables and redo them when adding equipment. They don't look quite as nice as plastic strips, but it is just so much more enjoyable to work with for projects like this.
https://www.amazon.com/VELCRO-Brand-Black-2-Inch-91140/dp/B001E1Y5O6
Similar ones can be bought on AliExpress for peanuts if you can wait a month.
From the looks of it pulling the server out on the rails will disconnect the power cords. I would mount an extension socket next to it with an on/off switch that lights up.
This is a nice change from the typical setup, especially having two monitors on top of each other. Thanks for the variety. That said, some simple cable management would clean up everything nicely and make finding stuff, unplugging things if anything goes wrong, and moving stuff around if needed much easier. I don't think you need to do much. Some simple velcro ties could do wonders for you and is probably all you need.
That would look great, if you know where to buy that sleeve material, please let me know for future projects. I recently did all my cable management along the back edge of my desk with velcro ties, and it was very fast and easy to get everything into one bundle.
These are the ones I purchased. Absolutely worth it.
OK, there are two ways to attach this thing to the Fidelio X2.
The first it to just plug them in directly to the bottom of the headphone.
Side View
Front View
The other option is to use a short AUX cable and then use a velcro zip tie to attach them to the headband. The AUX cable I bought was red, but you can get a black one to make it look less conspicuous.
Side View
Rear View
Front View
The short AUX cables I bought were these.
The zip ties I used were these.
Hope this was useful.
EDIT: If you're going to go the short aux cable route, then I strongly recommend finding a cable with 45 degreee connectors on both ends.
What is a "Cable binder" ? A zip tie according to my very grueling research.
Velcro ties work much better. I use these specific cable ties on my racks as well as workstations. They look nice, secure, and easily removable when adding, subtracting, or re-routing.
https://www.amazon.com/VELCRO-Brand-Black-2-Inch-91140/dp/B001E1Y5O6
Perfect!!! I decided to use that!
Can you let me know if you see any problems with this list?? Anything I can improve?? Anything I don't need??
Frame, PDB, FC, Motors, ESCs
Extra XT60 Battery Connectors
Props
Standoffs
2mm Gold Bullet Connector
Cable/Zip Ties
DIY FPV Kit
Tx/Rx
Tx/Rx to USB Adapter
Drone Battery 1 (heavy) 2200mAh
Drone Battery 2 (light) 1800mAh
FPV battery 1500mAh
What's the cheapest way to be able to get voltage to show on my FPV setup?
-Would I be able to use this voltage checker/warning buzzer?
What about a cheap lost model buzzer/discovery buzzer?? Can I use a switch on my Tx to make the alarm sound??
Is it overkill to get 3 batteries total?? 2 for the drone (So I can keep flying when one is charging) and 1 for the FPV reciever/display?
Thanks for the help!!
NavePoint Cantilever Server Shelf Vented Shelves Rack Mount 19" 1U Black 10" (250mm) deep https://www.amazon.com/dp/B008LUW49G/ref=cm_sw_r_cp_api_nXb9BbQ2ZKE7R
I used this one for my modem and small stuff. It’s less expensive and has edges that are rolled up to keep stuff on the shelf. I don’t have any of the larger shelves because all of the big stuff is rail mounted. But the modem is on a small shelf. There are a bunch of different sizes.
One thing to keep in mind when looking at stuff is the specs online for how deep things are does not include the amount of depth that cables like the power cable adds to the back.
Also, if you have dell sliding rails, consider the cable management arm. It’s really nice to have to keep cables organized and keep them from ripping out of the back when you slide the server out.
It has sideways cuts in the bottom for airflow. I used Velcro cable ties to keep stuff in place. I attached multiple cable ties together and down through the shelf holes.
VELCRO Brand ONE WRAP Thin Ties | Strong & Reusable | Perfect for Fastening Wires & Organizing Cords | Black, 8 x 1/2-Inch | 100 Count https://www.amazon.com/dp/B001E1Y5O6/ref=cm_sw_r_cp_api_nYb9Bb1E6D6EM
I wrap it around with one (or two!) of those mini velco straps. Earlier I used the joycon leg strap... which might sound counterproductive but basically I would use it while collecting points/watching tv (aka the game is turned off so I'm just doing reps with the ring-con) (if I'm playing the game, the rattle doesn't matter cause I'm already making too much noise with huffing, puffing, and stomping)
Anyway velcro seems like a cheap wrap-around, hope this helps! (let me know if you find something better/cheaper tho)
As a side note, my brother's joycons are really snug while mine are not... But mine have no visible wear/tear and I'm assuming some joycons are just like that. Maybe mine was made with less plastic on the rail part or something...
You can go a number of ways with the Twist/Cable ties. Twist ties seem to imply those bendable wire ties, which I'm not too fond of since they can become undone.
There are these trusty zip ties, which are strong and handy if your case comes with holes to thread the ties through. You can also cut the excess tie for a more appealing appearance (not so with twist ties).
I also like velcro ties for bigger cables and also for cable management outside your tower (mice and keyboard cords, power cables, speaker cables, etc). They're reusable, and it's easy to add cables to a bundle without having to undo the entire existing bundle.
If you're getting an SSD, you also might want to get a 2.5" SSD tray if your case doesn't come with one.
As for tools, precision screwdrivers are handy for small screws and for reaching deep into the case. An alternative to magnetic tip screwdrivers are long nosed pliers.
Easy fix.
Use cable trays on the bottom of the desk: https://www.amazon.com/WireTamer-Cable-Management-Tray-Black/dp/B01BVYW7UY/ref=sr_1_4?keywords=cable+tray&qid=1571879377&sr=8-4
Then screw in a large strip cord to the bottom: https://www.amazon.com/gp/product/B0036DEC48/ref=ppx_yo_dt_b_asin_title_o09_s02?ie=UTF8&psc=1
Some cable clips to top it off (use your favorite style, there are plenty): https://www.amazon.com/gp/product/B075Y9J42T/ref=ppx_yo_dt_b_asin_title_o07_s00?ie=UTF8&psc=1
Then run them down the legs from the bottom of the desk, just use Velcro straps or something :)
​
Here are both of my main setups using only those products: https://imgur.com/a/67TxbQQ
Got 100 on amazon for like 12$
VELCRO Brand ONE WRAP Thin Ties | Strong & Reusable | Perfect for Fastening Wires & Organizing Cords | Black, 8 x 1/2-Inch | 100 Count https://www.amazon.ca/dp/B001E1Y5O6/ref=cm_sw_r_cp_apa_i_85atDbRAKBAQZ
I used these: https://www.amazon.com/gp/product/B000FPAI3Y/ref=oh_aui_detailpage_o04_s00?ie=UTF8&psc=1 for my attic cat6 runs and they worked out great. They were also good for holding the coax. The cables can split off from these to their respective headers without any fuss.
Use velcro straps to tie bundles together, never zip ties.
This is still messy, but coming off of my Extron I essentially only have THREE wires coming off. OK, two are large bundles of wire held together by velcro one runs to the monitors, the other to the area where all my video game consoles are. The third is simply the power cord for the Extron:
https://i.imgur.com/hcZGnM6.jpg
Velcro is your friend as well:
https://www.amazon.com/gp/product/B001E1Y5O6/ref=oh_aui_search_detailpage?ie=UTF8&psc=1
Yeah, velcro strips or zip ties are a good idea. I don't know how many fans that case has, but a fan spllitter would be nice because I know that mobo only has 1 sysfan header.
The power supply and motherboard should have all the other cables you need. And that 1060 does have HDMI out so if you have a cord you're good.
CPU | Intel Core i5-4690K 3.5GHz Quad-Core Processor | $241.98 @ Newegg
CPU Cooler | Corsair H110i GTX 104.7 CFM Liquid CPU Cooler | $99.99 @ Newegg
Motherboard | MSI Z97S SLI Krait Edition ATX LGA1150 Motherboard | $92.98 @ Newegg
Memory | Corsair Vengeance 8GB (2 x 4GB) DDR3-1600 Memory | $36.99 @ Amazon
Storage | Western Digital Caviar Blue 1TB 3.5" 7200RPM Internal Hard Drive | $49.98 @ NCIX US
Storage | Western Digital Caviar Blue 1TB 3.5" 7200RPM Internal Hard Drive | $49.98 @ NCIX US
Video Card | EVGA GeForce GTX 970 4GB FTW ACX 2.0 Video Card | $313.98 @ Newegg
Case | Fractal Design Define S w/Window ATX Mid Tower Case | $79.99 @ Newegg
Power Supply | EVGA SuperNOVA GS 650W 80+ Gold Certified Fully-Modular ATX Power Supply | $79.99 @ Amazon
Operating System | Microsoft Windows 10 Home OEM 64-bit | $84.99 @ NCIX US
Monitor | Samsung S24D300H 24.0" 60Hz Monitor | $180.98 @ Newegg
Keyboard | Corsair STRAFE RGB Wired Gaming Keyboard | $144.99 @ Amazon
Mouse | Logitech G402 Wired Optical Mouse | $44.76 @ Amazon
Headphones | Audio-Technica M50x Headphones | $119.99 @ Micro Center
| Prices include shipping, taxes, rebates, and discounts |
| Total (before mail-in rebates) | $1663.57
| Mail-in rebates | -$50.00
| Total | $1613.57
| Generated by PCPartPicker 2016-06-08 00:31 EDT-0400 |
I think I'd still prefer these, for cables, since they're just always on the cable. Just about every camera cable or BNC I have has one of these on it. You can wind it and wrap your cable nicely, or when you plug the cable into your camera you have a convenient tie to tidy up the camera with.
https://www.amazon.com/VELCRO-Brand-ONE-WRAP-Management-Multi-color/dp/B00T2JQ0ZE/ref=pd_sbs_201_3?_encoding=UTF8&pd_rd_i=B00144CABS&pd_rd_r=78W4R4ST5S50NQD2XN0F&pd_rd_w=V9o9C&pd_rd_wg=96TF0&refRID=78W4R4ST5S50NQD2XN0F&th=1
EDIT: These would be good to replace bongo ties with since bongos are breaking constantly.
EDIT2: Amazon has a really good deal on some too.
https://www.amazon.com/Attmu-Reusable-Fastening-Microfiber-6-Inch/dp/B00O9VKVFK/ref=sr_1_4?ie=UTF8&qid=1498509092&sr=8-4&keywords=hook+and+loop+cable+ties
My store used to have the trough /u/caecus mentioned but we switched to a new type of steel so there was no place for the trough.
Honest suggestion? Get with your sup and have them move all the repeater boards to the center of each aisle. If the cat 5 cables don't reach to the panel there you'll need to convince them that running new cat 5 cable (and leaving a few feet of slack on each end) is cheaper than having an entire department waste hours of their time, and is cheaper than a whole box of new 25' hdmi cables.
Then convince someone (I wound up buying it for the department) to buy THESE and make sure everyone doesn't just cut them open.
In a trough or under the steel ideally you'll want to separate the power cables and hdmi cables into separate bundles but TV's move often enough that it won't be very practical.
Sauce: My warehouse/sup didn't even bother to listen and bought $500+ in cables instead (Sapphire corporate account). Don't be like us.
Protip: Replace the vga adapter (edit:for the computer monitors) with a cheap HDMI splitter
Not sure why my links came out all fucked up? Too lazy to try and fix it.
His.
Monitors: [Dell S2716DGR] (https://www.amazon.com/gp/product/B0149QBOF0/ref=oh_aui_detailpage_o05_s00?ie=UTF8&psc=1)
Triple Monitor Mount: [EZM Deluxe Triple Monitor Mount] (https://www.amazon.com/gp/product/B006JG7G2E/ref=oh_aui_detailpage_o06_s06?ie=UTF8&psc=1)
Keyboard: [Corsair K70 Cherry MX Reds] (https://www.amazon.com/CORSAIR-K70-Mechanical-Gaming-Keyboard/dp/B01ER4B8C8/ref=sr_1_2?ie=UTF8&qid=1526665446&sr=8-2&keywords=corsair%2Bk70%2Bcherry%2Bred&th=1)
Mouse: [Corsair Scimitar Pro RGB] (https://www.amazon.com/Corsair-Gaming-SCIMITAR-Mechanical-Buttons/dp/B013KK9JOO/ref=sr_1_2?s=electronics&ie=UTF8&qid=1526665487&sr=1-2&keywords=corsair+scimitar+pro+rgb)
Mouse Pad: [Razer Goliathus Overwatch Mouse Mat] (https://www.amazon.com/Razer-Goliathus-Overwatch-Mouse-Professional-Grade/dp/B01DXVKEJY)
Wireless Headset: [Steel Series 800 Wireless] (https://www.amazon.com/SteelSeries-Lag-Free-Wireless-Transmitter-Surround/dp/B016YGMH9U/ref=sr_1_3?s=electronics&ie=UTF8&qid=1526665568&sr=1-3&keywords=steelseries+h800)
Speakers: [Audioengine A5+] (https://www.amazon.com/dp/B005OSR1C8/ref=twister_B00L3KRZS6?_encoding=UTF8&psc=1)
Speaker Mounts: [Audioengine DS2 Desktop speaker stands] (https://www.amazon.com/gp/product/B005STCILC/ref=oh_aui_detailpage_o06_s04?ie=UTF8&psc=1)
Desk Surface: [Ikea EKBACKEN countertop 98in] (https://www.ikea.com/us/en/catalog/products/80274864/)
Desk Drawers: Haha who am I kidding everyone knows that those are!
Lamp: [IKEA Hektar lamp] (https://www.ikea.com/us/en/catalog/products/40349376/)
Cable Management
[Raceways] (https://www.amazon.com/gp/product/B0015EDVVU/ref=oh_aui_detailpage_o06_s06?ie=UTF8&psc=1)
[Velcro zip ties] (https://www.amazon.com/gp/product/B001E1Y5O6/ref=oh_aui_detailpage_o06_s05?ie=UTF8&psc=1)
[Desk Grommet ](https://www.amazon.com/gp/product/B000MX5TH4/ref=oh_aui_detailpage_o06_s05?ie=UTF8&psc=1)
[Cable clips] (https://www.amazon.com/gp/product/B075WWCN1K/ref=detailpage?ie=UTF8&psc=1)
Pc build specs
Case: NZXT H440
Motherboard: ASUS ROG Maximus IX Hero Z270 LGA1151
CPU: i7 6700k
RAM: G.SKILL TridentZ RGB Series 32GB
Power supply: Corsair RM series modular 1000W 80plus Gold
Power cables: Corsair custom sleeved in blue
CPU cooler: NZXT Kraken X52
Boot Drive: SAMSUNG 750 EVO 2.5" 500GB
HDD: 2TB Western Digital
GPU: EVGA 12GB Titan black
Hers.
Monitor: [Asus ROG Switft 34in ultra wide] (https://www.amazon.com/ASUS-ROG-SWIFT-PG348Q-3440x1440/dp/B01C83BE6U/ref=sr_1_fkmr0_1?ie=UTF8&qid=1526666082&sr=8-1-fkmr0&keywords=Asus+-+ROG+Swift+34%22+IPS+LED+Curved+QHD+GSync+Monitor+-+Armor+titanium+Plasma+copper)
Monitor Mount: [VIV duial mount] (https://www.amazon.com/gp/product/B01CUW5HDU/ref=oh_aui_detailpage_o06_s00?ie=UTF8&psc=1)
Mouse: [Razer Naga Chroma] (https://www.amazon.com/Razer-Naga-Chroma-Programmable-Adjustible/dp/B01798WKTY/ref=sr_1_4?s=electronics&ie=UTF8&qid=1526666200&sr=1-4&keywords=razer+mmo+mouse)
Keyboard: [Corsair K70 Cherry MX Reds] (https://www.amazon.com/CORSAIR-K70-Mechanical-Gaming-Keyboard/dp/B01ER4B8C8/ref=sr_1_2?ie=UTF8&qid=1526665446&sr=8-2&keywords=corsair%2Bk70%2Bcherry%2Bred&th=1)
Mouse pad: [Razer Goliathus Overwatch Mouse Mat] (https://www.amazon.com/Razer-Goliathus-Overwatch-Mouse-Professional-Grade/dp/B01DXVKEJY)
Wireless Headset: [Steel Series 800 Wireless] (https://www.amazon.com/SteelSeries-Lag-Free-Wireless-Transmitter-Surround/dp/B016YGMH9U/ref=sr_1_3?s=electronics&ie=UTF8&qid=1526665568&sr=1-3&keywords=steelseries+h800)
Speakers: [KRK Rokit 5 ](https://www.amazon.com/KRK-RP5G3-NA-Generation-Powered-Monitor/dp/B00FX7MMRO/ref=sr_1_1?ie=UTF8&qid=1526666262&sr=8-1&keywords=krk+rokit+5)
Desk Surface x2 : [IKEA Linnmon] (https://www.ikea.com/us/en/catalog/products/S39932699/)
Cable Management
Cable Rack: [IKEA Signum rack] (https://www.ikea.com/us/en/catalog/products/30200253/)
PC Build specs
Case: Corsair crystal series 460X
Motherboard: ASUS ROG Maximus IX Hero Z270 LGA1151
CPU: i7 7700k
RAM: G.SKILL TridentZ RGB Series 32GB
Power supply: Corsair RM series modular 1000W 80plus Gold
CPU cooler: NZXT Kraken X52
HDD: WD 1TB
GPU: GTX 1080 ti SC
Working through the album (I'll add links progressively, just want to get most of it written out):
Pockets:
The bag: The bag mostly goes from my car to under the desk to the work truck if we need to visit a transmitter site. That can be somewhat unpredictable hence some of the supplies.
Left to right, top down.
All neatly packed away in a Midway Compact Comp Range Bag
Everything is tied and stuffed behind the back panel. There are a lot of zip ties as well as these awesome Velcro ones I got from Amazon.
http://www.amazon.com/gp/product/B001E1Y5O6/ref=oh_aui_detailpage_o01_s00?ie=UTF8&psc=1
I just took a look at your case and even with a non-modular PSU. You shouldn't have an issue keep thing neat. Your case has so much room for activities.
I bought these and I love them! Unlike other things they're reusable and they don't require any nailing to the wall or anything. Here's what the underside of my desk looks like thanks to them.
Since you can't screw anything into the desk, here's what I would do:
Grab some of these while they're on sale
Then grab some 3M Command Strips to hold up some sort of cable raceway like this (Although you can probably find something cheaper than this particular one at Lowes or Home Depot.)
Or you could just buy a few of these
Or a cable box like this. Personally, I'd go with the box and velcro strips, since your tower is so close to the outlet. Unless you plan to relocate it.
But most importantly for college dorm life: 3M command strips are your friend for almost everything.
I recently installed the same thing. Instead of allowing the cable to slide freely through the hoops, you want to tie down the cables to the hoops with some appropriate amount of slack. That way when you bend down, the leashes will extend, instead of the cable sliding through.
Pick up some velcro cable ties (zip ties seem too permanent). Then you can adjust the slack to what you want and it won't change. I used something like this:https://www.amazon.com/VELCRO-Brand-ONE-WRAP-Management-Multi-color/dp/B00144CABS/ref=sr_1_5?s=office-products&ie=UTF8&qid=1522950872&sr=1-5&keywords=velcro+cable+ties
You will want some slack between the leashes also, so you don't end up extending all the leashes at the same time. As long as the slack is short enough that the dangling cables are still over your head, you should be fine. I can pretty much cover my entire space with just two of the leashes extended.
It's a bit of work, but not having to move your cable every time your turn around, will significantly improve your immersion.
if you think that's long, wait till you get a Q701 :-)
best way: cut to length and solder a new connector. Even a good Neutrik connector costs only a few dollars. Soldering isnt difficult, igf you have never soldered before might as well start somewhere.
The non-DIY way: braid it
The option for the lazy braider: coil it and use something like [this] (http://www.amazon.com/Velcro-Reusable-Self-Gripping-Inches-91140/dp/B001E1Y5O6) to keep things in place
https://www.amazon.com/VELCRO-Brand-Black-2-Inch-91140/dp/B001E1Y5O6/
These last forever for $10. You can cut them shorter for small bunches of cables or keep them long, but they are great for keeping tiny bunches in line and reusable when you make changes. I've found the easiest way to add cables is to use a new zip tie next to the old then remove the old and go down the line.
(EDIT: Also, it looks great.)
http://www.amazon.com/Plastic-Cable-Ties-100-Pack-Black/dp/B002C0SKBW
$1.99 and free shipping. Maybe $0.34 more than OP's pricing, but they're also charging several dollars to ship. You'd have to order some serious bulk to make up for OP's shipping costs.
http://www.amazon.com/VELCRO-ONE-WRAP-Self-Gripping-Cable-Reusable/dp/B001E1Y5O6/
Velcro ties 100ct for $5.99 and free shipping if you have Prime.
These are just the first two products I searched for. You may find even better options.
Lowes.com also has 100ct ties for $5-10 range. If you want just one bag and your local Lowe's is on the way for your daily commute it still may be cheaper. One 100ct bag of the standard plastic ties will last you a long time even if you're constantly reorganizing, cutting and tossing them.
The standard cheapo plastic ones are even reusable if you push small (electronics size) flat blade in the back of the clasp, so a single 20ct bag could last you indefinitely.
Do yourself a favor and get these instead:
VELCRO Brand One Wrap Thin Ties | Strong & Reusable | Perfect for Fastening Wires & Organizing Cords | Black, 8 x 1/2-Inch | 100 Count https://www.amazon.com/dp/B001E1Y5O6/ref=cm_sw_r_cp_api_i_sXRUDbBV5ANWG
Buy these 2 cheap items off amazon. I used them to route all my cables under my desk, behind my computer, where ever. They are pretty awesome. You can also get little tiny zip ties if you want something more permanent.
http://www.amazon.com/gp/product/B00AUB81DC/ref=oh_details_o06_s01_i01?ie=UTF8&psc=1
http://www.amazon.com/gp/product/B001E1Y5O6/ref=oh_details_o06_s01_i00?ie=UTF8&psc=1
These velcro ties are awesome for network/computer equipment:
https://www.amazon.com/gp/product/B001E1Y5O6
Apparently, I paid nearly 1/2 of the current price but that was also in 2011. 100 lasts forever at home. They are cut stamped so there is a little opening that the loop can go through. I never thought I'd get excited about velcro ties but these are awesome.
Here's a short album of my recent 650D build. There are 3 shots from the back from various points in the process. It's a pretty tight fit back there (giggity) and the most difficult part for me was the flat SATA cables. These little suckers made my life so much easier, and I'd highly recommend them. Some round SATA cables would probably help as well.
Here is my rig before I moved the drives and added a second gpu.
don't need to staple if you buy these bad boys.
https://www.amazon.com/gp/product/B075Y9J42T/ref=ppx_yo_dt_b_asin_title_o00_s00?ie=UTF8&psc=1
Also easy to detach because its just sticky tape :)
Here is my setup with like 50 cable clips underneath the desk XD
Ok So what you want is some self-adhesive zip tie mounts - something like this
https://www.amazon.com/Install-Bay-CTM34-Adhesive-Backed/dp/B001JT5S7Q/ref=sr_1_3?ie=UTF8&qid=1474553181&sr=8-3&keywords=zip+tie+mounts
and then zip tie the power strip down. you probably don't want to put self adhesive strips directly on the power strip because heat could loosen the adhesive and let it fall down.
also
https://www.amazon.com/VELCRO-Brand-ONE-WRAP-Management-Self-Gripping/dp/B001E1Y5O6/ref=sr_1_2?ie=UTF8&qid=1474553348&sr=8-2&keywords=velcro+straps
these things are a godsend for cable management
edit: also looking at your picture, your desk has that built in cable management bar, you may be able to just get some long zip cords or use those velcro straps to attach it directly to that bar. those zip tie mounts may just be a little too weak (probably not..but maybe) and that would be a more sturdy solution
I just re-did all of the external cable management on my setup, and after cutting about 20 zip ties, decided that I needed a better solution. I found these, and they're glorious:
velcro-loops!
CPU | Intel - Core i5-8600K 3.6GHz 6-Core Processor | $279.89 @ B&H
CPU Cooler | Noctua - NH-L9x65 33.8 CFM CPU Cooler | $49.95 @ Amazon
Motherboard | Asus - ROG Strix Z370-I Gaming Mini ITX LGA1151 Motherboard | $184.39 @ OutletPC
Memory | G.Skill - Ripjaws V Series 16GB (2 x 8GB) DDR4-3200 Memory | $189.50 @ Amazon
Storage | Crucial - MX300 525GB M.2-2280 Solid State Drive | $149.88 @ OutletPC
Video Card | Asus - GeForce GTX 1080 8GB TURBO Video Card | $499.99 @ Amazon
Case | Silverstone - RVZ03B Mini ITX Desktop Case | $104.99 @ Amazon
Power Supply | EVGA - SuperNOVA G3 550W 80+ Gold Certified Fully-Modular ATX Power Supply | $58.98 @ Newegg
| Prices include shipping, taxes, rebates, and discounts |
| Total (before mail-in rebates) | $1542.57
| Mail-in rebates | -$25.00
| Total | $1517.57
| Generated by PCPartPicker 2017-11-20 11:07 EST-0500 |
It's (oddly--usually SATA M.2 vs 2.5" is about the same price) slightly more expensive.
I'd also suggest not using regular zip ties as they can be quite a pain to remove/modify later if needed. Velcro Ties do just as good of a job and can be easily removed:
https://www.amazon.com/VELCRO-Brand-Black-2-Inch-91140/dp/B001E1Y5O6
I highly recommend using some velcro wraps rather than zip-ties for your cables. Easier to remove when you want to adjust things and pretty cheep. I bought a couple packs on Amazon for just a few bucks.
I responded to a similar comment earlier so I'll just copy/paste it here:
I have a power strip located on the underside of the desk that powers the PC, 3 monitors, and speakers. It is held in place by a cable management net that comes included with the Ikea Bekant desk.
I used a lot of velcro ties to group up any cables coming from a similar area. You can get a pack of 100 ties on Amazon for $10. Once they were grouped I kinda just threw them into the cable management net, there's probably a more elegant way of doing it, but I didn't want to spend even more time trying to do that 😅
Here are some pics of how I did it
I think what helps the most is having a cable management net on the underside of a desk.
https://imgur.com/gallery/qIbQBB5
Retractable with great height, even with this low entertainment block. 😼🎶
Should work with either generation PS4 camera; just remove its stand.
I made one of the mount holes large enough (with a small drill bit.. ideally you'd have the proper bit size 🥴) to fit my TV's bolt. If yours is smaller screen size it may have smaller bolts.
The parts:
What I like to do is zip them together in bundles, and then use anchors to keep them in place. Of course, this is semi-permanent, so not great if you keep changing your configuration or moving components. For a less permanent solution, velcro cable ties are great for at least bundling the cables.
Twist ties work, but they look a bit sloppy.
The zip ties are okay, but they're permanent, and kind of suck if you want to move things around later.
Velcro ties are alright. But I find they're usually too long, and end up wrapping them around and around and around, which makes the ties look bulky, and unkempt.
https://www.amazon.com/gp/product/B00O9VKVFK/
If you have a big bunch of cables all going the same way, you can use one of these: https://www.amazon.com/gp/product/B004M8SSW8
I used one of those for my V-drum set. You know, with each drum head and cymbal having its own chord running around the frame to the drum unit, it looked much, much nicer when they were all bundled and covered together.
The nice thing about those big cable sleeves is that they're wide enough to run a cable through doubled over without pinching anything. You know, if the cable is too long, just loop it back around to the other end and back again through the tube until the length is right where you need it.
Aside from that, and if you have cables that need to be out in the open (like mic cables), just try to coil the excess neatly under the mic stand so it doesn't look quite so messy. And coil them loosely around the stand so they don't stand out or wave around so much.
Learn how to properly roll cables over-under. This especially applies to long cables like AC extension cords, XLR cables, etc. Doing this type of wrapping in the OP will fuck up your cables pretty quickly if you use them a lot - again, especially when it comes to things like long power cords. Here's a quick demo video.
Also these velcro cable ties are great. Put them on everything you wrap and unwrap frequently.
Adhesive cable clips (www.amazon.com/dp/B075Y9J42T/ref=cm_sw_r_cp_api_i_9QR0DbQ1P7ZRS)
These will be your best friend!
Yeah, I see. That does sound to be an issue where the force of the snow is stronger than the pieces holding it together.
The plastic buttons will only work if they actually fit in the holes though. My old splash shield was actually held on by metal screws. Which did the job until they just corroded and rusted to the point where they would fall off.
The zip ties always worked for me but I also didn't have to drive through deep snow with the car. If anything, it was mostly just slush.
They do have stainless steel zip ties. Maybe they would be strong enough to hold it in place?
https://www.amazon.com/SunplusTrade-Stainless-Exhaust-Multi-Purpose-Locking/dp/B072WC1MXT/ref=pd_sbs_263_t_0/136-5397765-0847362?_encoding=UTF8&pd_rd_i=B072WC1MXT&pd_rd_r=fdc24f29-0782-4b9c-8b96-6f9031e56660&pd_rd_w=a5n13&pd_rd_wg=Za0YO&pf_rd_p=5cfcfe89-300f-47d2-b1ad-a4e27203a02a&pf_rd_r=3VYS6GE0YT7HE0E9XAT4&psc=1&refRID=3VYS6GE0YT7HE0E9XAT4
Well, I don't think there are really that many specialized tools the average user would need. I guess if you want to do some minor modifications or sleeve your psu, you would really benefit from some specialty tools. Generally speaking, I think nearly everyone would benefit from:
total: $15.60
It goes without saying that you should also have a Phillips screwdriver, but who doesn't have one of those around anyway? Of course, there are some extras you might want if you're messing with your psu cables (like if you're sleeving them or whatever), installed and reinstalling coolers, I don't know. It is all stuff I've used with my PC at one time or another.
total: $48.61
I don't know why you'd really want that ultra-mega-deluxe $49 kit I put together, unless you're certain you will be modding your pc. If you want to be all hardcore you could get a soldering iron just for your pc, but I wouldn't recommend doing that unless you already have experience. Seriously though, everyone should get some cable ties and compressed air.
These cable tie mounts work pretty good for things like this, just stick under the cabinets and zip-tie them up.
Great build!
Every single one of those parts are balanced and well priced. You could downgrade the PSU to the 550 Rosewill Hive and save a few dollars, but that is not necessary if you don't wish to. As for cable ties, I suggest some 4" black zip ties, a good pair of scissors, and these velcro cable wraps for both the interior and exterior cables: http://www.amazon.com/Velcro-Reusable-Self-Gripping-Inches-91140/dp/B001E1Y5O6/ref=sr_1_2?ie=UTF8&qid=1394638134&sr=8-2&keywords=velcro+cable+tie
Thanks! The cables are secured with tie wraps and tie wrap mounts very similar to these ones. I bought a bag of them a while back to try to clean up the cabling around my house and they still seem to come in handy now and then.
Woo for free lunch! I spent my lunch money on a broccoli crunch salad! here are some cable holders I could really use for my house!!
I like to use these: https://amzn.com/B001E1Y5O6
When they wind around the cable too many times, I just cut them. Makes it easier to re-tie them and they're cheap enough to experiment.
I really like the use of wall space. Would be cool to have some 3d printed hangers for the controllers!
I got some nice velcro ties off of amazon. They worked like magic, I will never use cabe or twist ties again.
I recommend these http://www.amazon.com/VELCRO-Brand-ONE-WRAP-Self-Gripping-Reusable/dp/B001E1Y5O6/ref=sr_1_1?ie=UTF8&qid=1421176688&sr=8-1&keywords=velcro+ties
This will help you clear up most of that and these will take care of most of the rest.
If those are random cables going into the wall, then get a keystone jack or something.
These things are also super useful if your case isn't designed with zip-tie points. You don't have to get them from Amazon, I found them at my local Menards, it's a couple bucks for 100 of 'em.
I know you are looking to fix your cables but for future reference, I use these throughout my systems and they are great since you never have to worry about taking sharp objects near cables.
https://www.amazon.com/VELCRO-Brand-ONE-WRAP-Management-Self-Gripping/dp/B001E1Y5O6/ref=sr_1_3?ie=UTF8&qid=1466388086&sr=8-3&keywords=velcro+ties
Probably better prices to be found elsewhere, but in a rush to find cable ties, I bought one of these a couple years ago (for personal cables, not bulk use), and I still have them around and use them regularly. I bought them as an Amazon Prime customer, so they were $7.10 and free shipping.
http://www.amazon.com/gp/product/B001E1Y5O6/
You gotta buy this: https://www.amazon.com/gp/product/B001E1Y5O6
You also have to buy extensions/long versions of each cable. Its easier to cable manage when you have long cables v.s. short cables. I know it seems contradictory, but at least for cables that are outside the case (i.e. not PSU cables) then the longer they are, the more you have to work with and you can route them any way you want (e.g. so you can route a power cable all the way around something instead of going direct because its too short).
Then, on the back of your PC/monitor/what have you, you have to bunch up all the cords into a group. This becomes the "dock" of that object.
From there, you just need to keep grouping them all into one big "trunk" line.
For my table, I'm lucky that it comes with this "catcher" net for all the cables, but you can also install one easily from IKEA. If not, you can still route the whole trunk behind the table or somewhere where it can be hidden.
http://www.amazon.com/gp/product/B001E1Y5O6/ref=oh_aui_detailpage_o02_s00?ie=UTF8&psc=1
These velcro ties makes everything much easier. I wished I had this when I first built my computer. Best part of all, it is really cheap!
CPU | Intel Core i7-5960X 3.0GHz 8-Core Processor | $989.99 @ SuperBiiz
Motherboard | Asus X99-A ATX LGA2011-3 Motherboard | $228.99 @ SuperBiiz
Memory | Corsair Vengeance LPX 16GB (4 x 4GB) DDR4-2133 Memory | $99.99 @ Newegg
| Prices include shipping, taxes, rebates, and discounts |
| Total | $1318.97
| Generated by PCPartPicker 2015-11-03 07:55 EST-0500 |
I'm going to try to get the processor from here http://siliconlottery.com/ and the motherboard from either Newegg or Amazon.
That Silicon Lottery place tests the chips to see how much they could be overclocked and then sell you those in categories. It's about the same price or maybe even cheaper, so it would work great in this case.
This is the USB repeater that I have setup for the web cams. It almost didn't work because both the repeaters and cameras are USB powered, so they draw almost all the juice that USB allows. I start the cameras one at a time so the power draw from the motherboard isn't overwhelming. Even doing that, we blew out the on-board USB ports and needed new ones using a PCI slot. Also, sometimes the cameras don't turn on and we need to restart the machine. I think that's related to the power draw.
Here's that crazy large fan from the case. for the current Intel Core i7-3930K Hexa-Core Processor 3.2 Ghz. This is a 6 core processor. The new processor has 8 cores and I should be able to overclock it a bit more.
Of course, I can't forget to link the colored zip ties and the colored stickers to match cameras with the cables.
Edit: I also use Samsung SSD drives.
Had about fixing the cable clutter. I highly recommend these https://www.amazon.com/gp/aw/d/B0154MS9Q0/ref=mp_s_a_1_6?ie=UTF8&qid=1500860828&sr=8-6&pi=AC_SX236_SY340_QL65&keywords=velcro+cable+ties&dpPl=1&dpID=51lf5Z18ACL&ref=plSrch. You'll love them 2 ! Tidy up cowboy
I believe these ties are what you're referring to. I bought them for cable management behind my entertainment center, and ended up also using for cable management in my pc build. They worked great!
You should get these little velcro cable ties. I recently started using them because the back of my computer desk was littered with 6 ft cables that I only needed 2 ft of. I folded up all the extra slack in my cables like this and used the velcro to ensure that they don't come undone. It's trivial to do, and it will clean up that clutter nicely.
I wrap them (over-under if they're long) then use those velcro straps to keep them from unraveling - http://www.amazon.com/VELCRO-ONE-WRAP-Self-Gripping-Cable-Reusable/dp/B001E1Y5O6/
They get separated by type (USB, Cat5, audio, video, power etc) and thrown into this style bin - http://www.amazon.com/Sterilite-18828012-through-Aquarium-Latches/dp/B001RCUN9I (I like this range from Sterilite because the lids are thicker than the clear type).
A bunch of manufacturers sell different sizes/styles. Just make sure they're stackable and have a locking lid. I keep these on a long shelf, stacked 3 high in the garage, labeled. I've been in the A/V industry for many years and ended up with tons of cables - data, a/v, power, etc, but this system has kept everything in check and easy to find.
I actually use a combo of zip tie mounts, zip ties, and these velcro cable ties.
i put the zip tie into the mount, zip it down tight, and then feed the velcro tie through. secure, easy to use, and clean cables.
I think I like this idea too. They make self adhesive plastic tabs that are slotted to accept a zip tie running through them, I think that may be a good way to go. Like these little chingaderos
These are better
https://www.amazon.com/dp/B001E1Y5O6/ref=cm_sw_r_cp_apa_cpS0AbD1AE3AR
100 instead of 50, Velcro brand, great reviews. $6.88
I use these cheap straps plus this stuff for grip. It has worked very well so far.
Try to build your micro in such a way that the straps are easy to replace. Also put some electric tape over any sharp edges on the carbon (or file the edges smooth if you aren't lazy) so the straps don't get cut as easily.
Some velcro cable ties work well and usually look very discrete. Like you said, maybe a nice, smaller screwdriver and a small LED flashlight for more light?
If you want a solution that is repeatable and nice looking, maybe do some of these w/ some zip ties? That way, you can just cut the zip ties when done, and leave the mounts on the boards for next year.
Edit: These are the same thing, but more cost effective and have the prime/free shipping option.
If it's going to be hidden away and you're ok with adhesive on that part of the cabinet, then one option is zip tie anchors. Beyond that, there are Nail-In options and cable clips. Amazon is your friend!
Use something like this:
https://www.amazon.com/Zip-Tie-Mount-25-Pack/dp/B000BSJHLE
to attach these: https://www.amazon.com/Nippon-Labs-CT-4MINI-BK-Cable-Pieces/dp/B008TVFHXC/ref=sr_1_4?s=electronics&ie=UTF8&qid=1486365120&sr=1-4&refinements=p_n_feature_keywords_two_browse-bin%3A7065319011
Use a special tool to install them so you do not leave sharp edges. Improperly installed will scratch at a minimum you and can draw blood:
https://www.amazon.com/Cable-Tie-Gun-Installation-Tool/dp/B00B52NYNM/ref=sr_1_1?s=mobile-apps&ie=UTF8&qid=1486365283&sr=8-1&keywords=zip+tie+gun
You can use this document as a guideline on how to do the cabling.
https://www.hq.nasa.gov/office/codeq/doctree/NSTD87394A.pdf
I would try to run all cables that I could on the scope itself. I would also pay attention to adding extra length of wires across parts that move, twist, rotate.
I would definitely try to route the cables in a bundle together as much as possible.